Building a garage car turntable can completely change how you use your parking space. If you have a tight driveway, a narrow street, or simply want to avoid reversing, a turntable lets you rotate your car so you can always drive in and out facing forward.
While commercial car turntables can be expensive, you can build your own with careful planning, the right tools, and some hands-on effort. This guide explains everything you need to know, from understanding the basics to step-by-step building instructions, safety tips, and common mistakes to avoid.
What Is A Garage Car Turntable And Why Build One?
A garage car turntable is a rotating platform installed in your garage or driveway. You park your car on the platform, and with a push of a button or a manual effort, the platform spins, allowing you to face your car in any direction. This is especially useful if you have:
- A narrow or busy street where reversing is difficult or dangerous
- A tight parking space with limited room to maneuver
- Multiple vehicles or frequent guests
Most people install turntables for convenience and safety. According to recent data, over 35% of accidents in private driveways happen while reversing, especially in homes with children or limited visibility. By building a turntable, you reduce these risks and save time every time you use your car.
Planning Your Garage Car Turntable
Before you start buying materials or cutting metal, it’s essential to plan your project carefully. Here’s what you need to consider:
Measuring Space And Choosing The Right Size
The turntable must fit both your car and your garage. Measure your vehicle’s length, width, and wheelbase. Add at least 30 cm (12 inches) to each side for safety. For most cars, a minimum diameter of 4.5 meters (about 15 feet) is recommended. For SUVs or larger vehicles, go up to 5 meters.
| Vehicle Type | Recommended Turntable Diameter |
|---|---|
| Compact Car | 4.0 m |
| Sedan | 4.5 m |
| SUV/Truck | 5.0 m |
Also, check the height clearance in your garage. The turntable will raise your car by a few centimeters.
Assessing Your Floor Structure
The base of the turntable must be level and strong. Concrete is ideal. If your garage has an uneven or weak floor, reinforce it before starting. If you’re unsure, consult a structural engineer.
Manual Vs. Motorized Turntables
Decide if you want a manual turntable (rotated by hand) or a motorized version (powered by an electric motor). Manual turntables are cheaper and simpler but require more effort. Motorized models are more convenient, especially for heavy vehicles.
Local Regulations And Permits
Some cities require permits for large mechanical installations, even on private property. Check with your local building authority before starting work.
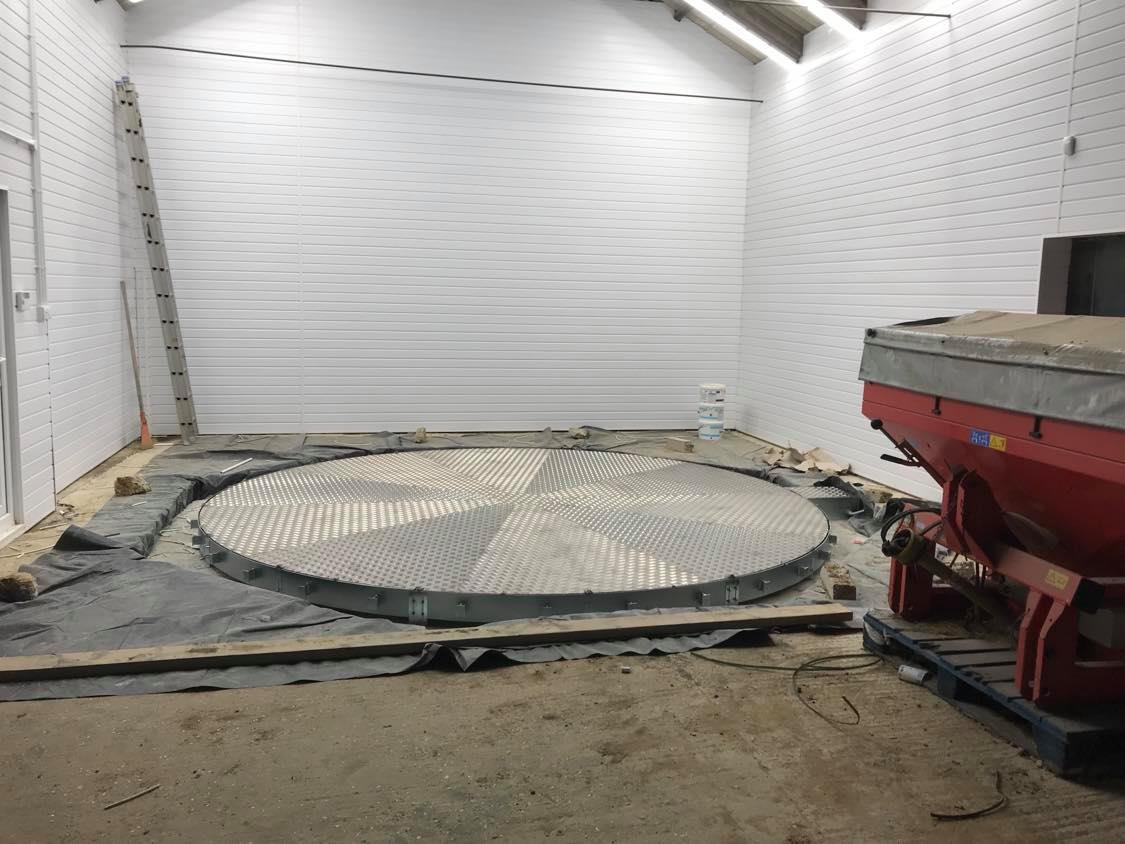
Credit: www.ukturntables.com
Materials And Tools Needed
Building a car turntable requires sturdy materials and basic mechanical knowledge. Here’s what you’ll need for a typical DIY project:
Core Materials
- Steel or heavy-duty aluminum ring (acts as the rotating rail)
- Plywood or steel plate for the platform surface (at least 18mm thick plywood or 6mm steel)
- Heavy-duty caster wheels or roller bearings (minimum load rating must match your car’s weight)
- Central spindle/axle (solid steel rod)
- Support frame (steel angle iron or rectangular tubing)
- Motor and gearbox (for motorized versions)
- Power supply and wiring (for motorized turntables)
- Anti-slip surface coating (paint, rubber, or grip tape)
Essential Tools
- Electric drill and bits
- Welder (for steel frames)
- Angle grinder or metal saw
- Socket set and wrenches
- Measuring tape and level
- Concrete drill (if anchoring into the floor)
- Screwdrivers and pliers
For safety, always use protective gloves, goggles, and ear protection when cutting or welding.
Step-by-step Guide: Building Your Garage Car Turntable
Here’s a clear process to build a basic manual garage car turntable. Adjust as needed for your space and materials.
1. Prepare The Floor
Clear the garage and clean the floor. Mark the center point where the turntable will be installed. Use a chalk line or laser level to mark a perfect circle matching your chosen diameter.
If your floor is uneven, use self-leveling concrete to create a flat surface. This step is crucial for smooth rotation.
2. Build The Support Frame
The frame supports the turntable and carries your car’s weight. Weld a circular frame using steel angle iron or rectangular tubing, matching your marked circle. If welding isn’t possible, you can bolt pre-cut segments together.
At the center, install a vertical spindle (steel rod) anchored into the concrete floor. This spindle is the main pivot point for rotation.
3. Install The Roller System
Attach caster wheels or roller bearings around the frame’s perimeter. Space them evenly (every 30–40 cm). Each wheel must be rated for at least 300 kg (660 lbs), but more is better.
The rollers should touch both the ground and the underside of the rotating platform, keeping movement stable. Some builders use V-groove wheels that run on a steel rail for smoother motion.
4. Construct The Platform
Cut a circular platform from heavy plywood or steel plate. The size must match your frame. For best results, use at least two layers of plywood glued and screwed together. If using steel, add cross-bracing underneath to prevent sagging.
Attach the platform to the central spindle with a heavy-duty bearing. The platform should rest on the outer rollers, not the center spindle, for most of its weight.
5. Add The Surface Finish
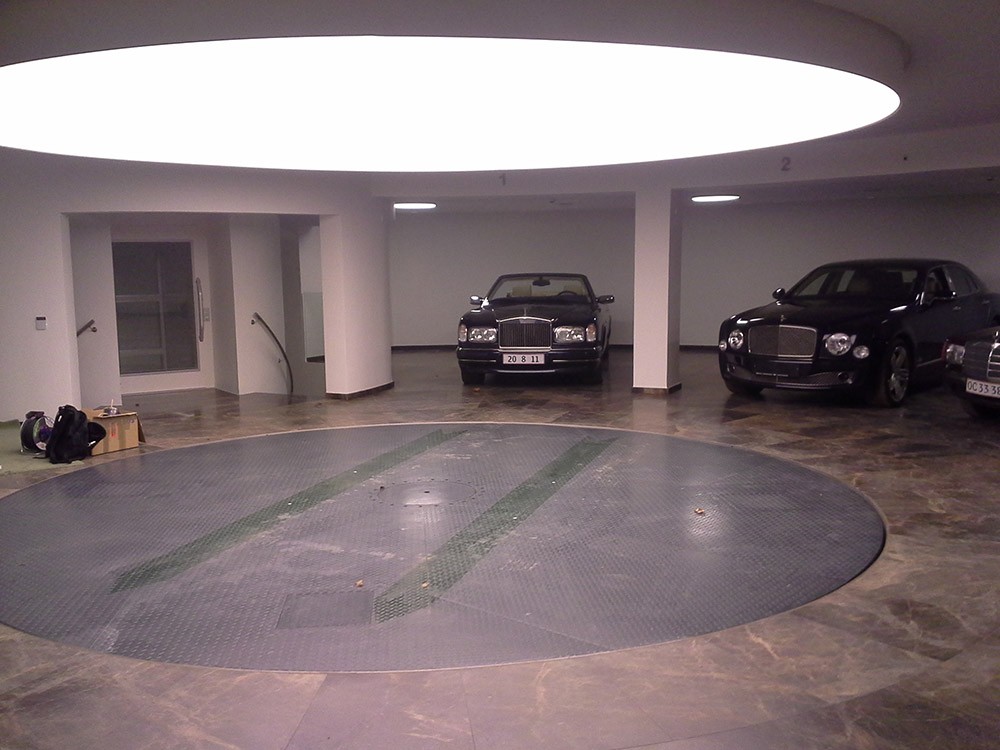
Apply anti-slip coating or rubber matting to the platform. This prevents tires from spinning and keeps the surface safe in wet weather.
Mark the edges with reflective tape or bright paint for visibility, especially in dim garages.
6. Test The Rotation
Before using with your car, rotate the platform by hand. It should spin smoothly with minimal effort. Adjust roller heights or lubricate bearings if needed.
Place some weights (such as sandbags) on the platform to simulate your car’s weight. Test again. Address any sticking or wobbling before loading your vehicle.
7. (optional) Install A Motor
For a motorized turntable, mount an electric gear motor to the frame. Use a drive wheel or chain mechanism to rotate the platform. Install limit switches to stop the turntable at the correct positions.
Wire the motor to a wall switch or remote control. Always follow electrical safety codes, and if unsure, hire a licensed electrician.
Key Considerations For Safety And Reliability
A car turntable must be safe for people and vehicles. Here are some critical tips:
- Overbuild the structure. Always use materials stronger than your minimum needs.
- Check all welds and bolts regularly for signs of wear or fatigue.
- Use locking pins or brakes to prevent accidental movement when loading or unloading.
- Keep the roller system clean from dirt, debris, and oil.
- If motorized, install an emergency stop switch within easy reach.
| Manual Turntable | Motorized Turntable |
|---|---|
| Lower cost | Higher cost |
| Simple construction | More complex wiring |
| Physical effort needed | Easy button operation |
| Less maintenance | Requires regular electrical checks |
Common Mistakes To Avoid
Even experienced DIY builders can make mistakes. Here are some issues to watch for:
- Underestimating weight: Cars are heavy. Make sure every component (rollers, frame, bearings) is rated above your vehicle’s total weight.
- Poor floor preparation: An uneven or weak floor will cause the turntable to jam or fail.
- Incorrect measurements: A turntable that’s too small is dangerous and unusable.
- Skipping safety features: Always include stops, brakes, and anti-slip surfaces.
- Inadequate testing: Test with weights before trusting the turntable with your car.
A non-obvious insight: The center spindle should not carry most of the car’s weight. The outer rollers must support most of the load, or the spindle bearing will wear out quickly. Another common beginner mistake is using too few rollers, leading to flat spots and rough rotation.

Credit: www.turntables.com.au
Advanced Tips And Customization Ideas
If you want to go beyond the basics, consider these upgrades:
- Remote-controlled operation: Add wireless controls for convenience.
- Automatic alignment stops: Use sensors or mechanical stops to align the turntable perfectly with your garage door.
- Integrated lighting: LED strips around the platform improve safety at night.
- Drainage channels: If installing outdoors, add drains to prevent water pooling.
Some high-end car turntables also feature weight sensors that stop rotation if the load is too high, or child safety locks to prevent accidental use.
Maintenance And Longevity
A well-built turntable can last decades. Here’s how to keep yours in top shape:
- Inspect rollers and bearings twice a year. Replace any worn parts.
- Lubricate moving parts as needed, but avoid over-greasing (which attracts dust).
- Tighten all bolts and check the frame for rust or cracks.
- For motorized units, test the emergency stop and safety sensors regularly.
Weather can affect performance, especially for outdoor installations. Protect metal parts from rust, and cover the platform when not in use.
Credit: www.bueter-hubtische.de
Real-world Example
John, a classic car enthusiast in the UK, built his own garage turntable for under £2,000. He used a steel frame, plywood deck, and 16 heavy-duty rollers. The project took three weekends, and now he can turn his prized Jaguar around with one hand. He advises to double-check all measurements and use more rollers than you think you need.
According to Wikipedia, car turntables have been used since the early 20th century in railway yards and garages, showing their long-term practicality and value.
Frequently Asked Questions
What Is The Average Cost To Build A Garage Car Turntable?
DIY turntables can cost anywhere from $1,000 to $4,000, depending on size, materials, and whether you use a motor. Commercial units can cost $10,000 or more. Doing the work yourself saves money but requires careful planning.
Can I Build A Turntable For An Electric Vehicle (ev)?
Yes, but make sure the platform supports the heavier weight of EVs, which are often 10–20% heavier than similar gas cars. Choose rollers and bearings with a higher load rating.
How Much Space Do I Need For A Turntable?
Allow at least 1 meter (3 feet) of extra space around your car’s length and width. Most garages will need a 4. 5 to 5 meter diameter platform for comfortable use.
Is A Motorized Turntable Difficult To Install?
It adds complexity, especially wiring and safety features. If you’re not confident with electrical systems, it’s smart to hire a professional for this part.
How Long Does It Take To Build A Diy Turntable?
Most DIYers can complete the project in 2–4 weekends, depending on experience and whether you need to pour new concrete or reinforce your floor.
Building a garage car turntable is a project that pays off every time you pull in or out of your driveway. With careful planning, strong materials, and attention to safety, you can create a solution that makes parking simpler, safer, and much more enjoyable.
