Changing your engine oil at home is a fundamental vehicle maintenance task that can save you time and money while providing a deeper understanding of your car. This process involves gathering specific tools and supplies, safely lifting your vehicle, draining the old oil, replacing the oil filter, and refilling the engine with fresh, appropriate lubricant. Proper disposal of used oil is also a critical step to ensure environmental responsibility.
- Regular oil changes are vital for engine health and longevity.
- Gathering the correct tools and supplies beforehand streamlines the process.
- Safety precautions, such as using jack stands, are paramount.
- Draining old oil and replacing the filter are key steps.
- Always dispose of used oil and filters responsibly at designated centers.
- Performing your own oil change offers a sense of accomplishment and potential savings.
Why Regular Oil Changes are Crucial for Your Vehicle
Engine oil serves multiple critical functions within your vehicle’s power plant. It lubricates moving parts, reducing friction and wear that could otherwise lead to premature component failure. Beyond lubrication, engine oil also helps to cool the engine by carrying heat away from vital components, preventing overheating.
Furthermore, engine oil acts as a cleaning agent, suspending dirt, sludge, and metallic particles that accumulate during operation. Over time, these contaminants degrade the oil’s effectiveness, turning it into a less efficient lubricant and coolant. Regular oil changes ensure that your engine always has clean, fresh oil performing these essential tasks, thereby extending its lifespan and maintaining optimal performance.
Essential Tools and Supplies for a DIY Oil Change
Before embarking on an oil change, gathering all necessary tools and supplies is crucial for a smooth and efficient process. Having everything at hand prevents interruptions and ensures safety.
Tools You Will Need:
- Socket Wrench or Combination Wrench:To remove the drain plug, ensure it matches your vehicle’s specific plug size.
- Oil Filter Wrench:Essential for loosening and tightening the oil filter, as they can often be very tight.
- Drain Pan:A container large enough to collect all the old engine oil without overflowing.
- Funnel:To prevent spills when refilling the engine with new oil.
- Jack and Jack Stands:To safely lift and support the vehicle, providing access to the drain plug and oil filter. Never rely solely on a jack.
- Gloves:Protect your hands from hot oil and chemicals.
- Rags or Shop Towels:For cleaning up spills and wiping components.
Supplies You Will Need:
- New Engine Oil:Consult your vehicle’s owner’s manual for the correct type, viscosity, and quantity of oil. Using the wrong oil can damage your engine.
- New Oil Filter:Ensure it is the correct filter for your specific make and model.
- New Drain Plug Washer/Gasket:Often recommended to prevent leaks, as the old one can become compressed and lose its sealing ability.
Prioritizing Safety: Before You Begin Your Oil Change
Safety should always be your top priority when working on any vehicle. An oil change, while seemingly straightforward, involves working under a raised car and handling hot fluids. Taking proper precautions can prevent accidents and injuries.
Key Safety Measures:
- Work on a Level Surface:Ensure your vehicle is parked on a flat, stable surface to prevent it from rolling or falling off the jack stands.
- Engage Parking Brake:Always set the parking brake firmly to prevent accidental movement.
- Use Wheel Chocks:Place chocks behind the rear wheels (if lifting the front) or front wheels (if lifting the rear) for added stability.
- Allow Engine to Cool Slightly:While warm oil drains better, extremely hot oil can cause severe burns. Let the engine cool for 15-30 minutes after driving.
- Wear Protective Gear:Always wear safety glasses to protect your eyes from splashes and gloves to shield your hands from hot oil and contaminants.
- Properly Support Vehicle:Use sturdy jack stands once the vehicle is lifted. Never work under a vehicle supported only by a jack. Gently shake the vehicle to confirm it is stable on the jack stands before getting underneath.
how to change engine oil at home step by step
Once you have gathered all your tools and supplies and taken the necessary safety precautions, you are ready to proceed with the oil change. Follow these steps carefully for a successful DIY maintenance task.
Prepare the Vehicle
Drive your car for a few minutes to warm up the engine oil. Warm oil flows more easily, ensuring a more complete drain. Park the car on a level surface, engage the parking brake, and place wheel chocks. Using your jack, lift the front of the vehicle to a height that allows comfortable access to the oil pan and filter. Position jack stands securely under the vehicle’s frame or designated lift points, then slowly lower the vehicle onto the stands. Remove the jack, or leave it in place as an additional safety measure without carrying the vehicle’s weight.
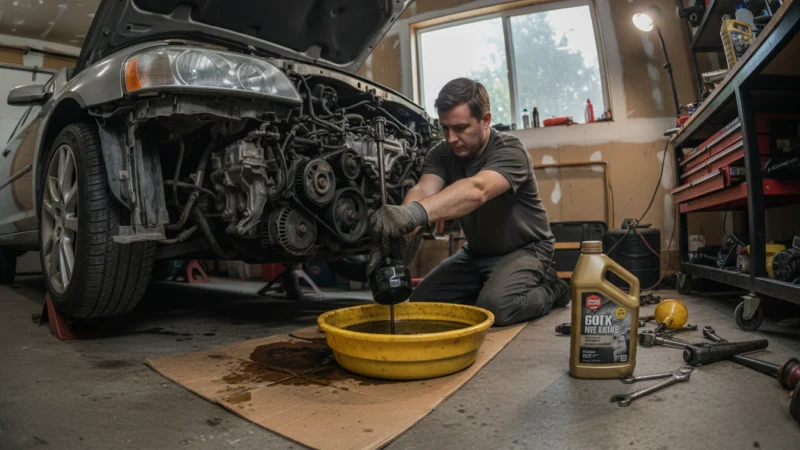
Locate and Remove the Drain Plug
Slide your drain pan under the oil pan, positioning it directly beneath the drain plug. Using the correct size wrench, carefully loosen the drain plug. Be prepared for the oil to start flowing immediately once the plug is loose. Once it’s loose enough, remove the plug by hand, allowing the hot oil to drain into the pan. Exercise caution to avoid contact with the hot oil. Allow several minutes for all the old oil to drain completely. While the oil is draining, inspect the drain plug and replace its washer or gasket if necessary.
Remove the Old Oil Filter
Once the oil flow has slowed to a drip, reposition the drain pan under the oil filter. Use your oil filter wrench to loosen the old oil filter. It may be tight, so apply firm, steady pressure. Once it’s loose, unscrew it by hand. Be aware that additional oil will drain from the filter as you remove it. Allow any remaining oil to drip out, then wipe the filter mounting surface clean with a rag.
Install the New Oil Filter
Before installing the new oil filter, apply a thin film of new engine oil to the rubber gasket of the new filter. This helps create a better seal and makes future removal easier. Screw the new filter onto the engine by hand until the gasket makes contact with the mounting surface. Then, tighten it an additional three-quarters to one full turn, or according to the manufacturer’s specifications. Do not overtighten, as this can damage the filter or its housing.
Replace the Drain Plug
Once the old oil has finished draining and the new filter is in place, reinstall the drain plug with a new washer or gasket. Tighten the drain plug securely with your wrench, but do not overtighten, as this can strip the threads in the oil pan. Wipe away any residual oil around the drain plug area.
Refill with New Engine Oil
Lower the vehicle safely off the jack stands and remove the wheel chocks. Locate the oil filler cap on top of the engine, usually marked with an oil can symbol. Remove the cap and place a funnel into the filler neck. Carefully pour the recommended amount and type of new engine oil into the engine, consulting your owner’s manual for the exact capacity. Pour slowly to prevent spills. Once the oil is added, replace the oil filler cap securely.
Check Oil Level and Inspect for Leaks
Start the engine and let it run for a minute or two to circulate the new oil. Turn off the engine and wait a few minutes for the oil to settle back into the oil pan. Pull out the dipstick, wipe it clean, reinsert it fully, and then pull it out again to check the oil level. The oil level should be between the ‘min’ and ‘max’ marks. Add more oil if needed, in small increments, rechecking the dipstick each time. While the engine is running, briefly check under the car for any signs of leaks around the drain plug or oil filter.
Proper Disposal of Used Engine Oil and Filters
Responsible disposal of used engine oil and filters is not just good practice; it’s often legally required. Used engine oil is a hazardous waste and can severely contaminate soil and water if not handled correctly. Never pour used oil down drains, onto the ground, or into storm sewers.
Most auto parts stores, service stations, and municipal recycling centers accept used engine oil and filters for free. Store the used oil in a clean, sealed container, such as the empty bottles from your new oil. Place the old oil filter in a sealed plastic bag to prevent drips. Contact your local recycling facility or auto parts store for specific drop-off instructions and locations in your area.
Common Mistakes to Avoid During an Oil Change
Even experienced DIYers can make mistakes. Being aware of common pitfalls can help you avoid them and ensure a successful oil change.
- Not Using Jack Stands:Relying solely on a jack is extremely dangerous and can lead to severe injury if the vehicle falls.
- Overtightening the Drain Plug or Filter:This can strip threads, crack the oil pan, or damage the filter, leading to leaks or difficult removal in the future.
- Using the Wrong Oil Type or Quantity:Always consult your owner’s manual. Incorrect oil can lead to engine wear or damage.
- Forgetting to Replace the Drain Plug Washer:A worn or missing washer is a common cause of oil leaks.
- Not Priming the New Oil Filter:While not always strictly necessary, pre-filling the new filter with a small amount of oil can help reduce the time the engine runs without full oil pressure after a change.
- Not Checking for Leaks:A quick visual inspection after the oil change can prevent significant oil loss and potential engine damage.
- Improper Disposal:Disposing of used oil and filters incorrectly harms the environment and can result in fines.
Benefits of Performing Your Own Engine Oil Change
Performing your own engine oil change offers several advantages beyond just vehicle maintenance. It provides a deeper connection to your vehicle and fosters a sense of self-reliance.
- Understanding Your Vehicle:Regularly working on your car helps you become more familiar with its components and can make you more attuned to potential issues.
- Scheduling Flexibility:You can perform the oil change at your convenience, without needing to adhere to a service center’s hours.
- Quality Control:You have complete control over the type and brand of oil and filter used, ensuring you meetyour vehicle’s specific requirements and your personal preferences.
- Learning Opportunity:It’s a foundational DIY skill that builds confidence for tackling other automotive tasks.
Frequently Asked Questions
How often should I perform a DIY oil change when learning how to change engine oil at home step by step?
The frequency of oil changes depends on your vehicle’s make, model, age, and driving conditions. Always refer to your owner’s manual for the manufacturer’s recommended service intervals. Modern vehicles often have longer intervals, but severe driving conditions might necessitate more frequent changes.
What are the most important safety precautions to take when changing engine oil at home?
The most critical safety precautions include working on a level surface, securely supporting the vehicle with jack stands, using wheel chocks, and allowing the engine to cool slightly before starting. Wearing protective gloves and safety glasses is also essential to prevent burns and splashes.
Can I use any type of engine oil when I change engine oil at home?
No, using the correct type and viscosity of engine oil is crucial for your engine’s health. Your vehicle’s owner’s manual specifies the exact oil requirements, including whether it needs conventional, synthetic blend, or full synthetic oil, and its viscosity grade (e.g., 5W-30).
What should I do with the old engine oil after learning how to change engine oil at home step by step?
Used engine oil must be disposed of responsibly. Collect it in a sealed, leak-proof container and take it to an authorized recycling center, auto parts store, or service station that accepts used oil. Never pour it down drains or onto the ground.
Is changing my own engine oil really cost-effective compared to a professional service?
Performing your own oil change can offer savings on labor charges, as you only pay for the oil and filter. Over time, these savings can accumulate. It also provides the satisfaction of maintaining your own vehicle and ensures you use the specific products you prefer.
What tools are absolutely essential for someone learning how to change engine oil at home step by step?
Essential tools include a wrench for the drain plug, an oil filter wrench, a drain pan, a funnel, a jack and jack stands for safety, and protective gloves and rags. Having these items ensures you can complete the job safely and efficiently.
Conclusion
Changing your engine oil at home is a rewarding and practical skill that contributes significantly to your vehicle’s longevity and performance. By following a systematic approach, prioritizing safety, and using the correct tools and supplies, you can confidently perform this essential maintenance task. Remember to always dispose of used oil and filters responsibly to protect the environment. Regular DIY oil changes empower you with knowledge and control over your vehicle’s care, fostering a deeper appreciation for automotive maintenance.
