Checking your engine oil level is a fundamental DIY car maintenance task that ensures your vehicle’s longevity and optimal performance. To perform this essential check, park your car on a level surface, allow the engine to cool for at least 15-20 minutes, locate the dipstick, remove it, wipe it clean, reinsert it fully, and then pull it out again to read the oil level between the designated ‘full’ and ‘add’ marks.
- Regular oil checks prevent costly engine damage.
- Understanding your dipstick is crucial for accurate readings.
- Always ensure your vehicle is on a level surface and the engine is cool.
- Proper oil disposal is an environmental responsibility.
- Recognize signs of low or contaminated oil beyond just the dipstick.
Why Regular Engine Oil Checks Are Essential for Vehicle Longevity
Engine oil is the lifeblood of your vehicle, performing several critical functions that contribute to its overall health and operational efficiency. It lubricates moving parts, reducing friction and wear that can lead to premature component failure. Beyond lubrication, engine oil helps to cool the engine by dissipating heat generated during combustion, preventing overheating that can cause severe damage.
Furthermore, engine oil cleans the internal components by carrying away dirt, sludge, and microscopic metal particles, keeping them suspended until they can be filtered out. It also provides a protective seal between the piston rings and cylinder walls, which helps maintain compression and power. Neglecting regular oil level checks can lead to insufficient lubrication, increased friction, excessive heat buildup, and ultimately, catastrophic engine failure, resulting in expensive repairs or even a complete engine replacement.
Understanding Engine Oil: Its Role and Different Types
Engine oil is a complex blend of base oils and additives, each designed to perform specific taskswithin the engine. The base oil, which can be conventional (mineral), synthetic, or a blend of both, provides the primary lubricating properties. Additives enhance these properties, offering resistance to oxidation, corrosion, and foaming, while also improving viscosity stability across varying temperatures.
Different types of engine oil are formulated to meet the specific demands of various engines and driving conditions. Conventional oil is derived from crude oil and is suitable for many older vehicles and standard driving. Synthetic oil, engineered in a lab, offers superior performance, better protection against wear, and improved temperature stability, making it ideal for modern engines and demanding conditions. Synthetic blend oils offer a compromise, combining benefits of both. Always consult your vehicle’s owner’s manual to determine the correct oil type, viscosity grade (e.g., 5W-30), and specifications required for your specific engine.
When and How Often Should You Check Your Car’s Oil?
Establishing a routine for checking your engine oil is paramount for proactive vehicle maintenance. The general recommendation is to check your oil level at least once a month, or before embarking on a long road trip. This frequency allows you to catch any significant drops in oil level or changes in oil quality before they become critical issues.
Factors such as your vehicle’s age, mileage, and driving habits can influence how often you should check. Older vehicles or those with high mileage may consume oil more rapidly, necessitating more frequent checks. Similarly, aggressive driving, frequent short trips, or towing heavy loads can put additional stress on the engine and its oil, warranting more vigilant monitoring. Always refer to your owner’s manual for specific manufacturer recommendations, as some modern vehicles have advanced oil monitoring systems that provide guidance.
Gathering Your Tools and Ensuring Safety First
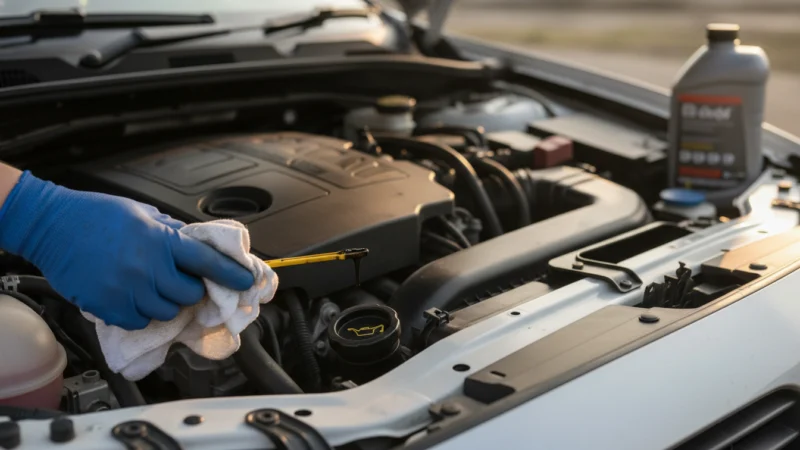
Before you begin the process of checking your engine oil, it’s important to gather the necessary items and prioritize safety. A clean, lint-free rag or paper towel is essential for wiping the dipstick. You might also want a funnel if you anticipate needing to add oil, along with the correct type and amount of engine oil as specified in your owner’s manual. Wearing gloves can help keep your hands clean.
Safety is paramount. Always ensure your vehicle is parked on a flat, level surface to get an accurate reading; an incline can skew the results. The engine should be turned off and allowed to cool down for at least 15-20 minutes. This allows the oil to drain back into the oil pan, providing a true reading, and also prevents burns from hot engine components. Never attempt to check oil on a hot engine immediately after driving.
How to Check Engine Oil Level DIY: A Step-by-Step Guide
Performing a DIY engine oil level check is a straightforward process that empowers car owners to take an active role in their vehicle’s maintenance. Following these steps carefully will ensure an accurate reading and help you identify if your engine requires additional oil.
- Park on a Level Surface:Ensure your vehicle is parked on flat, level ground. This is crucial for an accurate oil level reading, as an incline can cause the oil to pool unevenly in the oil pan.
- Turn Off and Cool Down Engine:Switch off the engine and wait at least 15-20 minutes. This allows the oil to drain back into the oil pan from various engine components, providing a true indication of the oil level. It also prevents burns from hot engine parts.
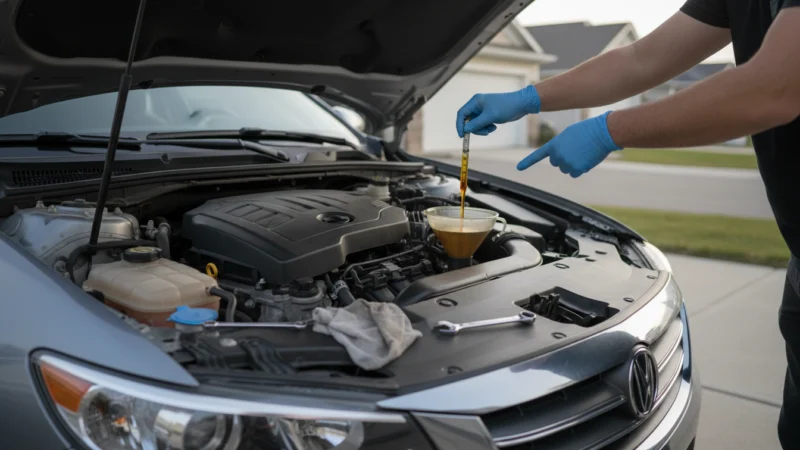
- Locate the Dipstick:Open the hood and identify the engine oil dipstick. It typically has a brightly colored handle (often yellow or orange) and is usually labeled with an oil can symbol or the word ‘OIL’.
- Remove and Wipe Clean:Pull the dipstick completely out of its tube. Use a clean, lint-free rag or paper towel to thoroughly wipe off all the oil from the metal stick. This removes any residual oil that might have splashed up the tube.
- Reinsert Dipstick Fully:Push the clean dipstick back into its tube all the way until it seats firmly. Ensure it is fully inserted to get an accurate measurement.
- Remove and Read Oil Level:Pull the dipstick out again, slowly and steadily. Observe the oil level on the stick. There will typically be two marks, often labeled ‘FULL’ and ‘ADD’ (or ‘MAX’ and ‘MIN’, or dots/notches). The oil level should fall between these two marks.
- Inspect Oil Condition:While checking the level, also observe the oil’s color and consistency. Fresh oil is usually amber or light brown. Dark brown or black oil is normal with use, but milky or frothy oil could indicate coolant contamination, and oil with a strong gasoline smell might suggest other engine issues.
Reading the Dipstick: Interpreting Your Oil Level
Once you’ve performed the steps to check your engine oil, interpreting the dipstick reading is the next critical phase. The dipstick typically features two distinct marks: an upper mark indicating the ‘full’ or ‘maximum’ level, and a lower mark indicating the ‘add’ or ‘minimum’ level. For optimal engine health, the oil level should ideally be at or very close to the ‘full’ mark.
If the oil level falls between the ‘full’ and ‘add’ marks, your engine has a sufficient amount of oil, but it’s a good idea to monitor it more closely. If the oil level is at or below the ‘add’ mark, it indicates that your engine is low on oil and requires immediate attention. Most vehicles require approximately one quart (or liter) of oil to bring the level from the ‘add’ mark to the ‘full’ mark. Always add oil gradually and recheck the level to avoid overfilling.
What to Do If Your Engine Oil is Low or Overfilled
Discovering your engine oil is low requires prompt action to prevent potential engine damage. If the level is at or below the ‘add’ mark, you should add the correct type and viscosity of oil as specified in your owner’s manual. Add a small amount, typically half a quart at a time, wait a few minutes for it to settle, and then recheck the dipstick. Repeat this process until the oil level reaches the ‘full’ mark, being careful not to overfill.
Conversely, an overfilled engine oil level can also be problematic. Too much oil can lead to aeration, where the crankshaft whips the oil into a froth, reducing its lubricating effectiveness. This can also cause excessive pressure, potentially damaging sealsand gaskets, leading to leaks. If you’ve overfilled, it’s best to drain some oil out. This usually involves carefully loosening the oil drain plug or using a fluid extractor. If you’re unsure how to safely drain oil, it’s advisable to consult a professional mechanic.
Common Pitfalls to Avoid During Your DIY Oil Check
While checking engine oil is a simple task, several common mistakes can lead to inaccurate readings or potential issues. One frequent error is checking the oil on an uneven surface, which can give a false low or high reading. Always ensure your vehicle is on level ground.
Another pitfall is checking the oil immediately after driving when the engine is hot. Hot oil expands, and much of it is still circulating in the engine, not yet settled in the oil pan. Waiting 15-20 minutes allows the oil to drain down, providing an accurate cold reading. Using a dirty rag or leaving lint on the dipstick can contaminate the oil or obscure the reading. Finally, not fully reinserting the dipstick before the second pull can also result in an incorrect measurement. Always ensure the dipstick is seated completely.
Beyond the Dipstick: Recognizing Other Oil-Related Issues
While the dipstick provides a crucial snapshot of your oil level and basic condition, it’s important to be aware of other signs that might indicate oil-related problems. Pay attention to any dashboard warning lights, particularly the oil pressure light, which signals a critical issue requiring immediate attention. Unusual engine noises, such as ticking, knocking, or grinding, can often be attributed to insufficient lubrication.
Visible smoke from the exhaust, especially blue smoke, is a strong indicator of oil burning, suggesting worn piston rings or valve seals. Puddles or drips under your car could point to an oil leak, which should be investigated promptly. Additionally, a strong smell of burning oil while driving is a clear sign that oil is leaking onto hot engine components. Recognizing these symptoms alongside regular dipstick checks provides a more comprehensive understanding of your engine’s health.
The Importance of Proper Oil Disposal
After performing an oil change or draining excess oil, proper disposal of used engine oil is not just a recommendation, but an environmental responsibility. Used oil contains harmful contaminants and heavy metals that can severely pollute soil and water if not handled correctly. Never pour used oil down drains, onto the ground, or into regular trash bins.
Most auto parts stores, service stations, and municipal recycling centers offer facilities for collecting used engine oil. It’s typically collected in a clean, sealed container and then recycled. This process re-refines the oil, turning it into new lubricating oils or fuel products, thereby conserving resources and protecting the environment. Always check with your local authorities or auto parts retailers for specific guidelines on used oil disposal in your area.
Frequently Asked Questions
How frequently should I check my engine oil level DIY?
It is generally recommended to check your engine oil level at least oncea month. More frequent checks are advisable if you drive an older vehicle, have high mileage, or regularly engage in demanding driving conditions like towing or frequent short trips.
What’s the best engine temperature to check oil level DIY?
The best engine temperature to check your oil level is when the engine is cool. After driving, turn off the engine and allow it to sit for at least 15-20 minutes. This ensures all the oil has drained back into the oil pan for an accurate reading.
What tools are essential for checking engine oil level DIY?
For a DIY engine oil level check, the primary tool you need is a clean, lint-free rag or paper towel. If you anticipate needing to add oil, a funnel and the correct type of engine oil are also essential. Gloves can be useful for keeping your hands clean.
What should I do if my engine oil level is consistently low?
If your engine oil level is consistently low, it indicates that your engine is consuming or leaking oil. While topping it up is a temporary solution, it’s crucial to have a professional mechanic inspect your vehicle to diagnose and address the underlying cause, such as a leak or internal engine wear.
Is it possible to overfill my engine oil when topping it up?
Yes, it is definitely possible to overfill your engine oil, and this can lead to problems such as aeration of the oil, reduced lubrication effectiveness, and potential damage to seals and gaskets due to increased pressure. Always add oil gradually and recheck the dipstick frequently to avoid overfilling.
Can I check my engine oil level DIY on an uneven surface?
No, you should not check your engine oil level on an uneven surface. Parking on an incline or decline will cause the oil to pool incorrectly in the oil pan, leading to an inaccurate reading on the dipstick. Always ensure your vehicle is on a flat, level surface for the most precise measurement.
Conclusion
Regularly checking your engine oil level is a simple yet critical DIY maintenance task that significantly contributes to your vehicle’s health and longevity. By following the straightforward steps of parking on a level surface, allowing the engine to cool, and accurately reading the dipstick, you can ensure your engine remains properly lubricated and protected. This proactive approach helps prevent costly repairs and keeps your car running smoothly.
Make engine oil checks a routine part of your vehicle care. If you notice consistent low oil levels, unusual oil conditions, or other concerning symptoms, do not hesitate to consult a trusted professional mechanic for a thorough inspection and diagnosis.
