Many car owners struggle with clutter in their trunks. Groceries roll around, sports gear gets lost, and small items disappear under seats. If you’ve ever opened your trunk to a mess, you’re not alone. There’s a simple solution: installing a car cargo net trunk organizer. This handy tool keeps your trunk tidy and your items secure. The best part? You can install one yourself in under 30 minutes. Let’s walk through everything you need to know to choose, install, and get the most from a cargo net organizer—without the confusion.
What Is A Car Cargo Net Trunk Organizer?
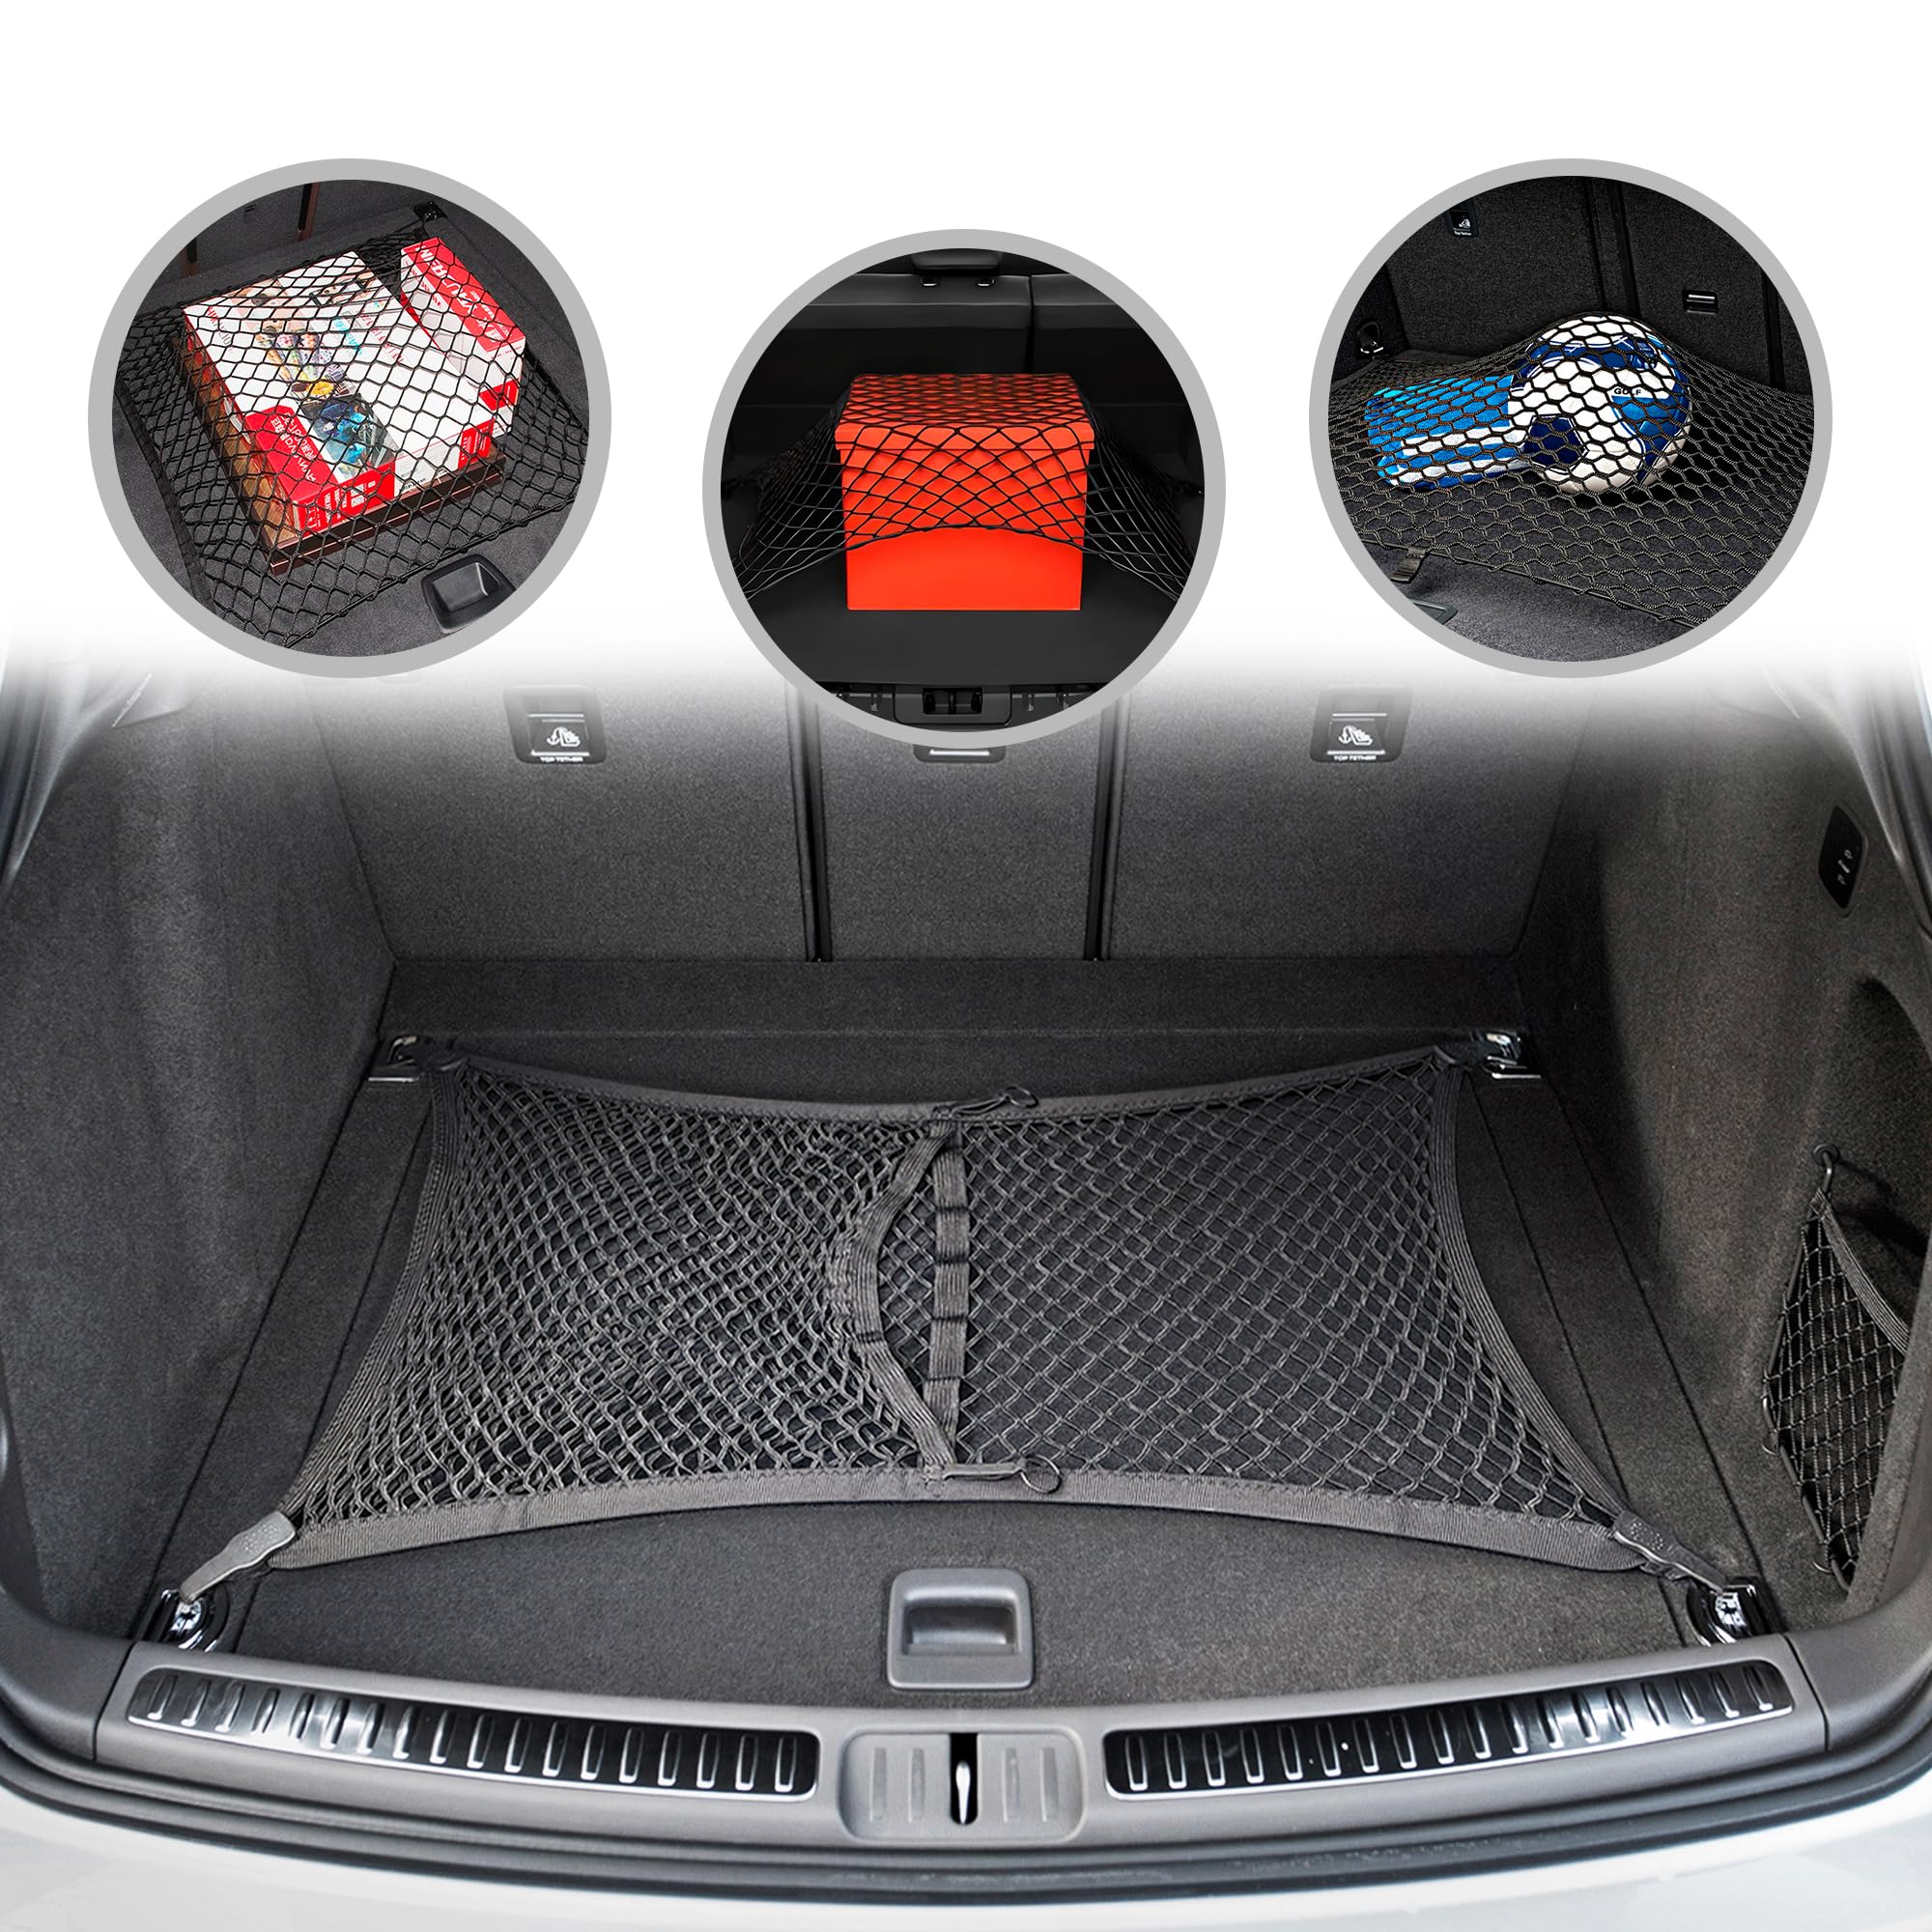
A car cargo net trunk organizer is a flexible net designed to hold and secure items in your trunk. Unlike boxes or bins, a cargo net stretches and adapts to the size and shape of your belongings. Most nets attach to hooks or anchor points in your car. Some models have pockets or extra compartments for smaller items.
Key benefits include:
- Prevents items from moving: Groceries, bottles, and tools stay in place.
- Saves space: Nets fold flat when not in use.
- Easy access: Quickly grab what you need without digging.
Many new cars come with anchor points for cargo nets, but older vehicles may require a bit more installation effort. Understanding the basics helps you pick the right net and install it properly.
Choosing The Right Cargo Net For Your Car
Before you buy, consider these factors to get the best fit and function:
1. Compatibility With Your Vehicle
Check your car’s make and model. Most nets are “universal,” but some are custom-fit. Custom-fit options match the size and anchor points of your trunk exactly, while universal nets use adjustable straps.
2. Size And Type
Measure the width, length, and depth of your trunk. Nets come in different shapes:
- Envelope style: Forms a pocket for loose items.
- Horizontal/Flat style: Stretches across the trunk floor.
- Vertical style: Attaches to the sides or back for taller storage.
Pick a net that matches both your trunk size and the way you use your cargo space.
3. Material And Durability
Look for heavy-duty nylon or polyester. These materials resist tears and are easy to clean. Check the stitching and hook quality—cheap plastic hooks may snap under weight, while metal clips last longer.
4. Attachment Method
Some nets use built-in hooks, while others use adhesive pads or require screwing in anchor points. If your car doesn’t have factory anchors, be ready to install them.
5. Price And Features
Basic nets cost between $10–$25. Premium options with pockets or multiple compartments can reach $40 or more. Think about your needs before spending more.
Here’s a quick comparison of cargo net types and features:
| Net Type | Best For | Average Price | Ease of Install |
|---|---|---|---|
| Envelope | Loose groceries, balls | $15–$25 | Easy |
| Horizontal | Flat items, boxes | $10–$20 | Very Easy |
| Vertical | Bags, tall gear | $20–$30 | Moderate |
Tools And Materials You’ll Need
Installing a cargo net is simple. You only need a few items:
- The cargo net (choose based on your car and needs)
- Measuring tape
- Screwdriver or drill (if your car needs new anchors)
- Marker or pencil
- Mounting hardware (may come with net)
- Cleaning supplies (wipe down the area before installing)
Not all installations require tools. Some nets clip onto existing hooks.
Step-by-step Guide: Installing A Car Cargo Net Trunk Organizer
Let’s get practical. Follow these steps for a secure, neat result.
Step 1: Prepare Your Trunk
Remove all items from your trunk. Vacuum or wipe the area where you’ll install the net. Clean surfaces help adhesive or mounts stick better.
Step 2: Locate Or Install Anchor Points
Factory-installed anchors look like small metal rings or hooks. Check your trunk’s side panels, floor, or back wall. If your car already has four anchors in a rectangle or square shape, you’re ready to attach the net.
If not, you’ll need to install anchors:
- Mark anchor locations: Place them at the four corners of where you want your net.
- Drill pilot holes: Use a small drill bit. Be careful not to drill too deep.
- Install anchors: Screw in the provided hooks or use adhesive pads (for lighter nets).
Pro tip: For heavier loads or large nets, screw-in anchors are stronger than adhesive pads.
Step 3: Attach The Net
Most nets have loops or clips on each corner.
- Hook style: Attach each loop to an anchor point. Adjust the tension so the net is stretched but not too tight.
- Clip style: Snap each clip onto its anchor. Check that each one is secure.
Envelope nets may need only two anchors at the bottom and two at the top. Flat nets attach at each corner.
Step 4: Adjust And Test
Gently pull on the net to make sure it is secure. Place a few items behind or under the net. Close the trunk and drive around the block. If items shift or the net sags, tighten the straps or move the anchors closer together.
Step 5: Organize Your Cargo
Put your groceries, emergency kit, tools, or sports gear behind the net. For nets with pockets, place smaller items inside. Avoid overloading the net—most hold 20–50 pounds, depending on the material.
Here’s a summary of the steps and what to check:
| Step | What to Do | Common Mistakes |
|---|---|---|
| Prepare trunk | Clean area, remove items | Skipping cleaning—anchors fall off |
| Install anchors | Drill/screw or stick anchors | Poor alignment, loose anchors |
| Attach net | Clip or hook net in place | Uneven tension, missed clips |
| Test & adjust | Check fit, re-tighten if needed | Ignoring sagging or loose net |

Credit: hellbentfitness.com
Practical Tips For A Strong, Long-lasting Installation
1. Use the right anchors for your load. If you plan to carry heavy gear, use metal screw-in anchors. Adhesive anchors are best for light loads only.
2. Don’t overstretch the net. Too much tension can break the net or pull out the anchors.
3. Keep the net clean. Dirt and sand wear out the fibers faster. Wash the net with mild soap every few months.
4. Check the fit after heavy use. Over time, straps may loosen or anchors may wiggle. Retighten every few months.
5. Choose a spot that doesn’t block trunk access. Avoid placing the net where it stops you from folding seats or reaching your spare tire.
6. Store the net when not in use. Most nets fold flat—keep it under your trunk floor or with your tools.
7. Replace damaged parts. Broken hooks or torn nets should be replaced right away to avoid spills.
Common Mistakes To Avoid
Many beginners make a few avoidable errors when installing their cargo net:
- Using weak anchors: Adhesive pads peel in hot weather or under heavy weight. Always check the anchor’s weight rating.
- Mounting the net too high or too low: The net should line up with the center of your cargo for best hold.
- Not testing with real items: Always try a short drive with your usual load to see if the net holds up.
- Ignoring anchor alignment: Misaligned anchors cause the net to twist or bunch up.
Avoiding these mistakes helps your cargo net last for years.
Real-life Example: Installing A Cargo Net In A Sedan
Let’s look at a practical case. Maria owns a 2016 Honda Accord. She often carries groceries and gym gear. Her trunk has two factory anchor points at the back, but none near the opening.
Maria’s steps:
- She buys a universal envelope net with mounting hardware.
- She uses the factory anchors for the back and installs two screw-in hooks near the trunk opening.
- The net stretches from the opening to the back wall, forming a strong pocket.
- After loading groceries, she does a quick drive test. Everything stays in place—no more rolling bottles.
Maria’s experience shows that even with only two factory anchors, adding your own hooks is easy and effective.
Cargo Nets Vs. Other Trunk Organizers
You might wonder if a cargo net is better than bins, boxes, or trays. Here’s a quick side-by-side comparison:
| Organizer Type | Pros | Cons |
|---|---|---|
| Cargo Net | Flexible, space-saving, easy install | Lower weight limit, not for liquids |
| Storage Box | Holds heavy/bulky items, stackable | Takes up floor space, less flexible |
| Trunk Tray | Protects carpet, easy to clean | Doesn’t hold items in place |
For most daily drivers, a cargo net offers the best mix of flexibility and value.

Credit: www.reddit.com
Where To Buy And What To Look For
Major car accessory shops, online retailers, and even some supermarkets sell cargo nets. Look for:
- Good customer reviews (check for complaints about weak hooks or poor fit)
- Clear return policy
- A warranty (even a short one shows confidence in quality)
If you want to read more about different types of car organizers, check this Wikipedia article on car organizers.
Frequently Asked Questions
How Much Weight Can A Cargo Net Hold?
Most cargo nets hold between 20 and 50 pounds. The actual weight depends on the net’s material and the strength of the anchors. Always check your net’s packaging for the maximum safe load.
Can I Install A Cargo Net If My Car Has No Anchor Points?
Yes. Many cargo nets come with mounting hardware. You may need to screw in new anchors or use adhesive pads. Screw-in anchors are more secure for heavy loads.
Will A Cargo Net Fit In A Small Car Or Hatchback?
Cargo nets come in many sizes, including compact models for small cars. Measure your trunk before buying, and look for “universal fit” or “adjustable” nets.
Is It Safe To Put Liquids Or Fragile Items In A Cargo Net?
It’s better to use a storage box for liquids or glass. Cargo nets work best for soft bags, groceries, and tools. Small bottles may slip through large mesh, so check the net’s design.
How Do I Clean And Maintain My Cargo Net?
Wash the net with mild soap and water every few months. Let it air dry. Check anchors and straps for wear, and replace any damaged parts right away.
Keeping your trunk organized makes every trip easier. A well-installed cargo net trunk organizer is a simple, affordable way to prevent messes and protect your belongings. With the right net and a careful install, you’ll enjoy a tidier, more useful trunk for years to come.
Credit: mroyo.com
