Installing a USB charging port in your car can make your daily life much easier. You won’t have to worry about your phone battery dying on long drives, and you can keep your devices charged for navigation, music, or calls.
Many cars, especially older models, don’t come with built-in USB ports. But you can add one yourself, even if you’re not an expert with car electronics. This guide shows you how to install a car USB charging port DIY, step by step, with real examples, safety tips, and common mistakes to avoid.
By the end, you’ll know exactly how to upgrade your car for modern charging needs.
Why Install A Car Usb Charging Port Yourself?
Adding a USB charging port isn’t just about convenience. It’s a small upgrade with big benefits. First, you save money by doing it yourself instead of paying a mechanic. Second, you can choose the right location and type of port for your needs. Finally, you learn more about your vehicle’s electrical system, which can help you with other small repairs in the future.
If you use your phone for GPS, music, or work, a reliable charging port is essential. Many modern devices need more power than old cigarette lighter adapters can provide. By installing a dedicated port, you ensure stable power that won’t damage your gadgets.
Choosing The Right Usb Charging Port
Before starting, you need to pick the right USB charging port for your car. There are many options, and the right choice depends on your needs, your car’s design, and your budget.
Types Of Car Usb Ports
- 12V Socket Adapters: These plug into the cigarette lighter. They’re easy and require no wiring, but can look messy and sometimes disconnect during bumpy rides.
- Panel Mount USB Ports: These install directly into your dashboard or console. They look neat and are powered by your car’s electrical system.
- Dual or Multi-Port Chargers: Useful if you need to charge several devices at once.
- Quick Charge or PD Ports: Support fast charging for devices that need more power.
Power Output Matters
Check the amp rating:
- 1A (Amp): Good for small devices, but slow for smartphones.
- 2.1A – 2.4A: Standard for most smartphones and tablets.
- 3A or higher: Needed for fast charging and larger devices.
Tip: Always choose a port with over-current and over-voltage protection. This keeps your devices safe from power surges.
Where To Install
Common locations include:
- Dashboard (easy to reach)
- Center console (hidden and tidy)
- Rear seat areas (for passengers)
Measure the space to ensure your chosen port will fit. Some ports require drilling, so check what’s behind the panel to avoid damaging wires or airbags.
Credit: sluzebniczki.com
Tools And Materials Needed
Having the right tools makes installation smooth and safe. Here’s what you’ll need:
- USB charging port kit (panel-mount style recommended)
- Wire tap connectors or fuse tap
- Wire stripper/crimper
- Screwdriver set
- Drill and step bit (for creating the mounting hole)
- Multimeter (to test voltage)
- Electrical tape or heat shrink tubing
- Zip ties (for cable management)
- 12V automotive wire (if extra wire is needed)
- Fuses (check your USB port’s requirement)
- Plastic trim removal tool (to avoid scratching interior panels)
- Owner’s manual (for fuse box location and wiring diagrams)
Non-obvious insight: Many beginners skip the multimeter. But it’s crucial for checking live wires and preventing mistakes.
Step-by-step Installation Guide
Let’s break the process into clear steps. Always double-check each step before moving forward.
1. Plan The Installation
Decide where you want the USB port. Make sure it’s easy to reach but not in the way of any controls or airbags. Hold the port in place and mark the spot with a pencil.
Check behind the chosen area for wires, structural braces, or airbag modules. Use your owner’s manual or look under the panel. Never drill until you’re sure it’s safe.
2. Disconnect The Battery
Before working with car wiring, disconnect the negative terminal of your battery. This prevents accidental shorts or shocks.
Tip: Some cars store radio presets and clock settings in memory that can be lost. Note any settings you want to remember.
3. Prepare The Mounting Hole
Use a drill and a step bit to make a hole just large enough for your USB port. Go slow to avoid cracking the plastic. Test fit the port before moving to the next step.
If you’re nervous about drilling, practice on a piece of scrap plastic first.
4. Wiring The Usb Port
There are two safe ways to get power:
A) Fuse Box Connection
- Use a fuse tap to connect to an accessory power fuse. This ensures the port only works when the car is on.
- Remove the fuse, install the fuse tap with the original fuse plus a new fuse for the USB port.
- Connect the positive wire (usually red) to the fuse tap, and the negative wire (black) to a metal ground point on the car’s frame.
B) Tapping Existing Wires
- Find an accessory power wire (often behind the radio or cigarette lighter).
- Use a wire tap connector to attach the USB port’s positive wire.
- Ground the negative wire as above.
Non-obvious insight: Avoid connecting to constant 12V power (battery direct), or the port may drain your battery even when the car is off.
5. Secure And Test The Connections
Once connected, use electrical tape or heat shrink tubing to insulate all wire joins. Use zip ties to keep wires tidy and away from moving parts.
Reconnect the battery and test the port with a USB device. If it works, proceed to the next step. If not, double-check your connections with a multimeter.
6. Final Installation
Fit the USB port into the hole and secure it per the instructions (usually with a screw ring or snap fit). Replace any panels you removed.
Double-check that the port works only when the car is on, and that it charges at the correct speed for your device.

Credit: www.youtube.com
Common Mistakes To Avoid
Even simple DIY jobs can go wrong. Here’s how to avoid the most frequent problems:
- Not disconnecting the battery: This can cause blown fuses or short circuits.
- Choosing the wrong power source: Tapping into constant power drains your battery.
- Poor grounding: If the ground isn’t tight and clean, the port might not work or can overheat.
- Using thin wires: Always use automotive-grade wire thick enough for the port’s current draw.
- Skipping fuse protection: A blown fuse is better than a melted wire or fire.
Safety Considerations
Working on your car’s electrical system can be safe if you follow basic rules:
- Always disconnect the battery before starting.
- Don’t work near airbags or sensitive electronics.
- Use the right fuse rating (usually 5A or 10A for USB ports).
- Never run wires where they can be pinched or cut.
If you’re unsure about any part of the process, ask a professional for help.
Example Installation Scenarios
Let’s look at two real-world examples to help you visualize the process.
Example 1: Dashboard Panel Mount
Maria drives a 2010 sedan with no USB ports. She chooses a dual 2. 4A panel-mount USB port and wants it in the dash near the radio. She checks behind the panel, drills the mounting hole, and runs the wires to an accessory fuse in the fuse box using a fuse tap.
The entire process takes about 90 minutes. The finished result looks factory-installed and charges her smartphone and GPS at full speed.
Example 2: Rear Seat Charger For Kids
John has a family SUV. He wants a port for his kids in the back seat. He buys a dual port with a 2-meter extension cable. Instead of drilling, he mounts it under the rear center console and runs the cable under the carpet, connecting it to the power wire for the rear 12V outlet with a tap connector.
He secures all wires with zip ties to prevent them from coming loose.
Cost Comparison: Diy Vs. Professional Installation
To show why DIY makes sense, here’s a cost comparison:
| Option | Parts Cost | Labor Cost | Total |
|---|---|---|---|
| DIY Installation | $15 – $40 | $0 | $15 – $40 |
| Professional Installation | $15 – $40 | $60 – $150 | $75 – $190 |
DIY saves you $60 to $150. Plus, you gain the skill for future upgrades.
Feature Comparison: Usb Port Types
Not all USB ports are created equal. Here’s a quick look at different types:
| Type | Power Output | Number of Ports | Best For |
|---|---|---|---|
| Basic 1A Port | 1A | 1 | Old phones, MP3 players |
| Standard 2.1A Port | 2.1A | 1-2 | Modern smartphones, tablets |
| Fast Charge/PD Port | 3A+ | 1-2 | New phones, laptops, tablets |
| Multi-Port Charger | Varies | 2-4 | Families, multiple devices |
Tip: If you often charge two or more devices, a dual or multi-port charger is worth the slightly higher price.
Troubleshooting Tips
If your new USB port isn’t working, check these areas:
- Fuse blown? Replace with the correct rating.
- Power wire connected to the right source? Must be accessory power, not battery direct.
- Good ground? Clean, tight contact with bare metal.
- Device charges slowly? Check the port’s amp rating. Some devices need a higher output.
A multimeter can help you check if voltage is reaching the port. Touch the probes to the positive and ground wires: you should see about 12V when the car is on.
Maintenance And Upgrades
Once installed, USB ports need little care. But it’s smart to:
- Check occasionally for loose wires or connections.
- Clean the port with a dry brush to remove dust.
- Consider upgrading if you buy new devices needing more power (like fast charging or USB-C).
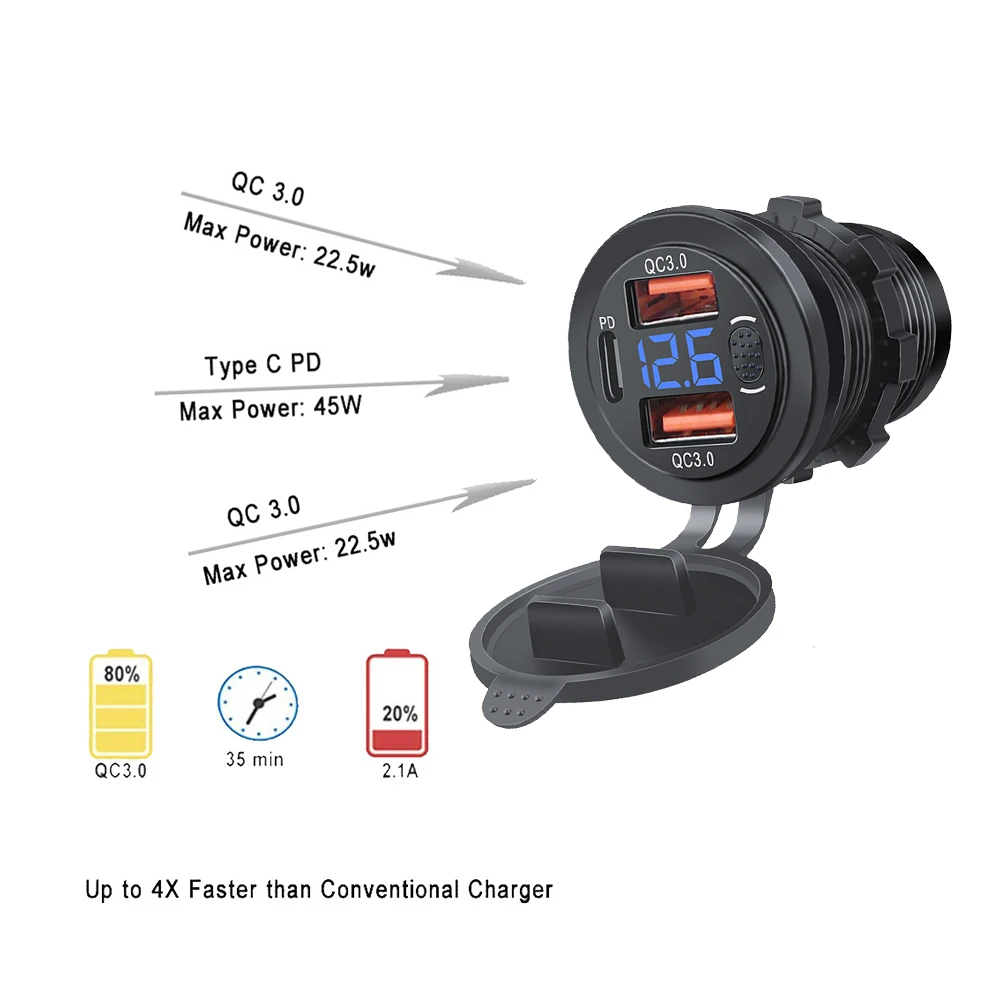
Some new ports even include voltage displays to monitor your car’s battery. These can be helpful if you want to keep an eye on battery health.
When To Ask For Help
Most car owners can handle this DIY upgrade. But seek help if:
- You’re unsure about wiring or fuses.
- Your car has complex electronics (luxury models, hybrid/electric vehicles).
- You can’t access the desired area safely.
A professional can install the port quickly and safely if you have doubts.

Credit: www.amazon.com
Where To Find Quality Usb Ports
Buy from trusted auto parts stores or online retailers. Look for products with:
- Over-current protection
- Good reviews
- Clear instructions
For more on automotive wiring and electronics safety, check resources like the Automotive electronics page on Wikipedia.
Frequently Asked Questions
What Is The Safest Power Source For A Diy Car Usb Port?
The accessory power fuse in your fuse box is usually safest. It only provides power when the car is on, so there’s no risk of battery drain overnight.
Do I Need A Special Fuse For My Usb Port?
Yes. Most USB ports require a 5A or 10A fuse. Always follow the instructions that come with your kit.
Can I Install A Usb Port Without Drilling Holes?
Yes, you can use existing holes (like unused switch blanks) or choose a plug-in adapter for the cigarette lighter. But panel-mount ports look neater and are more secure.
Will Installing A Usb Port Void My Car’s Warranty?
Usually, small electrical modifications like this won’t void your warranty, especially if you use a fuse tap and don’t cut factory wires. Check your owner’s manual or ask your dealer to be sure.
Why Does My Device Charge Slowly From My New Port?
Likely, the port’s amp rating is too low. For fast charging, you need at least a 2.1A or higher port. Check your device’s requirements.
Adding a USB charging port is one of the best DIY upgrades for any car. With the right tools, careful planning, and the steps above, you can enjoy fast, reliable charging on every drive—without breaking the bank or risking your car’s electronics.
