Keeping your car’s paint looking shiny and new isn’t just about pride—it can make your vehicle hold value longer and protect it from the elements. Many people think professional machines or detailing shops are the only way to get that deep gloss, but you can actually polish car paint by hand at home. With patience, the right products, and a careful approach, you can bring out the best in your car’s finish. This guide will show you, step by step, how to polish your car paint by hand safely and effectively.
Why Polish Car Paint By Hand?
Machine polishers are fast and powerful, but they can damage paint if used incorrectly. Hand polishing is gentler, giving you more control. It’s perfect for beginners, classic cars with thin paint, or anyone who wants to avoid expensive tools. Plus, the process lets you get close to your car, making it easier to spot small imperfections and enjoy the work.
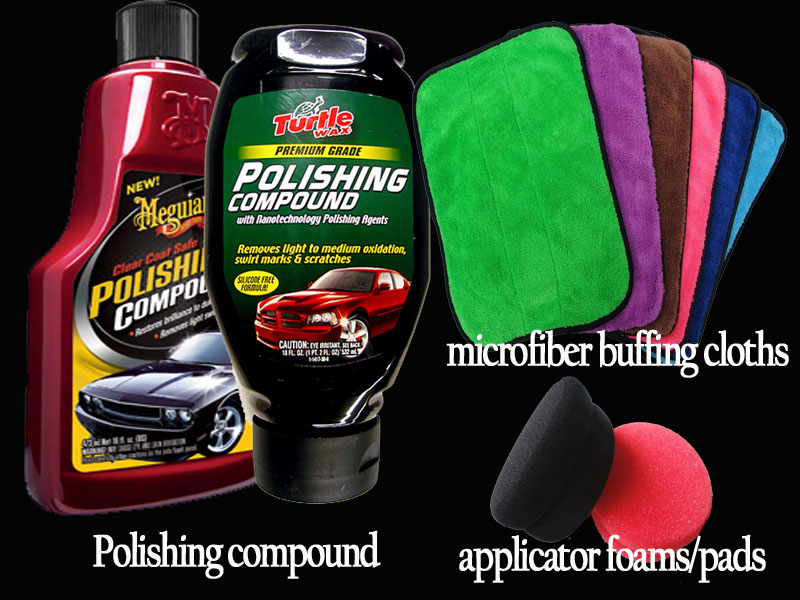
What You Need Before You Start
Before you begin, make sure you have all the right supplies. Using the proper products and tools is key to a great result.
Essentials:
- Automotive car wash soap
- Two buckets (one for soapy water, one for rinsing)
- Microfiber wash mitt
- Clay bar kit
- Automotive masking tape
- Microfiber towels (at least 6–8)
- Foam or microfiber applicator pads
- Hand polish (look for “hand polish” or “finishing polish”)
- Car wax or sealant
Optional but useful:
- Paint depth gauge (to check paint thickness)
- Detailing spray (for lubrication)
- Bright LED light (for spotting swirls)
Most hand polishes are not abrasive like compound, but always check the label. Never use household products like toothpaste or kitchen cleaners—they can scratch or harm the paint.
Preparing The Car: Cleaning And Inspection
A clean car is the foundation for any paint correction. Skipping this step can cause scratches and ruin your hard work.
1. Wash Thoroughly
Start by washing your car using the two-bucket method. Fill one bucket with soapy water and one with clean water for rinsing your mitt. This helps avoid rubbing dirt back into the paint. Use automotive car wash soap and a microfiber wash mitt. Rinse often.
2. Dry Completely
Use clean microfiber towels to dry the car. Avoid letting water dry on the surface, as this can leave spots.
3. Inspect For Contaminants
Run your hand gently over the paint. If it feels rough or gritty, there are contaminants stuck to the surface. These must be removed before polishing.
4. Clay Bar Treatment
A clay bar removes embedded dirt and makes the paint feel smooth. Spray a lubricant (included in most clay bar kits) on a small section, then rub the clay gently over the area. Check the clay often and knead it to reveal a clean surface. Repeat over the whole car.
5. Mask Off Sensitive Areas
Use automotive masking tape to cover rubber trims, plastic edges, and emblems. This prevents polish residue from staining or building up in tight spots.
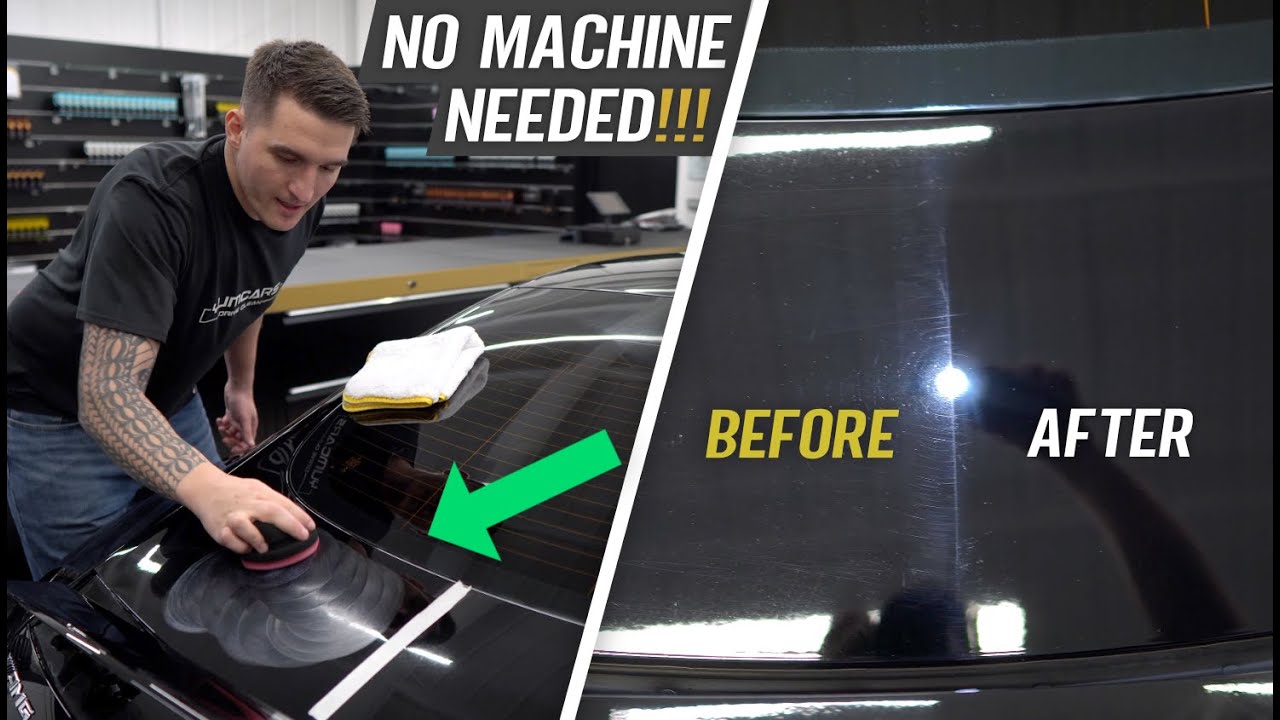
Step-by-step: How To Polish Car Paint By Hand
Now your car is clean and ready, it’s time for the main event. Follow each step closely for the best results.
1. Choose The Right Polish
Look for a hand polish meant for your paint type (clear coat or single-stage). If you’re not sure, most modern cars have a clear coat. Avoid aggressive compounds unless you have deep scratches—these can cut through paint if overused.
2. Test On A Small Area
Before doing the whole car, test your polish and pad on a small, hidden area. This ensures there are no negative reactions and lets you check the results.
3. Apply A Small Amount Of Polish
Put a pea-sized drop of polish onto a clean applicator pad. Less is more; using too much can make it harder to buff off and may leave streaks.
4. Work In Small Sections
Choose a panel, like a door or half the hood. Work on an area about 2 feet by 2 feet. This lets you focus your effort and prevents the polish from drying before you can buff it off.
5. Use Correct Technique
Place the pad flat against the paint. Using moderate pressure, move the pad in small circles or overlapping straight lines. Keep your motions slow and even. Spend about 1–2 minutes on each section. If the polish starts to dry, add a tiny bit more to the pad.
Pro tip: Don’t rush. Polishing by hand takes time, but the slow and careful approach is what brings out the best shine.
6. Buff Off Residue
Let the polish haze for a minute, then wipe it off with a clean, soft microfiber towel. Turn the towel often to use a clean side.
7. Inspect And Repeat If Needed
Check the area under bright light. If you still see light swirls or haze, repeat the process on that section. Don’t over-polish—modern paint is thin, and too much polishing can wear it down.
8. Continue Panel By Panel
Repeat the process on each section of the car. Change applicator pads and towels as they get dirty or saturated.
9. Final Inspection
Walk around the car in good light. Look for missed spots, streaks, or residue. Wipe down as needed.
Protecting The Finish: Wax Or Sealant
Polishing removes small scratches and smooths the surface, but it leaves your paint exposed. It’s vital to add a protective layer.
- Car wax: Adds shine and protection but needs reapplying every 1–2 months.
- Paint sealant: Lasts longer (up to 6 months) and gives strong protection.
Apply your chosen product with a new applicator pad, following the directions on the label. Usually, you apply a thin layer, let it haze, then buff off with a microfiber towel.
Comparing Hand Polishing Vs. Machine Polishing
Many people wonder if hand polishing is worth the time compared to using a machine. Here’s a quick comparison:
| Feature | Hand Polishing | Machine Polishing |
|---|---|---|
| Cost | Low | Medium to High |
| Skill Required | Beginner-friendly | Requires practice |
| Risk of Damage | Very low | Medium–High (if not careful) |
| Results | Good (for light defects) | Excellent (for heavy defects) |
| Time Needed | High | Low |
Hand polishing is perfect for regular maintenance, spot correction, or anyone who wants a safe way to improve their car’s appearance.
Common Mistakes To Avoid
Even with the best intentions, simple mistakes can ruin your work or harm your paint. Watch out for these common errors:
- Skipping the wash or clay step: Polishing dirty paint grinds debris into the surface, causing scratches.
- Using too much polish: More product doesn’t mean better results. It just makes buffing harder.
- Working on hot panels: Always polish in the shade. Hot surfaces dry the polish too fast and may cause streaks.
- Not changing towels/pads: Dirty applicators can scratch paint or leave residue.
- Polishing too often: Even by hand, you remove a small layer of clear coat each time. Only polish when necessary.
How Often Should You Polish?
For most cars, hand polishing once or twice a year is enough. If your car spends a lot of time outside or you notice more swirls, you might need to polish a bit more often. But always check your paint thickness if you’re not sure—modern cars have thinner clear coats than you might expect.
Real-world Example: Results From Hand Polishing
A 2015 Honda Civic owner reported that after a careful hand polish and wax, the paint looked almost new, with most swirl marks gone and a deep shine returning. The process took about four hours for a compact sedan. This matches what many enthusiasts report: you can achieve 80–90% of “machine-polish” results by hand if you use good technique.
How To Choose The Best Hand Polish
With dozens of products on the market, it can be confusing to pick the right one. Here’s a quick guide comparing three popular options:
| Product | Type | Best For | Approx. Price (USD) |
|---|---|---|---|
| Meguiar’s Ultimate Polish | Finishing Polish | Gloss, light swirls | $10–15 |
| Autoglym Super Resin Polish | All-in-one | Minor scratches, shine | $15–20 |
| 3M Hand Glaze | Glaze | Show car finish | $15–25 |
For most beginners, a finishing polish or all-in-one product is best. Avoid heavy compounds unless you have experience.

Credit: www.youtube.com
Two Insights Beginners Often Miss
- Paint thickness is limited. Every time you polish, you remove a thin layer of clear coat. If you polish too much over the years, you can wear down the protection, making your paint more likely to fade or peel.
- Lighting is critical. Swirls and scratches often hide in poor light. Use a bright LED flashlight or inspect your work in sunlight to spot missed areas or leftover residue.
Tips For Better, Longer-lasting Results
- Wash your car every 1–2 weeks using the two-bucket method.
- Avoid automatic car washes—they can scratch the finish.
- Use a quick detailer spray between washes to keep the shine.
- Reapply wax or sealant every few months to maintain protection.
Credit: detailxperts.com
Frequently Asked Questions
What’s The Difference Between Polish And Wax?
Polish is designed to remove tiny scratches and oxidation from paint, making it smooth and shiny. Wax (or sealant) is applied after polishing to protect the paint and make it shine even more.
Can I Polish A Brand-new Car By Hand?
Yes, but it’s usually not needed unless you see swirls or light scratches from shipping or dealer prep. Most new cars only need wax for protection.
Is Hand Polishing Safe For All Paint Types?
Hand polishing is safe for almost all modern clear coat or single-stage paints. If your car is older (pre-1980s) or has a custom finish, test an area first or ask a professional.
How Long Does Hand Polishing Take?
Expect to spend 3–6 hours on a typical sedan, including washing, claying, polishing, and waxing. Rushing leads to poor results.
Where Can I Learn More About Car Paint Care?
For more in-depth advice and product reviews, visit resources like Autogeek, which offers guides and forums for all skill levels.
Polishing your car paint by hand is a satisfying and rewarding way to care for your vehicle. With the right approach and a little patience, you can make your car look great and keep it protected for years to come.
Credit: www.youtube.com
