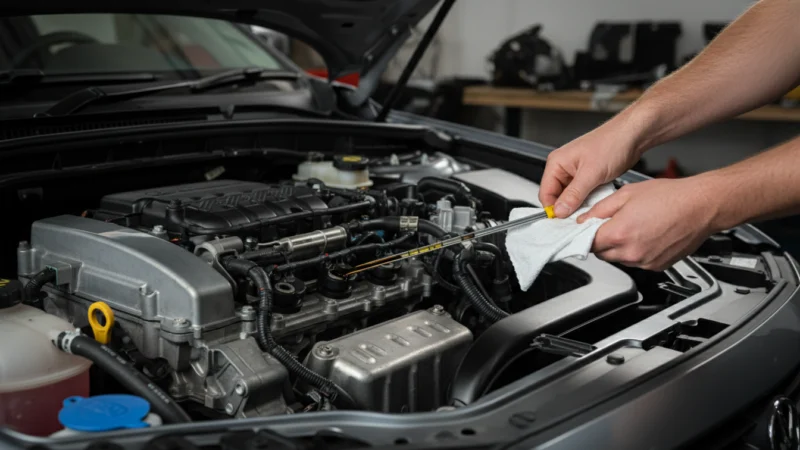
To read an oil dipstick correctly, ensure your vehicle is parked on a flat, level surface and the engine has been off for at least 10-15 minutes, allowing oil to drain back into the oil pan. Carefully remove the dipstick, wipe it completely clean with a rag, reinsert it fully until it seats properly, then pull it out again to accurately observe the oil level between the designated ‘full’ and ‘add’ marks.
- Always check oil on level ground.
- Allow engine to cool for an accurate reading.
- Wipe the dipstick clean before the final reading.
- Understand the ‘full’ and ‘add’ indicators.
- Regular checks prevent major engine issues.
Why Checking Your Engine Oil is Crucial
Engine oil is the lifeblood of your vehicle’s engine. It performs several vital functions, including lubricating moving parts to reduce friction and wear, cooling the engine by dissipating heat, and cleaning internal components by carrying away dirt and sludge. Without adequate and clean oil, engine components can overheat, seize, and suffer irreversible damage, leading to costly repairs or even complete engine failure.
Regularly checking your engine oil level and condition is a fundamental aspect of vehicle maintenance. It allows you to identify potential issues early, such as oil leaks, excessive oil consumption, or contamination, before they escalate into serious problems. This simple routine can significantly extend the lifespan of your engine and ensure reliable performance.
Gathering Your Tools and Preparing for an Accurate Reading
Before you begin, ensure you have a few basic items on hand. You will need a clean rag or paper towel to wipe the dipstick. It is also advisable to have a funnel and the correct type of engine oil readily available in case you need to top up the level. Always consult your vehicle’s owner’s manual to determine the specific oil type and viscosity recommended for your engine.
Proper preparation of your vehicle is equally important for an accurate reading. Park your car on a completely level surface, such as a flat driveway or garage floor. An incline can cause the oil to pool unevenly in the oil pan, leading to a misleading reading. Additionally, allow the engine to cool down for at least 10 to 15 minutes after driving. This gives the oil sufficient time to drain back into the oil pan from the upper engine components, ensuring the level shown on the dipstick reflects the true volume of oil available.
Understanding Different Types of Oil Dipsticks
While the fundamental purpose of an oil dipstick remains the same across all vehicles, there can be slight variations in their design and markings. Most modern vehicles feature a yellow or orange plastic handle for easy identification, typically located near the front or side of the engine. The dipstick itself is usually a long, thin metal rod.
The markings on the dipstick are crucial for interpreting the oil level. Common markings include two small holes, two notches, or a cross-hatched area. The lower mark typically indicates the ‘add’ or ‘minimum’ level, meaning you need to add oil. The upper mark signifies the ‘full’ or ‘maximum’ level. Some dipsticks might also have a ‘safe’ operating range between these two marks. Always refer to your vehicle’s owner’s manual for specific details regarding your dipstick’s unique markings.
How to Read Oil Dipstick Correctly: Step-by-Step Guide
- Park on Level Ground:Ensure your vehicle is on a completely flat and level surface. This is critical for an accurate oil level measurement.
- Allow Engine to Cool:Turn off the engine and wait at least 10-15 minutes. This allows all the engine oil to drain back into the oil pan, providing a true reading. Some manufacturers recommend checking oil when the engine is warm but not hot, so consult your owner’s manual.
- Locate the Dipstick:Identify the oil dipstick, usually marked with a brightly colored handle (often yellow or orange). It typically protrudes from the engine block.
- Remove and Wipe Clean:Pull the dipstick out completely. Use a clean rag or paper towel to wipe off all the oil from the metal rod. This removes any residual oil that might have splashed up during engine operation, ensuring a clean slate for the actual reading.
- Reinsert Fully:Push the clean dipstick back into its tube until it is fully seated. Ensure it goes all the way in and clicks or settles into place.
- Remove and Read:Pull the dipstick out again, slowly and steadily. Observe the oil level on the metal rod. The oil film will be visible between the markings.
- Interpret the Reading:The oil level should ideally fall between the ‘full’ (upper) and ‘add’ (lower) marks. If it’s below the ‘add’ mark, you need to add oil. If it’s at or slightly above the ‘full’ mark, the level is adequate.
Interpreting Your Oil Dipstick Readings: What Do the Marks Mean?
Understanding the markings on your oil dipstick is key to proper engine maintenance. The two primary marks, often labeled ‘MIN’ and ‘MAX’ or simply represented by two holes or notches, define the acceptable operating range for your engine’s oil level. The lower mark indicates the minimum safe oil level. If your oil falls below this point, your engine is running with insufficient lubrication, which can lead to accelerated wear and potential damage.
The upper mark signifies the maximum recommended oil level. An oil level at or slightly below this mark is ideal. It’s important not to overfill your engine beyond this maximum mark, as excessive oil can cause aeration, leading to reduced lubrication effectiveness and potential damage to seals and gaskets. The area between these two marks represents the optimal operating range, indicating a healthy oil level that provides proper lubrication and cooling for your engine.
When and How to Add Engine Oil Safely
If your dipstick reading indicates that the oil levelis below the ‘add’ or ‘minimum’ mark, it’s time to add oil. First, ensure you have the correct type and viscosity of engine oil as specified in your vehicle’s owner’s manual. Using the wrong oil can harm your engine.
To add oil, locate the oil filler cap on your engine, usually marked with an oil can symbol. Remove the cap and place a clean funnel into the filler neck. Slowly pour a small amount of oil, typically half a quart at a time, into the engine. After adding, wait a few minutes for the oil to settle, then recheck the dipstick using the steps outlined above. Repeat this process until the oil level is within the optimal range, between the ‘min’ and ‘max’ marks, being careful not to overfill. Always replace the oil filler cap securely once finished.
Common Mistakes to Avoid When Checking Oil
Several common errors can lead to inaccurate oil dipstick readings or potential engine issues. One frequent mistake is checking the oil immediately after driving, when the engine is hot and oil has not fully drained back into the pan. This can result in a falsely low reading, prompting an unnecessary overfill.
Another error is checking the oil on uneven ground, which skews the oil level within the pan. Not wiping the dipstick clean before the second insertion is also a common oversight, as residual oil can create a misleadingly high reading. Finally, using the wrong type of oil or overfilling the engine can both cause significant problems, from reduced lubrication efficiency to damage to engine seals. Always follow the manufacturer’s recommendations and check the level incrementally when adding oil.
How Often Should You Check Your Engine Oil?
The frequency of checking your engine oil depends on several factors, including your vehicle’s age, mileage, and driving habits. As a general rule, it is advisable to check your engine oil at least once a month. This routine check helps you monitor consumption and identify any leaks or issues early.
For older vehicles or those with higher mileage, more frequent checks, perhaps every couple of weeks, might be necessary as they tend to consume oil at a faster rate. Additionally, if you frequently drive long distances, tow heavy loads, or operate your vehicle in extreme temperatures, checking your oil more often is a prudent practice. Always consult your vehicle’s owner’s manual for specific recommendations on oil check intervals and maintenance schedules.
Beyond the Dipstick: Other Signs of Oil Issues
While the dipstick provides a direct measure of oil level and a visual cue for its condition, other indicators can signal potential oil-related problems. A dashboard oil pressure warning light, for instance, indicatescritically low oil pressure, which requires immediate attention. Ignoring this light can lead to severe engine damage.
Unusual engine noises, such as knocking or ticking sounds, can also point to insufficient lubrication or worn engine components due to oil issues. Visible smoke from the exhaust, especially blue smoke, often suggests that oil is burning in the combustion chambers. Additionally, a strong smell of burning oil, either inside or outside the vehicle, can indicate a leak onto hot engine parts. If you notice any of these signs, it is important to have your vehicle inspected by a qualified mechanic promptly.
Frequently Asked Questions
What is the best time to check my oil dipstick for an accurate reading?
The most accurate reading is obtained when the engine is cool or has been off for at least 10-15 minutes, allowing all the oil to drain back into the oil pan. The vehicle must also be parked on a completely level surface.
How do I know if my oil dipstick reading is too low or too high?
An oil level is too low if it falls below the ‘add’ or ‘minimum’ mark on the dipstick. It is too high if the oil film extends significantly above the ‘full’ or ‘maximum’ mark, indicating an overfill.
Can I read the oil dipstick correctly if my car is not on level ground?
No, checking the oil on uneven ground will result in an inaccurate reading. An incline causes the oil to pool unevenly in the pan, giving a misleading indication of the actual oil level.
What should the color and consistency of the oil on the dipstick tell me?
New oil is typically amber or light brown and transparent. As it ages, it darkens due to contaminants. Very dark, gritty, or milky oil can indicate serious issues like coolant contamination or excessive wear, requiring immediate attention.
Is it possible to overfill my engine when trying to read the oil dipstick correctly and add oil?
Yes, it is very possible to overfill an engine. Adding oil too quickly or without rechecking the dipstick incrementally can lead to an excessive oil level, which can cause engine damage and reduced performance.
How does a hot engine affect how to read oil dipstick correctly?
A hot engine will cause an inaccurate reading because a significant portion of the oil is still circulating in the upper engine components and has not yet drained back into the oil pan. This typically results in a falsely low reading.
Conclusion
Mastering how to read your oil dipstick correctly is a fundamental skill for any vehicle owner, directly impacting the longevity and reliability of your engine. By consistently following the steps of checking on level ground with a cool engine, wiping the dipstick clean, and accurately interpreting the ‘full’ and ‘add’ marks, you can ensure your engine always has the optimal level of lubrication. Regular oil checks are a simple yet powerful preventative measure against costly engine repairs.
Make checking your oil a routine part of your vehicle maintenance schedule. If you ever find yourself uncertain about your readings or notice persistent issues, do not hesitate to consult a trusted mechanic for professional advice and service.
Related Guides: How to Safely Work Under a Car at Home, Can You Work Under Car With Only Jack? T, How to Secure Car on Ramps Safely, How to Check if Jack Stand is Stable.
