Replacing a car’s intake manifold at home can seem like a big task. But with the right tools, patience, and careful steps, many car owners can handle it themselves. The intake manifold is vital for your engine’s air and fuel delivery.
A failing manifold can cause rough idling, poor fuel economy, or even engine damage. If you notice coolant leaks near the manifold, check engine lights, or loss of power, replacement might be needed. This guide will walk you through the whole process—preparation, removal, installation, and post-replacement tips—so you can do the job right and safely.
Understanding The Intake Manifold
The intake manifold sits between the air filter and the engine. Its job is to send air (and sometimes fuel) into the engine’s cylinders. Modern cars often have complex manifolds with sensors, hoses, and sometimes built-in coolant passages. Older cars may have simpler designs. Knowing your car’s type helps you plan the job.
The main signs your intake manifold needs replacing are:
- Coolant leaks around the manifold
- Misfires or rough idle
- Check engine light related to air/fuel mix codes
- Loss of engine power
- Visible cracks or damage
Not every issue means you must replace the manifold—sometimes, a gasket swap is enough. But if the manifold is cracked, warped, or clogged, replacement is best.
Tools And Materials You’ll Need
Gather all tools and parts before starting. This saves time and prevents surprises halfway through the job.
Essential tools and materials:
- Ratchet and socket set (metric and standard)
- Wrenches (open and box-end)
- Screwdrivers (flat and Phillips)
- Torque wrench
- Pliers (regular and needle-nose)
- Gasket scraper or plastic razor blade
- Clean rags or shop towels
- Engine degreaser
- Gasket sealant (if recommended by your car’s manual)
- Replacement intake manifold
- New intake manifold gasket(s)
- Coolant (if your engine uses coolant passages in the manifold)
- Replacement hoses or vacuum lines (if worn or cracked)
- Shop light or headlamp
Optional but helpful:
- Magnetic pickup tool (for dropped bolts)
- Labeling tape and marker
- Phone or camera (to take reference photos)
- Small containers for bolts and nuts
Having a repair manual for your car model is very helpful. It includes torque specs, diagrams, and step-by-step procedures.
Preparing For The Job
Safety and preparation are key. Here’s how to get ready:
- Work in a well-ventilated area. If possible, do the job in a garage with good lighting.
- Let the engine cool. Working on a hot engine can cause burns or damage parts.
- Disconnect the battery. Remove the negative terminal to prevent accidental shorts.
- Drain the coolant. If your manifold has coolant passages, open the radiator drain plug or remove the lower hose and collect old coolant in a pan.
- Take photos. Before disconnecting anything, take clear pictures of hoses, wires, and linkages. This helps during reassembly.
Removing The Old Intake Manifold
This is the most involved part. Take your time, and don’t force anything.
Step 1: Remove Air Intake Components
Start by removing the air filter box, intake tubes, and any sensors attached to the air intake system. Set them aside.
Step 2: Disconnect Hoses, Cables, And Sensors
Label and disconnect:
- Vacuum lines
- Fuel lines (relieve fuel pressure first)
- Coolant hoses
- Throttle and cruise control cables
- Electrical connectors
Use labeling tape to mark each hose and connector. This avoids confusion later.
Step 3: Remove Fuel Rails And Injectors (if Needed)
Many intake manifolds have fuel rails and injectors attached. Carefully remove these as one unit, or disconnect injectors from the manifold, depending on your car.
Step 4: Unbolt The Intake Manifold
Using your socket set, remove all intake manifold bolts in the reverse order specified in your manual (usually from outside to inside). Some bolts may be hidden under hoses or brackets. Place bolts in a tray as you remove them.
Step 5: Remove The Manifold
Gently wiggle and lift the intake manifold away from the engine. If it’s stuck, tap it lightly with a rubber mallet. Never pry hard—this can damage the mating surfaces.
Step 6: Clean The Mating Surfaces
Scrape off all old gasket material from the engine surface using a gasket scraper. Be careful not to let debris fall into the engine ports. Wipe the surfaces with a clean rag and some degreaser.
Comparing Old And New Intake Manifolds
Before installing, compare the old and new parts. Here’s a table showing what to check:
| Check | Why It Matters |
|---|---|
| Bolt hole alignment | Ensures the manifold will fit your engine |
| Port shape and size | Prevents air/fuel flow issues |
| Sensor and hose locations | Guarantees all connections can be made |
| Coolant/fuel passages | Prevents leaks and engine problems |
If anything doesn’t match, do not install the new part. Double-check the part number and consult your supplier.
Installing The New Intake Manifold
Now it’s time to put everything back.
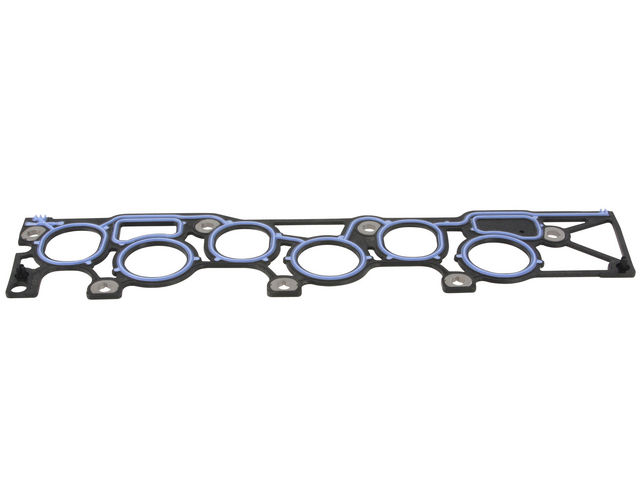
Step 1: Place The New Gasket
Set the new intake manifold gasket onto the cleaned surface. Some gaskets use a little sealant—check your manual. Make sure the gasket is aligned and sits flat.
Step 2: Lower The New Manifold
Carefully lower the new intake manifold onto the gasket and engine. Avoid sliding it around. If it’s heavy or awkward, get a helper.
Step 3: Insert Bolts And Torque Properly
Install the bolts by hand first to avoid cross-threading. Tighten them lightly, then use a torque wrench to tighten to the specified value, following the pattern in your manual. The usual pattern is from the center outwards, in stages.
For most four-cylinder engines, this is between 15–25 ft-lbs (20–35 Nm). V6 or V8 engines may require more.
Step 4: Reinstall Fuel Rails, Hoses, And Sensors
Reconnect everything you removed earlier, using your photos and labels as a guide. Double-check each connector, hose, and bracket.
Step 5: Refill Coolant
If you lost coolant, refill the system with the correct type. Bleed air from the cooling system as required.
Step 6: Reconnect Battery
Attach the battery negative terminal.
Credit: www.ebay.com
Double-check And Initial Startup
Before starting the engine, double-check your work:
- Are all bolts tight and torqued?
- Are all hoses and sensors connected?
- Is there coolant in the radiator?
- Are tools and rags cleared from the engine bay?
Now, start the engine. Expect a longer crank on first start. Check for leaks around the manifold. Listen for hissing (vacuum leaks) or drips (coolant/fuel leaks). Let the engine reach operating temperature, watching for the check engine light or warning signals.
Common Mistakes To Avoid
Many beginners make avoidable errors. Watch out for these:
- Using old gaskets: Always use new gaskets. Old ones won’t seal properly.
- Skipping torque specs: Overtightening can crack the manifold. Undertightening can cause leaks.
- Forgetting hoses or sensors: Even one missed connection can cause poor running or warning lights.
- Letting debris fall in engine: Always cover open ports when cleaning.
- Mixing up bolts: Intake manifold bolts are sometimes different sizes. Keep them organized.

Credit: www.walmart.com
Extra Tips For Success
- Take your time. Rushing leads to mistakes.
- If you’re unsure, check your car’s repair manual or online forums.
- Keep small parts in labeled containers.
- If you drop a bolt into the engine bay, use a magnetic pickup tool.
- After the first drive, check for leaks and retorque bolts if your manual recommends it.
Intake Manifold Replacement: Cost Comparison
Doing this job at home can save a lot of money. Here’s a cost breakdown:
| Item | DIY Cost (USD) | Shop Cost (USD) |
|---|---|---|
| Intake manifold | $100–$350 | $100–$350 |
| Gaskets & sealant | $20–$60 | $20–$60 |
| Coolant | $15–$30 | $15–$30 |
| Labor | $0 | $300–$600 |
| Total | $135–$440 | $435–$1040 |
The main savings come from doing your own labor. This project typically takes 3–6 hours for most people.
Credit: theplantfedgut.com
How Long Will A New Intake Manifold Last?
A well-installed intake manifold can last 100,000 miles or more. Cheap aftermarket parts may not last as long. Always buy quality parts from trusted brands.
Signs You Did The Job Right
After replacement, your engine should:
- Idle smoothly
- Run without leaks
- Have no warning lights
- Warm up normally
If you notice rough running, leaks, or new warning lights, double-check your work.
Troubleshooting After Replacement
Some problems can appear even after careful work.
| Symptom | Possible Cause | Fix |
|---|---|---|
| Hissing noise | Vacuum leak at gasket | Retorque bolts, check gasket |
| Coolant leak | Loose hose or bad seal | Tighten clamps, check connections |
| Check engine light | Sensor left unplugged | Check all connectors |
| Rough idle | Air leak or injector problem | Inspect hoses, injector seals |
When To Call A Professional
Replacing an intake manifold is within reach for careful DIYers. But if you see:
- Broken bolts in the engine
- Damaged wiring
- Unusual noises after the job
- No improvement in engine running
Don’t hesitate to call a professional. It’s better to ask for help than to risk expensive engine damage.
For more technical details and diagrams, you can visit the Wikipedia Intake Manifold page.
Frequently Asked Questions
How Long Does It Take To Replace An Intake Manifold At Home?
Most people need 3 to 6 hours for the job, depending on experience and car type. Some engines are more complex and may take longer.
What Happens If I Don’t Replace A Bad Intake Manifold?
Ignoring a bad intake manifold can cause engine misfires, coolant leaks, poor fuel economy, and even major engine damage if left too long.
Do I Need Special Tools For This Job?
You need basic hand tools (wrenches, sockets, screwdrivers) and a torque wrench. No special tools are required for most cars.
Can I Reuse The Intake Manifold Gasket?
No, always use a new gasket. Old gaskets rarely seal well and can lead to leaks.
Is It Safe To Drive With A Leaking Intake Manifold?
It’s not recommended. Driving with leaks can cause overheating, engine misfires, or even severe engine damage.
Replacing a car intake manifold at home is a rewarding project that can save you hundreds of dollars. With careful work and the right preparation, you’ll keep your engine running strong and learn more about your car along the way.
