
Replacing a serpentine belt can be a practical DIY job when the belt is accessible and the correct routing and tensioner procedure are known. The important first step is identifying the exact accessory-drive layout for your engine, because not every vehicle uses the same belt path, tensioner, or driven accessories.
This guide covers a safe replacement framework. Use the vehicle’s belt-routing diagram and service information for the exact procedure, especially where access is tight or a stretch belt, manual adjuster, or unusual tensioner is used.
Confirm the Belt Is the Problem
Squealing, chirping, a battery warning, or accessory problems do not automatically mean the belt itself is bad. A weak tensioner, worn idler, misaligned pulley, seized accessory, fluid contamination, or damaged crank pulley can create similar symptoms.
Inspect the belt and drive system with the engine off before replacing parts. Diagnose the cause of abnormal wear so a new belt is not damaged by the same fault.
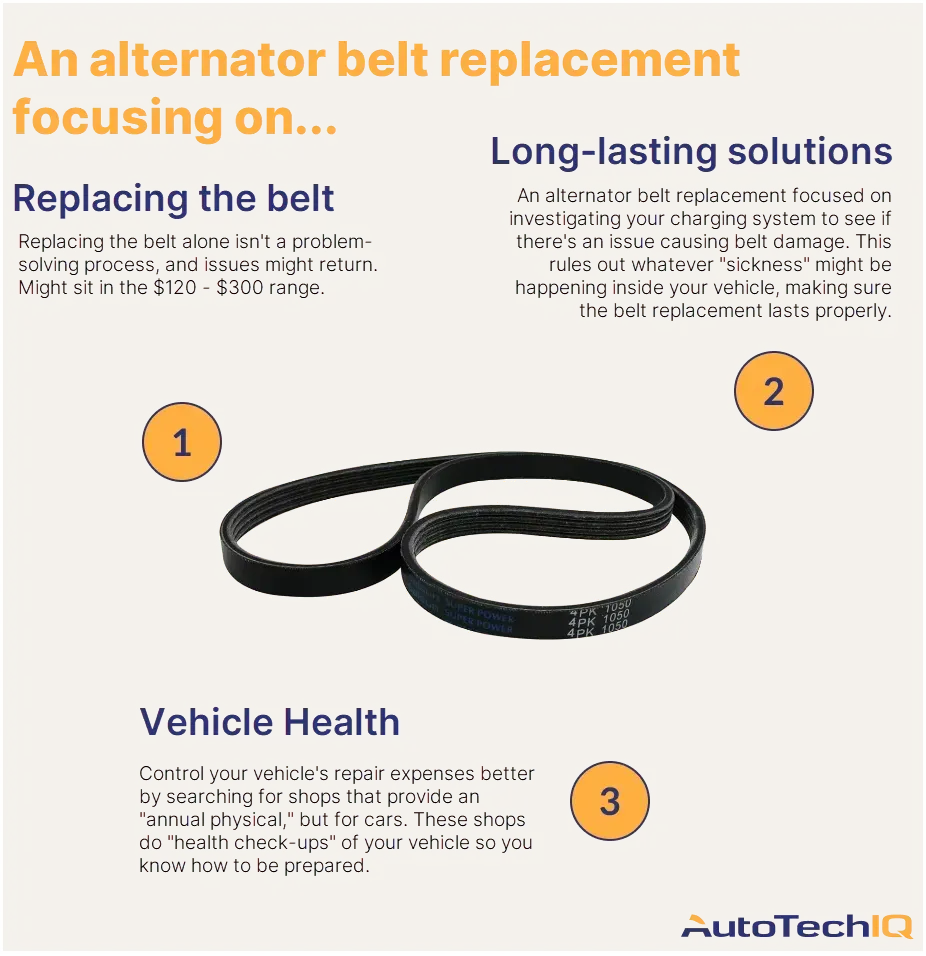
Credit: www.autotechiq.com
Get the Correct Belt for the Exact Engine
Use reliable catalog or manufacturer information for the vehicle’s exact engine and accessory package. Similar models can use different belt lengths or routing depending on air conditioning, hydraulic power steering, supercharger equipment, or other options.
Compare the new belt’s rib count, width, and application with the removed belt, but do not rely on an old stretched or incorrectly installed belt as the only fitment reference.
Record the Routing Before Removal
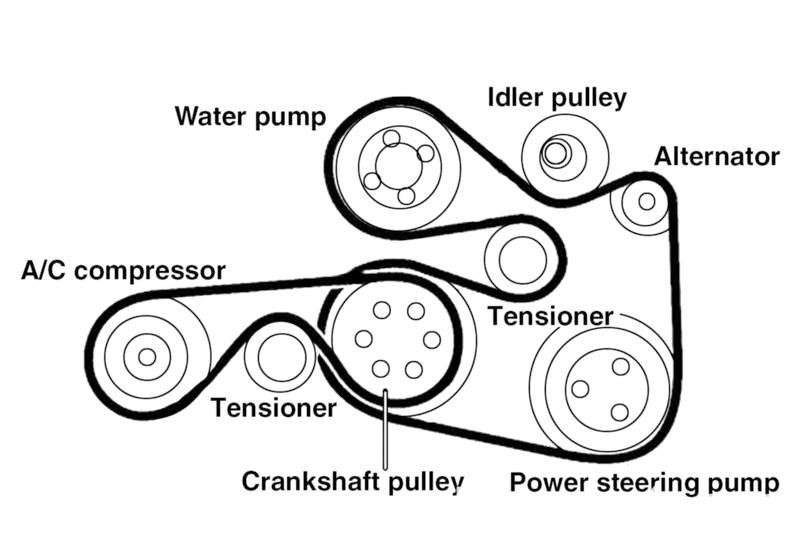
Find the under-hood routing label or the vehicle service diagram. If the existing belt is known to be routed correctly, a clear photo can also help. Do not guess the route after the belt is off.
The ribbed and smooth sides of a belt normally contact matching pulley surfaces, but the exact path and component direction must come from the correct diagram.
Prepare the Vehicle Safely
Switch the engine off, remove the key or keep the key/fob away as appropriate, and allow hot or moving components to become safe to work around. Follow the manufacturer’s battery-isolation guidance if the repair requires working near exposed electrical terminals or removing powered components.
Never attempt to adjust, route, or inspect the belt with the engine running.
Inspect the Tensioner and Pulleys Before Fitting the New Belt
With the old belt removed, inspect accessible idlers, tensioner pulleys, and driven accessories for roughness, looseness, obvious damage, or misalignment according to the service procedure. Do not spin components aggressively or treat every small sound as proof of failure.
Look for oil or coolant contamination and repair the leak before installing a new belt.
Credit: www.e39source.com
Release Belt Tension Using the Specified Tool and Direction
Automatic tensioners can use different tool interfaces and rotation directions. Manual adjusters and stretch belts use different methods entirely.
Use the specified tool and controlled movement. Do not pry the belt off a pulley, use excessive leverage, or let a spring-loaded tensioner snap back uncontrolled.
Remove the Old Belt and Check Its Wear Pattern
Once tension is released, slip the belt from an accessible pulley and remove it from the remaining path. Look for missing ribs, edge wear, glazing, cracking, fraying, or contamination.
Edge wear can point to alignment problems. Repeated glazing or noise can indicate tension, pulley, or accessory issues rather than a belt-quality problem alone.
Route the New Belt Exactly as Specified
Route the belt around the pulleys according to the correct diagram, usually leaving an accessible pulley for the final installation step. Make sure every rib is seated in the matching grooves and that the belt is not twisted.
Do not force a belt that seems too short or accept a belt that leaves the tensioner outside its intended operating range. Recheck the part and routing first.
Return the Tensioner to Its Operating Position Slowly
After the belt is seated, slowly release the automatic tensioner or set a manual system according to its specified procedure. Do not use a generic twist or deflection rule unless the manufacturer specifically calls for that method.
Inspect the Entire Belt Path Before Starting the Engine
Check every pulley from as many angles as possible. Confirm the belt is centered, all ribs are seated, no wiring or hose is trapped, tools are removed, and any covers or access panels are secure.
Do not manually rotate components in a way that could disturb engine timing or damage an accessory. Follow the service information if a manual rotation check is specified.
Start the Engine From a Safe Position and Observe
Keep hands, clothing, tools, and hair away from moving parts. Start the engine and observe the belt from a safe distance. It should track normally without obvious wandering, whipping, smoke, or abnormal noise.
If the belt walks off a pulley, squeals severely, or an accessory warning appears, shut the engine off and recheck the routing, fitment, tensioner, pulleys, and accessories.
Credit: www.youtube.com
Know What a Broken Belt Would Affect on Your Vehicle
The consequences of a failed serpentine belt are vehicle-specific. It commonly stops the alternator. On some vehicles it can also stop a mechanically driven water pump or hydraulic power-steering pump; other vehicles use electric steering or a separately driven water pump.
If a broken belt causes an overheating warning, loss of steering assistance, or other immediate hazard, get to safety and stop the vehicle rather than attempting to continue for a promised distance.
When to Replace the Belt
Use the vehicle or belt manufacturer’s inspection and replacement guidance. There is no single mileage interval that applies to every serpentine belt. Replace it when scheduled, when inspection criteria are met, or when damage or contamination makes it unserviceable.
When to Call a Professional
Professional help is appropriate when the belt path is inaccessible, the tensioner is damaged or unusually difficult to control, an accessory pulley is seized or loose, the crank pulley is damaged, or the belt repeatedly comes off after correct installation.
Frequently Asked Questions
Do I need to replace the tensioner with the belt?
Not automatically. Inspect it and follow the vehicle’s service guidance. Replace it if it is faulty, due for service, or does not meet the specified condition checks.
Can I use belt dressing to stop a squeal?
Do not use a product unless the belt or vehicle manufacturer specifically allows it. Squeal should be diagnosed for contamination, tension, alignment, pulley, or accessory faults.
Can I drive if the serpentine belt breaks?
The effect depends on what that belt drives. Because charging, cooling, or steering assistance may be affected, continuing to drive can be unsafe or damaging. Stop safely and identify the affected systems.
Takeaway
A safe serpentine-belt replacement depends on correct fitment, exact routing, proper tensioner handling, inspection of the drive system, and careful verification before and after startup. Keep this page focused on the replacement procedure; the separate GearsAdvisor mistakes article can cover common errors without competing for the same primary intent.