
Replacing the exhaust manifold gasket in your car is a job that can save you money and keep your engine running smoothly. Many people think this repair is only for professionals, but with the right guidance, tools, and patience, you can do it yourself at home.
If you notice a ticking sound from the engine, loss of power, or smell exhaust fumes under the hood, it might be time to change the gasket. This article will guide you step-by-step through the process, explain what to watch out for, and help you avoid mistakes that can lead to leaks or damage.
What Is An Exhaust Manifold Gasket And Why Does It Matter?
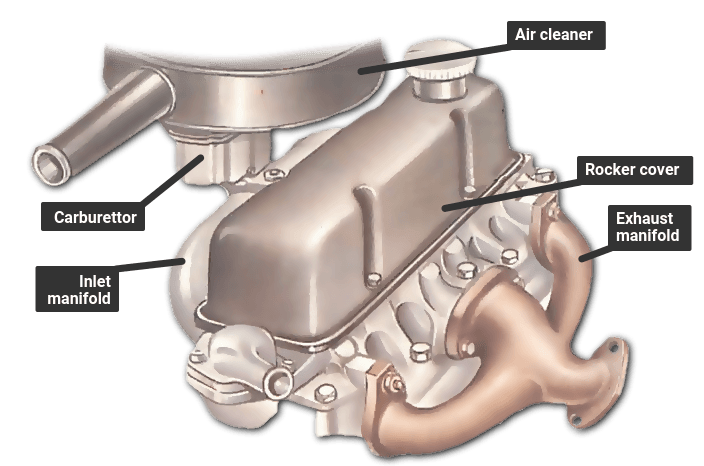
The exhaust manifold gasket is a heat-resistant seal that fits between the engine’s exhaust manifold and the cylinder head. Its main job is to keep exhaust gases from leaking before they reach the catalytic converter. If this gasket fails, you could experience:
- Reduced engine power
- Increased fuel consumption
- Loud ticking or hissing noises
- Risk of engine damage over time
In some cases, gases can enter the car’s cabin, which is dangerous for health. That’s why replacing a bad gasket quickly is important.
Signs Your Exhaust Manifold Gasket Needs Replacement
Many car owners miss the early signs of a failing gasket. Here’s what to look for:
- Ticking noise: Especially when starting the engine or accelerating.
- Visible exhaust leak: Sometimes you can see black soot or feel gases near the manifold.
- Check engine light: Codes related to exhaust leaks may appear.
- Reduced performance: The engine might feel weak or unresponsive.
- Burning smell: Exhaust gases can burn nearby plastic or wiring.
Noticing one or more of these symptoms means you should inspect the gasket soon.
Credit: www.howacarworks.com
Tools And Materials Needed
Before starting, gather all the necessary tools. Missing tools can slow you down or lead to mistakes. Here’s a list of what you’ll need:
- New exhaust manifold gasket (exact fit for your car)
- Socket set (metric and standard sizes)
- Wrenches (open-end and box-end)
- Torque wrench
- Screwdrivers
- Pliers
- Penetrating oil (like WD-40)
- Wire brush
- Safety glasses and gloves
- Gasket scraper or razor blade
- Shop rags
- Jack and jack stands (or ramps)
- Service manual for your car (for torque specs and diagrams)
Optional but helpful:
- Anti-seize compound
- Thread locker
- Replacement exhaust manifold bolts or studs (if old ones are rusted)
Preparing Your Car For The Job
Before you start, make sure you’re working safely. Car exhaust systems get extremely hot, so never work on a car that has been running recently. Let it cool for at least an hour.
- Disconnect the battery: Always remove the negative cable to avoid electrical shorts.
- Lift the car: If your exhaust manifold is hard to reach from the top, use a jack and stands to lift the car securely.
- Spray penetrating oil: Apply to all exhaust manifold bolts and nuts. Let it soak for at least 15 minutes—rusted bolts are common.
A common mistake is not giving the car enough time to cool down. Even after an hour, touch metal parts carefully.
Removing The Exhaust Manifold
This is the most challenging part for many people. Work slowly and keep track of every bolt.
- Remove engine covers and heat shields: These might block access to the manifold. Keep screws and bolts organized.
- Disconnect oxygen sensors: If they’re attached to the manifold, unplug them carefully.
- Detach exhaust pipe: Use a wrench or socket to remove the bolts connecting the exhaust pipe to the manifold.
- Remove manifold bolts: Work in reverse order of installation (usually outside-in). Use a breaker bar if bolts are stuck, but avoid snapping them.
- Remove the manifold: Once all bolts are out, gently lift the manifold away from the engine.
Tip: Take photos before and during disassembly. This helps you remember bolt locations and cable routing.
What If A Bolt Breaks?
Exhaust manifold bolts are often rusted. If one breaks, don’t panic. Use penetrating oil, a bolt extractor, and patience. For deeply rusted bolts, you might need to drill and retap the hole, but this is rare.
Cleaning The Mating Surfaces
Cleanliness is critical. Even a small piece of old gasket can cause leaks.
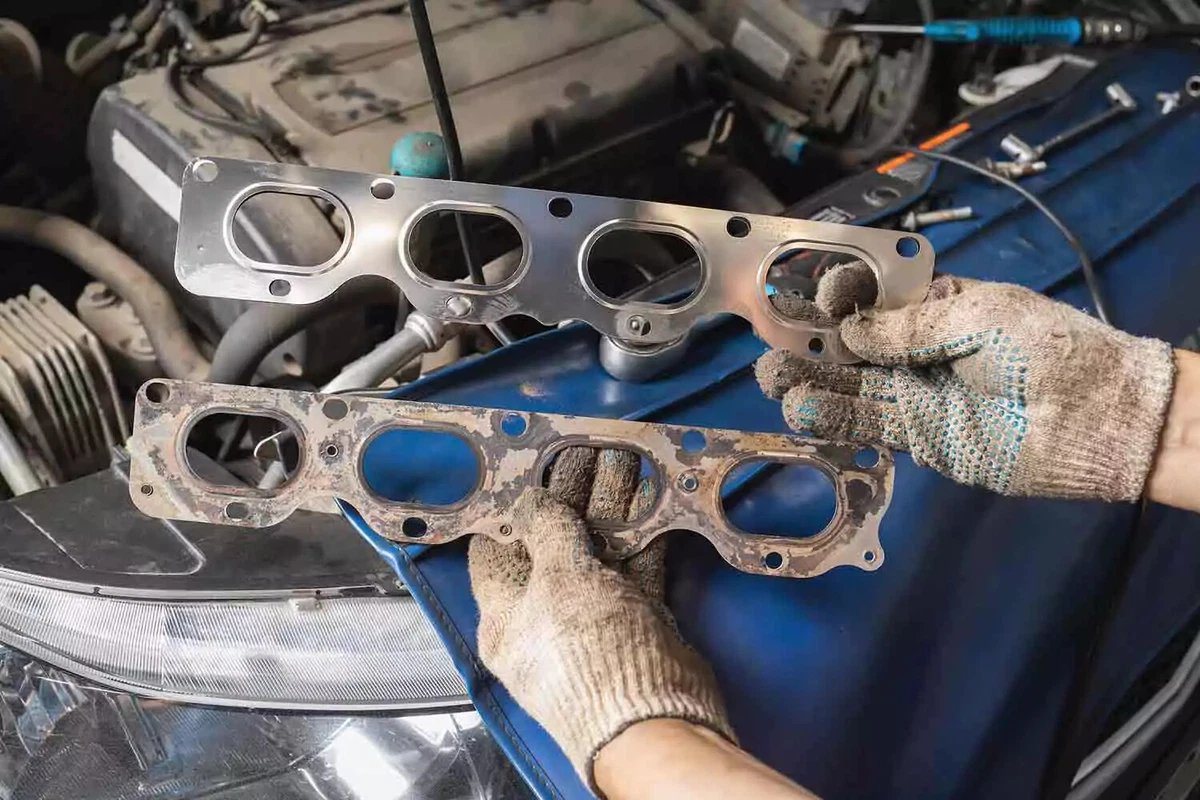
- Use a gasket scraper or razor blade to remove all traces of the old gasket from the cylinder head and manifold.
- Scrub with a wire brush and wipe with a clean rag.
- Check for cracks or warping on the manifold. If you see damage, the manifold may need replacing.
Never use power tools that could gouge the metal. The surfaces must be smooth and flat.
Credit: www.ebay.com
Installing The New Exhaust Manifold Gasket
Now it’s time to install the new gasket and reassemble everything.
- Position the new gasket: Line it up with the bolt holes. Some gaskets have a “this side out” marking.
- Install the manifold: Carefully fit the manifold onto the studs or bolt holes.
- Insert bolts by hand: Start all bolts by hand to avoid cross-threading.
- Torque bolts in sequence: Use a torque wrench and follow the sequence in your car’s manual. This ensures even pressure.
Here’s a typical torque sequence:
| Bolt Number | Order to Tighten |
|---|---|
| 1 | Middle bolt |
| 2 | Next to middle (left) |
| 3 | Next to middle (right) |
| 4 | Far left |
| 5 | Far right |
Always check your car’s service manual for the correct order and torque specs.
Reassembling And Reconnecting Everything
With the new gasket and manifold in place:
- Reconnect exhaust pipe: Tighten bolts evenly to prevent leaks.
- Plug in oxygen sensors: Make sure connections are tight.
- Reinstall heat shields and engine covers: These protect other parts from exhaust heat.
- Reconnect the battery: You’re almost done.
Tip: If you bought new bolts, apply a small amount of anti-seize compound to help with future removal.
Starting The Car And Checking For Leaks
The first start after gasket replacement is important. Here’s what to do:
- Start the engine: Let it idle for a few minutes.
- Listen for leaks: A hissing or ticking sound means something is not sealed.
- Feel for escaping gases: Run your hand (cautiously) near the repair area—don’t touch hot parts.
- Check for warning lights: If the check engine light appears, scan for error codes.
If you hear leaks, shut off the engine and retorque the bolts once the engine cools.
Common Mistakes And How To Avoid Them
Many DIY repairs fail because of simple errors. Here are mistakes to avoid:
- Not tightening bolts in the correct sequence. This can warp the manifold.
- Using the wrong gasket. Always match the part number.
- Failing to clean surfaces completely.
- Over-tightening bolts, which can strip threads or break bolts.
- Not replacing rusted or stretched bolts.
Insight: One often-missed detail: always inspect the exhaust manifold for warping with a straightedge. Even a slightly warped manifold can cause leaks with a new gasket.
How Long Does The Job Take?
For most cars, plan 2–4 hours if you’re experienced. Beginners may need up to 6 hours, especially if bolts are rusted. Take your time—rushing increases the risk of mistakes.
Cost Comparison: Diy Vs. Professional Repair
Replacing the gasket yourself can save a lot of money. Here’s a typical cost breakdown:
| Item | DIY Cost | Shop Cost |
|---|---|---|
| Gasket | $15–$40 | Included |
| New Bolts | $10–$25 | Included |
| Labor | $0 | $200–$500 |
| Total | $25–$65 | $215–$565 |
Non-obvious insight: Some shops may not replace the bolts unless you ask. Old bolts can fail soon after a repair.
Credit: www.youtube.com
Tips For A Successful Gasket Replacement
- Take photos before removing anything. This helps during reassembly.
- Label bolts if they are different lengths or types.
- Work in a well-ventilated area.
- Double-check torque specs for your specific engine.
If you want to see diagrams or more technical info, the Wikipedia page on exhaust manifolds is a good resource.
When To Call A Professional
If you break a bolt inside the cylinder head or see cracks on the manifold, it’s best to call a mechanic. These problems need special tools and experience. Also, if your car has a turbocharger or complex exhaust system, the job can be much harder.
Frequently Asked Questions
How Do I Know If My Exhaust Manifold Gasket Is Bad?
Common signs are a ticking noise, loss of engine power, visible exhaust leaks, and a burning smell under the hood. Sometimes you’ll see a check engine light.
Can I Drive With A Leaking Exhaust Manifold Gasket?
It’s not safe. Exhaust leaks can let toxic gases into the cabin and may cause engine damage or reduced performance. Replace the gasket as soon as possible.
Do I Need Special Tools To Replace The Gasket?
Most tools are standard, like wrenches, sockets, and a torque wrench. A gasket scraper and penetrating oil help with cleaning and removing rusted bolts.
How Tight Should Exhaust Manifold Bolts Be?
Use a torque wrench and follow your car’s specifications. Over-tightening can break bolts or damage threads, while under-tightening can cause leaks.
Should I Replace The Bolts When Installing A New Gasket?
It’s a good idea, especially if the old bolts are rusted or stretched. New bolts help ensure a proper seal and make future repairs easier.
Replacing your car’s exhaust manifold gasket isn’t easy, but it’s a skill any careful DIYer can learn. With good preparation and attention to detail, you can fix leaks, save money, and keep your engine healthy for years to come.