
Swapping your car’s stock air intake for a short ram intake system is one of the most popular upgrades among car enthusiasts. This modification is loved because it’s affordable, gives a noticeable boost in engine sound, and can improve throttle response. But for many drivers, the idea of working under the hood is intimidating. The good news? With some basic tools, patience, and the right instructions, you can install a short ram intake yourself—even if you’re not a seasoned mechanic.
In this guide, you’ll learn exactly how to install a car short ram intake system, step by step. We’ll cover the tools you need, the process from start to finish, tips for avoiding mistakes, and how to make sure your car runs smoothly afterward.
By the end, you’ll feel confident about tackling this upgrade and understanding what really matters for your car’s performance.
What Is A Short Ram Intake System?
A short ram intake is an aftermarket car part that replaces your car’s stock air intake. Its main purpose is to let your engine breathe better by allowing more air, and sometimes cooler air, into the combustion chamber. This can help your engine produce more power, especially at higher RPMs. The design is usually simpler and shorter than a cold air intake, which means installation is easier and there’s less risk of water entering the system.
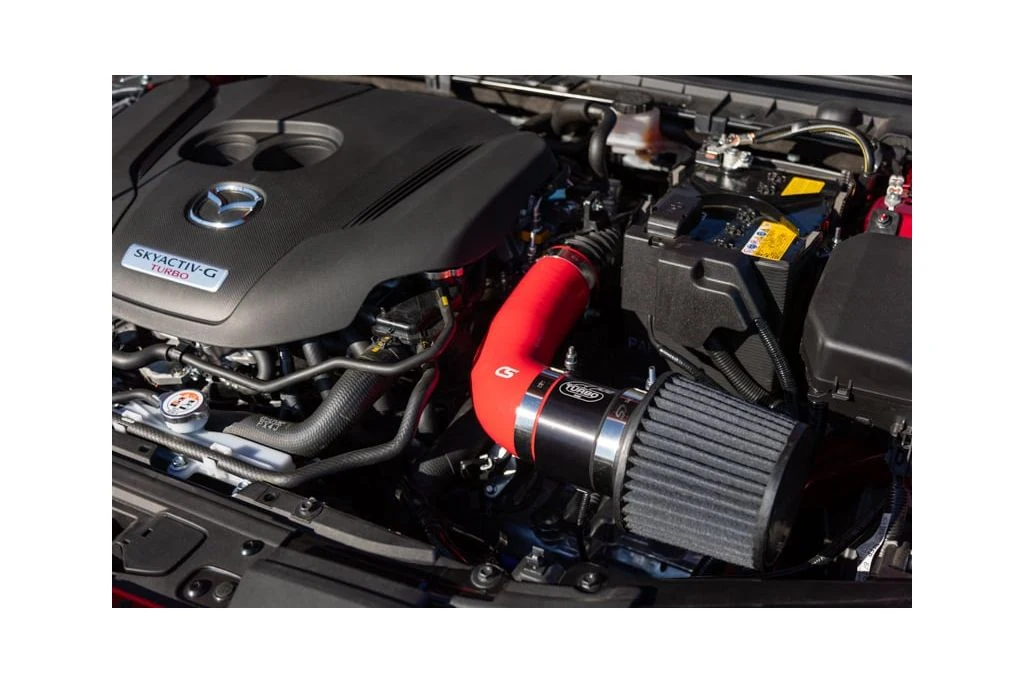
Short ram intakes typically use a straight or slightly curved pipe with a high-flow air filter at the end. They’re often made of aluminum, stainless steel, or plastic. The main benefit is improved airflow compared to the restrictive factory air box.
Key Benefits
- Better throttle response: Your car feels more responsive when you press the gas pedal.
- Slight power increase: Usually 3–8 more horsepower, depending on the car.
- Enhanced engine sound: Many drivers enjoy the deeper intake roar during acceleration.
- Simpler installation: Fewer parts and easier access under the hood than cold air intakes.
However, gains vary. Cars with highly restrictive stock intakes benefit the most, while other models may see smaller improvements.
Tools And Materials You’ll Need
Before you start, it’s important to have all the right tools and parts. Missing something can slow you down or lead to mistakes.
Essential tools:
- Socket set (usually 8mm, 10mm sizes)
- Flathead screwdriver
- Phillips screwdriver
- Pliers
- Ratchet and extension
- Torque wrench (optional but useful)
- Clean rags
Materials:
- Short ram intake kit (pipe, filter, couplers, clamps, mounting hardware)
- New gaskets or O-rings (if needed)
- Replacement MAF (mass air flow) sensor gasket (if your car uses one)
- Zip ties or hose clamps for securing hoses
- Safety gloves and eye protection
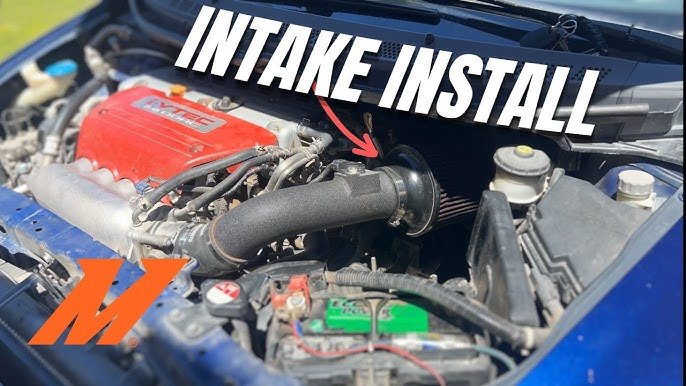
Some kits include all needed hardware, but double-check before starting. If your car’s air filter is located deep in the engine bay, you may need to remove extra parts for access.
Credit: www.youtube.com
Preparing Your Car For Installation
A smooth installation starts with good prep. Park your car on a level surface, let the engine cool, and disconnect the negative battery terminal. This step keeps you safe from electrical shorts or accidental startups.
Next, inspect your intake kit. Lay out all the pieces and compare them to the instructions. Look for any missing clamps, rubber couplers, or small brackets. A quick inventory check can save you from frustration halfway through the job.
Pro Tip: Take photos of your engine bay before you remove anything. These can help you remember how hoses and sensors are connected.
Removing The Stock Intake System
Most stock intakes are made of plastic tubing with a large air box. Here’s how to remove it:
- Disconnect sensors. Unplug the MAF sensor or intake air temperature (IAT) sensor. Handle these carefully—they’re sensitive and expensive to replace.
- Loosen hose clamps. Use a screwdriver or socket to loosen clamps holding the intake pipe to the throttle body and air box.
- Remove air box. Some air boxes are held by bolts, others just snap in. Remove any bolts and gently lift out the air box.
- Detach vacuum lines. If small hoses or breather lines connect to the intake, gently pull them off. Remember their locations for reinstallation.
Common mistake: Forgetting to unplug sensors can lead to damaged wires or engine codes.
Advanced tip: Some cars have a secondary air injection system or resonator box. Remove these only if the new kit supports it—otherwise, leave them in place.

Credit: speedlogicauto.com
Installing The Short Ram Intake System
With the old intake out, it’s time to install your new short ram intake. Follow these steps:
- Install rubber coupler. Place the provided rubber or silicone coupler onto the throttle body. Tighten the clamp lightly so you can still adjust it.
- Fit the intake pipe. Insert the main pipe into the coupler. Position it so it doesn’t touch hot engine parts or rub against the battery.
- Attach air filter. Slide the air filter onto the end of the pipe. Tighten the clamp securely, but don’t overtighten—it can crack plastic fittings.
- Reconnect sensors. If your intake pipe has a port for the MAF or IAT sensor, install it now. Use a new gasket if possible for an airtight seal.
- Secure mounting bracket. Use the included bracket and hardware to secure the intake pipe to a solid point in the engine bay. This prevents vibration and movement.
- Reconnect vacuum and breather lines. Attach all hoses to their correct spots on the new pipe. Some kits need adapters for smaller hoses.
Tighten all clamps and bolts, but don’t overtighten—especially if your intake uses plastic couplers.
Non-obvious insight: Sometimes, the new intake pipe is a tight fit. A little soapy water on the coupler can help slide the pipe in without tearing the rubber.
Double-checking Your Work
Before starting the engine, check your work carefully:
- All clamps are tight
- All hoses are connected
- No tools are left in the engine bay
- Sensors are plugged in
Wiggle the intake pipe gently. It should not move much. If it does, adjust the mounting bracket or tighten the clamp.
Starting Your Engine And Initial Testing
Reconnect the battery and start the engine. It should idle smoothly. You may hear a new, deeper sound—that’s normal with a short ram intake.
Let the car run for a few minutes. Listen for hissing, whistling, or rattling noises. These can mean a vacuum leak or loose fitting. If you hear strange sounds, turn off the engine and check all connections.
After confirming all is secure, give the throttle a few quick blips. If the engine hesitates or the check engine light appears, recheck the MAF or IAT sensor installation.
Non-obvious insight: Some cars need time to adjust to the new airflow. The engine computer may take a few miles of driving to recalibrate fuel trims.
Tips For Best Performance
Getting the most from your short ram intake is about more than just installation.
- Keep the filter clean: Dirty filters reduce airflow and power.
- Check for heat soak: Short ram intakes can draw hot air from the engine bay. If your car loses power on hot days, consider adding a heat shield.
- Listen for signs of trouble: Hissing or rough idle can mean a vacuum leak.
- Don’t ignore warning lights: If the check engine light stays on, scan for codes. Sometimes, an adapter for the MAF sensor is needed for a proper fit.
Common Mistakes To Avoid
Many beginners make simple errors that can cause headaches later:
- Overtightening clamps: This can crack plastic parts and damage couplers.
- Forgetting to reconnect hoses: Missing vacuum lines can cause a rough idle or engine codes.
- Not securing the pipe: If the intake isn’t mounted properly, it can vibrate, wear holes in hoses, or even fall off.
- Installing the filter in a bad spot: If the filter sits too close to hot engine parts, it draws in warm air, reducing performance.
- Skipping the battery disconnect: This can cause accidental shorts or reset issues for the ECU.
Comparing Short Ram Intake Vs. Stock Intake
Here’s a quick look at how a short ram intake compares to a factory air intake:
| Feature | Stock Intake | Short Ram Intake |
|---|---|---|
| Airflow | Restrictive | Improved |
| Engine Sound | Quiet | Louder, sportier |
| Installation Time | Not needed | 1–2 hours |
| Maintenance | Low | Filter cleaning required |
Credit: corksport.com
Estimated Time And Difficulty
Most short ram intake installations take between 1 and 2 hours. Difficulty is low to moderate, depending on your car model. Here’s a rough breakdown:
| Car Type | Estimated Time | Difficulty |
|---|---|---|
| Honda Civic | 1 hour | Easy |
| Toyota Corolla | 1.5 hours | Easy |
| Subaru WRX | 2 hours | Moderate |
Aftercare: Maintenance And Monitoring
A short ram intake needs regular maintenance to keep working well. The most important job is cleaning the filter. Most filters are reusable and should be cleaned every 10,000–15,000 miles, or more often in dusty areas.
Steps to clean the filter:
- Remove the filter from the intake pipe.
- Tap out loose dirt.
- Wash with filter cleaner or mild soap and water.
- Let it dry completely before reinstalling.
Also, check all clamps and brackets every oil change to make sure nothing has come loose. A small air leak can reduce power or cause engine problems over time.
When Not To Install A Short Ram Intake
While short ram intakes work well for many cars, they’re not always the best choice. If you live in an area with heavy rain or frequent water puddles, a cold air intake may be risky but a short ram is safer. However, if your car’s engine bay gets very hot, a short ram intake can draw in warm air, reducing performance. Some turbocharged engines also benefit more from different intake setups.
Always check your car’s warranty and local emissions laws. Some areas require a CARB-compliant intake or prohibit modifications that increase noise.
Reliable Brands And Where To Buy
When choosing a short ram intake, stick to well-known brands. Quality matters—a poorly made kit can cause fitment problems or engine codes.
Popular brands:
- K&N
- Injen
- AEM
- Airaid
Buy from reputable retailers or directly from manufacturers. Avoid very cheap, unbranded kits online—they often don’t fit well and can cause more problems than they solve.
For more technical details, you can check the Wikipedia page on short ram intakes.
Frequently Asked Questions
Does A Short Ram Intake Really Increase Horsepower?
Yes, but the increase is usually modest. Most cars gain 3 to 8 horsepower with a short ram intake, depending on how restrictive the original intake was. The biggest improvement is often in throttle response and engine sound.
Will Installing A Short Ram Intake Void My Warranty?
This depends on your car’s manufacturer and local laws. Most of the time, installing a short ram intake will not void the entire warranty. However, if a problem can be traced back to the intake, that specific repair might not be covered.
Always keep your stock parts in case you need to reverse the modification.
How Often Should I Clean The Air Filter?
Clean your short ram intake filter every 10,000–15,000 miles, or sooner if you drive in dusty or dirty conditions. A clean filter helps maintain power and protects your engine from dirt.
Can I Install A Short Ram Intake Without Tuning My Ecu?
In most cases, yes. Modern ECUs can adjust to small changes in airflow. However, if you also add other modifications (like a larger exhaust or turbo), a professional tune may give better results and reliability.
Is A Short Ram Intake Better Than A Cold Air Intake?
Each has pros and cons. Short ram intakes are easier to install and safer in wet conditions, but they can draw in warmer air from the engine bay. Cold air intakes often provide cooler air but are harder to install and can be risky in heavy rain. Choose based on your climate, driving style, and performance goals.
Upgrading to a short ram intake is a rewarding project that most drivers can handle. With the right tools, careful preparation, and a little patience, you can unlock better sound and a small boost in performance—plus the satisfaction of doing it yourself.
Always follow the kit’s instructions, double-check your work, and enjoy your improved driving experience.