Control arm bushing replacement usually means lifting the car safely, removing the control arm, pressing out the worn bushing, installing the new bushing, torquing bolts at ride height and checking alignment afterward. Replace them when you hear clunks, feel wandering steering, see cracked rubber or notice uneven tire wear.
Before starting, confirm the bushing is the real problem and not a loose ball joint, bad strut or bent control arm. If the whole arm is damaged, compare this job with the risks in driving with bad control arms. If the joint is also worn, use the lower ball joint replacement guide before reassembling the suspension.
What Are Control Arm Bushings?
Control arm bushings are cylindrical parts made of rubber, polyurethane, or similar materials. They fit between the control arm and the car’s frame or suspension. Their job is to absorb shocks, reduce vibrations, and keep the control arm moving smoothly. Without healthy bushings, the control arm would rattle, the ride would feel rough, and the car could become unsafe to drive.
Key Functions Of Control Arm Bushings
- Shock absorption: They cushion the impact from road bumps.
- Noise reduction: They prevent metal-on-metal contact, reducing noise.
- Steering stability: They maintain wheel alignment for predictable handling.
Many drivers overlook these bushings because they are out of sight. However, ignoring them can lead to expensive suspension repairs or even accidents.
Signs Your Control Arm Bushings Need Replacement
Understanding the symptoms of bad bushings helps you act before bigger problems occur. Some common signs include:
- Clunking noises: When driving over bumps or turning.
- Uneven tire wear: Indicates poor wheel alignment.
- Loose or wandering steering: The car feels unstable or drifts.
- Vibration in the steering wheel: Especially when accelerating.
- Visible cracks or wear: If you inspect under the car, worn bushings may look cracked or split.
Ignoring these signs not only damages your suspension further but also reduces your vehicle’s safety on the road.
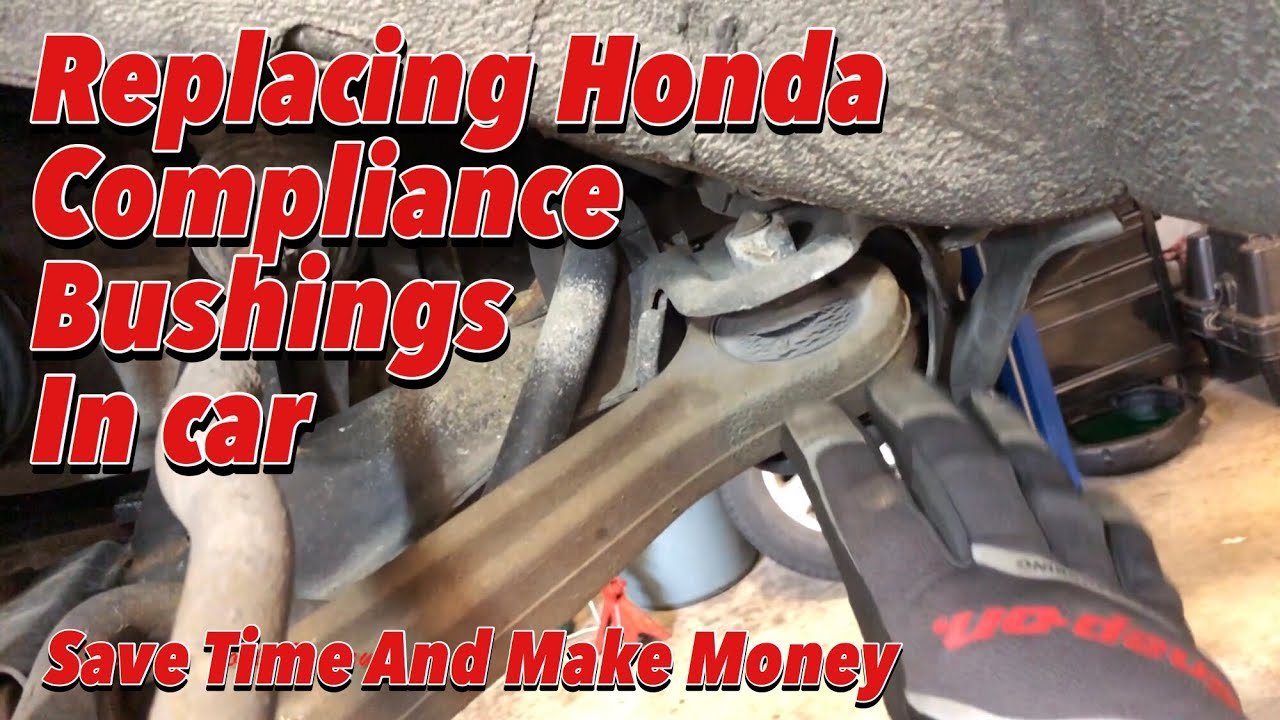
Credit: www.youtube.com
Tools And Parts Needed
Before you begin, gather all necessary tools and parts. Having everything ready will make the job smoother and safer.
| Tool/Part | Purpose |
|---|---|
| Jack and jack stands | Lift and secure the car |
| Socket set and wrenches | Remove bolts and nuts |
| Ball joint separator | Disconnect control arm from suspension |
| Bushing press or vice | Press old bushings out, new ones in |
| Hammer and punch | Tap out stubborn bushings |
| Pry bar | Help remove control arm |
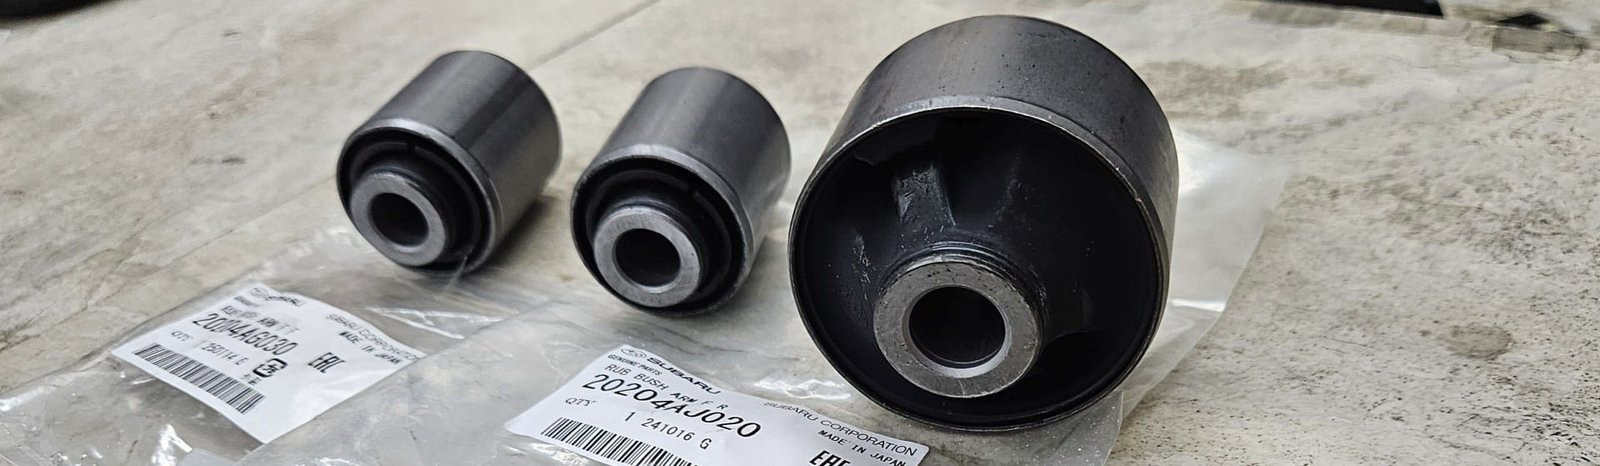
| New control arm bushings | Replacement parts |
| Grease or lubricant | Ease installation, prevent squeaks |
| Torque wrench | Properly tighten bolts |
| Safety glasses and gloves | Protect yourself |
Non-obvious Tip:
Many beginners forget to buy replacement bolts or nuts. Some vehicles require new hardware when reinstalling the control arm. Check your car’s manual or ask at the parts store.
Step-by-Step Guide to Replacing Control Arm Bushings
Let’s break down the process into clear steps. This guide covers most vehicles, but always check your car’s service manual for details.
1. Prepare Your Workspace
- Park on a level surface and engage the parking brake.
- Loosen the lug nuts on the wheel (do not remove yet).
- Gather all tools and parts within reach.
2. Lift And Secure The Vehicle
- Use a jack to lift the car at the recommended jacking point.
- Place jack stands under the car for safety.
- Remove the wheel to access the suspension.
3. Locate And Remove The Control Arm
- Find the control arm—usually a wishbone-shaped part connecting the wheel hub to the frame.
- Note how it’s attached: There are usually two bushings (front and rear) and a ball joint.
- Use a ball joint separator to disconnect the control arm from the steering knuckle.
- Remove the bolts or nuts holding the control arm to the frame.
- Carefully slide the control arm out.
Practical example: On a Honda Civic, the control arm is held by two bolts at the frame and one ball joint at the hub.
4. Remove The Old Bushings
- Inspect the bushings for orientation (which side faces forward/backward).
- Use a bushing press, vice, or hammer and punch to push the old bushing out.
- If the bushing is stuck, apply penetrating oil and tap gently.
- Clean the inside of the control arm with a wire brush.
Warning: Do not use excessive force—bending the control arm can make it unsafe.
5. Install The New Bushings
- Lubricate the new bushing with silicone grease or the recommended product.
- Align the bushing with the opening, making sure it faces the correct direction.
- Use the press or vice to slowly push it in. If it’s tight, tap gently with a hammer and block of wood.
- Repeat for the other end if your control arm uses two bushings.
Non-obvious tip: Some aftermarket bushings have an inner sleeve or need to be pressed to a specific depth. Check the instructions before starting.
6. Reinstall The Control Arm
- Slide the control arm back into position.
- Hand-tighten all bolts and nuts first.
- Use a torque wrench to tighten to the car maker’s specification (usually found in your service manual).
- Reattach the ball joint and secure it.
7. Reassemble And Lower The Car
- Reinstall the wheel and hand-tighten the lug nuts.
- Remove the jack stands and lower the car.
- Fully tighten the lug nuts in a star pattern.
8. Final Checks
- Double-check all bolts are secure and bushings are seated correctly.
- Test drive the car at low speed first to check for noises or handling issues.
Choosing The Right Replacement Bushings
Picking the correct bushing type is important for safety, performance, and comfort. Here’s a quick comparison of the most common materials:
| Bushing Material | Pros | Cons | Best For |
|---|---|---|---|
| Rubber | Quiet, absorbs vibration | Wears faster, soft handling | Daily driving |
| Polyurethane | Durable, improved handling | More noise, can squeak | Performance cars |
| Solid (metal) | No flex, precise steering | Very harsh ride, noisy | Race cars only |
Most drivers will prefer rubber for comfort or polyurethane for sportier handling. If you are unsure, ask a mechanic or look up your car’s recommended part numbers.
Common Mistakes When Choosing Bushings
- Picking the wrong size or type. Always match your car’s make, model, and year.
- Buying cheap, unbranded bushings. These wear out faster and can be unsafe.
- Forgetting to buy new hardware (bolts, nuts, washers).
When Should You Replace Control Arm Bushings?
There’s no fixed mileage for bushing replacement. However, most bushings last 60,000–100,000 miles. If your car sees rough roads, heavy loads, or aggressive driving, bushings can wear out sooner. Always replace them if you notice:
- Excessive movement in the control arm (seen during inspection)
- Cracks, splits, or missing rubber
- Failed vehicle inspection due to suspension play
Pro tip: Replace bushings in pairs (left and right sides) to maintain balanced handling.
Tips For A Successful Replacement
- Take photos of the original setup before removing anything. This helps you remember where parts go.
- Mark bolt positions with paint or a marker to keep alignment close to original.
- Use a torque wrench for all bolts. Overtightening can crush bushings or strip threads.
- Get an alignment after replacing bushings. Even small changes in the control arm position can affect alignment and tire wear.
- Test drive carefully and listen for new noises or changes in handling.
| Step | Estimated Time | Difficulty |
|---|---|---|
| Preparation | 15 minutes | Easy |
| Remove control arm | 30–60 minutes | Medium |
| Replace bushings | 30–45 minutes | Hard |
| Reinstall & test | 30 minutes | Medium |
Safety Warnings And Precautions
- Always use jack stands. Never trust a car supported only by a jack.
- Wear eye protection when using hammers, presses, or under the car.
- If a bushing won’t come out, do not heat with a torch—the rubber can catch fire.
- If you feel unsure at any step, ask for help or visit a professional mechanic.
Should You Replace The Entire Control Arm?
Sometimes, it is easier and safer to replace the whole control arm, especially if:
- The control arm itself is bent or rusted.
- The bushings are difficult to remove or install.
- Replacement arms come with new bushings pre-installed at a reasonable price.
Compare the cost and effort. For some vehicles, a new control arm is only slightly more expensive than bushings alone and saves a lot of work.
How Much Does It Cost?
DIY replacement of bushings usually costs $20–$60 for parts. If you choose a mechanic, labor can add $150–$300 per side. Full control arm replacement typically costs more, but can be worth it if the arm is worn or damaged.
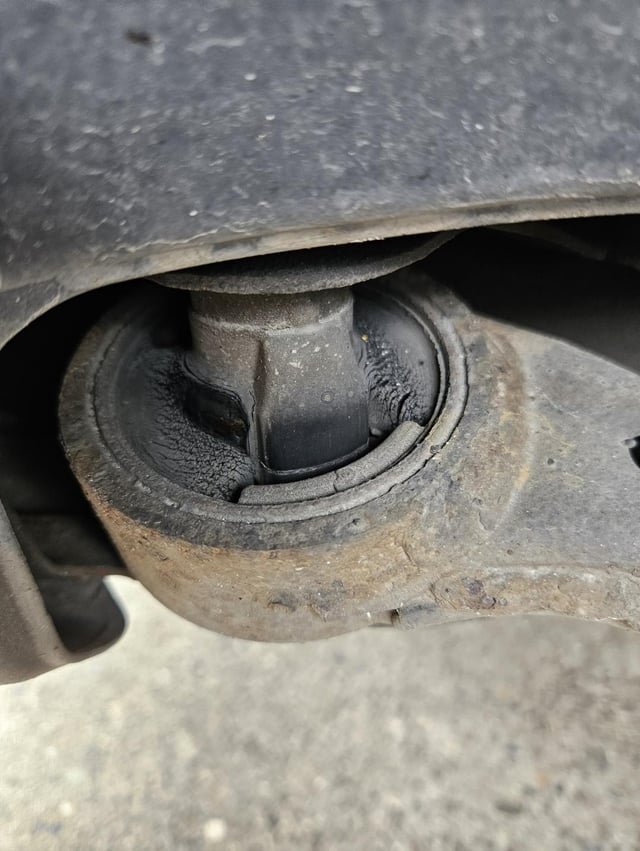
Credit: www.reddit.com
Professional Vs. Diy: Which Is Right For You?
Doing it yourself saves money and gives you the satisfaction of fixing your own car. However, if you lack tools, a safe workspace, or confidence, there’s no shame in hiring a professional. Incorrect installation can cause more damage or make the car unsafe.
For a deeper look at suspension systems, see the Wikipedia guide to vehicle suspension.
Frequently Asked Questions
How Do I Know If My Control Arm Bushings Are Bad?
Common signs are clunking noises, uneven tire wear, loose steering, or visible cracks in the bushing. You may also feel vibrations in the steering wheel. Inspecting the bushings visually is the best way to confirm.
Can I Replace Control Arm Bushings Without Removing The Control Arm?
Usually, you must remove the control arm to press out the old bushings and press in new ones. Some mechanics have special tools to do it on the car, but results are better with the arm removed.
How Long Does It Take To Replace Control Arm Bushings?
For most cars, expect 2–3 hours for a DIY job, including setup and cleanup. Experienced mechanics can do it faster with the right tools.
Is An Alignment Needed After Replacing Control Arm Bushings?
Yes. Any change to the control arm position can affect wheel alignment. Always get a professional alignment after replacing bushings to avoid uneven tire wear and handling problems.
What Happens If I Don’t Replace Worn Control Arm Bushings?
Ignoring worn bushings can lead to unsafe handling, rapid tire wear, and damage to other suspension parts. In extreme cases, the control arm can move enough to cause an accident.
Replacing control arm bushings is a practical repair that most car owners can tackle with patience and the right tools. Doing the job properly restores your car’s comfort, safety, and handling. Take your time, follow the steps, and enjoy the smoother ride ahead.
Credit: artsautomotive.com
