Replacing a car’s neutral safety switch might sound complicated, but with the right approach, it becomes a manageable task for many car owners. The neutral safety switch is a small but crucial part of your vehicle’s starting system. It prevents the car from starting unless the transmission is in park or neutral, adding an important layer of safety. Over time, this switch can fail, causing starting issues or even making the car start in gear—a dangerous situation.
If your car won’t start, or if it starts in gear, the neutral safety switch could be to blame. Fixing this not only restores normal operation but also keeps you and others safe. Whether you’re a do-it-yourself enthusiast or someone who simply wants to understand the process before heading to a mechanic, this guide will walk you through every step.
You’ll learn how to replace the neutral safety switch, what tools you need, common mistakes to avoid, and how to test the new switch. By the end, you’ll feel confident taking on this repair or understanding what your mechanic is doing.
What Is A Neutral Safety Switch And Why Does It Matter?
Before jumping into the replacement steps, it’s important to understand the neutral safety switch and its role. This device is usually found in automatic transmission vehicles. Its job is simple but essential: allow the engine to start only when the transmission is in “park” or “neutral.”
A faulty switch can cause several problems:
- Car won’t start, even with a good battery and ignition.
- Engine starts in gear, risking sudden movement.
- Reverse lights stop working (in some car models).
Ignoring these issues can lead to accidents or leave you stranded. That’s why replacing a bad neutral safety switch is so important.
Signs Your Neutral Safety Switch Needs Replacement
Knowing when the neutral safety switch is failing helps you avoid bigger problems. Watch for these clear signs:
- Car won’t start when in park or neutral, but starts in another gear.
- Starter works in all gear positions, not just park/neutral (a serious safety risk).
- Intermittent starting issues—sometimes the car starts, sometimes it doesn’t.
- Reverse lights don’t work when you shift into reverse (for switches that control these lights).
- Check engine light is on, with error codes related to the transmission or start circuit.
If you see these symptoms, it’s time to check and possibly replace the switch.
Tools And Parts You’ll Need
To replace your neutral safety switch, gather these tools and parts:
- New neutral safety switch (exact type for your car model)
- Wrench set (usually metric and standard sizes)
- Socket and ratchet set
- Screwdrivers (Phillips and flathead)
- Jack and jack stands (for cars with switches under the vehicle)
- Safety gloves
- Multimeter (for testing electrical connections)
- Service manual (for your specific vehicle model)
- Pen and notepad (to note wire positions, if needed)
Having everything ready before you start saves time and prevents mistakes.
Step-by-step: How To Replace The Neutral Safety Switch
Replacing a neutral safety switch is a hands-on process. The exact location and steps can vary by car, so always check your vehicle’s manual first.
1. Safety First
- Park the car on a flat surface.
- Turn off the engine and remove the key.
- Disconnect the negative battery terminal to avoid shocks or short circuits.
- If the switch is under the vehicle, use a jack to lift the car and jack stands for safety.
2. Locate The Neutral Safety Switch
The switch is usually found:
- On the transmission, near the gear selector shaft (for automatic vehicles).
- Inside the gear shifter assembly (in some cars).
Check your manual for the exact spot.
3. Remove Components Blocking Access
You may need to:
- Take off plastic covers under the dash or center console (for inside switches).
- Remove parts of the exhaust or transmission linkage (for under-vehicle switches).
Take photos or notes as you go, so you can put everything back easily.
4. Disconnect The Switch
- Unplug the electrical connector from the switch. Some connectors have tabs or clips—don’t force them.
- Mark wire positions if there are several wires, to avoid confusion later.
5. Remove The Old Switch
- Use the correct socket or wrench to remove the bolts or screws holding the switch.
- Gently remove the switch from its mounting point. If it’s stuck, wiggle it carefully—don’t use force, as you may damage the transmission case.
6. Compare Old And New Parts
Before installing, compare the old switch and new switch side by side. Look for:
- Same connector type
- Same mounting holes
- Identical pin layout
If anything is different, double-check your part number.
7. Install The New Switch
- Position the new switch in place.
- Insert and tighten the mounting bolts. Don’t overtighten—this can crack the switch.
- Plug in the electrical connector securely.
8. Adjust The Switch (if Needed)
Some switches need adjustment so they only allow starting in park or neutral. Here’s how:
- Put the gear selector in “neutral.”
- Loosen the switch slightly.
- Rotate the switch until the alignment marks line up (or follow the manual).
- Tighten the bolts.
9. Reassemble And Test
- Reinstall any parts you removed earlier.
- Reconnect the negative battery terminal.
- Start the car in “park” and “neutral.” It should not start in any other gear.
- Check reverse lights and check engine light.
If everything works, you did it! If not, double-check connections and adjustment.
Example: Neutral Safety Switch Locations In Popular Cars
To help you visualize, here’s a quick comparison of where you’ll find the neutral safety switch on some common vehicles:
| Car Model | Switch Location | Special Notes |
|---|---|---|
| Honda Accord | Transmission, left side | Access from engine bay |
| Ford F-150 | Transmission, external | May need to remove heat shield |
| Toyota Camry | Under shifter (inside cabin) | Remove center console |
| Chevrolet Silverado | Transmission, driver’s side | Car must be raised |
Common Mistakes To Avoid
Many beginners make small mistakes that can cause big problems. Here’s what to watch out for:
- Forgetting to disconnect the battery—this can cause electrical shorts.
- Not marking wire positions—wrong connections can prevent starting.
- Overtightening bolts—risk of cracking the new switch.
- Skipping switch adjustment—car may not start in the right gears.
- Installing the wrong part—always compare old and new switches.
A non-obvious tip: Some switches have hidden alignment marks that are easy to miss. Always look for these when adjusting.

Credit: empire.pizza
Testing Your New Neutral Safety Switch
After installation, it’s vital to test the switch fully. Here’s a simple checklist:
- Start the car in park—should start normally.
- Start the car in neutral—should start normally.
- Try starting in reverse or drive—car should NOT start.
- Check reverse lights (if controlled by the switch).
- Scan for error codes with a diagnostic tool, if available.
If anything isn’t right, revisit the adjustment steps.
How Much Does It Cost To Replace A Neutral Safety Switch?
Costs can vary based on your car and location. Here’s a comparison of average costs:
| Replacement Type | Parts Cost (USD) | Labor Cost (USD) | Total Estimated |
|---|---|---|---|
| DIY Replacement | $30 – $120 | $0 | $30 – $120 |
| Mechanic Shop | $30 – $120 | $70 – $200 | $100 – $320 |
| Dealership | $50 – $150 | $120 – $300 | $170 – $450 |
Prices depend on car model and region. Doing it yourself saves money but requires time and care.
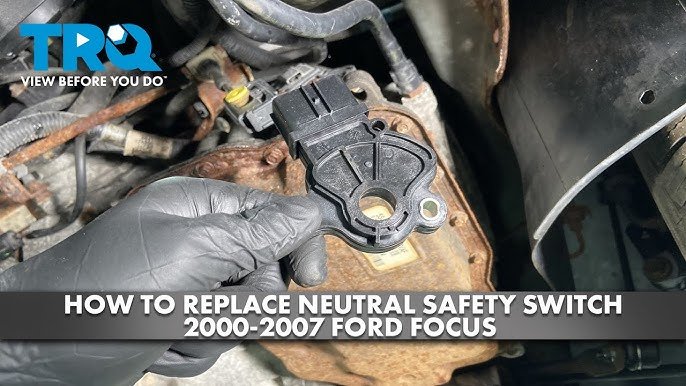
Credit: www.youtube.com
Extra Tips For A Smooth Replacement
Here are a few expert tips most beginners miss:
- Double-check part numbers using your VIN or with a dealer before buying.
- If the switch is under the car, wear safety goggles to protect your eyes from dirt and debris.
- Take clear photos of every step—these help during reassembly, especially with tricky connectors.
- If you’re unsure about the adjustment, most manuals have diagrams—refer to these closely.
When To Call A Professional
If you run into problems—like stuck bolts, wiring confusion, or if your car still won’t start after replacement—it’s wise to call a certified mechanic. Electrical and transmission components can be sensitive, so don’t risk further damage if you’re unsure.
For detailed technical information or wiring diagrams, you can check trusted resources like the Wikipedia page on neutral safety switches.
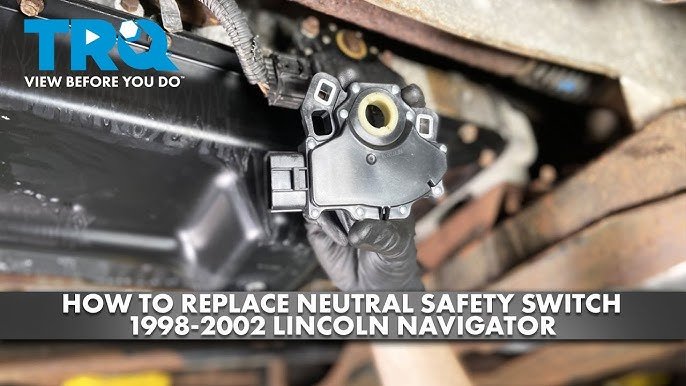
Credit: www.youtube.com
Frequently Asked Questions
What Happens If I Drive With A Faulty Neutral Safety Switch?
Driving with a bad switch can be risky. Your car might start in gear, causing sudden movement. This can lead to accidents or injuries, especially in crowded areas.
Can I Bypass A Neutral Safety Switch?
Some people bypass the switch to make the car start, but this is not safe. Bypassing removes an important safety feature and could be illegal in some places. It’s better to fix or replace the switch.
How Long Does It Take To Replace A Neutral Safety Switch?
Most replacements take 30 minutes to 2 hours, depending on the car and switch location. Some vehicles require removing more parts, which adds time.
Is It Expensive To Have A Mechanic Replace The Switch?
The cost depends on your car and local labor rates. On average, professional replacement costs $100–$320. Doing it yourself can cost as little as $30 if you have the tools.
How Do I Know If My New Switch Is Adjusted Correctly?
Your car should start only in “park” or “neutral. ” If it starts in any other gear, or not at all, the switch needs further adjustment. Always test after installation.
Replacing your neutral safety switch restores important safety features and can solve frustrating starting problems. With patience and the right tools, many car owners can do this job themselves. If you ever feel unsure, don’t hesitate to seek help from a professional. That way, your car remains safe and reliable for every drive.
