Checking your car’s AC refrigerant level is a smart way to keep your vehicle cool and comfortable. Too little refrigerant can make your air conditioning weak or stop it from working altogether. Too much can cause damage. Most people only notice a problem when the air isn’t cold anymore, but by that point, it could be an expensive fix.
Learning how to check the refrigerant level yourself can help you avoid bigger issues, save money, and enjoy a colder ride in summer.
This guide will walk you through every step of checking your car’s AC refrigerant level safely and accurately. You don’t need to be a mechanic or have advanced tools. With a little care and attention, you can spot problems before they grow.
We’ll also look at common mistakes, safety tips, and answer the most frequent questions car owners have about this process.
Why Checking Ac Refrigerant Level Matters
Your car’s AC refrigerant is like the blood in your cooling system. It’s a special fluid (often called Freon or R134a in most modern cars) that absorbs heat from the air inside your car and releases it outside. If the level gets too low, your AC blows warm air or works much harder, which can damage other parts like the compressor.
Losing refrigerant is not always obvious. It can escape slowly through tiny leaks, which are hard to see. Regular checks help you catch problems early. Proper refrigerant levels mean:
- Cooler air even on hot days
- Less strain on your AC system
- Longer life for expensive parts
Tools And Materials You’ll Need
Before you begin, gather these items:
- AC pressure gauge or refrigerant gauge set
- Safety glasses and gloves
- Thermometer (optional but helpful)
- Owner’s manual (for car-specific details)
- R134a refrigerant can (only if you plan to refill)
- UV leak detector kit (optional for finding leaks)
Most auto parts stores sell an AC recharge kit that includes a pressure gauge and a can of refrigerant. Don’t buy refrigerant unless you’re sure you need it.
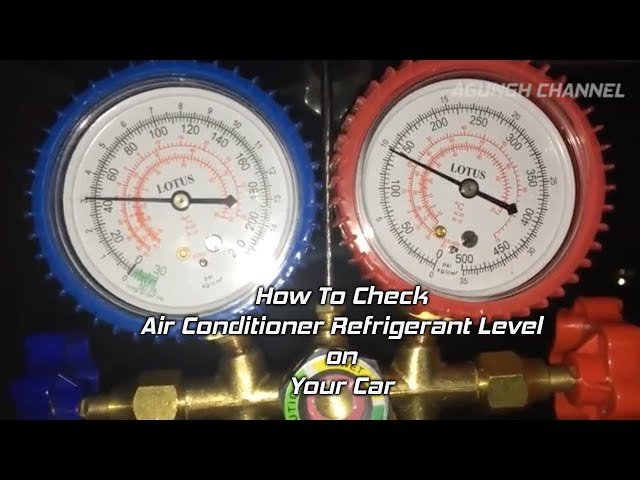
Credit: www.youtube.com
Understanding Ac System Basics
To check refrigerant, you need to know a bit about your car’s AC system. It has two main ports:
- Low-pressure port (where you check and add refrigerant)
- High-pressure port (used only by professionals)
You’ll only work with the low-pressure port. Connecting to the wrong port can be dangerous and damage your tools. The low side is usually marked with an “L”, is the larger AC line, and sits between the compressor and firewall.
| Port Type | Location | Typical Cap Color |
|---|---|---|
| Low-Pressure | Between compressor & firewall | Blue or Black |
| High-Pressure | Near radiator or AC condenser | Red |
Step-by-step: How To Check Car Ac Refrigerant Level
Checking refrigerant is easier than you might think. Follow these steps carefully:
1. Park And Prepare
- Park on a flat surface in a well-ventilated area.
- Turn off the engine and let it cool for at least 10 minutes.
- Put on safety glasses and gloves. AC refrigerant can be dangerous if it touches skin or eyes.
2. Locate The Low-pressure Port
- Open your car’s hood.
- Find the AC lines—usually aluminum tubes running along the engine bay.
- Look for the L-marked port with a plastic cap. Remove the cap and keep it somewhere safe.
3. Attach The Pressure Gauge
- Take the AC gauge and make sure it’s set to “off.”
- Connect the gauge’s hose to the low-pressure port. It should snap in easily. If it doesn’t, double-check you have the right port.
- Do not force it—wrong connections can break the port.
4. Start The Engine And Ac
- Start your car.
- Set the AC to the coldest setting and the fan to the highest speed.
- Let the AC run for 2-3 minutes to stabilize.
5. Read The Pressure
- Look at the gauge reading. Most gauges show pressure in PSI (pounds per square inch).
- Compare your reading to your car’s recommended range (usually 25–45 PSI for the low side, but check your manual).
Here’s a quick reference:
| Low-Side Pressure (PSI) | Condition | What It Means |
|---|---|---|
| Below 25 | Too Low | Likely low refrigerant or leak |
| 25-45 | Normal | System is healthy |
| Above 45 | Too High | Possible overcharge or blockage |
6. Check Ac Temperature (optional)
- Place a thermometer in the center AC vent.
- After 3-5 minutes, a healthy system should blow air at 38–50°F (3–10°C).
- If the air is not cold enough and the pressure is low, you likely need a recharge.
7. Remove The Gauge And Replace Cap
- Turn off the engine.
- Carefully remove the gauge from the low-pressure port.
- Replace the cap tightly to prevent leaks.
Common Mistakes To Avoid
Many beginners make simple mistakes when checking AC refrigerant. Watch out for these:
- Using the wrong port: Connecting to the high-pressure port can break your gauge and is dangerous.
- Overcharging: Adding refrigerant when you don’t need it can damage the compressor.
- Ignoring safety gear: Refrigerant can cause frostbite or eye injury.
- Not checking for leaks: Topping up refrigerant without fixing leaks is a waste.
- Assuming all AC problems are refrigerant: Sometimes, a bad compressor, clogged filter, or electrical fault is the cause.
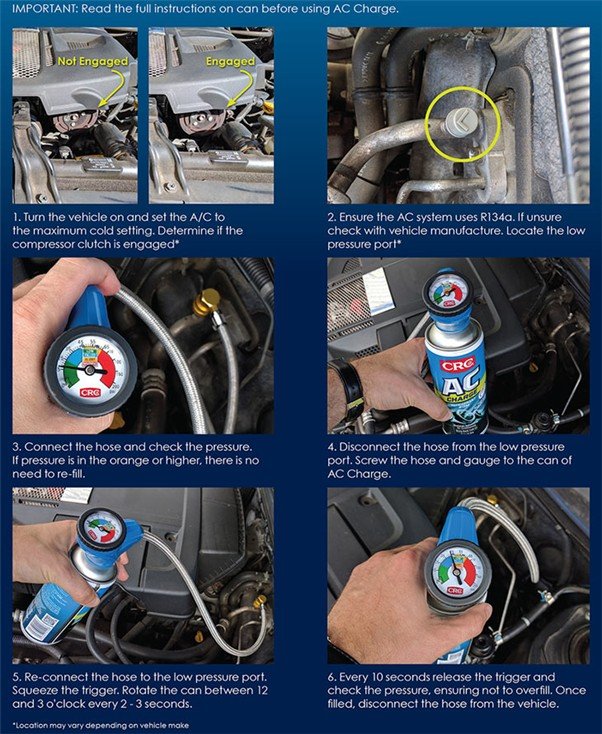
A non-obvious insight: Always check the AC compressor clutch (the small spinning plate on the compressor) is engaging when the AC is on. If it’s not, your problem may not be refrigerant-related.
How To Tell If Your Car Needs Refrigerant
Your car may need more refrigerant if you notice:
- AC blows warm air even when set to cold
- AC cycles on and off quickly (short cycling)
- Hissing or bubbling noises from AC lines
- Visible oil or dye leaks around fittings
But low refrigerant isn’t always the cause. Modern cars have sensors that can turn off the AC system if pressure is too low or too high. That’s why checking the pressure with a gauge is the best way to know for sure.
What To Do If The Refrigerant Is Low
If your gauge shows low pressure:
- Do not rush to refill. First, check for leaks. Most leaks are small and hard to see. Use a UV dye kit or ask a mechanic to check.
- If you add refrigerant: Follow the instructions on your recharge kit. Add small bursts and check the gauge often. Never go above the recommended range.
- If pressure drops quickly after refill: You have a leak that needs repair. Don’t keep adding refrigerant—it’s bad for the environment and your wallet.
Safety Tips When Checking Refrigerant
- Always wear safety glasses and gloves.
- Work in a well-ventilated area—refrigerant fumes are dangerous.
- Never inhale refrigerant or get it on your skin.
- Don’t smoke or use open flames near the car.
- If refrigerant contacts skin or eyes, rinse with water and seek medical help immediately.
An insight many miss: Never mix different types of refrigerant. Mixing R134a with older R12 or newer R1234yf can damage your AC and is illegal in many places.
Credit: www.haircareclinic.net
How Often Should You Check Ac Refrigerant?
Most cars don’t lose much refrigerant yearly. A good rule is to check once a year, ideally before summer. If your AC system is tight and healthy, you may never need to top up between full services.
When To Call A Professional
If you notice these signs, it’s time for expert help:
- AC pressure stays low even after refilling
- AC system cycles on and off but doesn’t cool
- You see green or fluorescent dye (from leak kits) under your car
- Strange noises or burning smells from the compressor
A professional can vacuum test your system, repair leaks, and recharge safely using proper equipment. For more technical details, see this Wikipedia page on automotive air conditioning.
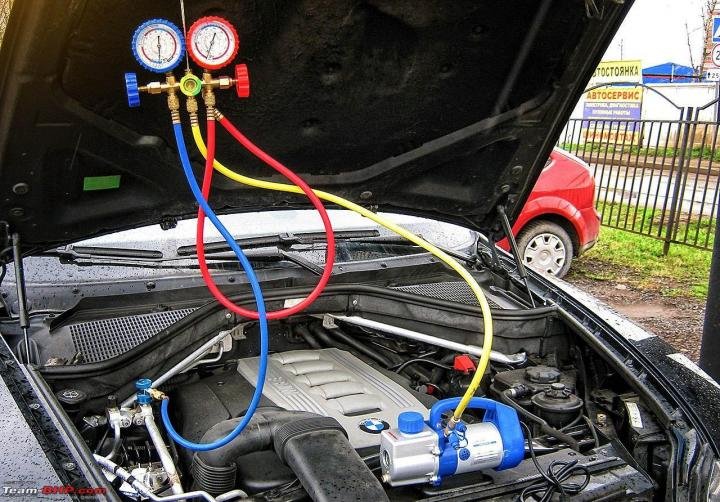
Credit: www.team-bhp.com
Comparing Diy And Professional Ac Checks
Many drivers wonder if they should check refrigerant themselves or visit a shop. Here’s a quick comparison:
| DIY Check | Professional Check |
|---|---|
| Low cost (just a gauge kit) | Higher cost but includes leak detection |
| Quick (15-20 minutes) | 30-60 minutes, may require appointment |
| Can miss small leaks | Finds even tiny leaks |
| Only checks low-pressure side | Checks all system pressures and temperatures |
Troubleshooting Common Ac Issues
If your refrigerant level is fine but your AC still isn’t cold, consider these other possibilities:
- Clogged cabin filter: Reduces airflow, making AC feel weak.
- Faulty AC clutch relay: Stops compressor from running.
- Blend door stuck: Controls hot/cold air mix, and can get stuck on warm.
- Electrical issues: Blown fuses or bad wiring can disable AC.
These problems usually need a mechanic to fix.
Frequently Asked Questions
What Type Of Refrigerant Does My Car Use?
Most cars made after 1996 use R134a refrigerant. Some very new cars (after 2015) use R1234yf. Check your owner’s manual or a sticker under the hood to be sure.
Can I Drive With Low Refrigerant?
Yes, but it’s not recommended. The AC system may shut off to protect itself, but running with low refrigerant can overheat the compressor. It’s best to fix the issue quickly to avoid costly repairs.
How Much Does It Cost To Recharge Ac Refrigerant?
DIY recharge kits cost $20–$60. A professional service can range from $100–$300 because it includes leak testing and vacuuming the system.
Is It Safe To Add Refrigerant Myself?
It’s safe if you follow instructions, use the correct refrigerant, and wear safety gear. Never overfill or use the wrong type. If unsure, ask a professional.
Why Does My Ac Lose Refrigerant Over Time?
Most loss is due to small leaks in hoses, seals, or connections. Age, vibration, and heat can cause these leaks. Regular checks can catch leaks before they get worse.
Keeping your car’s AC refrigerant at the right level means cooler drives, lower repair bills, and a longer-lasting air conditioning system. It’s a simple task with the right tools and knowledge. By staying alert for signs of trouble and avoiding common mistakes, you’ll keep your car comfortable through every season.
