Installing a trailer hitch on your car can open up new possibilities for travel, hauling, and even adventure. Whether you want to tow a bike rack, a small trailer, or extra cargo, learning how to do it yourself can save you money and give you a sense of accomplishment.
Many car owners feel unsure about tackling this project, but with the right tools and clear guidance, most people can install a hitch at home—even with basic mechanical skills.
This guide will walk you through every step, from choosing the right hitch to tightening the last bolt. Along the way, you’ll discover tips that even some professionals overlook, and learn how to avoid mistakes that could damage your vehicle or make your towing unsafe.
You’ll also find practical advice for different car models, and how to check your work with confidence.
Understanding Trailer Hitches
Before starting, it’s important to know what a trailer hitch is and the main types available. A trailer hitch is a device attached to the frame of your vehicle, allowing you to tow a trailer or mount accessories. There are several hitch classes, each designed for different towing weights and purposes.
Main Types Of Trailer Hitches
- Receiver Hitch: The most common type, fits many cars and SUVs, used for towing light to medium loads.
- Gooseneck Hitch: Usually for trucks, designed for heavy loads, mounted in the truck bed.
- Fifth Wheel Hitch: Also for trucks, handles very heavy loads, often used for RVs.
- Bumper Hitch: Lighter duty, mounts directly to the bumper.
For most cars, a Class I or Class II receiver hitch is the right choice. These can tow between 2,000 and 3,500 pounds, which covers cargo carriers, small trailers, and bike racks.
Choosing The Right Hitch For Your Car
Picking the correct hitch is critical for safety and performance. Not every hitch fits every car, so double-check compatibility.
| Hitch Class | Towing Capacity | Common Vehicles |
|---|---|---|
| Class I | Up to 2,000 lbs | Small Cars, Sedans |
| Class II | Up to 3,500 lbs | SUVs, Crossovers |
| Class III | Up to 5,000 lbs | Trucks, Large SUVs |
Key factors to consider:
- Vehicle Make and Model: Check your car’s manual or manufacturer website.
- Towing Capacity: Never exceed your car’s towing limit.
- Hitch Class: Match the hitch class to your towing needs.
- Attachment Points: Some cars need holes drilled, others have pre-drilled points.
Common mistake: People often choose a hitch based on price, not fit. Always select a hitch designed for your specific vehicle.
Credit: www.youtube.com
Tools And Materials Needed
Before you begin, gather all necessary tools. This avoids delays and helps you finish the job smoothly.
- Trailer hitch kit (make sure it fits your vehicle)
- Socket set (metric and SAE sizes)
- Torque wrench (essential for correct tightness)
- Screwdrivers
- Safety glasses
- Jack and jack stands (if extra ground clearance is needed)
- WD-40 or penetrating oil
- Measuring tape
- Work gloves
- Drill and drill bits (rarely needed, but helpful for older cars)
Some kits include hardware such as bolts and washers. Check the package before starting.
Preparing Your Car
Preparation is often overlooked but makes installation much easier and safer.
- Read the instructions: Each hitch kit has specific guidance for your car.
- Park on a flat surface: This keeps the car stable.
- Engage the parking brake: Safety first.
- Lift the car if needed: Use a jack and jack stands for more room.
- Clean mounting points: Remove dirt, rust, or debris with a wire brush and WD-40.
- Test-fit the hitch: Hold it up to the frame to check alignment.
Pro tip: If you see factory plugs or covers where the hitch mounts, remove them before starting.
Step-by-step Installation Guide
Let’s break down the installation into clear steps. This method works for most receiver hitches on cars, SUVs, and small crossovers.
1. Locate Mounting Points
Most vehicles have holes in the frame for the hitch. These are usually behind the rear bumper. Use your car’s manual or the hitch instructions to find them. If the holes are covered, gently pop out the plugs.
2. Position The Hitch
With a friend’s help (hitches are heavy), hold the hitch up to the frame. Line up the holes in the hitch with the mounting points on your car.
Insider tip: Use a jack stand to hold one end while you bolt the other end in place. This makes solo installation possible.
3. Insert Fasteners
Slide the provided bolts through the hitch and into the frame. Hand-tighten all bolts before fully tightening. This allows you to adjust the position if needed.
4. Tighten Bolts
Using a socket wrench, tighten each bolt in a crisscross pattern. This ensures even pressure and a secure fit. Next, use a torque wrench to tighten bolts to the manufacturer’s specified torque (often listed in the instructions).
| Bolt Size | Typical Torque (ft-lbs) |
|---|---|
| 1/2 inch | 75-85 |
| 5/8 inch | 100-110 |
Do not guess on torque. Under-tightening can cause the hitch to come loose. Over-tightening can strip the threads.
5. Reinstall Any Removed Parts
If you removed plastic underbody panels or the bumper cover, put them back. Trim them if needed for a snug fit around the hitch. Use a sharp utility knife for best results.
6. Check Clearance And Alignment
Look under the car to make sure the hitch does not touch the exhaust, suspension, or body panels. The receiver tube should be level and not block the license plate.
Non-obvious insight: Check for wiring or brake lines near the mounting points. Accidentally pinching a line can cause expensive damage.
7. Test The Installation
Before towing, give the hitch a strong shake. It should feel rock-solid. Attach a cargo carrier or bike rack and drive over a speed bump to test stability.
Wiring The Trailer Lights (if Needed)
If you plan to tow a trailer, you’ll need to connect the trailer wiring harness. This lets your car’s tail lights and turn signals work on the trailer.
- Locate the wiring connector: Many modern cars have a trailer wiring connector near the rear lights.
- Plug in the harness: Use a plug-and-play harness if available. These snap in without cutting wires.
- Route the wires: Run the harness along the frame, away from moving parts and the exhaust.
- Secure with zip ties: This keeps wires from hanging or catching on the road.
Beginner mistake: Forgetting to test the trailer lights before driving. Always check brake, turn, and tail lights on the trailer.
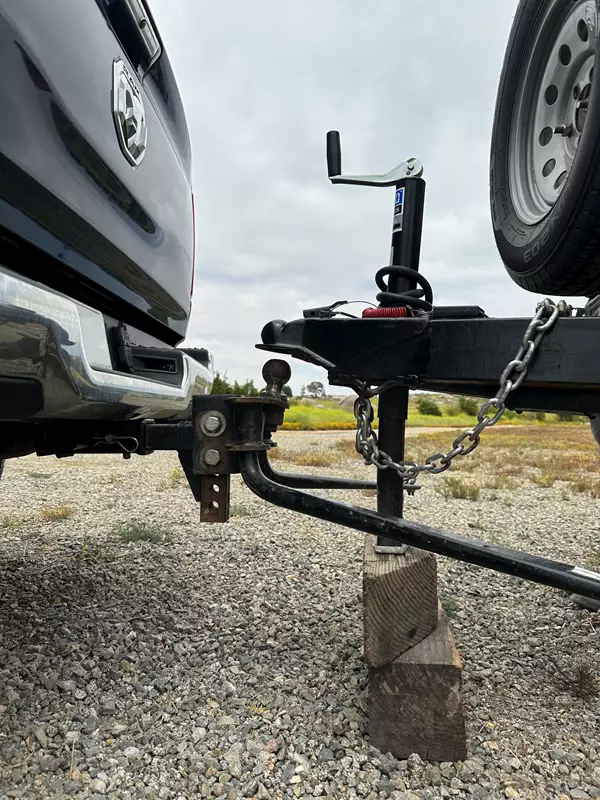
Credit: neighborstrailer.com
Practical Tips For A Smooth Install
- Soak bolts in WD-40 overnight if they’re rusty or hard to remove.
- Take photos before removing underbody panels—this helps during reassembly.
- Keep all old hardware until you finish the job, just in case you need a spare.
- If you’re unsure about wiring, ask an auto electrician to help with the electrical part.
Common Problems And How To Fix Them
Problem: Bolts Don’t Fit
Check if you have the right hitch for your car. If the frame holes are rusted or damaged, clean them with a wire brush. Sometimes, a thread tap is needed to clear out rust.
Problem: Hitch Touches The Exhaust
If the hitch is too close to the exhaust, add washers or spacers (as recommended by the hitch maker). Never bend the exhaust or force the hitch into place.
Problem: Wiring Harness Won’t Connect
Double-check the harness model and your car’s wiring. Some cars need a universal harness that requires splicing wires.
Comparing Diy Vs. Professional Installation
Some wonder if doing it yourself is really worth it. Here’s a quick side-by-side comparison:
| Aspect | DIY Installation | Professional Shop |
|---|---|---|
| Cost | $100–$300 (hitch + tools) | $350–$600 (including labor) |
| Time Required | 1–3 hours | 1–2 hours |
| Skill Needed | Basic tools, careful following instructions | None (leave it to pros) |
| Warranty | Possible to void vehicle warranty if done incorrectly | Professional warranty included |
Non-obvious insight: Many professional installers use the same bolt-on kits you can buy online. The main difference is their experience and speed.
Safety Checks Before Towing
After installation, a few final checks keep you and others safe:
- Double-check all bolts for tightness using the torque wrench.
- Inspect the hitch for movement or gaps.
- Test the trailer lights with the vehicle running.
- Check tire pressure on both car and trailer.
- Review local laws about towing—some places require extra safety chains or reflectors.
Credit: www.mcsweeneyarms.ie
Maintaining Your Trailer Hitch
A well-installed hitch needs little care, but some maintenance helps it last longer:
- Inspect bolts and hitch every few months for tightness and rust.
- Apply rust-resistant spray to exposed metal.
- Keep the receiver tube clean with a plastic cover when not in use.
- Grease the hitch ball if you tow often.
When To Avoid Diy Installation
Doing it yourself is not always best. Skip the DIY route if:
- Your car has heavy rust or frame damage.
- You do not have basic tools or cannot safely lift the car.
- You are unsure about electrical wiring.
- The hitch requires welding (rare for most cars).
In these cases, it’s safer to let a professional handle the job.
Final Thoughts
Learning how to install a trailer hitch on your car DIY can give you more freedom and save you money. With patience, the right tools, and careful attention to detail, most people can do this project in an afternoon. Remember, safety always comes first—never rush the job or skip steps.
Once finished, you’ll be ready to haul bikes, trailers, or extra gear with confidence. If you ever have doubts, ask an experienced friend or a professional for a second opinion. Happy towing!
For more detailed vehicle-specific guidance, visit the official etrailer website.
Frequently Asked Questions
How Long Does It Take To Install A Trailer Hitch?
For most cars, expect the process to take 1 to 3 hours. If you’ve never done it before, give yourself extra time to read instructions and check your work.
Do I Need To Drill Holes In My Car?
Most modern cars have pre-drilled mounting points for hitches. Drilling is rarely required. Always check your vehicle’s instructions before starting.
Can I Install A Hitch Without A Lift Or Ramp?
Yes, most installations can be done with just a jack and jack stands. A lift makes it easier, but is not necessary for most cars and SUVs.
Will Adding A Hitch Affect My Car Warranty?
If installed correctly using a bolt-on kit, most manufacturers will not void your warranty. However, improper installation or modifications can cause issues. Always check with your dealer if you’re unsure.
Do I Need To Wire Trailer Lights If I’m Only Using A Bike Rack?
No, wiring is only needed if you are towing a trailer with lights. For bike racks or cargo carriers, you do not need to install a wiring harness.
