Adding compressed air to your home garage can transform the way you work. Many tasks—like inflating tires, powering air tools, and cleaning—become easier, faster, and safer with the right compressed air setup. But setting up compressed air in a home garage is more than just buying an air compressor.
There are choices to make, mistakes to avoid, and small details that can make a big difference. If you want a reliable, safe, and efficient compressed air system, it’s important to plan well from the start.
This guide will walk you through every step needed to add compressed air to your home garage. Whether you’re a beginner or just want to avoid common pitfalls, you’ll find clear advice, practical examples, and helpful comparisons that make the process simple and manageable.
Understanding Compressed Air Needs In The Garage
Before you start buying equipment, it’s smart to think about how you’ll use compressed air in your garage. Not all uses require the same tools or setup. Here are some common uses:
- Inflating tires and sports equipment
- Powering pneumatic tools (impact wrenches, ratchets, grinders, paint sprayers)
- Cleaning dust and debris
- Blowing up pool toys, mattresses, or air beds
Each of these tasks may need different air pressure (measured in PSI) and airflow (measured in CFM). For example, an impact wrench might need 90 PSI and 4 CFM, while inflating a tire requires much less. Knowing your needs helps you choose the right compressor and accessories.
Non-obvious insight: People often overlook the total airflow (CFM) needed if using two or more tools at once. Always add up the CFM requirements if you want to run multiple tools simultaneously.
Choosing The Right Air Compressor
The air compressor is the heart of your system. Picking the right one is crucial. Here’s what you need to consider:
Size And Power
- Tank size: Ranges from small 1-gallon units to large 60-gallon tanks. Bigger tanks mean longer run time for tools.
- Horsepower (HP): More HP generally means more power, but efficiency is just as important.
- Airflow (CFM): Match the CFM to your tools’ requirements, plus some margin.
Portability Vs. Stationary
- Portable compressors are easy to move around but have smaller tanks.
- Stationary compressors offer more power and capacity but need a fixed space.
Oil-lubricated Vs. Oil-free
- Oil-lubricated compressors are quieter and last longer but need maintenance.
- Oil-free units require less upkeep but can be louder and wear out faster.
Noise Level
If your garage is attached to your home, a quieter unit might be important. Models can range from 60 dB (quiet) to over 90 dB (loud).
Example Compressor Comparison
Here’s a comparison of three popular compressor types for home garages:
| Model Type | Tank Size | CFM @ 90 PSI | Noise Level (dB) | Ideal Use |
|---|---|---|---|---|
| Pancake | 6 gallon | 2.6 | 78 | Inflating, small tools |
| Vertical Stand | 20 gallon | 5.0 | 83 | Power tools, painting |
| Stationary | 60 gallon | 10.2 | 75 | Multiple tools, heavy use |
Pro tip: Don’t buy the biggest compressor you can find. Oversized units waste energy and space. Match your compressor to your real needs.
:max_bytes(150000):strip_icc()/Cover-fd15052ce37e4116ac7397ddd3937e43.png)
Credit: www.woodmagazine.com
Planning Your Compressed Air Layout
A well-thought-out air line layout saves time and headaches later. Good planning means fewer leaks, easier tool use, and safer operation.
Key Decisions
- Where will the compressor sit? Near a power outlet, away from dampness, and with enough ventilation.
- How will you run air lines? Along walls, overhead, or under benches.
- Where do you need outlets? At workbenches, car bays, or outside the garage door.
Materials For Air Lines
You can use different materials for your air lines. Each has pros and cons:
| Material | Durability | Ease of Install | Cost | Notes |
|---|---|---|---|---|
| PVC | Low | Easy | Low | Unsafe for air, can explode |
| Copper | High | Medium | High | Resists corrosion, professional look |
| Steel (Black Pipe) | Very High | Hard | Medium | Strong, but heavy and can rust |
| PVC-Alternative (PEX/Aluminum) | High | Easy | Medium-High | Lightweight, fast install |
Important: Never use standard PVC pipe for compressed air. It can shatter and cause injury.
Planning For Drainage And Safety
Condensation forms inside air lines. Plan for drain valves at low points to release water. Install a pressure relief valve at the compressor for safety.
Non-obvious insight: Placing your main air lines with a slight slope toward the drain points helps water collect where you want, not inside your hoses or tools.
Installing The Compressor And Main Air Lines
Now it’s time to install your system. Here’s a step-by-step approach:
1. Place The Compressor
- Set it on a level, sturdy surface.
- Allow at least 12 inches of space around for ventilation.
- Bolt down larger, stationary models to prevent movement.
2. Connect To Power
- Small units can use standard outlets.
- Large compressors may need a dedicated 220V line.
- Never use extension cords; they can cause voltage drops and damage the compressor.
3. Install Main Air Lines
- Use chosen materials (copper, steel, or PEX-aluminum systems).
- Run lines along walls or ceiling, keeping them out of the way.
- Use elbows and tees for corners and branches.
- Secure lines every 3-4 feet with clamps or hangers.
4. Add Drop Lines And Outlets
- At each work area, install a drop line that comes down from the main line.
- Use quick-connect fittings at the end for easy tool change.
- Install a moisture trap and filter at each drop to protect tools.
5. Install Drain Valves
- Place a drain at the lowest point of the compressor tank.
- Add drains at low points of your main lines.
6. Test For Leaks
- Pressurize the system.
- Spray soapy water on all joints and fittings; bubbles show leaks.
- Tighten or reseal any leaking joints.

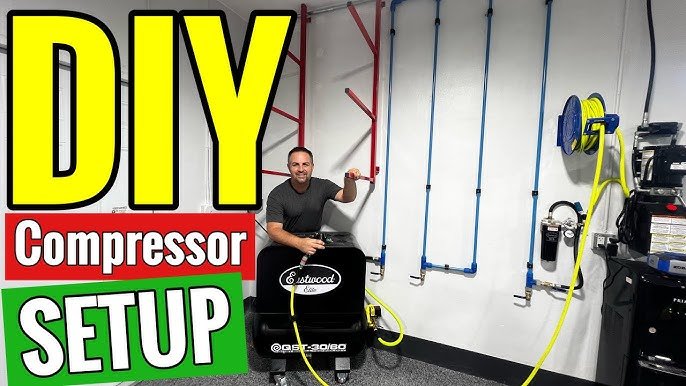
Credit: www.eastwood.com
Choosing And Installing Hoses And Reels
Hoses are the bridge between your air lines and your tools. Picking the right hose makes work easier and safer.
Hose Types
- Rubber hoses: Flexible, durable, work well in cold.
- Polyurethane hoses: Lightweight, kink-resistant, but can be stiff in cold weather.
- PVC hoses: Cheap, but stiff and prone to cracking.
Length And Diameter
- Standard lengths are 25, 50, or 100 feet.
- Most home setups use 3/8” diameter for good airflow.
Hose Reel Benefits
- Keeps hoses off the floor, reducing tripping hazards.
- Prevents kinks and damage.
- Makes storage quick and easy.
Pro tip: Mount your hose reel near your main work area or even outside the garage for car-related tasks.
Selecting And Maintaining Air Tools
Once your system is set up, choose the right air tools for the job. Always check the CFM rating of each tool and match it to your compressor’s output.
Common Air Tools For Home Garages
- Impact wrenches (for lug nuts)
- Air ratchets (for tight spaces)
- Die grinders and sanders
- Paint sprayers
- Blow guns
Example: Impact Wrench Cfm Needs
A typical 1/2” impact wrench might need 4-5 CFM at 90 PSI. Some cheaper compressors can’t keep up for long, so plan for short bursts or upgrade your tank size.
Tool Maintenance Tips
- Drain water from compressor and lines after each use.
- Use a few drops of air tool oil in tools before use.
- Store tools in a dry place to prevent rust.
Non-obvious insight: Water in compressed air can ruin paint jobs and damage air tools quickly. Using a desiccant dryer or high-quality filter at your drop lines can make a big difference, especially if you plan to paint or use precision tools.
Safety Tips For Compressed Air Systems
Compressed air is powerful and useful, but it can also be dangerous if not handled properly.
- Never point an air nozzle at yourself or others.
- Wear safety glasses when working with compressed air.
- Install a pressure regulator to avoid over-pressurizing your tools or hoses.
- Drain tanks and lines regularly to prevent corrosion and water buildup.
- Check hoses for cracks or leaks and replace as needed.
Common mistake: Many people forget to check the condition of hoses and fittings. Old, cracked hoses can burst and cause injury or property damage.
Cost Estimates And Budgeting
Setting up a basic compressed air system for a home garage doesn’t have to break the bank, but costs can add up if you want a professional setup.
| Item | Budget Option | Mid-Range | Premium |
|---|---|---|---|
| Compressor | $100-$200 | $300-$600 | $800-$1500 |
| Air Lines | $30 (PVC, not recommended) | $100 (PEX/Aluminum) | $300+ (Copper/Steel) |
| Hoses/Reels | $20-$40 | $50-$120 | $150+ |
| Fittings/Valves | $20 | $50 | $100 |
Tip: Start small and expand as your needs grow. It’s easy to add more drop lines or a bigger compressor later.
Credit: www.youtube.com
Troubleshooting Common Problems
Even with good planning, problems can happen. Here’s how to fix some common issues:
- Compressor won’t start: Check power supply, breakers, and motor reset.
- Low pressure at tools: Look for leaks, undersized hoses, or dirty filters.
- Water in air lines: Drain tanks daily; consider adding water separators.
- Air leaks: Use soapy water to spot leaks; reseal or replace fittings.
- Noisy compressor: Tighten bolts, check for worn bearings, or move unit to a sound-dampening mat.
Extra Tips For A Smooth Setup
- Label each drop line and outlet for easy identification.
- Keep a set of spare fittings and hose clamps handy.
- Consider installing a manifold near your workbench for quick tool changes.
- If you spray paint, set up a dedicated moisture trap and filter.
For more details on air compressor safety and standards, see Wikipedia.
Adding compressed air to your home garage isn’t just about convenience—it boosts the quality of your work and makes many tasks possible that would be hard or slow otherwise. With smart planning and a careful setup, you’ll enjoy years of trouble-free service and get the most from your investment.
Frequently Asked Questions
How Big Should My Air Compressor Be For A Home Garage?
Most home garages do well with a 20 to 30-gallon compressor for general use. If you plan to use multiple tools at once or larger tools (like sandblasters or paint sprayers), consider a 60-gallon unit.
Can I Use Pvc Pipe For My Air Lines?
No, PVC pipe is not safe for compressed air. It can shatter under pressure and cause injury. Use copper, black steel, or specialty aluminum/PEX systems designed for air.
How Do I Prevent Water In My Compressed Air Lines?
Drain your compressor tank daily, install water separators at each drop, and slope your main lines toward drain points. For sensitive work (like painting), add a desiccant dryer.
What’s The Best Way To Find Air Leaks In My System?
Spray soapy water on all connections, joints, and fittings. If bubbles form, you have a leak. Tighten or reseal as needed.
Do I Need A Professional To Install A Compressed Air System In My Garage?
Most people can install a basic system with simple tools and DIY skills. For large compressors that require special power hookups, or if you’re unsure about plumbing, it’s smart to hire a professional.
