Building your own car rotisserie at home might sound like something for professionals, but with the right guidance, tools, and patience, it’s an achievable project for dedicated car enthusiasts. A car rotisserie allows you to rotate your vehicle’s body, making restoration, rust repair, and painting work much easier and safer. By lifting and turning the car, you can access the underbody and hard-to-reach areas without lying on your back or wrestling with awkward tools. This guide will walk you through every step, from planning to final assembly, with practical tips, safety advice, and insights that most beginners miss.
Understanding What A Car Rotisserie Is
A car rotisserie is a heavy-duty frame that holds a car body and lets you rotate it along its horizontal axis. It’s especially useful for classic car restorations, as it gives you full access to the chassis, undercarriage, and body panels.
Most home-built rotisseries are made from steel tubing and use either hydraulic jacks or manual pivots to lift and rotate the vehicle. The design can be simple or advanced, but the core idea is the same: secure rotation and stable support.
Planning Your Car Rotisserie
Before you start cutting metal, take time to plan your build:
- Vehicle Weight and Size: Know the weight and dimensions of your car. Most home rotisseries are built to handle vehicles up to 3,000 lbs. Oversized trucks or SUVs need a stronger frame.
- Workspace Needs: You need enough space to assemble, rotate, and move the car. A standard two-car garage is usually enough.
- Budget: Building a rotisserie will cost between $350–$800 depending on materials and whether you buy new or used parts.
- Tools and Skills: At a minimum, you’ll need a welder, angle grinder, drill, wrenches, and basic measuring tools. Some experience with welding and metalwork is necessary.
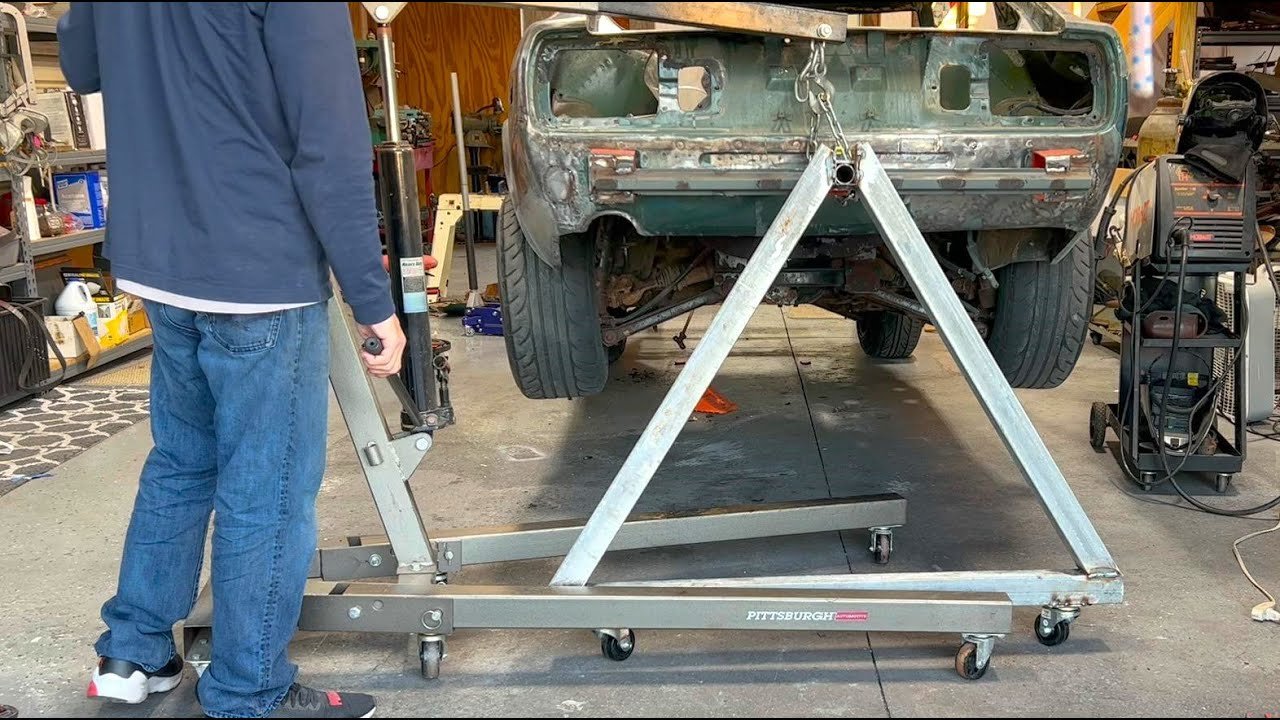
Credit: www.youtube.com
Materials And Tools Needed
Gathering the right materials upfront saves time and frustration later. Here’s a breakdown:
| Material/Tool | Suggested Specs | Purpose |
|---|---|---|
| Steel Square Tubing | 2″x2″ or 2″x3″, 11- or 14-gauge | Main frame and arms |
| Heavy-Duty Casters | 4 or 6-inch, 1,000 lb+ rating each | Mobility |
| Pins or Bolts | 5/8″ or 3/4″ hardened steel | Locking rotation positions |
| Hydraulic Jacks (optional) | 2-ton or higher | Height adjustment |
| Welding Machine | MIG or stick welder | Frame assembly |
| Angle Grinder & Blades | 4.5″ or 7″ | Cutting steel |
| Drill & Bits | 1/4″ to 3/4″ | Mounting holes |
Pro Tip: Many beginners forget to check the casters’ load rating. Under-rated wheels can fail suddenly, risking injury and damage.
Designing Your Rotisserie
A good design is key. There are two main types: fixed height and adjustable height. Adjustable versions are more flexible but also more complex.
Key Components
- Main upright posts: Hold the weight and serve as the rotation axis.
- Base/frame: Distributes weight and supports casters.
- Arms/mounts: Attach to your car’s bumpers or subframes.
- Rotation mechanism: Usually a round pipe or hub that allows the car to spin.
- Locking pins: Hold the car in place at different angles.
Example Dimensions
For a classic car (e.g., 1960s Mustang), a typical home rotisserie might use:
- Base length: 7-8 feet
- Height: 5-6 feet
- Width: 3-4 feet between uprights
- Rotation bar: 2” diameter, 36-40” long
Always adjust for your specific car.
Credit: redwingsteelworksplans.com
Step-by-step Construction Guide
Building a car rotisserie is not a one-day project. Here’s a practical process:
1. Cut And Prepare Steel Tubing
Measure and cut all steel pieces. Clean the ends with a grinder to ensure good welds.
- Base rails: 2 pieces, 7-8 ft each
- Uprights: 4 pieces, 5-6 ft each
- Cross-braces: 4-6 pieces for stability
2. Weld The Base And Uprights
Weld the uprights to the base rails at both ends. Add cross-braces at the bottom and midway up for extra strength. Check for squareness at every stage.
Mistake to avoid: Not checking alignment. Crooked frames make rotation difficult and stress the metal.
3. Build The Rotation Mechanism
Weld a round steel pipe or thick-walled tube to the top of each upright. This will be your rotation axis. The pipe should fit snugly into the arms or mounting plates that will attach to the car.
Non-obvious tip: Use bushings or bearing sleeves to reduce wear and make rotation smoother.
4. Add Casters
Drill holes and bolt on heavy-duty casters to each corner. Locking casters are ideal for safety.
5. Fabricate Car Mounting Arms
Design adjustable arms that bolt to the car’s bumper mounts or subframe points. These arms should slide in and out to fit different widths.
- Use thick steel plate for mounting flanges.
- Reinforce with gussets for strength.
Safety insight: Always use grade 8 bolts for all vehicle attachment points.
6. Install Locking Pins
Drill holes at set intervals around the rotation axis. Insert locking pins to fix the car in any position (upright, sideways, upside down).
7. Test Assembly
Before mounting your car, test the frame with weights (e. g. , sandbags) to ensure it holds securely and rotates smoothly. Check for flexing or weak welds.
8. Attach Your Car Safely
Remove the car’s engine, transmission, and other heavy parts to reduce weight. Roll the rotisserie up to the car, bolt the arms to the mounting points, and slowly lift it. Double-check all connections and lock pins before rotating.
Beginner’s mistake: Skipping a test fit. Always do a test run without fully lifting the car to catch any issues early.
Safety Precautions
Safety should never be an afterthought:
- Wear safety gear: Gloves, goggles, and a welding mask.
- Check welds: Poor welds can fail suddenly under load.
- Never exceed weight limits: Overloading is a top cause of accidents.
- Keep a fire extinguisher nearby when welding.
- Secure the area: Keep kids and pets away during assembly and use.
Common Mistakes And How To Avoid Them
- Using thin steel tubing: This can bend or snap under load. Stick with at least 11-gauge steel.
- Underestimating car weight: Remove as many parts as possible before lifting.
- Ignoring caster quality: Cheap casters make moving dangerous.
- Poor alignment: Take time to measure and square up every joint.
- No locking pins: Never rely on friction alone to hold the car’s position.
Comparing Home-built Vs. Store-bought Rotisseries
How does a DIY rotisserie stack up to a commercial one? Here’s a quick comparison:
| Feature | Home-Built | Store-Bought |
|---|---|---|
| Cost | $350–$800 | $900–$2,500 |
| Custom Fit | Yes (if designed well) | Some models only |
| Assembly Time | 2–3 days | 2–3 hours |
| Skill Needed | High (welding, measuring) | Low |
| Warranty | No | Yes |
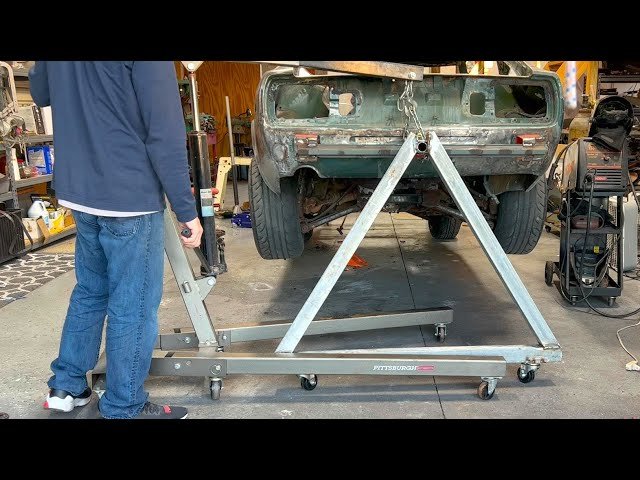
Credit: www.youtube.com
Practical Tips For Success
- Pre-fit everything before final welds. Temporary clamps help check fit.
- Label each part as you cut and prep. It saves time during assembly.
- Paint or powder-coat the finished frame to prevent rust.
- Store indoors when not in use, as rotisseries can rust quickly if left outside.
- Document your build with photos and notes. If you need to repair or adjust later, you’ll thank yourself.
When Not To Build Your Own
Building a car rotisserie isn’t for everyone. Here’s when you might want to buy instead:
- No welding experience: Mistakes can be dangerous.
- Limited workspace: Building needs more room than using.
- Tight deadline: Building takes time, buying is faster.
- Restoring very large or rare cars: Commercial rotisseries have tested load ratings and safety certifications.
Real-world Example
Consider Mike, a hobbyist restoring a 1972 Chevrolet Camaro. He spent $480 on steel, bolts, and casters, and took two weekends to finish the project. He found that adding extra cross-bracing improved stability and used leftover steel to make custom mounting arms.
Painting the frame added several years to its lifespan. He reported that rotating the shell was smooth, and he could clean and paint the underbody with much less effort.
Insight: Many DIY builders underestimate the value of adjustable arms. Investing a bit more time here will make your rotisserie useful for future projects, not just one car.
Maintenance And Storage
A car rotisserie is a long-term investment for any car enthusiast. To keep it in good shape:
- Check for rust and repaint as needed
- Inspect welds and bolts before each use
- Lubricate rotation points for smooth movement
- Store indoors or cover with a tarp if left outside
Frequently Asked Questions
How Much Weight Can A Home-built Car Rotisserie Hold?
Most home rotisseries, if built with 2” square 11-gauge steel and strong welds, can safely handle 2,000–3,000 lbs. Always aim for a safety margin and never push the maximum.
Can I Build A Car Rotisserie Without Welding?
It’s possible using heavy-duty bolts and brackets, but welding provides a much stronger and safer frame. If you’re not experienced, consider having a professional weld key joints.
What Are The Most Common Mounting Points On A Car?
Most cars have bumper brackets or subframe mounts that are strong enough for rotisserie use. Always consult your car’s service manual to avoid weak spots.
Is It Safe To Rotate A Car Shell Alone?
Never rotate the car by yourself. Always have at least one helper to guide and balance the shell, especially when moving past the balance point.
Where Can I Find Detailed Designs Or Plans?
Many restoration forums and sites offer free or paid plans. One reliable source for DIY plans and tips is the Hotrodders Knowledge Base.
Building a car rotisserie at home is a rewarding project that can save you thousands and make restoration work safer and more enjoyable. With careful planning, quality materials, and attention to detail, you’ll have a tool that lasts for years and helps take your car projects to the next level. Take your time, double-check your work, and don’t hesitate to ask experienced builders for advice along the way.
