Replacing car ball joints might sound easy to some people, but it can be a tricky job even for experienced DIYers. Ball joints are a small but critical part of your vehicle’s suspension system. If you make a mistake while replacing them, it can lead to strange noises, poor steering, or even dangerous driving conditions.
Learning about the most common mistakes when replacing car ball joints can help you avoid costly repairs and keep your vehicle safe on the road.
Why Ball Joints Matter
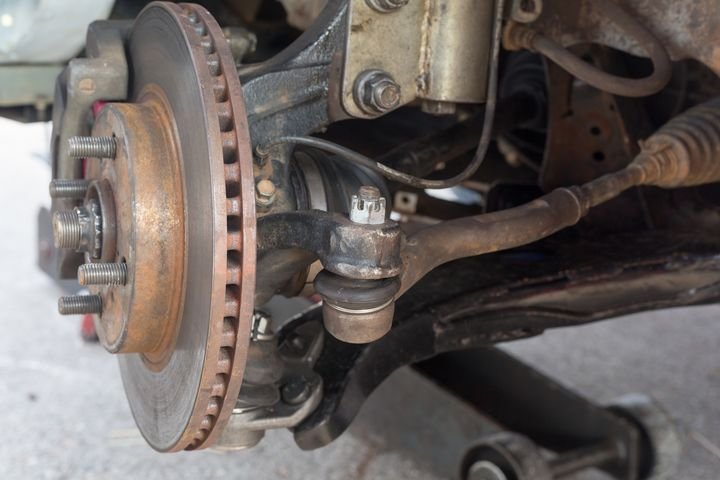
Ball joints connect your car’s control arms to the steering knuckles. They allow for movement and flexibility when you turn or go over bumps. If a ball joint wears out or fails, you might hear clunking noises, feel vibration in the steering wheel, or notice uneven tire wear. In the worst case, a failed ball joint can cause you to lose control of your car.
Many people try to save money by replacing ball joints themselves. This can work if you have the right tools and knowledge. However, making a mistake during the process can make things worse. Let’s look at the most common mistakes and how to avoid them.
1. Not Diagnosing The Real Problem
Before you even buy new ball joints, make sure they are the real problem. Sometimes, noises and loose steering can come from other suspension parts like tie rod ends, bushings, or wheel bearings. If you replace the ball joints without checking everything, you might waste time and money, and the problem will still be there.
Tip: Always check all suspension parts for play or damage before deciding to replace ball joints. Move the wheel up and down and side to side to feel for looseness.
2. Using The Wrong Tools
Ball joint replacement requires special tools. Many beginners try to use hammers, pry bars, or makeshift tools. This often causes damage to the new ball joint, the control arm, or even the steering knuckle.
A proper ball joint press or separator tool makes the job much safer and easier. If you don’t have these tools, you can often rent them from auto parts stores.
Insight: A common mistake is using a pickle fork (separator) without knowing it can rip the rubber boot on the new ball joint.
3. Not Following The Correct Procedure
Every vehicle is different. Some ball joints press in and out, while others bolt on or rivet. If you don’t follow the correct steps for your car, you can damage parts or miss important safety steps.
Tip: Always use the factory service manual or a trusted repair guide. This will show the right steps, torque specifications, and any special tricks for your car.
4. Forgetting To Torque Properly
Ball joints need to be tightened to a specific torque specification. If you guess or just “make it tight,” you risk the ball joint coming loose or damaging the threads.
Many DIYers skip using a torque wrench, but this is a big mistake. Too loose and the ball joint can separate. Too tight and you can strip threads or crack the control arm.
Example: On a Honda Civic, the ball joint castle nut often needs to be torqued to about 32-39 ft-lb (always check your manual).
5. Ignoring The Ball Joint Orientation
Some ball joints are designed to fit in only one direction. If you install it backwards or at the wrong angle, it will wear out fast or may not fit correctly.
Look for alignment marks, notches, or arrows on the ball joint. Make sure you match these to the control arm or steering knuckle.
Non-obvious insight: Some ball joints have a grease fitting that must face outwards for easy maintenance.
6. Damaging The Rubber Boot
The rubber boot protects the ball joint from dirt and keeps grease inside. Many people tear or pinch the boot during installation. Even a small tear can let dirt in and grease out, leading to early failure.
Be gentle when pressing in the new joint. Check that the boot is not twisted or crushed. If the boot is damaged, replace it before finishing the job.
7. Not Adding Grease (or Adding The Wrong Grease)
Some ball joints are pre-greased and sealed. Others need to be greased after installation. If you forget to add grease, the joint will wear out quickly. Using the wrong grease can also cause problems.
Tip: Use only high-quality, heavy-duty chassis grease. Always check if your new ball joint needs greasing or is sealed.
8. Failing To Replace Related Parts
Ball joints usually wear out along with other suspension parts. If you only replace the ball joint, but the control arm bushings or tie rod ends are also bad, you will still have problems.
Confident guidance: Always check bushings, tie rods, sway bar links, and wheel bearings. It’s often easier and cheaper to replace worn parts all at once, as you already have things apart.
9. Not Cleaning Mounting Surfaces
Dirty or rusty mounting surfaces can prevent the new ball joint from seating properly. This can cause a loose fit and early failure.
Clean all surfaces with a wire brush. Remove rust, dirt, and old grease. Make sure everything is dry before installing the new joint.
10. Forgetting To Install All Hardware
Most new ball joints come with new nuts, cotter pins, or snap rings. If you forget to use these, the ball joint might not stay secure.
Tip: Always use new hardware supplied with the kit. Never reuse old cotter pins or nuts. Check that the cotter pin is bent properly to lock the nut in place.
11. Not Marking Alignment Before Disassembly
When you remove suspension parts, you can change the alignment settings of your car. Many people forget to mark the position of bolts and components before taking things apart.
If you don’t mark them, you might put things back slightly off. This causes poor handling and uneven tire wear.
Practical example: Use a marker or punch to mark bolt positions. This helps you reassemble everything exactly as it was.
12. Skipping The Final Alignment
Even if you mark everything, replacing ball joints often changes the wheel alignment. Driving with bad alignment can ruin your tires and make steering difficult.
Always get a professional wheel alignment after replacing ball joints. This is not just a “nice to have”—it’s essential for safety and good tire life.
13. Not Checking For Free Movement
After installing the new ball joint, check that it moves smoothly with no binding or stiffness. If it feels stuck, something may be wrong—like a twisted boot or misaligned joint.
Non-obvious insight: New ball joints can feel stiff, but should not be frozen. Compare the movement with the old joint if unsure.
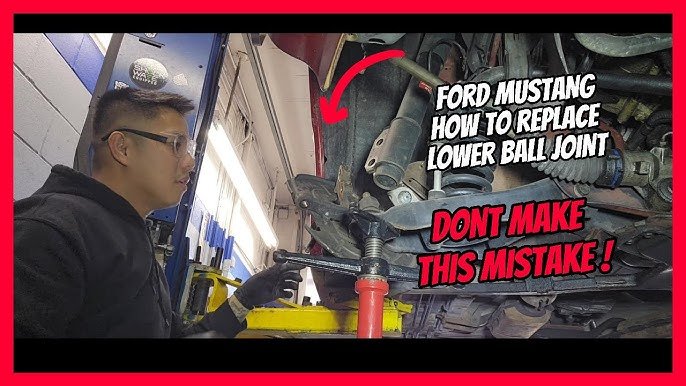
Credit: www.youtube.com
14. Overlooking Torque-to-yield Bolts
Some cars use torque-to-yield bolts, which stretch when tightened. These bolts must be replaced, not reused. If you reuse old torque-to-yield bolts, they may break or come loose.
Check your manual. If torque-to-yield bolts are used, always install new ones.
15. Not Test Driving Carefully
After finishing the job, it’s tempting to assume everything is fine. But some mistakes only show up during a test drive. Always listen for new noises, feel for vibrations, and check steering response.
Start with a short, slow test drive before getting back to normal driving. If something feels wrong, stop and check your work.
Comparison: Diy Vs. Professional Ball Joint Replacement
Here’s a side-by-side comparison to help you decide if you should do the job yourself or hire a professional:
| Factor | DIY Replacement | Professional Replacement |
|---|---|---|
| Cost | Lower (parts + tool rental) | Higher (labor + parts) |
| Time Required | 2-5 hours (depends on experience) | 1-2 hours |
| Risk of Mistakes | High for beginners | Low |
| Warranty | Parts only | Parts + labor |
| Need for Special Tools | Yes | No (shop provides tools) |
Signs Of A Bad Ball Joint
Knowing the signs of a failing ball joint can help you avoid bigger problems. Here are common symptoms:
- Clunking noises from the front end
- Uneven or rapid tire wear
- Steering feels loose or “wandering”
- Vibration in the steering wheel
- Car pulls to one side
If you notice these symptoms, check your suspension as soon as possible.
Credit: www.brakeandfrontend.com
Common Ball Joint Types And How They Differ
Not all ball joints are the same. Here’s a quick comparison of the most common types:
| Type | Mounting | Maintenance |
|---|---|---|
| Press-in | Pressed into control arm/knuckle | Usually sealed, some greasable |
| Bolt-on | Bolt directly to control arm/knuckle | Some greasable, some sealed |
| Screw-in | Screw into threaded hole | Usually greasable |
Check which type your car uses before buying replacement parts.
Safety Reminders When Working On Suspension
Working on suspension systems can be dangerous if you’re not careful. Here are some important safety tips:
- Always use jack stands, never rely on a jack alone.
- Wear safety glasses to protect your eyes from debris.
- Double-check that the car is stable before removing wheels.
- Keep your work area clean and organized.
- If you’re not sure, ask a professional for help.
Real-world Example: What Can Go Wrong
A DIY car owner tried to replace the ball joints on a pickup truck using only a hammer and a socket. He damaged the control arm, crushed the new ball joint boot, and the ball joint failed after two months.
The repair ended up costing more than if he had gone to a shop in the first place.
This story is a reminder: cutting corners can lead to bigger problems and higher costs later.
Frequently Asked Questions
What Happens If I Drive With A Bad Ball Joint?
Driving with a bad ball joint is very dangerous. The joint can break, causing the wheel to collapse or even separate from the car. This can lead to a serious accident.
How Often Do Ball Joints Need To Be Replaced?
Most ball joints last between 70,000 and 150,000 miles, but this depends on driving conditions and car type. Off-road driving or poor roads can make them wear out faster.
Can I Replace Just One Ball Joint, Or Do I Need To Do Both Sides?
You can replace just one if only one is bad. However, many mechanics suggest replacing both sides if one has failed, as the other may soon follow.
Do I Need An Alignment After Replacing Ball Joints?
Yes, you should always get a professional alignment after replacing ball joints. The job can change your wheel angles, and bad alignment can ruin tires quickly.
Where Can I Find The Correct Torque Specifications For My Car?
The best source is your car’s service manual. You can also find reliable information on trusted websites like Haynes.
Replacing car ball joints is a job that demands care and attention to detail. By understanding and avoiding these common mistakes, you’ll improve your car’s safety, performance, and save money in the long run. If you ever feel unsure, don’t hesitate to ask for professional help.
Your safety—and your car’s health—are always worth it.
Credit: beamertireofhighpoint.com
