Building your own car ramp out of wood is a project that offers both satisfaction and practical value. If you do car maintenance at home, a sturdy wooden ramp can make oil changes, inspections, and repairs much safer and easier.
Buying metal ramps can be expensive, and sometimes the designs do not fit your specific vehicle. With some planning and careful work, you can create a strong, reliable ramp using basic tools and materials. This guide will walk you through each step, highlight safety points, and share real tips that many beginners overlook.
Why Build A Wooden Car Ramp?
Wooden car ramps have a few advantages. First, wood is easy to find at hardware stores, and it is usually cheaper than metal. You can adjust the design to match your car’s weight and height. A homemade ramp also lets you add features like side guards or handles that may not come with store-bought versions.
But not every piece of wood will work. It’s important to use the right type of lumber and to follow good construction techniques. Some people make mistakes, such as using weak boards, which can lead to collapse. Building a proper ramp takes a little time and care, but the reward is a safe and useful tool for your garage.
Materials And Tools You Will Need
Before starting, collect all the materials and tools. Skipping this step can lead to mistakes and wasted time.
Essential Materials:
- Four 2×12-inch boards, each 8 feet long (for ramps up to 12 inches high)
- Wood screws, at least 3 inches long
- Wood glue (optional but increases strength)
- Sandpaper or a sanding block (medium grit)
- Non-slip tape or paint (for added tire grip)
- Wood sealer or outdoor paint (protects against moisture)
Recommended Tools:
- Circular saw or hand saw
- Cordless drill and drill bits
- Measuring tape
- Pencil or chalk for marking
- Carpenter’s square
- Safety goggles and gloves
Pro Tip: Avoid using soft woods like pine for the main load-bearing boards. Hardwoods (such as oak) or construction-grade fir are much stronger and last longer.
Planning The Ramp Design
The right design will depend on your car’s ground clearance and weight. For most sedans and light trucks, a ramp that lifts the wheels about 8-12 inches is enough. The slope should be gentle—steep ramps are dangerous, especially for cars with low bumpers.
How High And Long Should Your Ramp Be?
A safe ramp angle is about 10–15 degrees. If the ramp is too steep, your car might scrape or slide.
Here’s a simple formula:
- Ramp Length = Height / tan(angle in degrees)
- For a 12-inch rise at 10 degrees: Length = 12 / tan(10°) ≈ 68 inches
Example: For a 10-inch high ramp at 12 degrees, the ramp should be about 48 inches long.
Comparing Heights And Lengths
Let’s look at how ramp height affects length at different angles.
| Ramp Height (inches) | Ramp Angle (degrees) | Recommended Length (inches) |
|---|---|---|
| 8 | 10 | 45 |
| 10 | 12 | 48 |
| 12 | 15 | 45 |
Make sure the ramp is wide enough. Most car tires are between 7 and 10 inches wide. A 12-inch wide ramp gives plenty of space and margin for error.
Step-by-step Building Instructions
Now, let’s get into the construction. Patience and accuracy matter more than speed.
Step 1: Measure And Cut The Boards
- Mark the lengths on your 2×12 boards using the measuring tape and pencil.
- For each ramp, you need 3–4 pieces, each shorter than the last. For example:
- Bottom piece: 48 inches
- Next: 36 inches
- Next: 24 inches
- Top (optional, for smooth entry): 12 inches
- Cut the boards with a circular saw. Wear safety goggles.
Tip: Cutting each layer shorter creates a stepped ramp, which is much stronger than trying to cut one long slope.
Step 2: Stack And Attach The Layers
- Place the longest board at the bottom.
- Lay the next shortest board on top, aligning the back edges.
- Repeat with each smaller piece.
- Drill pilot holes through each layer to avoid splitting the wood.
- Secure each layer with 3-inch wood screws, spacing them about every 8 inches.
- Add wood glue between layers for extra strength.
Step 3: Shape The Ramp Edge
Use the saw to round off the front edge of the bottom board. This helps the car tire roll up smoothly and prevents catching.
Step 4: Sand And Finish
- Sand all exposed edges and surfaces to remove splinters.
- Apply non-slip tape or paint to the top for tire grip.
- Seal the wood with outdoor paint or sealer to prevent moisture damage.
Step 5: Add Safety Features
- Screw a stop block at the back of each ramp. This prevents the car from rolling off.
- Attach side rails (optional) using smaller wood strips. These help guide the tires.
Pro Insight: Many beginners forget to seal the wood. This mistake allows water to soak in, causing rot and making the ramp unsafe after a few months.

Credit: www.youtube.com
Safety Checks Before First Use
Before driving your car onto the ramp, check these points:
- Place the ramps on a flat, hard surface (not on dirt or grass).
- Stand on the ramp with your full weight to test strength.
- Double-check all screws are tight and boards are not cracked.
- Make sure the ramp does not wobble.
- Use wheel chocks for the rear tires so the car cannot roll.
Real-World Example: A friend ignored the flat surface rule and used his ramp on uneven gravel. One ramp shifted, and the car slid off one side. Always use ramps on concrete or asphalt for safety.
Comparing Wooden Ramps To Metal And Plastic
How does a homemade wooden ramp stack up against store-bought versions? Let’s compare the basics.
| Material | Typical Weight Limit (lbs) | Durability | Customizable | Cost |
|---|---|---|---|---|
| Wood | 3,000–6,000 (per pair) | High, if maintained | Yes | Low |
| Metal | 7,000–12,000 | Very High | No | High |
| Plastic | 4,000–8,000 | Medium | No | Medium |
Wooden ramps are strong enough for most personal vehicles if built well. They are not recommended for very heavy trucks or for use in wet, outdoor conditions unless sealed properly.
Common Mistakes To Avoid
Some errors can make a ramp weak or unsafe. Watch out for these:
- Using soft, cheap wood that cracks or splits.
- Not sealing the wood, which leads to rot and loss of strength.
- No stop block at the end, increasing the risk of driving off.
- Forgetting non-slip surfaces, making tires slide.
- Improper stacking of boards or not enough screws, causing shifting under load.
- Building too steep—steep ramps are a common beginner error.
Maintenance And Inspection Tips
A wooden ramp needs some care to stay safe and strong.
- Check for cracks or rot before each use.
- Re-tighten screws every few months.
- Reapply sealer once a year, especially if used outside.
- Replace non-slip tape or paint if it wears off.
If you store your ramp outside, try to keep it off the ground and cover it from rain. Wet wood is much weaker and can become slippery.

Credit: www.youtube.com
When Not To Use A Wooden Ramp
While wooden ramps work for most cars, there are times they are not the best choice.
- Heavy vehicles: If your car or truck weighs over 6,000 lbs, consider a professional metal ramp.
- Frequent outdoor use: Rain, snow, and sun can damage wood over time.
- Very low ground clearance cars: These may need a longer, gentler slope than most home-built ramps provide.
If you need more information about car weights and safety, check resources like the Wikipedia Car Ramp page.
Real-world Insights: What Beginners Miss
- Side-to-side stability: It’s easy to focus on the length and height, but a ramp that’s too narrow is risky. Always aim for at least 2 inches wider than your tire.
- Smooth transitions: The join between each step should be rounded or sanded. Sharp edges can damage tires, especially if you drive up slowly.
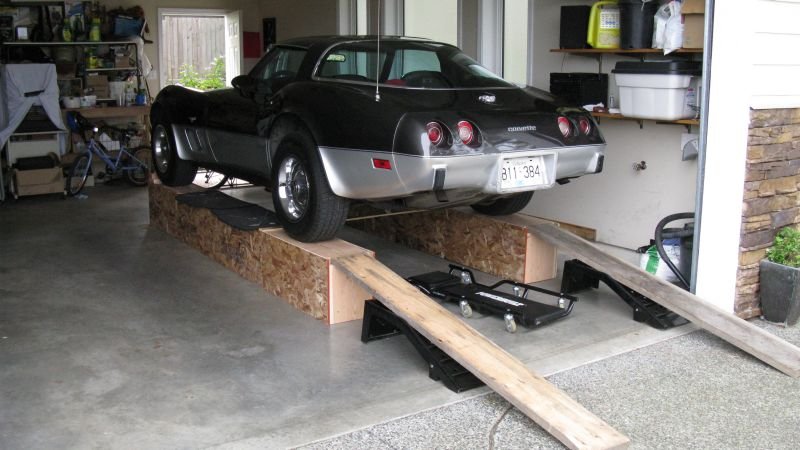
Credit: www.corvetteforum.com
Frequently Asked Questions
How Much Weight Can A Wooden Car Ramp Hold?
A properly built wooden ramp using high-quality 2×12 boards can usually support about 3,000 to 6,000 pounds per pair. Always check the strength of your chosen wood and build with care.
How Do I Keep My Ramp From Slipping?
Install non-slip tape or paint on the ramp surface. Also, make sure the ramp is placed on concrete or asphalt, and never use it on dirt or grass.
Can I Use Plywood Instead Of Solid Boards?
No. Plywood is not strong enough for load-bearing ramps, even if it looks thick. Solid 2×12 lumber is safer and lasts longer.
Do I Need To Use Glue And Screws?
Yes. Screws provide strength and hold the boards together, while wood glue fills gaps and adds extra bonding. Using both makes the ramp more durable.
How Often Should I Check My Ramp For Safety?
Inspect your ramp before every use for cracks, loose screws, or rot. Small problems can become dangerous fast, so regular checks are important.
Building a car ramp out of wood is a rewarding project if you follow these steps and tips. With the right materials, careful planning, and a focus on safety, you can create a strong, long-lasting ramp for your home garage.
If you ever feel unsure, ask a local carpenter or mechanic for advice—they can spot weak points or suggest simple improvements. Stay safe and enjoy the convenience of your new DIY car ramp!
