Changing your own brake pads can save money and boost your confidence in car maintenance. Many drivers feel nervous about working on brakes, but with the right steps, tools, and safety habits, this job is within reach for most people.
Good brakes are essential for safety, so learning how to change brake pads is a valuable skill. Whether you’re new to car repairs or want to refresh your knowledge, this guide explains the process in simple language, step by step.
Understanding Brake Pads And Their Importance
Brake pads are a key part of your vehicle’s braking system. When you press the brake pedal, these pads press against the brake rotors, creating friction that slows the car. Over time, the material on the pads wears down. If you don’t replace them, your stopping power drops and you risk damaging the rotors, which can lead to much higher repair bills.
It’s also important to note that worn brake pads can affect your car’s stopping distance. According to industry studies, a vehicle with worn-out brake pads can take 30% longer to stop compared to one with new pads. This difference can be critical in emergency situations.
Signs You Need To Change Brake Pads
Knowing when to change your brake pads can prevent bigger problems. Here are the main signs:
- Squeaking or squealing noise: This is often the first warning. Most brake pads have a wear indicator that makes noise when the pad is low.
- Grinding sound: If you hear grinding, your pads are likely worn through and metal is touching metal. Change them immediately.
- Longer stopping distance: If your car takes longer to stop, your pads may be thin.
- Warning light: Some cars have a brake pad warning light.
- Vibration: If you feel vibrations when braking, it might be time to check your pads.
If you notice any of these signs, inspect your brake pads soon.
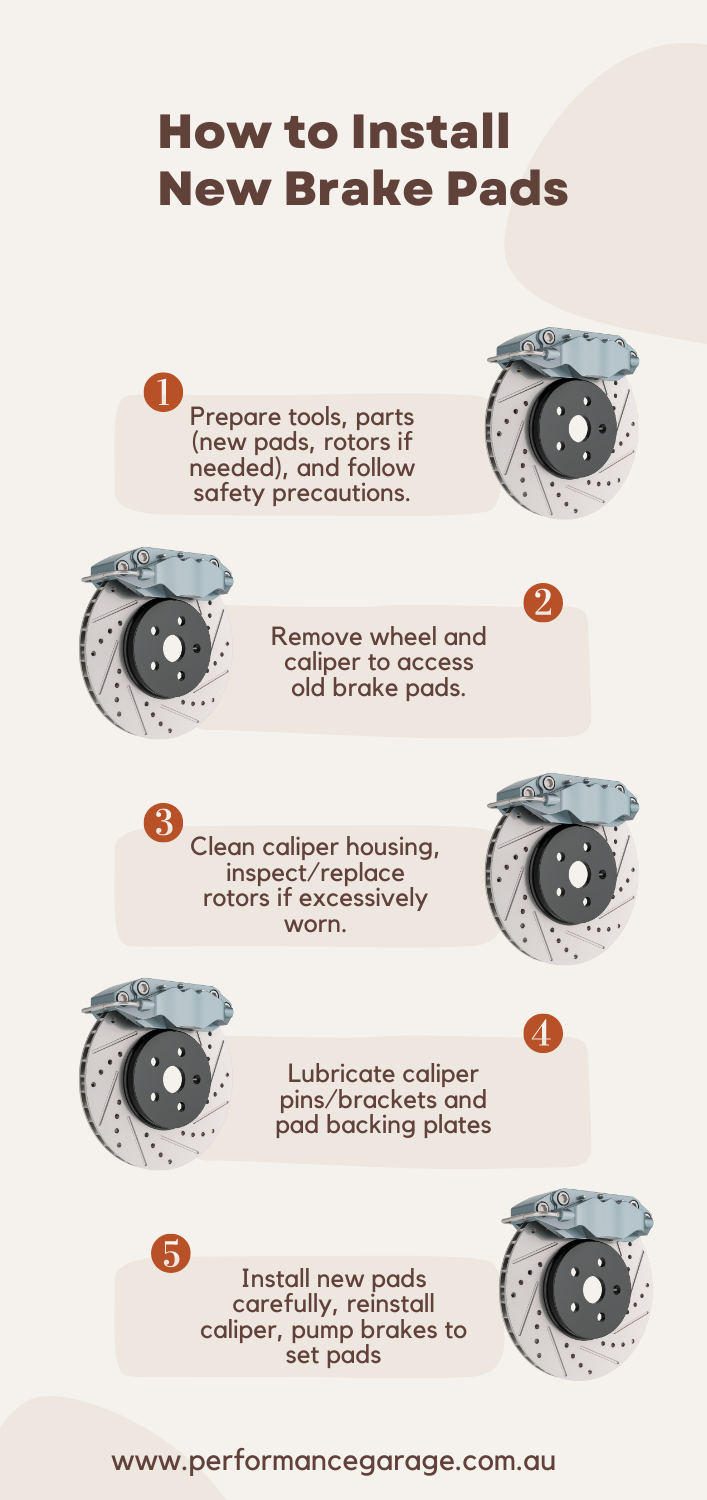
Credit: performancegarage.com.au
Tools And Materials Needed
Having the right tools makes the job easier and safer. Here’s a list of what you’ll need:
- New brake pads (make sure they fit your car’s make and model)
- Jack and jack stands
- Lug wrench
- Socket set and ratchet
- C-clamp or brake caliper tool
- Flat-head screwdriver
- Brake cleaner
- Mechanic’s gloves
- Protective eyewear
- Small bungee cord or rope
- Torque wrench
- Anti-squeal brake grease (optional but recommended)
Many auto parts stores can help you find the right brake pads if you tell them your car’s year, make, and model.
Preparing Your Vehicle
Safety is the first step. Park your car on a flat surface and set the parking brake. Loosen the lug nuts on the wheels before you lift the car. This makes removal easier once it’s off the ground.
Now, use the jack to lift one corner of the car at a time. Place jack stands under the car’s frame to keep it secure. Never rely on the jack alone—it can slip. Once the car is safely supported, remove the lug nuts and take the wheels off.
Here’s a quick overview of how different jack types compare:
| Jack Type | Pros | Cons |
|---|---|---|
| Scissor Jack | Lightweight, easy to store | Slower, less stable |
| Hydraulic Floor Jack | Fast lifting, more stable | Heavier, more expensive |
Always double-check that your car is secure before starting any work.
Removing The Old Brake Pads
With the wheel off, you’ll see the brake caliper. This part holds the brake pads against the rotor. Follow these steps:
- Locate the caliper bolts. They’re usually on the back of the caliper.
- Remove the bolts. Use your socket and ratchet for this.
- Lift the caliper off the rotor. If it’s stuck, gently pry it with a flat-head screwdriver.
- Support the caliper. Use a bungee cord or rope to hang it from the suspension. Don’t let it dangle by the brake hose—this can damage the hose.
- Remove the old pads. Slide them out. Notice how they fit, as you’ll install the new ones the same way.
Some calipers have clips or springs. Take care not to lose these parts.
Inspecting Other Brake Components
Before installing new pads, it’s smart to check other parts while you have everything apart:
- Brake rotors: Look for deep grooves, cracks, or a blue tint (from heat). If you see these, the rotor may need resurfacing or replacement.
- Caliper pins: Make sure they move freely. If not, clean and re-grease them.
- Brake hoses: Check for cracks or leaks.
If you find serious problems, fix them before continuing. Sometimes, beginners miss this check and only replace the pads, which can lead to uneven wear or noise later.
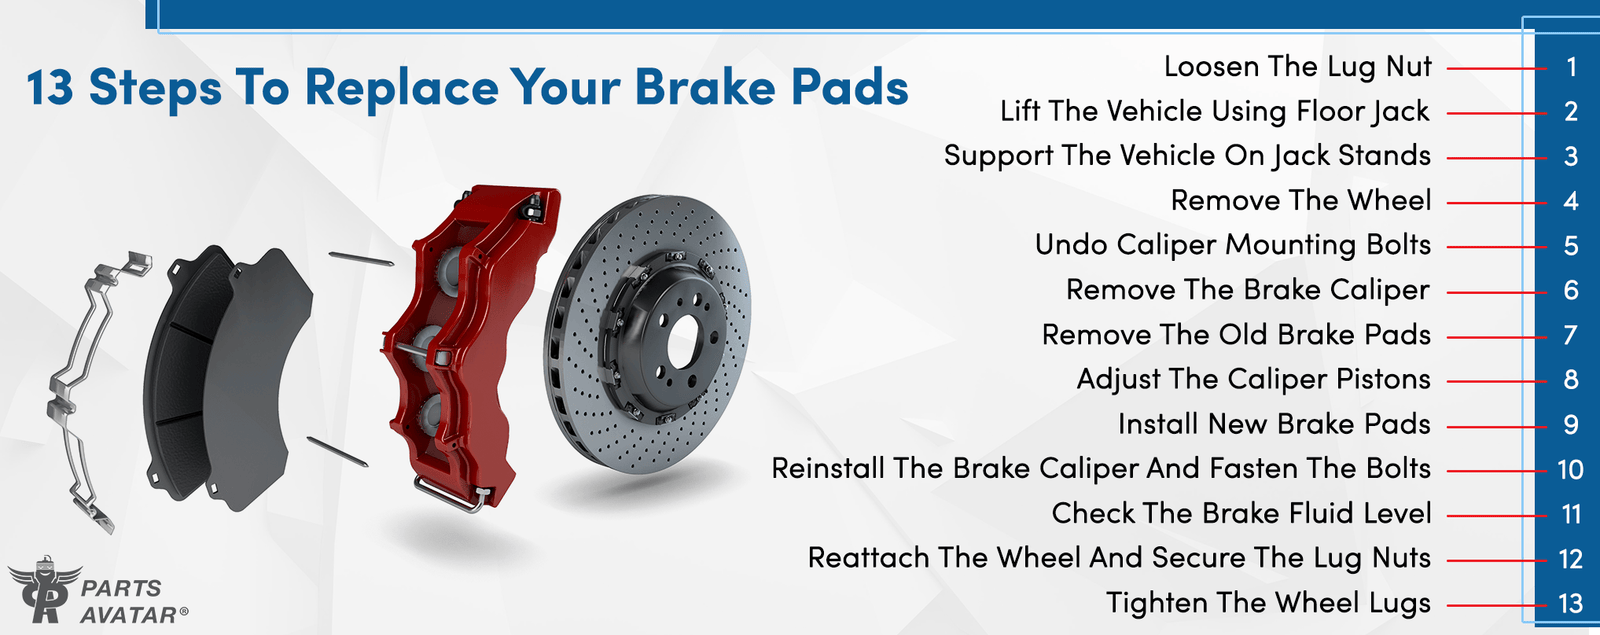
Credit: partsavatar.ca
Installing New Brake Pads
Installing new pads is straightforward, but go step by step:
- Compress the caliper piston. Use a C-clamp or brake tool to push the piston back into the caliper. This creates space for the new, thicker pads. Place the old pad against the piston, then tighten the clamp slowly.
- Apply brake grease. Put a thin layer on the back of the new pads and on contact points. This prevents squeaks.
- Insert the new pads. Slide them into the same position as the old ones. Make sure they’re seated fully and correctly.
- Reinstall the caliper. Fit it over the new pads and rotor. Align it carefully to avoid pinching the rubber boot on the piston.
- Tighten the bolts. Use your torque wrench to tighten to the manufacturer’s recommended setting. Overtightening can damage parts.
Here’s a simple comparison of common brake pad types:
| Pad Type | Performance | Cost | Noise Level |
|---|---|---|---|
| Ceramic | Excellent | High | Low |
| Semi-Metallic | Good | Medium | Medium |
| Organic | Fair | Low | High |
Choose the type that suits your driving style and budget.
Reassembling And Testing
Once the new pads and caliper are in place, you’re ready to put everything back together:
- Reinstall the wheel. Tighten the lug nuts by hand for now.
- Lower the car. Remove the jack stands and lower the car with the jack.
- Tighten lug nuts. Use a torque wrench to tighten to your car’s specification in a star pattern. This helps the wheel seat evenly.
- Press the brake pedal. Before driving, pump the pedal several times until it feels firm. This seats the pads against the rotors.
- Check brake fluid level. Top up if needed.
Before going on the road, test the brakes at low speed in your driveway. Listen for unusual noises and make sure the pedal feels normal.
Here is a comparison of the time and difficulty for DIY brake pad replacement on different car types:
| Vehicle Type | Approx. Time (per axle) | Difficulty (1-5) |
|---|---|---|
| Small sedan | 45-60 min | 2 |
| SUV | 60-90 min | 3 |
| Pickup truck | 75-120 min | 3 |
Plan your schedule so you don’t rush through the job.
Credit: www.youtube.com
Common Mistakes To Avoid
Changing brake pads is not hard, but beginners often make simple mistakes. Here are some to watch out for:
- Not supporting the caliper: Never let the caliper hang from the brake hose.
- Forgetting to pump the pedal: If you don’t, your brakes won’t work right away.
- Skipping rotor inspection: Worn rotors can ruin new pads quickly.
- Mixing up parts: Keep track of all bolts, clips, and springs.
- Not using a torque wrench: Guessing on bolt tightness can lead to parts coming loose or breaking.
Another common mistake is touching the pad friction surface with greasy hands. This can cause brake noise or poor performance.
Breaking In New Brake Pads
After installing new pads, it’s important to break them in, or “bed” them. This helps them work smoothly and last longer.
Here’s a simple break-in process:
- Make 5–6 stops from 30 mph to 10 mph, letting the brakes cool for a minute between each stop.
- Then make 2–3 harder stops from 40 mph to 15 mph.
- Avoid hard braking for the next 100 miles if possible.
This process helps transfer an even layer of pad material to the rotors, reducing noise and vibration.
When To Seek Professional Help
If you run into problems like stuck bolts, damaged hoses, or you feel unsure at any step, don’t hesitate to ask for help. Some vehicles (especially with electronic parking brakes or advanced safety systems) require special tools or steps. In these cases, professional service may be best.
Extra Tips For A Safe And Smooth Job
- Always work on one side at a time so you can use the other as a reference.
- If the weather is cold or wet, plan for extra time. Rust can make bolts harder to remove.
- Keep all tools and parts organized. A small tray helps.
- Check your owner’s manual for any special instructions for your car model.
If you want to read more about how brakes work or need further technical details, see this Wikipedia page on brakes.
Changing your own brake pads can feel intimidating at first, but each step builds your skill and confidence. With patience and attention to detail, you can do a safe and professional job. Don’t rush, and always put safety first.
Frequently Asked Questions
How Often Should I Change My Brake Pads?
Most brake pads last between 30,000 and 70,000 miles. The exact interval depends on your driving style, road conditions, and the pad material. Check them during regular maintenance or if you notice any warning signs.
Can I Change Brake Pads Without Special Tools?
You don’t need advanced tools, but a torque wrench and a C-clamp or brake caliper tool are important for safety and a good fit. Using the right tools makes the job easier and reduces the risk of mistakes.
What Happens If I Don’t Change Worn Brake Pads?
Driving with thin brake pads can damage the rotors, leading to expensive repairs. It also increases your stopping distance and can even cause brake failure in extreme cases.
Is It Safe To Drive Right After Changing Brake Pads?
Yes, but take it slow. Test your brakes at low speeds first. Remember to break in your new pads gently for the first 100 miles to ensure the best performance.
Do I Need To Replace Rotors Every Time I Change Pads?
Not always. If the rotors are smooth, within thickness limits, and not warped, you can keep them. If you see deep grooves or feel pulsing when braking, consider resurfacing or replacing them. Always inspect rotors during every pad change.
Changing brake pads is a practical skill that can save you money and give you more control over your car’s care. With good preparation and careful work, you can make your car safer in just an afternoon.
