Many car owners panic when they spot a crack in their plastic radiator tank. It’s easy to worry about expensive repairs or being stranded. But here’s some good news: with the right tools and steps, you can often repair a plastic radiator tank crack yourself. This not only saves money, but also helps you understand your vehicle better. If you’re not sure how to start, this guide will walk you through everything, from identifying the crack to making a lasting fix.
Understanding Plastic Radiator Tanks
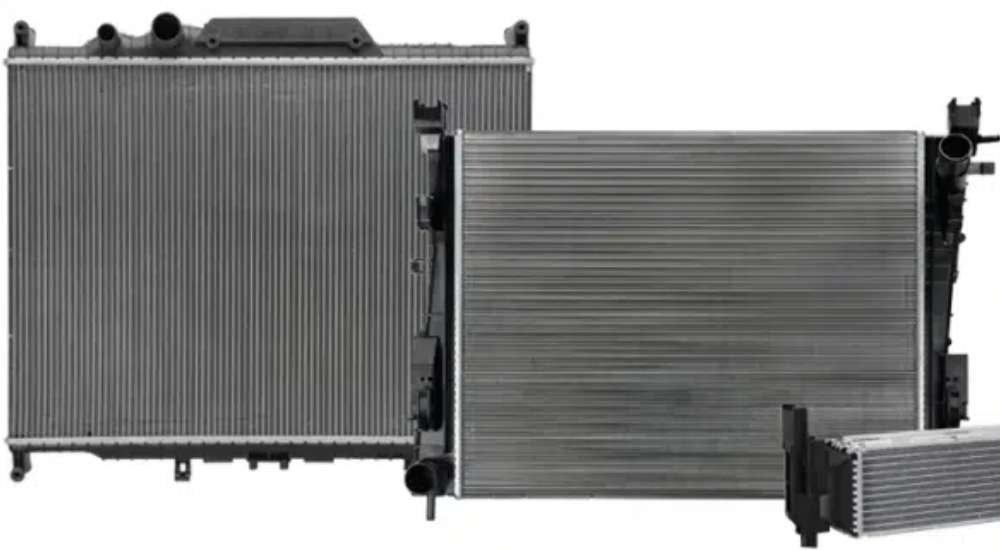
Modern cars use plastic radiator tanks because they are lightweight and cost less than metal. These tanks are molded from strong plastics like nylon-reinforced polyamide. They are attached to the aluminum core of the radiator. Over time, heat, vibration, and coolant chemicals cause the plastic to become brittle and sometimes crack.
A crack can lead to coolant leaks, overheating, and engine damage. Recognizing the signs early can save you from bigger problems.
Common Signs Of A Cracked Radiator Tank
- Coolant puddles under the car
- Steam from the engine bay
- Frequent overheating
- Low coolant warning on the dashboard
Ignoring these signs can result in serious engine trouble.
Why Do Plastic Radiator Tanks Crack?
Cracks in plastic radiator tanks can happen for several reasons:
- Heat cycling: The engine heats up and cools down repeatedly, making plastic expand and contract.
- Aging: After several years, even quality plastics lose flexibility.
- Vibration: Loose mounts or rough roads can stress the tank.
- Coolant type: Some coolants have chemicals that degrade plastic over time.
- Overtightening: Bolts and clamps that are too tight can crack the plastic.
- Freezing: In cold climates, water in the coolant can freeze and expand, cracking the tank.
Understanding the cause helps you prevent future cracks.
Tools And Materials Needed
Before you start, gather these items:
- Protective gloves and safety glasses
- Coolant catch pan
- Socket set or screwdriver
- Plastic welding kit or epoxy repair kit (for plastic tanks)
- Sandpaper (120 and 400 grit)
- Degreaser or rubbing alcohol
- Clean rags
- Distilled water and correct coolant
- Permanent marker
Optional but helpful:
- Drill with small bit (to stop crack from spreading)
- Plastic repair mesh (for large cracks)
- Zip ties or clamps
Having the right tools ready makes the repair smoother and safer.
Step-by-step Guide To Fixing A Plastic Radiator Tank Crack
1. Let The Engine Cool Down
Never open the radiator cap or work on the cooling system when the engine is hot. Wait at least one hour after driving.
2. Locate And Assess The Crack
Open the hood and check the radiator tank carefully. Use a clean rag to wipe away any coolant and mark the crack with a permanent marker. Check the size—if the crack is longer than 2–3 inches or the tank is badly warped, replacement may be safer.
3. Drain The Coolant
Position a catch pan under the radiator. Open the drain plug or remove the lower hose to drain the coolant. This prevents spills and gives you a clean, dry area for repair.
4. Clean And Prepare The Area
Scrub the cracked area with degreaser or rubbing alcohol and a rag. Dirt, oil, or old coolant will stop the repair from sticking.
For better results:
- Sand the area around the crack (1 inch on each side) with 120-grit sandpaper.
- Wipe away dust with a clean, dry rag.
5. Stop The Crack From Spreading
If the crack is growing, use a drill with a 1/16” bit to make a small hole at each end of the crack. This prevents further spreading.
6. Choose Your Repair Method
There are two main ways to repair a plastic radiator tank crack:
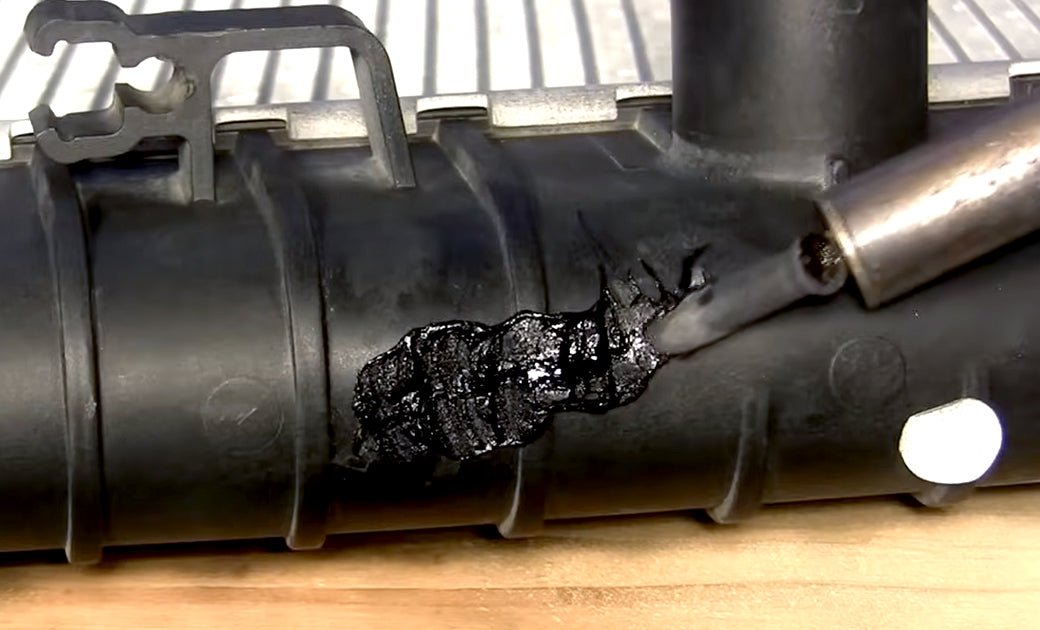
A. Plastic Welding
This method melts the plastic back together for a strong, permanent fix.
- Plug in the plastic welding kit and let it heat up.
- Use the tip to gently melt along the length of the crack.
- For larger cracks, press a plastic mesh into the melted area, then add more melted plastic over it.
- Smooth the surface with the tool.
- Let it cool completely.
B. Epoxy Or Plastic Repair Kit
Epoxy is easier for beginners and works well on small to medium cracks.
- Mix the two-part epoxy as directed.
- Apply it over the crack and press in a repair mesh if needed.
- Spread the epoxy at least 1 inch beyond the crack on all sides.
- Let it cure (usually 1–2 hours, but check instructions).
7. Inspect And Reassemble
After the repair hardens:
- Sand the area lightly with 400-grit sandpaper for a smooth finish.
- Check for missed spots or leaks.
- Reattach any hoses or parts you removed.
8. Refill Coolant And Test
- Fill the radiator with the proper mix of distilled water and coolant.
- Start the engine and let it run until warm.
- Watch for leaks and check coolant level again after the engine cools.
Important: Dispose of used coolant safely—it is toxic to people and animals.
When To Replace, Not Repair
Sometimes repairing is not enough. Consider replacing the radiator tank if:
- The crack is longer than 3 inches
- The plastic is very brittle or pieces are missing
- You see cracks in multiple areas
- The tank has warped from overheating
A weak tank can fail without warning, risking engine damage.
Cost Comparison: Repair Vs. Replacement
Here’s a look at typical costs involved.
| Option | Typical Cost | Time Needed | Durability |
|---|---|---|---|
| DIY Plastic Welding | $30 – $60 | 1-2 hours | High |
| Epoxy Repair Kit | $10 – $25 | 1 hour | Medium |
| Professional Shop | $100 – $300 | 1 day | High |
| Radiator Replacement | $200 – $600 | 2-4 hours | Very High |
Small cracks are usually worth repairing. For larger or repeated cracks, replacement is the safer investment.
Common Mistakes And How To Avoid Them
Many DIYers make small errors that lead to repeat leaks or wasted effort. Watch out for these:
- Skipping surface prep: Failing to clean and sand the area stops the repair from bonding.
- Working on a hot engine: Hot parts can cause burns or make epoxy cure incorrectly.
- Using the wrong epoxy: Not all glues work with high heat—only use products made for radiator repair.
- Not stopping the crack: If you don’t drill a hole at each end, the crack may grow, even after repair.
- Ignoring coolant choice: Using plain water or old coolant can speed up future damage.
Tips For A Lasting Repair
- Always use gloves and eye protection.
- Take your time preparing the surface.
- Allow full cure time, even if you’re in a hurry.
- Check for small leaks after your first drive.
- Carry extra coolant in your car for a few days, just in case.

Credit: www.youtube.com
Alternative Temporary Fixes
If you’re stuck and need to drive before a full repair, these can help:
- Radiator sealant: Poured into the radiator, it may stop small leaks temporarily.
- Duct tape: Wrap tightly over the crack for a short drive—but replace with a real repair as soon as possible.
- Super glue: Can seal tiny cracks for a day or two, but will fail with heat and pressure.
These are only for emergencies. Do a proper repair as soon as possible.
How To Prevent Future Cracks
Prevention is better than repair. Here’s what you can do:
- Check coolant levels regularly. Low coolant increases heat stress.
- Use the right coolant for your car type—check the owner’s manual.
- Inspect hoses and mounts for looseness or vibration.
- Flush the cooling system every 2–3 years to remove old chemicals.
- Avoid sudden temperature changes (like adding cold water to a hot engine).
These steps make your radiator last longer and reduce the chance of cracks.
Credit: natrad.com.au
Plastic Radiator Tank Repair Methods Compared
To help you choose, here’s a side-by-side comparison:
| Method | Skill Level | Best For | Limitations |
|---|---|---|---|
| Plastic Welding | Intermediate | Medium to large cracks | Needs special tool |
| Epoxy Repair | Beginner | Small cracks | Not for high-pressure leaks |
| Radiator Sealant | Beginner | Emergency only | Temporary, may clog system |
| Replacement | Professional | Severe or large cracks | Expensive, time-consuming |
Choosing the right method increases repair success and saves money.
Real-world Example
A 2012 Toyota Corolla owner noticed coolant drops under the car. On inspection, there was a 1.5-inch crack on the radiator tank. Using a plastic epoxy kit, he:
- Drained the coolant
- Cleaned and sanded the area
- Applied the epoxy and let it cure overnight
The repair lasted two more years until the radiator was eventually replaced. This shows that, with proper steps, DIY fixes can work well for small cracks.
Additional Resources
If you want to learn more about cooling system repairs, you can check the in-depth guides on Wikipedia. It covers how radiators work and why maintenance matters.
Frequently Asked Questions
What Type Of Epoxy Should I Use For A Plastic Radiator Tank?
Choose a high-temperature, plastic-compatible epoxy. Check that it is rated for at least 250°F (120°C) and works with automotive plastics. Most radiator repair kits at auto stores are suitable.
How Long Will A Repaired Crack Last?
If done well, epoxy repairs can last 1–2 years on small cracks. Plastic welding may last longer. But for large cracks, it’s best to plan for replacement soon.
Is It Safe To Drive With A Cracked Radiator Tank?
It’s risky. Even a small crack can get bigger fast, leading to overheating and engine damage. Do a temporary fix only to reach a repair shop.
Can I Use Super Glue Or Silicone Instead Of Epoxy?
Super glue and silicone are not strong enough for the high heat and pressure in a radiator tank. Use products made for radiator repair for safety.
How Do I Know If I Need To Replace The Radiator Instead Of Repairing?
Replace the radiator if the crack is longer than 3 inches, the plastic is brittle, or you see multiple cracks. If repairs keep failing, replacement is safer and more reliable.
Repairing a plastic radiator tank crack is a valuable skill for car owners. With good tools and careful steps, you can save money and avoid breakdowns. If you’re ever unsure, ask a trusted mechanic for help. Taking care of your radiator means a healthier engine and fewer surprises on the road.
Credit: www.polyvance.com
