Installing a car battery isolator for a dual battery setup can transform your vehicle’s electrical system. Whether you’re an adventurer, a camper, or someone who uses power tools on the go, having a dual battery system helps you run accessories without draining your main battery.
However, the process can feel complex, especially if you haven’t done much auto wiring before. This guide walks you through the steps, giving you practical advice, clear steps, and tips to make the installation smooth and safe.
Why Install A Car Battery Isolator For Dual Batteries?
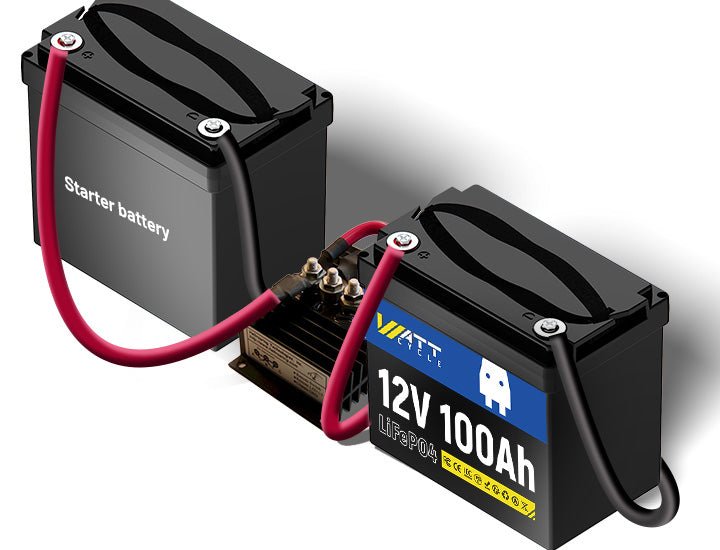
A car battery isolator is a device that lets you charge a secondary (auxiliary) battery from your vehicle’s alternator, while keeping it isolated from your main (starter) battery. This means you can use the auxiliary battery for fridges, lights, or inverters without risking a dead starter battery.
A dual battery system is common in:
- Off-road vehicles
- Camper vans
- Boats
- Work trucks
Without an isolator, both batteries could drain together, leaving you unable to start your engine. With an isolator, the main battery stays protected.
Types Of Battery Isolators
Choosing the right isolator matters. There are three main types:
| Type | Main Feature | Best Use |
|---|---|---|
| Solenoid (Mechanical) | Uses a relay to connect/disconnect batteries | Budget installs, older vehicles |
| Diode (Solid State) | Prevents current backflow, no moving parts | Boats, classic cars |
| Voltage Sensitive Relay (VSR) | Automates connection based on voltage | Modern cars, 4WD, RVs |
Non-obvious insight: Many beginners pick the cheapest isolator, but the best choice depends on your vehicle’s alternator and how much power you need.
Tools And Materials Needed
Before starting, gather all the tools and materials. Missing a tool mid-way can slow you down or lead to mistakes.
- Battery isolator (type suitable for your vehicle)
- High-quality battery cables (AWG size suitable for your current draw, usually 4 or 6 AWG)
- Cable lugs and crimping tool
- Fuse holders and fuses (usually 50–100A, check your isolator’s specs)
- Heat shrink tubing and electrical tape
- Socket set, screwdrivers, wire cutters, and pliers
- Multimeter
- Zip ties or cable clamps
- Protective gloves and safety glasses
Extra tip: Use marine-grade cables if you live in a humid or salty environment. They last longer and resist corrosion.
Planning The Installation
Think before you start. Plan your battery locations, cable routes, and fuse placements.
- Choose battery locations: The main battery stays in the engine bay. The auxiliary battery often goes in the cargo area, under a seat, or in a custom tray. The closer the two batteries, the less voltage drop, but safety and space come first.
- Check cable lengths: Measure the distance and add a little extra for flexibility.
- Fuse placement: Always put a fuse as close as possible to each battery’s positive terminal. This protects against short circuits.
- Plan cable routing: Keep cables away from sharp edges, hot surfaces, and moving parts.
Non-obvious insight: Not all fuse holders are equal. Use waterproof, vibration-resistant holders for under-hood applications.
Step-by-step Guide To Installing A Car Battery Isolator Dual Battery
Follow these steps to complete your installation. Take your time and double-check each connection.
1. Disconnect The Main Battery
Start by disconnecting the negative terminal of your starter battery. This prevents accidental shorts and protects you from electric shock.
2. Mount The Battery Isolator
Find a secure, dry spot near the main battery or fuse box for your isolator. It should be away from excessive heat and moisture. Secure it with screws, using rubber grommets if mounting on metal to reduce vibration.
3. Install The Auxiliary Battery
- Secure the auxiliary battery in its tray. Use proper hold-down clamps.
- If inside the cabin, use a sealed battery box to contain gases and prevent spills.
4. Run Cables Between Batteries And Isolator
- Cut cables to length, leaving some slack for movement.
- Crimp cable lugs on the ends, and cover the joints with heat shrink tubing.
- Run a positive cable from the main battery’s positive terminal to the “input” side of the isolator.
- Run another positive cable from the isolator’s “output” to the auxiliary battery’s positive terminal.
- Secure the cables along their path with zip ties or clamps.
| Cable | From | To | Fuse Location |
|---|---|---|---|
| Main battery to isolator | Main battery (+) | Isolator input | Near main battery (+) |
| Isolator to auxiliary battery | Isolator output | Auxiliary battery (+) | Near auxiliary battery (+) |
5. Ground Both Batteries
- Use thick black cable (same gauge as positive) to connect each battery’s negative terminal to a solid chassis ground.
- Clean the grounding point to bare metal for best contact.
- If possible, run a ground cable between both batteries for extra reliability.
6. Install Fuses
- Place an inline fuse holder within 10–20 cm of each battery’s positive terminal.
- Choose fuse sizes that match your isolator and expected current draw. For most setups, 60A or 100A fuses work well.
7. Connect Control Wires (if Required)
Some isolators (especially solenoid types) need a signal wire from the ignition or alternator. Follow the isolator’s wiring diagram:
- Run the control wire (often a thin blue or yellow wire) to an ignition-switched power source.
- Use an add-a-fuse adapter if tapping into the fuse box.
- Secure the wire and avoid sharp bends.
Extra tip: Label your wires as you go. It saves confusion later.
8. Double-check All Connections
Before reconnecting the batteries, use a multimeter to test continuity and check for shorts. Make sure all connections are tight and covered.
9. Reconnect The Main Battery
Reconnect the negative terminal of the main battery. Be prepared for a small spark, but if it’s large or you hear a pop, stop and check for errors.
10. Test The System
- Start the engine and measure voltage at both batteries.
- The isolator should connect the auxiliary battery once the engine runs and alternator voltage rises (usually above 13.2V).
- Turn on your accessories (like a fridge or inverter) from the auxiliary battery and confirm the main battery remains unaffected.
- If using a VSR, you should hear a click when it engages.
Practical Tips For A Reliable Installation
- Use quality parts. Cheap cables or connectors can cause voltage drop or fires.
- Keep cables short. Long runs mean more resistance. Use the shortest practical path.
- Protect cables. Use split loom or conduit in the engine bay.
- Check alternator output. Most car alternators can handle a second battery, but if you run heavy loads, upgrade your alternator.
- Avoid common mistakes:
- Skipping fuses or using the wrong size
- Poor ground connections
- Placing the auxiliary battery in a spot with poor ventilation

Credit: www.dfna.info
Troubleshooting Common Problems
If your system isn’t working as expected, try these checks:
- Isolator not engaging: Check the control wire and ignition source. Verify battery voltages.
- Auxiliary battery not charging: Inspect all fuses and cable connections.
- Main battery draining: You may have wired the isolator incorrectly, or the isolator is faulty.
- Corrosion at terminals: Clean and apply dielectric grease.
Maintenance For Dual Battery Systems
Routine checks keep your system safe and reliable:
- Inspect all connections every few months.
- Clean terminals and grounding points.
- Check fuses for signs of heat or corrosion.
- Replace damaged cables immediately.
Pro tip: Consider installing a battery monitor for your auxiliary battery. It helps prevent over-discharge, which shortens battery life.
Example: Installing A Vsr Isolator In A 4wd
Let’s say you have a Toyota Hilux and want to install a VSR isolator. You mount the isolator near the main battery, run 4 AWG cable to the rear (where your auxiliary battery sits in a battery box), install 100A fuses, and connect your fridge and lights to the auxiliary battery.
The VSR automatically joins both batteries when the engine runs, and disconnects when the engine is off. This setup lets you camp for several days without worrying about starting your engine.
When To Seek Professional Help
While many car owners can do this job, you should get help if:
- You’re uncomfortable with wiring or using tools
- Your vehicle has complex electronics (like CAN bus systems)
- You need to pass local safety inspections
A certified auto electrician can make sure everything meets safety standards.
Credit: www.wattcycle.com
Useful Resources
For more technical details and wiring diagrams, the Wikipedia page on battery isolators gives a clear technical background.
Frequently Asked Questions
What Size Cable Should I Use For A Dual Battery Isolator?
Use 4 AWG or 6 AWG cable for most setups up to 100A. If your cable runs are longer than 5 meters or you have high current draw, choose thicker (lower AWG number) cable to reduce voltage drop.
Can I Use A Regular Relay Instead Of A Battery Isolator?
While you can use a heavy-duty relay, it won’t protect against backflow or voltage differences as well as a proper isolator. Modern VSR isolators are safer and more reliable for most users.
Do I Need To Upgrade My Alternator For A Dual Battery Setup?
Most standard alternators can handle a second battery and light accessories. If you plan to run high-power inverters or fridges for long periods, check your alternator’s output and consider upgrading to avoid slow charging or alternator strain.
Will A Battery Isolator Drain My Main Battery?
A properly installed isolator will not drain your main battery. It keeps the auxiliary battery separate when the engine is off, so only the auxiliary battery is used for accessories.
How Do I Know If My Isolator Is Working?
Start your engine and use a multimeter to check voltage at both batteries. When the engine is running, both batteries should read around 13.5–14.2V. When the engine is off, only the main battery should show a higher voltage if it’s fully charged.
A well-installed car battery isolator dual battery setup gives you the freedom to use power on the go without worrying about being stranded. Take your time, follow safety steps, and you’ll enjoy reliable power wherever your adventures take you.
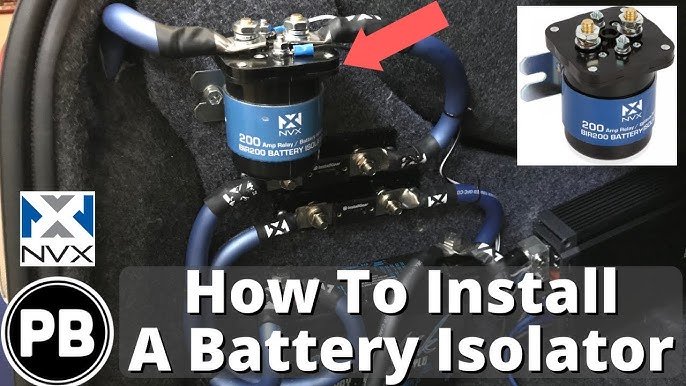
Credit: www.youtube.com
