Installing a car grille guard, also known as a bull bar, is one of the best ways to protect the front of your vehicle from damage. Whether you drive off-road, live in areas with a lot of wildlife, or just want a tougher look for your SUV or truck, a bull bar offers both style and function. Many vehicle owners hesitate because they think installation is difficult or needs professional help. The truth is, with the right tools and clear guidance, most people can install a bull bar at home—often in just a few hours.
This guide will walk you through every step, from understanding the parts to finishing the installation. You’ll learn what to prepare, how to avoid common mistakes, and get tips that even many experienced DIYers overlook. By the end, you’ll have the confidence to install a bull bar on your own, save money, and enjoy better protection for your car.
What Is A Car Grille Guard Bull Bar?
A bull bar is a metal bar attached to the front of a vehicle, usually made from steel or aluminum. Its main job is to protect the grille, radiator, and engine parts from impacts, especially during low-speed collisions, animal strikes, or when driving off-road. Bull bars also add a rugged appearance and can serve as a mounting point for accessories like lights and winches.
Benefits Of Installing A Bull Bar
- Front-end protection from minor accidents, rocks, and debris
- Better safety for the vehicle’s critical components
- Extra mounting options for lights or antennas
- Boosted style and a tougher, off-road look
Tools And Materials You’ll Need
Getting the right tools ready before you start saves time and reduces frustration. Here’s what you’ll need for most bull bar installations:
- Socket wrench set (metric and standard sizes)
- Ratchet and extensions
- Open-end and box-end wrenches
- Screwdrivers (flathead and Phillips)
- Torque wrench (for precise tightening)
- Measuring tape
- Marker or chalk
- Protective gloves and safety glasses
- Bull bar kit (with all included brackets, bolts, and instructions)
- Jack and jack stands (if extra ground clearance is needed)
Pro tip: Some vehicles may require special brackets or adapters. Always check your vehicle’s make and model compatibility before purchasing a bull bar.
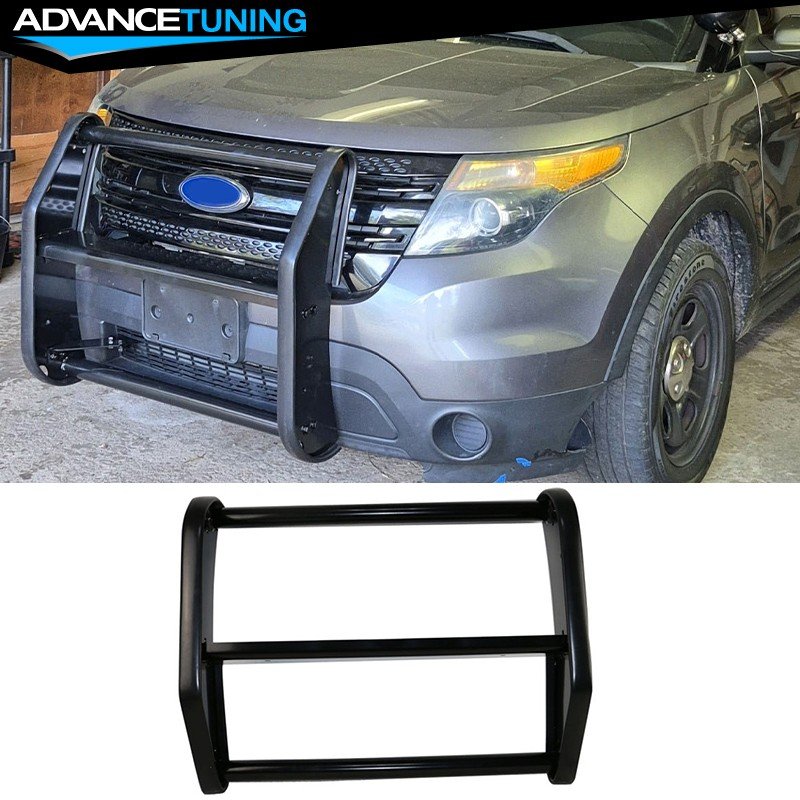
Credit: www.ebay.com
How To Prepare Your Vehicle
Proper preparation makes the installation smoother and helps avoid mistakes that could damage your car. Follow these steps:
- Park on a flat surface and engage the parking brake.
- Turn off the ignition and remove the keys.
- Check the bull bar kit and make sure all parts are present.
- Read the manufacturer’s instructions. Even if you follow this guide, some kits have unique steps.
- Remove license plates and any front-end accessories that may be in the way.
Checking For Compatibility
Some vehicles have airbag sensors, adaptive cruise control, or parking sensors in the front bumper. Installing a bull bar may affect these systems. If you’re not sure, check the owner’s manual or contact the manufacturer.
Step-by-step Bull Bar Installation
Here’s a detailed, experience-based guide to installing a car grille guard bull bar. Most installations take between 1. 5 to 3 hours.
1. Locate Mounting Points
Bull bars usually mount to the chassis or frame rails, not just the bumper. These are the strongest points and will hold the extra weight. Look for pre-drilled holes or brackets near the lower front of your car. On many trucks and SUVs, these are close to the tow hooks.
Beginner Insight: Some vehicles may have plastic covers or splash guards hiding the mounting points. You may need to remove these first.
2. Remove Tow Hooks Or Covers
If your vehicle has tow hooks where the bull bar mounts, you may need to remove them. Use the correct size socket or wrench and keep the bolts—you may reuse them.
Non-obvious tip: Take a photo of the area before removing parts. This makes it easier to reassemble if you get stuck.
3. Assemble The Mounting Brackets
Lay out all the brackets and hardware included in the kit. Connect the mounting brackets as described in your bull bar’s instructions, but do not fully tighten the bolts yet. The brackets should be loose enough to allow adjustment.
4. Attach Mounting Brackets To Vehicle
Align the brackets with the chassis mounting points. Insert the bolts and hand-tighten them. Make sure both sides are even. Use the measuring tape to check that the brackets are at the same height from the ground.
Real-world advice: If the holes don’t line up, don’t force them. Double-check the bracket orientation. Sometimes flipping a bracket solves the problem.
5. Position The Bull Bar
With the help of a friend (bull bars can be heavy), lift the bull bar into place and line it up with the mounting brackets. Insert the bolts through the bull bar and into the brackets. Hand-tighten the nuts.
Safety tip: Always wear gloves while handling metal parts to avoid cuts.
6. Align And Adjust
Step back and make sure the bull bar is centered and level. Adjust as needed by loosening and moving the brackets. Check the distance from the bull bar to the grille. There should be a small gap (usually about 1 inch) to prevent rubbing when the vehicle flexes.
7. Tighten All Fasteners
Once you’re satisfied with the position, use the torque wrench to tighten all bolts to the manufacturer’s recommended torque. This step is important for safety and to prevent the bull bar from loosening over time.
8. Reinstall Accessories
Put back any parts you removed, like license plates, parking sensors, or splash guards. If the bull bar blocks your license plate, you may need a relocation bracket (often included in the kit).
9. Check For Clearance And Function
Turn the steering wheel fully left and right. Make sure the bull bar does not touch the tires or interfere with the bumper. If you have front sensors or cameras, test them to confirm they work correctly.
Another beginner insight: After driving for about a week, re-check all bolts. Vibrations can sometimes loosen new hardware.
Comparison: Steel Vs. Aluminum Bull Bars
Choosing the right material is important for durability, weight, and cost. Here is a quick comparison:
| Feature | Steel Bull Bar | Aluminum Bull Bar |
|---|---|---|
| Weight | Heavier (30-50 lbs) | Lighter (15-30 lbs) |
| Strength | Very strong, high impact resistance | Strong, but less than steel |
| Corrosion Resistance | Needs coating to avoid rust | Excellent, naturally resists rust |
| Price | Lower to moderate | Usually higher |
Common Mistakes To Avoid
Many first-time installers make small mistakes that can lead to bigger problems. Here’s what to watch for:
- Overtightening bolts: This can strip threads or crack brackets.
- Incorrect bracket placement: Always double-check the orientation.
- Blocking sensors or lights: Some bull bars block front parking sensors or fog lights. Test everything after installation.
- Skipping the torque wrench: Hand-tightening is not enough for safety.
- Not re-checking bolts: Vibrations can loosen hardware over time.
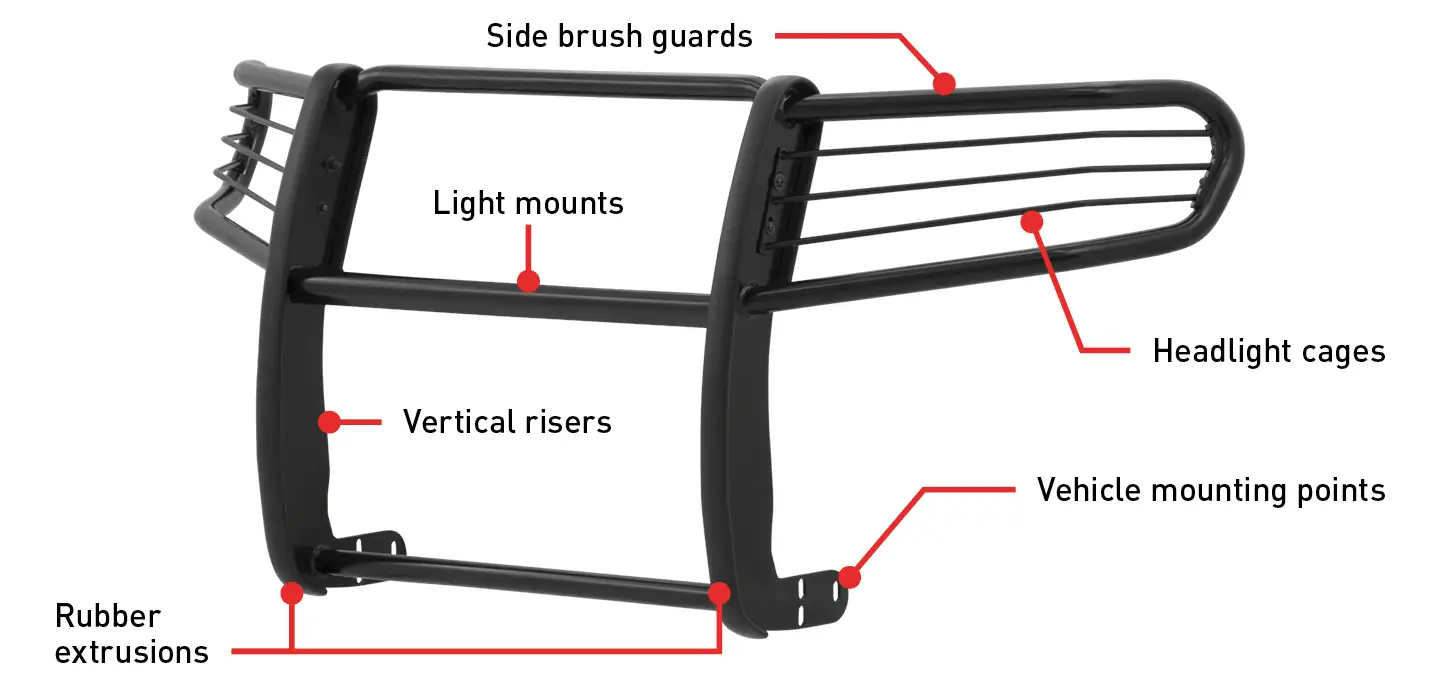
Credit: www.ariesautomotive.com
Bull Bar Feature Comparison
If you’re still deciding which bull bar to buy, focus on these features:
| Feature | Why It Matters | What to Look For |
|---|---|---|
| Material | Impacts weight, durability | Steel for strength, aluminum for lightness |
| Finish | Prevents rust, affects look | Powder coating or chrome plating |
| Mounting system | Ease of installation | Vehicle-specific for best fit |
| Accessory mounts | For lights, winch, etc. | Pre-drilled holes or tabs |
After Installation: Maintenance And Safety Tips
A bull bar is designed to last, but a little care keeps it looking good and working well.
- Check bolts every 3-6 months for tightness.
- Clean regularly to remove mud, salt, and dirt, especially after off-road use.
- Inspect for rust or damage—touch up scratches with paint or coating.
- Watch for changes in vehicle handling. If you notice pulling or vibrations, re-check the installation.
Expert tip: If you plan to add a winch or heavy lights, make sure your bull bar and brackets are rated for the extra weight.
Real-world Example: Installing A Bull Bar On A Toyota Hilux
Let’s look at a quick example. The owner of a Toyota Hilux wanted to install a steel bull bar for off-road trips. He followed these steps:
- Removed the front tow hooks and plastic guard.
- Assembled the mounting brackets and attached them to the chassis using the factory bolt holes.
- With a friend, lifted the bull bar and aligned it with the brackets.
- Adjusted for even spacing and tightened all bolts to 60 Nm using a torque wrench.
- Checked that the bar did not block the headlights or sensors.
- After a week of driving, he re-checked all bolts and found one slightly loose—a quick fix.
This shows that even with little experience, careful following of instructions leads to a safe and secure installation.
When To Get Professional Help
While most people can install a bull bar with basic tools, there are times when it’s better to seek a professional:
- Complex wiring: If you plan to connect fog lights or sensors to the bull bar.
- Modifying airbag sensors: Some vehicles require special knowledge to avoid safety risks.
- Heavy-duty models: Very large or custom bull bars may need welding or advanced fitting.
Trusted Resources
For more detailed vehicle-specific guides, visit the Wikipedia Bull Bar page. Always check your car’s manual and the bull bar manufacturer’s instructions.
Frequently Asked Questions
How Long Does It Take To Install A Bull Bar?
Most bull bar installations take between 1. 5 and 3 hours, depending on your experience and the complexity of your vehicle. First-timers should plan for the longer end of that range.
Do I Need To Drill Holes In My Car To Fit A Bull Bar?
Many bull bars are designed to fit existing holes in your vehicle’s chassis, so drilling is often not required. However, some models or older vehicles may need extra holes—always check before starting.
Will Installing A Bull Bar Affect My Airbags?
If not installed properly, a bull bar can interfere with airbag sensors. Choose a bull bar made for your vehicle and follow the instructions exactly. If unsure, ask a professional.
Can I Install A Bull Bar If My Car Has Front Sensors Or Cameras?
It depends on your vehicle and the bull bar design. Some bull bars are made to work with sensors and cameras, while others may block them. Test all systems after installation.
How Much Weight Does A Bull Bar Add To My Car?
A typical steel bull bar adds 30-50 lbs (14-23 kg), while aluminum models are lighter, adding 15-30 lbs (7-14 kg). Always consider the extra weight, especially if carrying heavy loads or off-roading.
Installing a car grille guard bull bar is a great way to protect your vehicle and boost its appearance. With careful planning and attention to detail, most people can complete the installation at home. Remember to check all bolts regularly and enjoy your new, rugged look on the road.
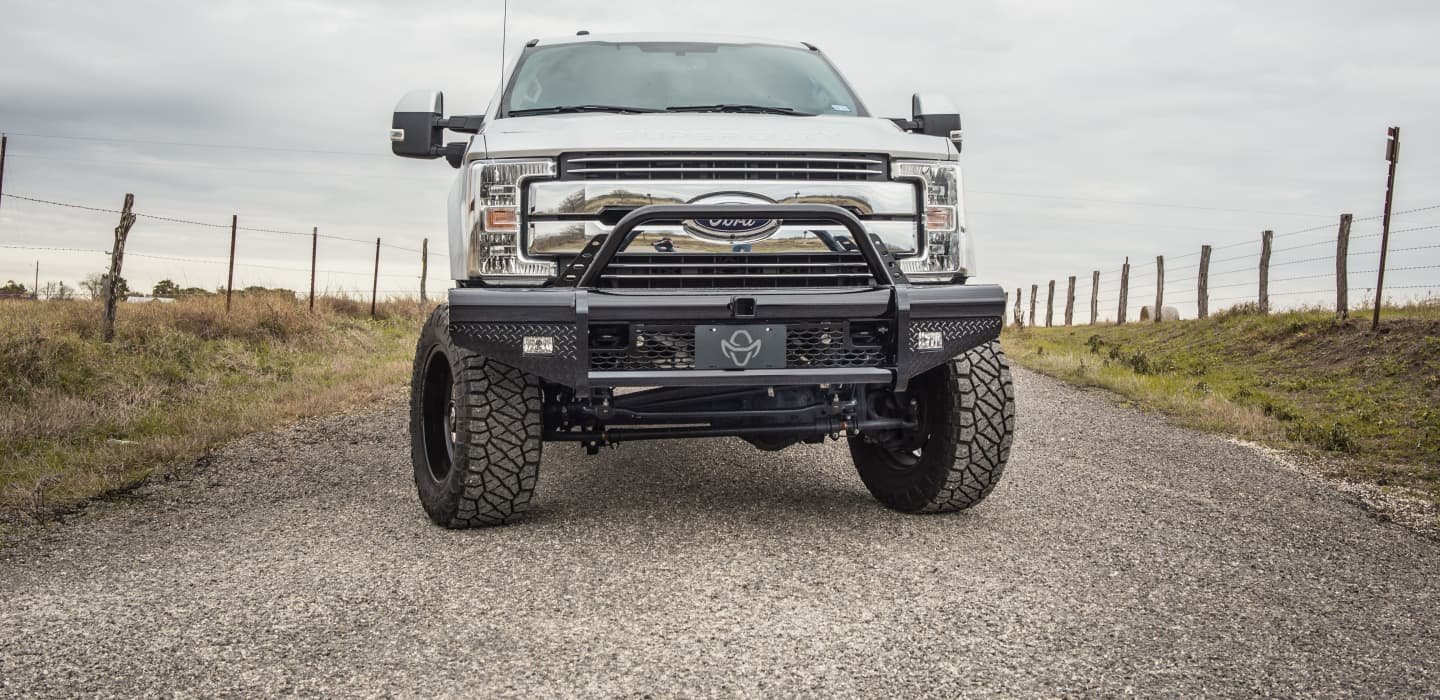
Credit: www.ranchhand.com
