Car interior lighting can completely change the look and feel of your vehicle. Many car owners want to add a modern touch or extra visibility without spending a lot at a shop. Installing LED interior lights yourself is a popular upgrade—it’s affordable, stylish, and not as hard as you might think. With the right tools and guidance, you can finish this project in a few hours, even if you’re not an expert in electronics.
This guide will walk you through everything you need to know about installing car LED interior lights yourself. You’ll learn which lights to choose, how to plan your installation, the tools you’ll need, and how to wire everything safely. I’ll also share useful tips and highlight mistakes that many beginners make, so you can avoid them.
By the end, you’ll be ready to transform your car’s cabin with confidence.
Understanding Car Led Interior Lights
Before you start, it’s important to know what LED interior lights are and why they’re popular. LEDs (Light Emitting Diodes) are small, energy-efficient lights that last a long time and produce little heat. They come in many colors and styles—some are simple bulbs, while others are flexible strips with color-changing features.
People choose LED lights for their cars because:
- They use less power than standard bulbs.
- LEDs last up to 25,000–50,000 hours, compared to 1,000–2,000 for regular bulbs.
- They can be installed almost anywhere inside the car.
- Many options offer remote control, smartphone apps, or sound-activated modes.
Common places for LED installation include footwells, under seats, door panels, dashboards, and ceilings.
Choosing The Right Led Interior Lights
Selecting the right LED kit is the foundation of a successful project. Not all lights are created equal, and the wrong choice can lead to frustration or even electrical problems.
Key Factors To Consider
- Voltage: Most car electrical systems are 12V. Always confirm that your LED lights are compatible with 12V systems.
- Color Options: Decide if you want single-color lights or RGB (color-changing) LEDs. RGB kits usually cost more but offer more flexibility.
- Control Method: Options include manual switches, remotes, or smartphone apps. App-controlled kits can sync with music or allow custom colors.
- Waterproofing: If you plan to install lights in areas that may get wet, such as footwells, make sure your lights are water-resistant.
- Brightness: Some LEDs are very bright. Check the lumen rating and choose a level that’s comfortable for your eyes.
- Size and Flexibility: LED strips are more flexible and fit tight spaces, while bulb replacements are best for dome or map lights.
Comparing Popular Led Kit Types
Here’s a quick comparison of the three most common types of car LED interior lights:
| Type | Features | Best For | Price Range |
|---|---|---|---|
| LED Bulbs | Simple, plug-and-play | Dome/map light replacement | $5–$20 |
| LED Strips | Flexible, color options | Footwells, under-dash, doors | $10–$40 |
| Fiber Optic Kits | Edge-lit, subtle glow | Dashboard, door trim | $20–$60 |
Non-obvious insight: Some cheap LED kits can cause radio interference or flicker due to poor circuit design. It’s worth reading reviews and choosing a brand with quality control.
Tools And Materials You’ll Need
Gathering the right tools and supplies before you start will save you time and stress. Here’s what you’ll need for most DIY LED installations:
- LED light kit (strips, bulbs, or fiber optics, as chosen)
- 12V car fuse tap or add-a-circuit adapter (for safe power connection)
- Wire strippers
- Crimp connectors or soldering iron (for secure wire joins)
- Electrical tape or heat shrink tubing
- Trim removal tools (plastic tools that won’t damage panels)
- Multimeter (to check voltages and connections)
- Zip ties or adhesive clips (for neat cable management)
- Alcohol wipes (to clean surfaces before sticking LEDs)
- Owner’s manual (to find fuses and wiring diagrams)
Optional but helpful: A headlamp, gloves, and a friend to hold things or check lights during the process.
Planning Your Installation
Rushing into installation can lead to messy results or even damage. Spend a little time planning where each LED will go, how you’ll run wires, and where you’ll connect to power.
Mapping Out Your Layout
- Decide on LED Locations: Most people install strips under the dashboard (for footwell lighting), under seats, or along door panels. Mark these spots with painter’s tape.
- Measure Lengths: Use a tape measure to check how much LED strip you’ll need for each area.
- Plan Power Source: The safest power source is usually the fuse box, using a fuse tap. Some people use the cigarette lighter socket, but this can leave wires visible or interfere with other devices.
- Route Wires Carefully: Plan to hide wires behind panels and under carpets. Avoid running wires near airbags, moving parts, or sharp edges.
- Test Fit Everything: Before sticking down LEDs, loosely lay them out and connect to power to check lengths and placement.
Non-obvious insight: Avoid connecting too many lights to one circuit. Overloading a fuse can cause it to blow or damage wiring. Check the total current draw of your LEDs and use the right fuse rating.
Credit: us.govee.com
Step-by-step Installation Guide
Now, let’s get into the actual process. These steps cover a typical LED strip or flexible kit install, which is the most common DIY upgrade.
1. Disconnect The Car Battery
Safety first. Disconnect the negative terminal of your car battery before working with electrical systems. This prevents accidental shorts and protects you from shocks.
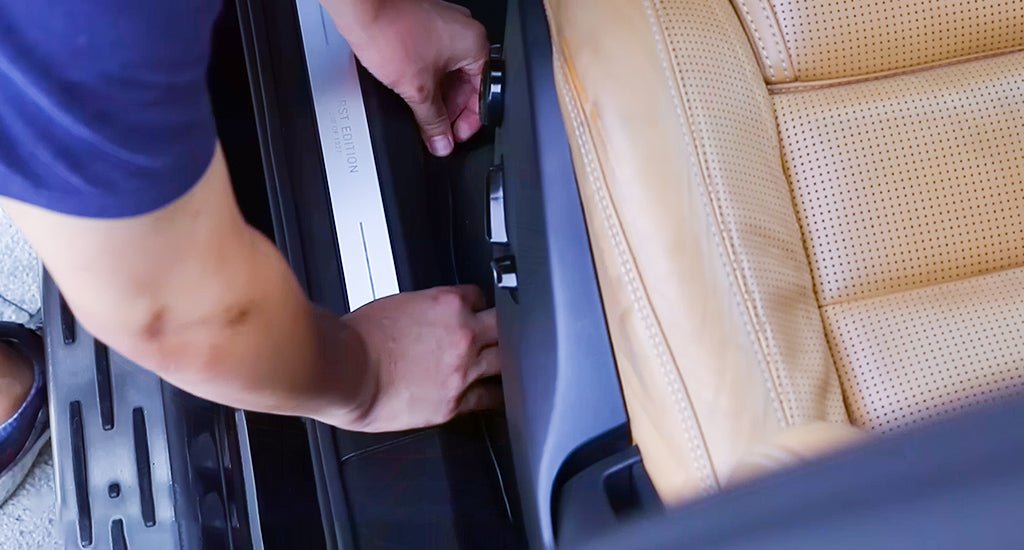
2. Remove Interior Trim (if Needed)
Use trim removal tools to gently pop off panels where you’ll hide wires or mount LEDs. Be patient—forcing panels can crack them. Keep screws and clips in a small container so you don’t lose them.
3. Prepare Mounting Surfaces
Clean the areas where you’ll stick LED strips with alcohol wipes. Dirt or grease will prevent adhesive from sticking properly, and your lights could fall off later.
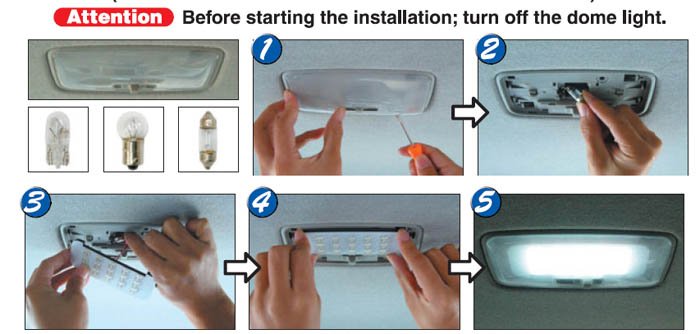
4. Install The Led Strips
Peel the adhesive backing off each strip, then press firmly onto the cleaned area. For best results, apply pressure for 30 seconds. If your kit uses screws or clips, install those as directed.
5. Route And Secure Wires
Run wires along planned paths, tucking them behind trim or under carpets. Use zip ties or adhesive clips to keep wires neat and prevent rattling. Make sure wires don’t interfere with pedals, seat tracks, or airbags.
6. Connect To Power And Ground
Here’s a basic overview of how to connect your LED kit:
- Power wire: Use a fuse tap to connect to a 12V fuse that’s only live when the car is on (like the radio or accessory fuse). Remove the chosen fuse, insert the tap, and plug both fuses in.
- Ground wire: Attach to a clean, unpainted metal surface on the car’s frame. Loosen a bolt, slide the ground ring underneath, and tighten.
- Optional: Switch: If your kit includes a manual switch, install it in an accessible spot on the dashboard.
Always check instructions for your specific kit, as wiring colors and methods can vary.
7. Test The Lights
Before reassembling everything, reconnect the battery and turn on the car. Try all modes and colors to ensure everything works. If a strip doesn’t light up, double-check your connections and fuse.
8. Reassemble Trim And Clean Up
Once you’re happy with the setup, carefully reinstall trim panels and secure any loose wires. Clean fingerprints or dust from the new lights.
9. Final Safety Check
Make sure no wires are pinched or exposed, and that all connections are firm. Test your car’s other electrical systems (radio, windows, etc. ) To ensure nothing was disturbed during installation.
Troubleshooting Common Issues
Even with careful work, you may run into issues. Here’s how to solve the most common problems:
- Lights won’t turn on: Check the fuse, power connection, and ground. Use a multimeter to verify 12V at the connection point.
- Some strips don’t light up: Make sure all connectors are fully plugged in. Try swapping strips to see if the problem follows the strip or the connector.
- LEDs flicker or change color randomly: This usually means a poor ground or weak connection. Re-crimp or re-solder the joint.
- Interference with radio: Cheap LEDs can emit electromagnetic noise. Try moving wires away from the radio antenna or upgrade to shielded LED kits.
Credit: store.ijdmtoy.com
Safety Tips And Legal Considerations
- Only install interior LEDs that don’t distract the driver or other drivers.
- Avoid bright or flashing lights that can be confused with emergency vehicles.
- Check your local laws—some places ban certain colors (like blue or red) inside cars.
- Never install lights in airbag zones or where they could block airbags.
For more safety standards, refer to your local vehicle code or resources like the National Highway Traffic Safety Administration.
Maintenance And Upgrades
Once installed, LED interior lights need little maintenance. If you notice a section is dim or not working, check the connections and replace faulty strips if needed. Modern kits often allow you to expand by adding extra strips or upgrading controllers for more features, such as smartphone compatibility or advanced color modes.
Cost Breakdown: Diy Vs. Professional Install
Wondering how much you can save by doing it yourself? Here’s a cost comparison:
| Option | LED Kit | Tools/Supplies | Labor | Total Cost |
|---|---|---|---|---|
| DIY | $20–$60 | $10–$30 | $0 (your time) | $30–$90 |
| Professional | $20–$60 | Included | $100–$300 | $120–$360 |
DIY installation usually saves at least 70% compared to hiring a shop. Plus, you get the satisfaction of customizing your car exactly how you want.
Avoiding Common Beginner Mistakes
Many first-time installers make mistakes that can be easily avoided:
- Not disconnecting the battery. This can lead to blown fuses or even electric shock.
- Skipping the cleaning step, which causes poor adhesion and falling strips.
- Overloading a circuit by connecting too many LEDs to one fuse.
- Using poor-quality LEDs that flicker, overheat, or interfere with electronics.
- Leaving wires visible or messy, which looks unprofessional and may cause rattling.
Take your time and double-check each step for the best results.
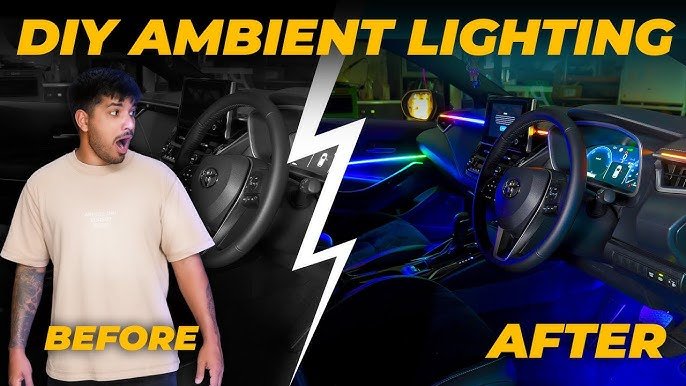
Credit: www.youtube.com
Frequently Asked Questions
How Long Does It Take To Install Car Led Interior Lights?
Most DIY installations take between 2 to 4 hours, depending on your experience and how many lights you’re adding. Planning and preparation usually take the longest, but the actual install goes quickly once you start.
Will Installing Leds Drain My Car Battery?
No, not if installed correctly. LEDs use very little power—a typical set draws less than 1 amp. If connected to a switched fuse (power only when the car is on), there’s almost no risk of battery drain.
Can I Control My Led Lights With My Phone?
Many modern LED kits come with Bluetooth or Wi-Fi controllers and free apps for iOS and Android. These apps let you change colors, brightness, and even sync lights to music.
Is It Safe To Install Led Lights Myself?
Yes, as long as you follow instructions and basic electrical safety. Always disconnect the battery and use a fuse tap for power. If you’re unsure, ask a friend with experience or consult your car’s manual.
What Should I Do If My Lights Stop Working After Installation?
First, check all connections and the fuse. Use a multimeter to test for 12V at the LED input. If only one section fails, replace that strip. If everything is dead, recheck your power and ground connections.
Upgrading your car with DIY LED interior lights is a project that pays off every time you drive. With careful planning and the right tools, you can create a custom look and enjoy a more inviting cabin. Take your time, follow these steps, and you’ll be proud of your work for years to come.
