Replacing a car’s ball joints might sound like a big challenge, but for many home mechanics, it’s a project that saves money and builds confidence. Ball joints are a key part of your car’s suspension. They connect the control arms to the steering knuckles, allowing the wheels to move smoothly as you drive and turn.
Over time, these joints wear out, leading to clunking noises, wandering steering, and uneven tire wear. If ignored, a failed ball joint can even cause you to lose control of the car. Learning how to replace car ball joints yourself puts safety back in your hands—and it’s not as difficult as you might think, if you follow each step carefully.
Understanding Ball Joints And Why Replacement Matters
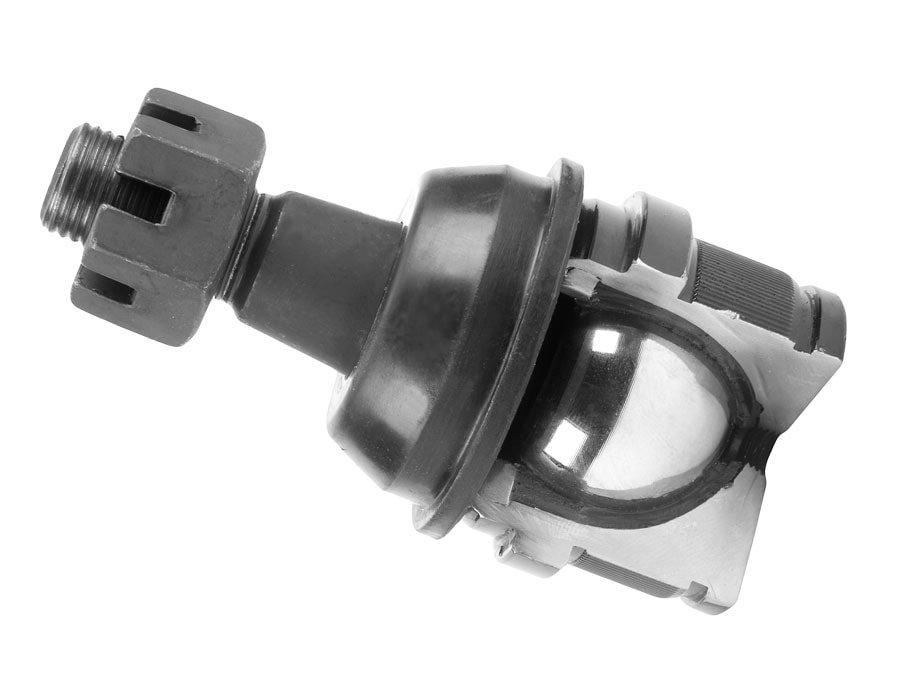
Ball joints work much like the human hip joint: they allow for movement in multiple directions. Most cars have upper and lower ball joints on each front wheel, though some modern vehicles use different setups. When ball joints wear out, your car may develop steering problems or even become dangerous to drive.
Ignoring bad ball joints can cause:
- Excessive tire wear
- Loose or unstable steering
- Noises when turning or going over bumps
- Risk of suspension failure
Some beginners overlook that symptoms often appear slowly. Regular checks can prevent sudden breakdowns.
Tools And Materials Needed
Before starting, gather all the tools and parts. Missing a single item can halt your progress.
Basic tools:
- Jack and jack stands (never work under a car with just a jack)
- Lug wrench
- Socket set and ratchets
- Pry bar
- Hammer
- Needle-nose pliers
- Wrenches (metric or standard, depending on your car)
- Ball joint separator (also called a pickle fork) or ball joint press kit
- Torque wrench
- Breaker bar
Other items:
- Replacement ball joints (exact fit for your vehicle)
- New cotter pins
- Safety glasses and gloves
- Penetrating oil (like WD-40)
- Grease
Pro tip: Some parts stores let you borrow a ball joint press. This saves money compared to buying one.
Credit: www.autozone.com
Safety First: Preparing Your Workspace
Safety is non-negotiable. Many injuries happen because people rush or ignore basic steps. Here’s how to get ready:
- Work on a level surface. Sloped driveways are unsafe.
- Use jack stands. Never trust a hydraulic jack alone.
- Wear gloves and eye protection. Ball joint removal can send metal fragments flying.
- Block the rear wheels. This prevents the car from rolling.
Be sure to read your car’s manual for any model-specific warnings.
Step-by-step Guide: How To Replace Car Ball Joints
Replacing ball joints takes patience and care. Each step matters. Here’s a practical order to follow:
1. Loosen The Wheel Lug Nuts
Before raising the car, slightly loosen the lug nuts with a wrench. Don’t remove them yet; this prevents the wheel from spinning while you work.
2. Lift And Secure The Vehicle
Raise the car with a jack under the correct jacking point, then place jack stands under the frame. Lower the car gently onto the stands. Always double-check stability before getting underneath.
3. Remove The Wheel
Take off the lug nuts and set the wheel aside. This opens access to the suspension.
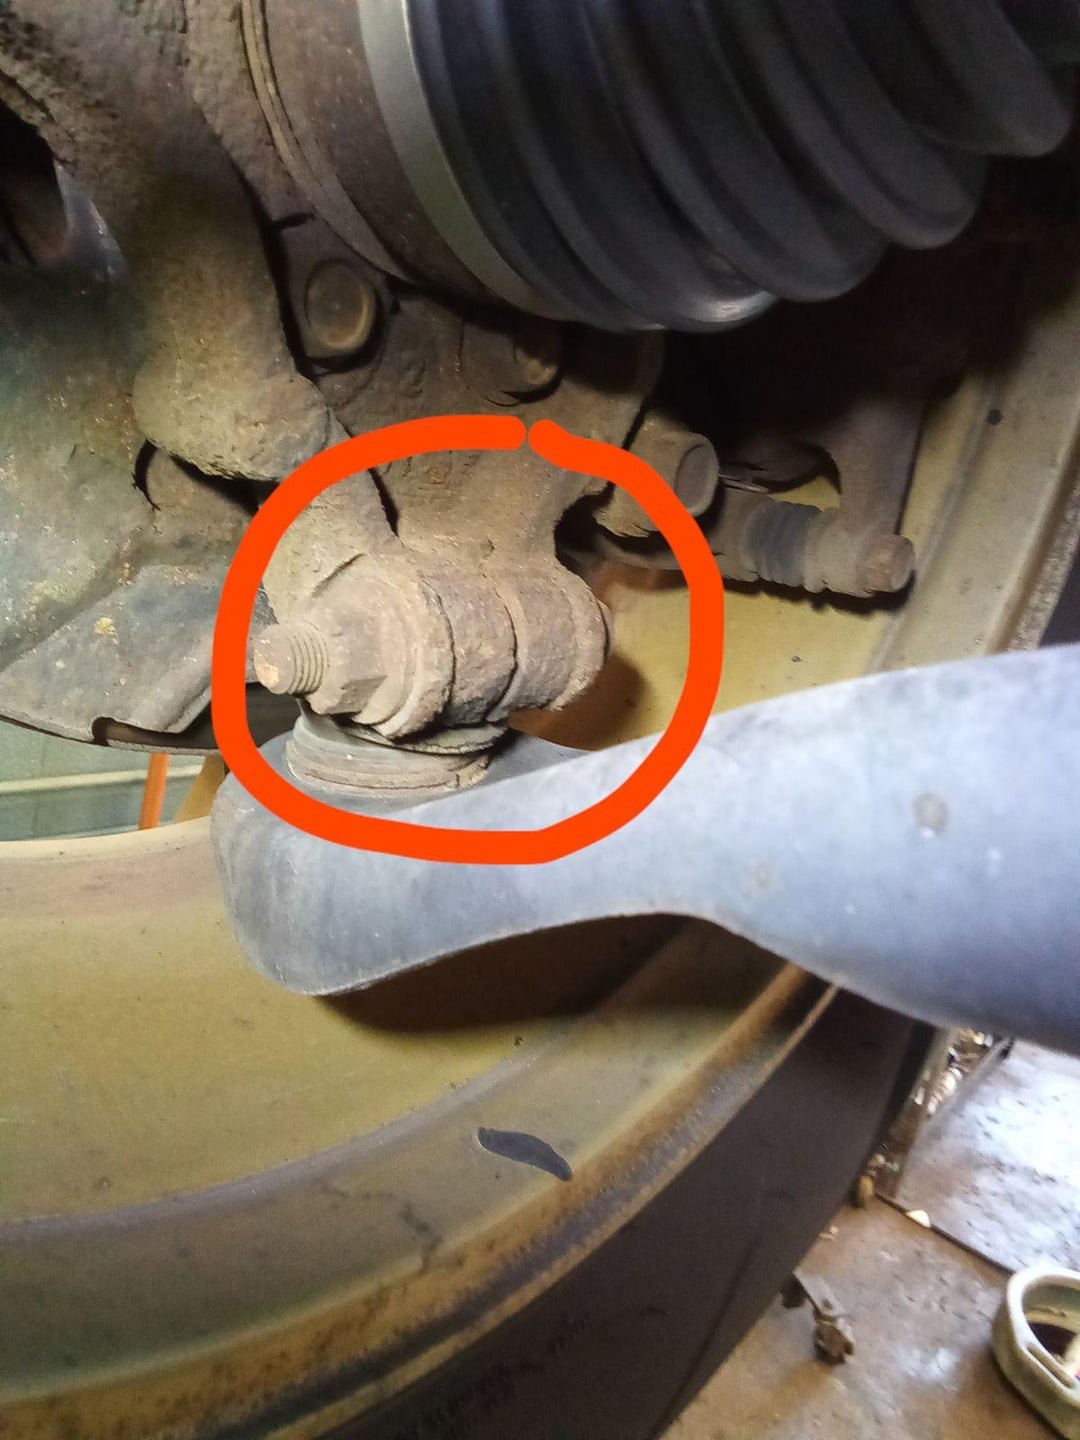
4. Locate The Ball Joint
Identify whether you’re replacing the upper, lower, or both ball joints. Most cars have a control arm attached to the ball joint at the wheel hub.
5. Remove The Cotter Pin And Castle Nut
Use pliers to straighten and pull out the cotter pin from the ball joint’s castle nut. Spray the nut with penetrating oil if it’s rusty, then remove it with a socket.
Common mistake: Beginners often damage the castle nut threads by using the wrong size wrench.
6. Separate The Ball Joint From The Steering Knuckle
This step can be stubborn. Use a ball joint separator or pickle fork to wedge between the joint and knuckle. Tap with a hammer until the joint pops free.
Non-obvious insight: If the joint doesn’t budge, double-check for hidden fasteners or rust buildup.
7. Remove The Ball Joint
Depending on your car, the ball joint may be pressed or bolted in.
- Bolted ball joints: Remove the bolts holding the joint to the control arm.
- Pressed ball joints: Use a ball joint press to push the joint out.
Tip: Take a photo before removing parts. It helps during reassembly.
8. Install The New Ball Joint
Clean the mounting area with a wire brush. Slide the new ball joint into place.
- Pressed joints: Use the ball joint press to press the new joint in.
- Bolted joints: Tighten bolts to factory specs.
Always use new hardware if provided. Old bolts can fail.
9. Reattach The Steering Knuckle
Reconnect the knuckle to the new ball joint. Install the castle nut and tighten to the specified torque (find this in your manual).
Insert a new cotter pin through the castle nut, bending the ends to secure.
10. Reinstall The Wheel
Slide the wheel back on, hand-tighten the lug nuts.
11. Lower The Car And Torque The Lug Nuts
Raise the car slightly, remove jack stands, and lower the car to the ground. Tighten the lug nuts in a star pattern with a torque wrench.
12. Test And Inspect
Turn the steering wheel lock-to-lock. Listen for noises and check that everything moves smoothly. Take a short, slow test drive, then recheck all bolts and nuts.
Extra tip: Schedule a wheel alignment after ball joint replacement. New ball joints can change your alignment, affecting tire life and handling.

Credit: www.youtube.com
When To Replace Ball Joints
Many people wait too long to replace ball joints, risking bigger problems. Watch for these signs:
- Clunking or popping noises when turning or going over bumps
- Steering feels loose or wanders
- Uneven or rapid tire wear
- Grease leaking from the ball joint boot
A simple test: Jack up the car, grab the wheel at 12 and 6 o’clock, and wiggle. If there’s play, the ball joint may be worn.
Pressed Vs. Bolted Ball Joints: Key Differences
Ball joints come in two main types. Your car will have one or the other.
| Type | How They’re Held In | Tools Needed | Replacement Difficulty |
|---|---|---|---|
| Pressed | Pressed into control arm | Ball joint press kit | Moderate to hard |
| Bolted | Bolted to control arm | Socket/wrench set | Easy to moderate |
Non-obvious insight: Pressed joints often require more force to remove, and it’s easy to damage the control arm if not careful. Bolted joints are simpler but must be torqued exactly to prevent loosening.
Credit: www.reddit.com
Choosing The Right Replacement Ball Joints
Not all ball joints are equal. Quality affects safety and how long your repair lasts.
What to check:
- Exact fit for your car’s make, model, and year
- OEM (original equipment manufacturer) quality or better
- Greaseable joints last longer, as you can add grease over time
- Warranty: Some brands offer lifetime warranties
Common mistake: Buying based on price alone. Cheap ball joints may wear out quickly or fit poorly.
Here’s a quick comparison of common ball joint brands:
| Brand | Warranty | Greaseable | Average Lifespan (miles) |
|---|---|---|---|
| Moog | Lifetime | Yes | 80,000+ |
| Dorman | Limited | No/Yes (varies) | 50,000–70,000 |
| ACDelco | 12 months | No | 50,000–70,000 |
Pro tip: Always keep your receipt and warranty info for future claims.
Mistakes To Avoid When Replacing Ball Joints
DIYers often make the same errors. Here’s how to avoid trouble:
- Skipping the wheel alignment after replacement. This leads to rapid tire wear.
- Mixing up parts during reassembly. Take photos or label bolts.
- Over-tightening or under-tightening nuts. Always use a torque wrench.
- Forgetting the cotter pin. Without it, the castle nut can come loose.
- Not checking both sides. If one ball joint is bad, the other may be worn too.
Not-so-obvious: Sometimes, a stiff or noisy suspension after replacement simply means the new joint needs a bit of use to break in.
How Long Does It Take To Replace Ball Joints?
Time varies by car and your skill level. Here’s a rough estimate:
| Vehicle Type | Ball Joint Type | Average Time (per joint) |
|---|---|---|
| Sedan | Bolted | 1–2 hours |
| Truck/SUV | Pressed | 2–4 hours |
If it’s your first time, plan for the longer end. Take breaks if needed—rushing leads to mistakes.
After The Replacement: What To Expect
After replacing ball joints, your car should steer more directly and quietly. However, it’s normal for the suspension to feel slightly stiff at first. This will soften after a few drives.
Always get a professional alignment to protect your tires and ensure safe handling. Watch for any new noises or changes in steering—these might signal a problem.
If you want to learn more about ball joints and car suspension, the Wikipedia Ball Joint page gives a solid technical overview.
Frequently Asked Questions
How Do I Know If My Ball Joints Are Bad?
Common signs include clunking noises, steering looseness, and uneven tire wear. You can also test by jacking up the car and trying to move the wheel vertically—excess play means the joint is likely worn.
Is It Safe To Drive With Bad Ball Joints?
No. Worn ball joints can fail without warning, causing loss of control. Always replace them as soon as you notice symptoms.
Do I Need An Alignment After Replacing Ball Joints?
Yes. Replacing ball joints can change your wheel angles. A professional alignment is needed to prevent tire wear and steering problems.
Can I Replace Ball Joints Without Special Tools?
You need at least a ball joint separator (pickle fork) and possibly a ball joint press for pressed-in types. Some parts stores loan these tools.
How Long Do New Ball Joints Last?
Quality ball joints can last 50,000 to 100,000 miles or more, depending on driving conditions and maintenance.
Replacing car ball joints yourself is a rewarding project. With the right tools and careful steps, you’ll not only save money—you’ll also gain valuable skills and confidence in maintaining your vehicle.
