
Replacing car door speakers can transform the way your music sounds and make every drive more enjoyable. Many people think this task is difficult or only for experts, but with the right guidance, almost anyone can do it. You do not need to be a car mechanic or have advanced technical skills.
All you need is patience, a few tools, and a clear step-by-step process. Taking control of your car audio upgrade can save you money, give you better sound, and even teach you more about your vehicle.
This guide will show you exactly how to replace car door speakers yourself. We’ll cover every step, from choosing the right speakers to finishing the installation. Along the way, you’ll find practical tips, warnings about common mistakes, and advice that most beginners miss.
By the end, you’ll know how to do the job confidently, avoid problems, and enjoy your new speakers to the fullest.
Why Replace Your Car Door Speakers?
Factory-installed speakers in most cars are made to keep costs low, not to deliver the best sound. You might notice your music sounds flat, lacks bass, or distorts at high volumes. Upgrading your car door speakers can solve these issues. New speakers can:
- Give you clearer sound and deeper bass
- Handle higher volumes without distortion
- Last longer than basic factory models
Many car owners are surprised by how much better their music sounds with just this one upgrade. It’s one of the most cost-effective changes you can make to your car’s audio system.
Tools And Materials Needed
Before starting, gather all the necessary tools and materials. You do not want to stop halfway because you are missing something important.
Basic Tools
- Screwdrivers: Both Phillips and flat-head types, in different sizes
- Panel removal tool: Plastic tools designed for removing door panels without scratching or breaking them
- Socket wrench set: For bolts that secure the speakers or panels
- Wire cutters/strippers: To prepare speaker wires
Materials
- New speakers: Make sure they fit your car’s doors
- Speaker mounting adapters (if required)
- Soldering iron and solder (optional, but makes a more secure connection)
- Electrical tape or crimp connectors
- Foam or rubber gasket tape (to reduce vibrations)
- Owner’s manual or speaker wiring diagram for your car
Helpful Extras
- Flashlight
- Magnet tray for holding screws
- Zip ties for organizing wires
Bringing everything together before you begin will save you time and frustration.
Choosing The Right Speakers
Not all car speakers are the same. Picking the right ones for your car and your music preferences is crucial.
Size And Fit
Car doors are designed for certain sizes. Common sizes are 6. 5-inch, 6×9-inch, or 5. 25-inch speakers. Check your vehicle’s manual or measure your existing speakers to avoid buying the wrong size.
Power Handling
Speakers have a power rating called RMS (Root Mean Square). Choose speakers with an RMS rating close to your car stereo’s output. Too high, and your stereo won’t drive them well. Too low, and you might damage them with too much power.
Speaker Type
- Coaxial speakers: Combine the woofer and tweeter in one unit. Easy to install and a good upgrade from factory speakers.
- Component speakers: Separate woofers, tweeters, and crossovers. More complex to install but offer better sound quality.
Sensitivity
A higher sensitivity rating means the speaker will play louder with less power. This is important if you are keeping your factory radio.
Brand And Quality
Stick with known brands like Pioneer, JBL, Alpine, or Kenwood. Reading reviews and checking forums can help you avoid poor-quality products.
Example Comparison
Here’s how three popular speaker models compare:
| Model | Size | RMS (W) | Sensitivity (dB) | Type |
|---|---|---|---|---|
| Pioneer TS-G1620F | 6.5″ | 40 | 89 | Coaxial |
| JBL GTO609C | 6.5″ | 90 | 92 | Component |
| Alpine SPE-6090 | 6×9″ | 85 | 91 | Coaxial |
Choosing a speaker that matches your car and audio style will make the installation worthwhile.
Preparing For Installation
Preparation is key for a smooth process and great results.
Disconnect The Battery
Before you touch any wires, disconnect the negative terminal of your car battery. This prevents electrical shorts and protects you from shocks.
Study Your Door Panel
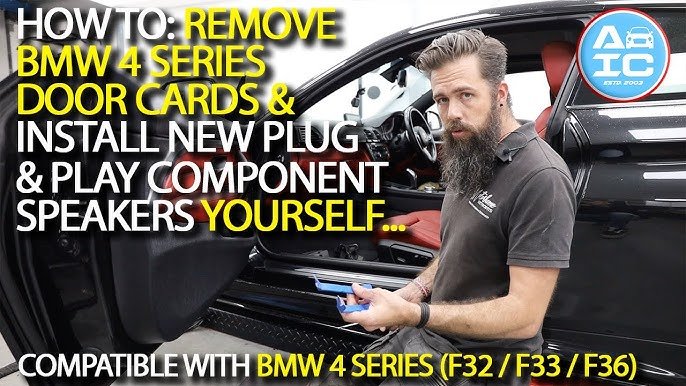
Look at your car’s door panel. Find all the screws and clips holding it in place. Your owner’s manual or a quick web search can show you where they are. Some screws are hidden under covers or inside the armrest.
Protect Your Workspace
Lay down a towel or cloth to protect your car’s interior. Keep a small container for screws and clips so you do not lose them.
Credit: www.youtube.com
Removing The Old Speakers
Now, you can start taking things apart.
Step 1: Remove Door Panel
- Use your panel removal tool to gently pry around the edges.
- Remove all visible screws.
- Carefully pop the panel loose. Some cars have strong clips that need a firm but gentle pull.
- Lift the panel up and away, watching for any wires connected to window switches or locks. Disconnect these if needed.
Step 2: Remove The Speaker
- Unscrew the old speaker from the door.
- Disconnect the wires. Some cars use clips; others may have the wires soldered or twisted on.
- Keep the old speaker for comparison or as a backup.
Common Beginner Mistake
Many first-timers forget to check for hidden screws or yank the panel too hard, breaking clips. Take your time and check for any resistance—if it feels stuck, look for another screw or clip.
Installing The New Speakers
This step is where your car’s sound will truly change.
Step 1: Connect The Wires
- Match the positive and negative wires. Usually, positive is marked with a red line or a plus sign.
- If your new speakers have different connectors, use adapters or crimp connectors.
- For a stronger connection, solder the wires and cover them with electrical tape or heat-shrink tubing.
Step 2: Mount The Speaker
- If your new speaker does not fit the existing hole, use a mounting adapter.
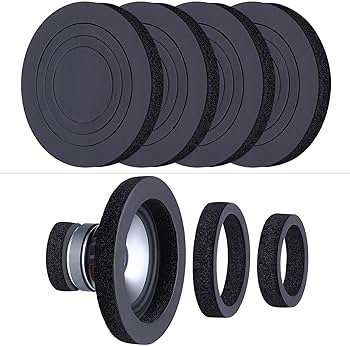
- Place foam or gasket tape around the edge. This reduces vibrations and rattles.
- Screw the speaker in tightly, but do not over-tighten, which can crack the plastic or the speaker frame.
Step 3: Test Before Reassembly
- Reconnect the battery and turn on your radio.
- Check that the speaker works and sounds clear.
- Listen for rattles or distortion. If something sounds wrong, check your wiring and mounting.
Step 4: Reassemble The Door Panel
- Reconnect any wires for window or lock controls.
- Align the door panel and press it back into place, making sure all clips snap in.
- Replace all screws and covers.
Example: Typical Installation Steps
For most cars, the process looks like this:
| Step | Action | Time Needed |
|---|---|---|
| 1 | Remove door panel | 15-30 minutes |
| 2 | Remove old speaker | 5-10 minutes |
| 3 | Connect and install new speaker | 10-20 minutes |
| 4 | Test and reassemble door | 15-25 minutes |
Troubleshooting Common Problems
Sometimes, even with the best preparation, things go wrong. Here’s how to handle the most frequent issues.
No Sound From New Speaker
- Double-check all wire connections.
- Make sure the wires are not reversed (positive and negative).
- Test the speaker on a different channel to see if the problem is with the wiring or the speaker.
Rattling Or Buzzing
- Ensure the speaker is tightly mounted and gasket tape is used.
- Check for loose parts inside the door.
- Make sure the door panel is properly reattached with all clips and screws.
Distorted Sound
- Check that the speaker matches your stereo’s power output.
- Look for damaged wires or poor connections.
- If you used the old speaker wiring, make sure it’s not corroded or broken.
Safety And Professional Tips
Some advice can make the process safer and give you a better result.
- Always disconnect the battery before working with car electronics.
- Do not force any part—if it is stuck, there is usually a hidden fastener.
- Label wires if you are unsure where they go. A small piece of tape with a note can save you confusion later.
- Take photos before removing anything, so you know how to put it back.
- If you are unsure about wiring, look for a video or guide for your specific car model. Forums and YouTube are full of helpful resources.
- Avoid working in wet or humid conditions. Moisture can damage your speakers or electrical parts.
Credit: carlosrepairsridge.com
Comparing Diy Vs. Professional Installation
Many people wonder if doing it themselves is worth it. Here’s a quick comparison:
| Aspect | DIY | Professional |
|---|---|---|
| Cost | Low (only parts) | High (labor + parts) |
| Time Required | 1-2 hours | 30-60 minutes |
| Learning Experience | High | Low |
| Quality of Result | Good with care | Usually excellent |
| Warranty | No (unless you damage parts) | Yes (on labor) |
DIY is a good choice if you want to save money and learn, but professional installation is faster and comes with a guarantee.
Two Insights Most Beginners Miss
- Speaker Depth Matters: Not all car doors have the same depth. If your new speakers are too deep, the window may hit them. Always check the depth of your old speaker and compare it to the new one.
- Sound Deadening Makes a Big Difference: Adding a layer of sound-deadening material inside the door can greatly improve sound quality by reducing vibrations and road noise. It’s an extra step, but well worth the effort if you want the best sound.
Credit: www.amazon.com
After Installation: Maximizing Your Upgrade
Once your new speakers are installed, take a few steps to make the most of your new sound:
- Adjust your stereo’s equalizer to match the new speakers. Factory settings may not sound right with better speakers.
- Listen for a week before making big changes. New speakers often sound even better after a short “break-in” period.
- Avoid turning the volume all the way up for long periods, as this can damage even high-quality speakers.
If you want to learn more about car audio systems or speaker technology, the Wikipedia page on Car Audio is a reliable resource.
Upgrading your car door speakers is a project that pays off every time you drive. With a little planning and care, you can do it yourself and enjoy much better sound.
Frequently Asked Questions
How Do I Know What Size Speakers Fit My Car?
Check your vehicle owner’s manual, measure the current speakers, or search online for your car’s make and model. Many auto parts websites offer tools where you enter your car details to find compatible speaker sizes.
Do I Need An Amplifier For New Speakers?
Not always. Many aftermarket speakers work well with your car’s factory stereo. However, if you want very loud or clear sound, or if the speakers have a high power rating, an amplifier can help get the best performance.
Can I Use The Factory Speaker Wires?
Yes, you can use factory wires if they are in good condition. If the wires are old, thin, or damaged, replacing them with new, thicker wires can improve sound quality and reliability.
What Should I Do If My New Speakers Don’t Work After Installation?
First, check all connections and make sure the wires are attached to the correct terminals. Test the speaker with another power source if possible. If it still does not work, the speaker or your stereo may be faulty.
Is It Safe To Replace Car Door Speakers Myself?
Yes, it is safe if you follow basic precautions. Always disconnect the battery before starting, use the right tools, and do not force any parts. If you feel unsure at any step, it’s best to consult a professional or look for model-specific guides.
Replacing your car door speakers is a rewarding project that brings better sound and satisfaction. With careful steps, anyone can do it and enjoy the benefits every day.
