Replacing a car heater core yourself can sound intimidating, but with the right steps, patience, and some basic tools, it’s possible for many car owners. If you’ve noticed your car’s windows fogging up, a sweet smell inside the cabin, or your heater blowing cold air, the heater core might be failing. While this job is detailed and can take several hours, doing it yourself saves hundreds in labor costs and helps you understand your vehicle better.
This guide explains how to replace your heater core step-by-step, what tools you’ll need, how to avoid common mistakes, and tips to make the process safer and smoother. Even if you’ve never done a repair like this, clear instructions and careful planning will help you succeed.
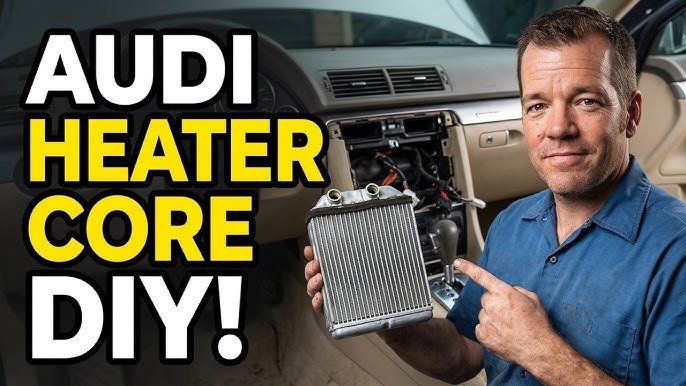
What Is A Heater Core And Why Replace It?
The heater core is a small radiator-like device inside your dashboard. Hot coolant from the engine flows through it, and the blower fan pushes air over the core, sending warm air into your car’s cabin. If the heater core leaks or clogs, you lose heat, and coolant can leak inside your car, causing odors, foggy windows, or even engine overheating.
Common reasons for replacing a heater core include:
- Coolant leaking inside the car
- Heater blowing cold air
- Sweet smell or fog inside the car
- Low coolant with no visible leak under the car
Ignoring a bad heater core can cause engine overheating or interior damage, so it’s important to fix it promptly.
Tools And Supplies You’ll Need
Having the right tools will make the job much easier. Here’s what you should prepare:
- Socket and ratchet set – Most heater cores are held in place by bolts of different sizes.
- Screwdrivers – Flat and Phillips types.
- Pliers – Useful for hose clamps.
- Plastic trim removal tools – To avoid damaging dashboard panels.
- Drain pan – For catching coolant.
- Replacement heater core – Make sure it fits your car’s make and model.
- New hose clamps – Optional but recommended.
- Coolant – For refilling the system.
- Shop towels and gloves – To keep things clean and safe.
- Service manual or diagram – For your specific car model.
Some vehicles may need Torx bits, Allen keys, or other specialty tools. Always check a repair manual or trusted source for your car before starting.
How Difficult Is Replacing A Heater Core?
This job is considered moderate to difficult for DIYers. The main challenge is that heater cores are usually deep inside the dashboard. Removing the dash can take hours and involves many small connectors, screws, and fragile parts. Some vehicles (like pickups or older cars) are easier, while modern sedans or SUVs may require more disassembly.
Estimated time: 4 to 8 hours, depending on your car and experience.
Step-by-step Guide To Replace Your Heater Core
The following steps provide a general overview. Your car may have small differences, so always double-check your vehicle’s manual.
1. Disconnect The Battery
Always start by disconnecting the negative battery terminal. This prevents electrical shorts or accidental airbag deployment while working on the dashboard.
2. Drain The Coolant
Open the radiator cap, place a drain pan under the radiator, and use the drain plug to empty the coolant. Some coolant will also come from the heater core hoses, so be prepared for extra spills.
3. Remove Dashboard Panels
Most heater cores are behind the dashboard. Start by removing:
- Lower dash panels
- Glove box
- Center console (if needed)
- Radio or climate controls
Use plastic trim tools to avoid damaging panels.
4. Disconnect Heater Hoses In The Engine Bay
The heater core has two hoses connected to it from the engine side. These are usually on the firewall. Use pliers to loosen hose clamps and gently twist the hoses off. If they’re stuck, don’t force them—use a hose removal tool or cut the hose if you have replacements.
5. Remove The Entire Dashboard (if Required)
Many cars require the entire dashboard to come out. This includes:
- Bolts under the dash and at the sides
- Screws behind trim pieces
- Electrical connectors for airbags, speakers, and electronics
Take photos as you go so you can remember where each connector belongs.
6. Remove The Heater Core Cover
Once the dash is out, find the heater core cover—usually a plastic or metal housing. Remove screws or bolts and carefully lift off the cover.
7. Take Out The Old Heater Core
Slide the heater core out of its housing. Be careful not to spill any remaining coolant inside your car.
8. Install The New Heater Core
Place the new heater core into the housing. Make sure it sits correctly and any gaskets or seals are in place to prevent future leaks.
9. Reassemble The Dash
Work backward, reinstalling the heater core cover, dashboard, connectors, and panels. Take your time. Rushing this part can lead to broken clips or electrical problems.
10. Reconnect Heater Hoses
Attach the heater hoses in the engine bay, tightening clamps securely. Double-check that hoses are not kinked or pinched.
11. Fill The Cooling System
Refill the radiator with the correct coolant. Bleed the system to remove air bubbles—consult your manual for the best procedure. Start the engine and let it warm up, checking for leaks and ensuring the heater works.
12. Check For Leaks And Test
With the engine running and heater on, check under the dash and in the engine bay for leaks. Also, monitor the temperature gauge to ensure the engine doesn’t overheat.

Credit: www.autozone.com
Common Mistakes To Avoid
Many first-timers make simple errors during this process. Here’s how to avoid them:
- Forgetting to disconnect the battery – This can cause electrical shorts.
- Mixing up connectors – Use labels or photos to track where everything goes.
- Breaking plastic clips – Use gentle pressure and the right tools.
- Not bleeding air from the cooling system – Air pockets can cause overheating.
- Forgetting to replace old hose clamps – Weak clamps lead to leaks.
- Not checking for leaks before full reassembly – Always test with the dash partly off if possible.
Tips To Make The Job Easier
- Organize all bolts and screws in labeled bags or trays.
- Take photos at every major step for reference.
- Use a service manual or a reliable online forum for your car.
- Work with a friend if possible—removing the dash is much easier with help.
- Replace related parts like old hoses or the thermostat if they’re hard to reach later.
Credit: www.youtube.com
Cost Comparison: Diy Vs. Professional Repair
Doing the job yourself can save a lot of money. Here’s a general comparison:
| Repair Option | Estimated Cost | Time Required |
|---|---|---|
| DIY Replacement | $70–$250 (parts & supplies) | 4–8 hours |
| Professional Repair | $500–$1,200 (parts & labor) | 1–2 days (including shop wait) |
Note: Prices vary by car model and location.
Signs You Need To Replace The Heater Core
Some drivers overlook the early symptoms. Watch for these signs:
- Wet carpets under the dashboard
- Foggy windows that don’t clear with defrost
- Sweet smell inside the car
- Heater not blowing hot air
- Low coolant with no visible leak
Delaying the repair can damage your car’s electronics or engine, so it’s best to act quickly.
Heater Core Materials: Which Lasts Longer?
Not all heater cores are made the same. Here’s how common materials compare:
| Material | Pros | Cons | Average Lifespan |
|---|---|---|---|
| Aluminum | Lightweight, resists corrosion | Can be damaged by old coolant | 8–15 years |
| Copper/Brass | Excellent heat transfer, easier to repair | Heavier, can corrode faster | 6–12 years |
| Plastic/Composite | Low cost, corrosion-resistant | Less durable, more prone to cracking | 5–10 years |
When buying a replacement, choose a quality part from a reputable brand.
Two Insights Many Beginners Miss
- Small interior leaks can still cause big engine problems. Even if you only notice a foggy window or a faint smell, a leaking heater core means you’re losing coolant. This can cause engine overheating and expensive damage if ignored.
- Airbags and sensitive electronics are often connected to the dashboard. Disconnecting the battery is not just for safety—it prevents accidental airbag deployment and protects your car’s computer. Always give the car at least 10 minutes after disconnecting the battery before unplugging airbag connectors.
Safety Precautions
- Let the engine cool before starting—hot coolant can cause burns.
- Wear gloves and eye protection when handling coolant.
- Dispose of old coolant properly—it’s toxic to pets and the environment.
- Handle airbag connectors with care; wait after disconnecting the battery.
For more details on safe handling and environmental rules, see the official EPA guidelines.
Frequently Asked Questions
How Long Does It Take To Replace A Heater Core?
Most DIYers need 4 to 8 hours depending on the car and their experience. Shops may finish faster but require you to leave your car for a day or more.
Can I Drive With A Bad Heater Core?
It’s risky. A leaking heater core can cause engine overheating or interior electrical problems. In an emergency, you can bypass the heater core by connecting the heater hoses together, but you’ll lose cabin heat.
How Much Coolant Will I Need To Refill?
Most cars take between 1.5 and 3 gallons of coolant. Always check your owner’s manual for the exact type and amount.
Do I Need To Replace Both Heater Hoses?
If your hoses are old, cracked, or swollen, it’s smart to replace them. New hoses ensure a better seal and reduce the risk of leaks.
Will Replacing The Heater Core Fix My Car’s Heating Problem?
If the heater core is clogged or leaking, replacing it will restore heat. But if your car still blows cold air, check the thermostat, blend door actuator, or coolant level for other issues.
Replacing a car heater core is a challenging but rewarding job. You’ll save money, avoid shop delays, and gain confidence in your repair skills. With careful planning, patience, and the right tools, you can bring warmth and comfort back to your car for years to come.

Credit: shop.advanceautoparts.com
