Replacing a car’s rear main seal at home can feel like a big challenge, even for people who are comfortable working on cars. But if your car is leaking oil between the engine and transmission, fixing the rear main seal yourself can save hundreds of dollars in labor costs. With the right tools, some patience, and careful planning, you can do this job in your own garage. This guide will walk you through everything you need to know, from understanding what the rear main seal does, to the step-by-step process, to practical tips that can make the job easier and safer.
What Is A Rear Main Seal And Why Replace It?
The rear main seal sits at the back of your engine, where the crankshaft exits and connects to the transmission. Its main job is to keep engine oil from leaking out. Over time, heat, pressure, and age can cause this seal to harden or crack. If it fails, you’ll notice oil drips under your car, especially near the back of the engine.
A leaking rear main seal is not just messy—it can cause low oil levels, which may lead to serious engine damage if ignored. If you see oil leaking between the engine and transmission, or your mechanic points out the seal is leaking, replacement is usually the only solution.
Tools And Supplies You Need
Before you start, gather all the tools and parts you’ll need. This will save time and help prevent mistakes.
- Socket set (metric and standard)
- Wrenches (including a torque wrench)
- Screwdrivers
- Pry bar
- Seal puller or flat-head screwdriver
- Hammer (rubber mallet preferred)
- Jack and sturdy jack stands
- Wheel chocks
- Transmission jack or a helper (transmissions are heavy)
- Replacement rear main seal (get the correct part for your car’s make, model, and engine)
- Gasket scraper or razor blade
- Brake cleaner (for cleaning surfaces)
- Engine oil (for topping off after the job)
- RTV sealant (if your car’s manual calls for it)
- Gloves and safety glasses
Optional but helpful:
- Service manual specific to your vehicle
- Shop towels
- Oil catch pan
Safety First: Important Precautions
This job involves lifting your car, removing the transmission, and working under heavy parts. Safety should always come first:
- Never work under a car that’s only supported by a jack. Always use jack stands on a level surface.
- Disconnect the battery before starting. This prevents accidental shorts and makes things safer.
- Label bolts and parts as you remove them. This helps avoid confusion during reassembly.
- Always wear safety glasses to protect your eyes from falling debris.
- If you’re not confident, ask a friend for help, or consider professional assistance for certain steps.
Step-by-step Guide To Replacing A Rear Main Seal
Now let’s break down the process. The exact steps can vary slightly depending on your vehicle, but the general process is similar for most cars and trucks.
1. Prepare Your Workspace
- Park the car on a flat, stable surface.
- Engage the parking brake.
- Place wheel chocks behind the wheels.
- Disconnect the negative battery cable.
2. Raise And Secure The Vehicle
- Use a hydraulic jack to lift the front or rear of the car, depending on your drivetrain.
- Place jack stands under the car’s frame or recommended lift points.
- Double-check the car is stable before getting underneath.
3. Remove The Transmission
This is the most time-consuming step. Here’s the general process:
- Drain the transmission fluid if necessary.
- Remove the driveshaft (for rear-wheel-drive cars).
- Disconnect any electrical connectors, cables, or shifter linkages attached to the transmission.
- Unbolt and remove the starter motor.
- Support the transmission with a transmission jack.
- Unbolt the transmission bellhousing from the engine.
- Carefully slide the transmission back and lower it out of the way.
Note: Transmissions are heavy—often 100 pounds or more. Never try to muscle it out alone.
4. Remove The Flywheel Or Flexplate
- With the transmission out, you’ll see the flywheel (manual) or flexplate (automatic).
- Use a wrench to remove the bolts holding the flywheel/flexplate to the crankshaft.
- Mark the position of the flywheel for correct reinstallation.
- Remove the flywheel and set it aside carefully.
5. Access And Remove The Rear Main Seal
- The rear main seal is now visible at the back of the engine.
- Use a seal puller or a flat-head screwdriver to gently pry out the old seal. Be careful not to scratch the crankshaft or engine block.
- Inspect the crankshaft for grooves or damage. If the surface is rough, you may need a repair sleeve.
6. Clean The Seal Area
- Use brake cleaner and a clean rag to remove any old oil, dirt, or sealant from the sealing surface.
- Remove all traces of the old gasket or sealant with a gasket scraper.
- Make sure the area is completely dry and clean before installing the new seal.
7. Install The New Rear Main Seal
- Lightly oil the lip of the new seal with clean engine oil.
- Align the seal with the opening and press it in by hand as evenly as possible.
- Use a seal installer tool (or a large socket that matches the seal’s diameter) to tap the seal in evenly. A rubber mallet works best.
- Make sure the seal is flush with the engine block—do not push it too deep.
8. Reinstall The Flywheel Or Flexplate
- Line up the marks you made earlier and bolt the flywheel/flexplate back to the crankshaft.
- Torque the bolts to the manufacturer’s specification using a torque wrench.
9. Reinstall The Transmission
- Carefully lift the transmission back into position with the jack.
- Align the transmission input shaft with the clutch (manual) or torque converter (automatic) and the engine.
- Bolt the transmission bellhousing to the engine block.
- Reconnect all electrical connectors, cables, linkages, and driveshaft.
- Reinstall the starter motor.
- Refill the transmission with fluid if needed.
10. Lower The Vehicle And Test
- Remove jack stands and lower the car.
- Reconnect the battery.
- Start the engine and let it idle.
- Check for leaks around the rear main seal area.
- Take a short drive and check again for any leaks.
Comparing Diy Vs. Professional Rear Main Seal Replacement
To help you see what’s involved, here’s a comparison of doing the job at home versus taking it to a mechanic.
| Factor | DIY at Home | Professional Shop |
|---|---|---|
| Cost | $30–$100 for parts, no labor cost | $600–$1,200 (parts + labor) |
| Time Required | 6–12 hours (depending on experience) | 4–8 hours |
| Tools Needed | Many specialty tools required | Shop has all tools |
| Risk of Mistakes | Higher for beginners | Low (experienced technicians) |
| Warranty | None (unless you buy parts with warranty) | Usually included |
Common Mistakes And How To Avoid Them
Replacing a rear main seal isn’t easy, and there are some common pitfalls. Here’s how to avoid them:
- Damaging the crankshaft: When removing the old seal, work carefully. Any scratch can cause new leaks.
- Incorrect seal installation: The seal must go in straight and even, or it won’t work. Use the right tool and take your time.
- Forgetting to torque bolts: Always use a torque wrench and follow your car’s specifications for all bolts.
- Skipping cleaning: Any dirt or oil under the new seal can cause leaks. Clean everything thoroughly.
- Not marking the flywheel: If you don’t mark its position, your engine may run rough or not start.
Credit: barsleaks.com
Extra Tips For A Successful Job
- Check related parts: While you have the transmission out, inspect the clutch (manual) or rear main bearing (automatic) for wear.
- Replace gaskets: If you remove other gaskets, such as the oil pan, replace them too.
- Take photos: Use your phone to take pictures as you go. This helps during reassembly.
- Bag and label bolts: Small bags and masking tape are cheap insurance against confusion.
- Don’t rush: Even if you’re experienced, take your time. Hurrying leads to mistakes.
Signs Of A Bad Rear Main Seal
It helps to be sure the rear main seal is the source of your oil leak. Look for these warning signs:
- Oil dripping from the bellhousing area
- Oil spots under the car after parking
- Oil covering the transmission or undercarriage
- Low engine oil level with no other leaks
- Burning oil smell while driving
Other leaks, like the oil pan gasket or valve cover, can look similar. Make sure the rear main seal is the real problem before starting this job.
Cost Breakdown And Time Estimates
Here’s an example of what you might spend and how long it might take to replace a rear main seal at home:
| Expense | Estimated Cost |
|---|---|
| Rear main seal | $20–$50 |
| RTV sealant | $5–$15 |
| Transmission fluid | $15–$40 |
| Miscellaneous supplies | $10–$20 |
| Total | $50–$125 |
Time required: For most beginners, expect 8–12 hours. If it’s your first time, plan for a full weekend.
Non-obvious Insights Most Beginners Miss
- You don’t always need to drop the oil pan, but some cars require it to remove or install the rear main seal. Always check your service manual before starting.
- Seals can be installed backwards by mistake. The lip of the seal must always face inward, toward the engine oil. Double-check before tapping it in.
- Transmission alignment is tricky. If the transmission doesn’t slide in smoothly, don’t force it. Misalignment can damage the input shaft or clutch.
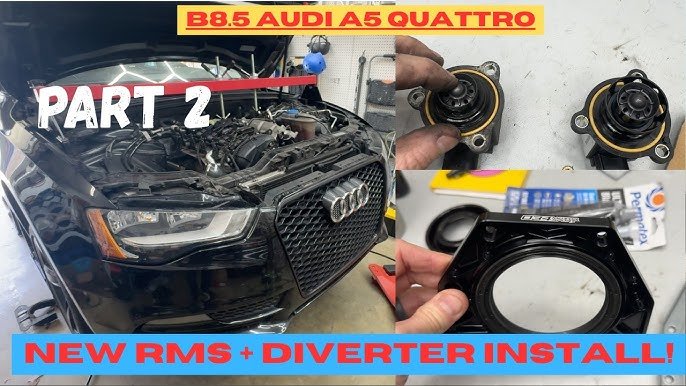
Credit: www.youtube.com
When To Consider Professional Help
- If you’re not comfortable removing a transmission
- If you don’t have the right tools or workspace
- If your car has complex electronics or all-wheel drive (AWD)
In these cases, paying a professional may save you time, frustration, and possible damage.
Recommended Resources
If you need more detailed instructions for your specific car model, consider checking a factory service manual or a trusted site like Wikipedia. These resources often have step-by-step guides and torque specs.

Credit: www.endurancewarranty.com
Frequently Asked Questions
What Causes A Rear Main Seal To Fail?
The most common reasons include age and heat, which cause the rubber to harden and crack. Low oil or dirty oil can also speed up wear, as can engine vibrations or a misaligned crankshaft.
Can I Drive With A Leaking Rear Main Seal?
It’s possible to drive for a while with a small leak, but it’s not recommended. Over time, you’ll lose engine oil, which can cause serious engine damage. If you see a big leak, fix it as soon as possible.
How Do I Know If The Rear Main Seal Is The Problem?
Look for oil leaks between the engine and transmission, oil on the bottom of the bellhousing, or unexplained drops in oil level. Other leaks can look similar, so check carefully before starting repairs.
Do I Need To Remove The Engine To Replace The Rear Main Seal?
For most cars, you do not need to remove the engine—just the transmission. However, some older or rare models may require engine removal. Always check your car’s service manual.
What Happens If I Install The Seal Incorrectly?
If the seal goes in crooked or backward, it will leak oil and you’ll need to repeat the repair. Always double-check the orientation and install the seal evenly and carefully.
Replacing a rear main seal at home is a demanding project, but it’s possible with patience, planning, and attention to detail. Take your time, stay organized, and don’t hesitate to ask for help if you need it. With the right approach, you can save money and gain valuable experience working on your own car.
