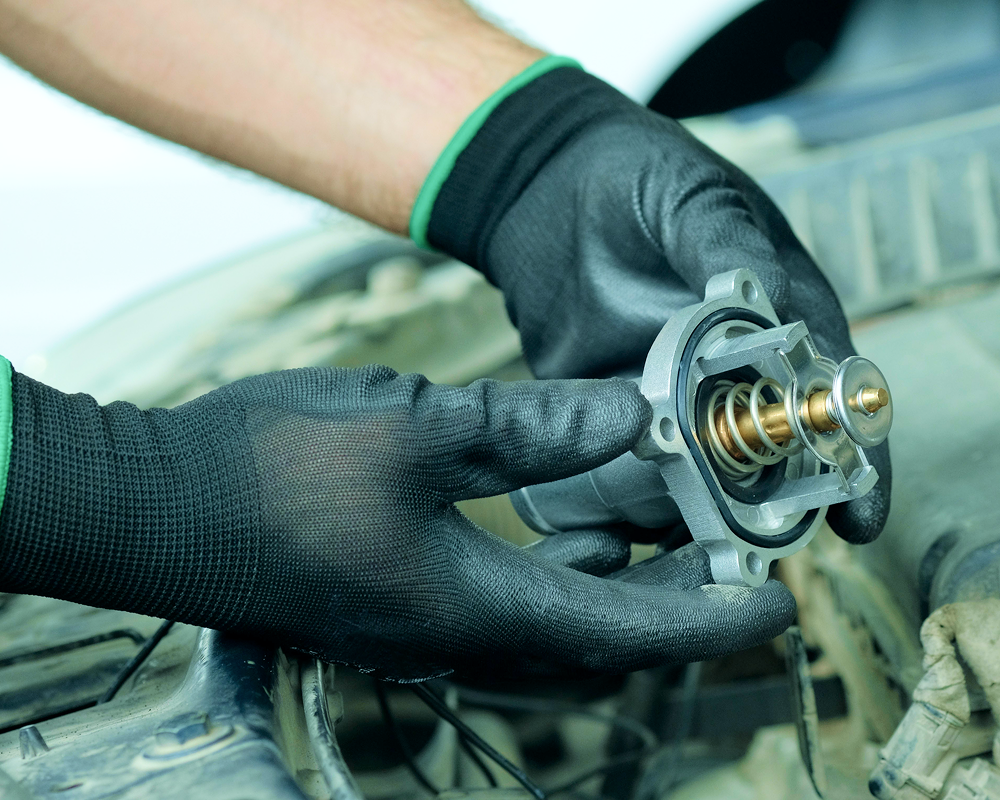
Replacing a car thermostat might look easy at first. Many car owners decide to do it themselves to save money and time. But this job is not as simple as it seems. Small mistakes can cause big problems, like engine overheating or coolant leaks.
Some errors are common, and even experienced DIY mechanics sometimes make them. If you want your engine to run smoothly and avoid extra repair bills, it’s important to understand what can go wrong during thermostat replacement. This article will guide you through the most frequent mistakes, how to avoid them, and why paying attention to small details makes a big difference.
Why The Thermostat Matters
The thermostat controls your car’s engine temperature. It opens and closes to let coolant flow between the engine and the radiator. If it fails or is installed incorrectly, your engine can run too hot or too cold. This can cause poor fuel economy, engine damage, or even a breakdown. That’s why replacing a thermostat correctly is so important.
Common Mistakes When Replacing Car Thermostat
1. Choosing The Wrong Thermostat
Not all thermostats are the same. Car models and engine types require specific thermostat sizes and temperature ratings. If you install the wrong part, your engine may not reach the right temperature, or it might overheat. For example, some thermostats open at 180°F, while others open at 195°F.
Using the wrong temperature rating can affect engine performance.
Tip: Always check your owner’s manual or ask for the correct part number before buying a new thermostat.
2. Not Draining The Coolant Properly
When changing the thermostat, you need to remove some coolant from the system. Many people skip this step or try to rush it. If you don’t drain enough coolant, it can spill when you remove the thermostat housing, making a mess and causing potential engine damage.
Old coolant can also mix with new coolant and reduce its effectiveness.
Insight: If your coolant is old, take this chance to do a full flush and replace it.
3. Ignoring Gasket Surfaces
The gasket creates a seal between the thermostat housing and the engine. If the surfaces are dirty or corroded, the new gasket won’t seal well. This can lead to leaks. Some people don’t clean the old gasket material fully, which is a big mistake.
Even a tiny piece left behind can cause a leak.
Advice: Use a plastic scraper to clean both surfaces. Avoid metal tools, as they can scratch the metal and cause leaks.
4. Using The Wrong Gasket Or Sealant
Thermostats come with different types of gaskets: paper, rubber, or metal. Some need a thin layer of sealant, while others do not. Using the wrong gasket or too much sealant can block the flow of coolant or create leaks. Excess sealant can also get inside the cooling system and clog small passages.
Non-obvious tip: If your thermostat comes with an O-ring, don’t use extra sealant unless the instructions say so.
5. Over-tightening Or Under-tightening Bolts
People often think tighter is better. But over-tightening thermostat housing bolts can crack the housing or strip the threads. Under-tightening can let coolant leak out. Each bolt needs to be tightened to a specific torque.
Here’s a look at common torque values for thermostat housing bolts:
| Car Type | Typical Torque (ft-lb) |
|---|---|
| Compact Cars | 7–10 |
| Sedans | 10–15 |
| Trucks/SUVs | 15–18 |
Tip: Always use a torque wrench if possible.
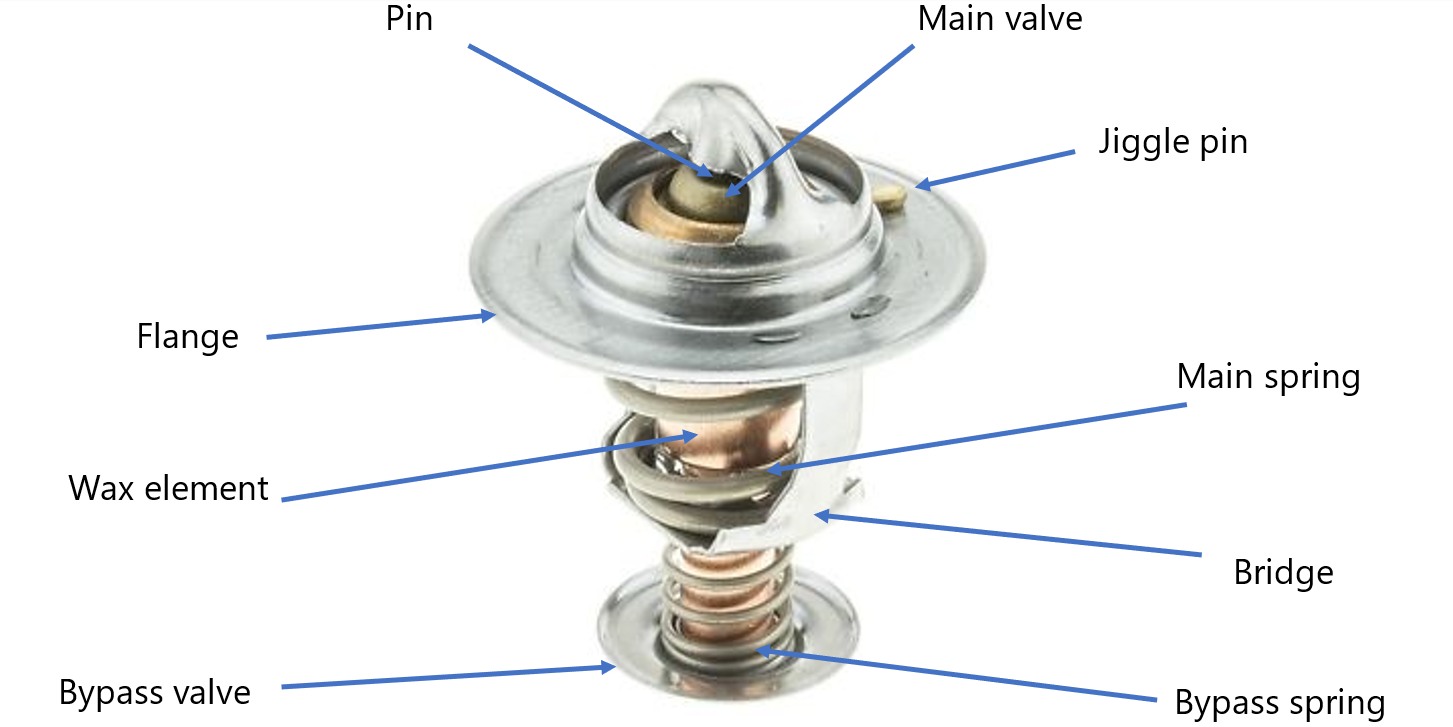
6. Installing The Thermostat Backwards
Thermostats have a specific direction. The spring part usually goes toward the engine. If you install it the wrong way, it won’t work. The engine may overheat quickly or fail to warm up.
Practical advice: Look for markings on the thermostat or check the instructions. Some have arrows or “engine side” labels.
7. Skipping The Air Bleed Step
Air can get trapped in the cooling system when you replace a thermostat. If you don’t bleed the air out, it can cause air pockets, which may lead to overheating. Many cars have a bleed screw or a special process to remove air.
Example: On some Hondas, you need to run the engine with the radiator cap off until the thermostat opens and air bubbles stop.
8. Reusing Old Coolant
Some people just top off the coolant after changing the thermostat. But old coolant can be contaminated or lose its ability to protect against rust and freezing. Mixing new and old coolant types can also cause chemical reactions and form sludge.
Tip: If your coolant is more than two years old or looks dirty, replace it completely.
9. Forgetting To Check Hoses And Connections
When replacing the thermostat, it’s a good time to check the radiator hoses and clamps for cracks or leaks. Many people forget this step and later find leaks or weak hoses that could have been fixed easily.
Non-obvious insight: Hoses can look fine on the outside but be soft or swollen inside. Squeeze them gently to check.
10. Not Testing The New Thermostat Before Installation
It’s possible to get a faulty thermostat right out of the box. Some experienced mechanics test new thermostats by placing them in hot water to see if they open at the right temperature.
How to test: Heat water in a pot and use a thermometer. The thermostat should start to open at its rated temperature.
11. Rushing The Job
Many mistakes happen because people are in a hurry. Not letting the engine cool down fully can cause burns. Forgetting to tighten bolts or skipping steps can lead to leaks or engine damage.
Advice: Set aside enough time and don’t rush. Double-check your work before starting the engine.
12. Failing To Dispose Of Old Coolant Properly
Coolant is toxic and dangerous for people, pets, and the environment. Pouring it down the drain or onto the ground is illegal in many places.
Tip: Collect old coolant in a container and take it to a recycling center or auto shop.
13. Ignoring Temperature Gauge After Replacement
Some drivers don’t check the temperature gauge after replacing the thermostat. If the gauge shows the engine is running hot or cold, stop and check your work. Ignoring warning signs can lead to engine failure.
Tip: Watch the gauge for the first few drives after the repair.
14. Not Checking For Leaks After Installation
It’s easy to forget to check for leaks after finishing the job. Leaks can develop slowly as the engine heats up and cools down.
What to do: Let the engine run until it reaches normal temperature, then inspect around the thermostat housing and hoses for drips.
15. Using Low-quality Parts
Cheap thermostats and gaskets can fail sooner and cause more problems. It’s tempting to save a few dollars, but using quality parts saves time and money in the long run.
Data point: According to a study by the Automotive Aftermarket Suppliers Association, high-quality parts last up to 60% longer than the cheapest options.
Credit: www.fleetio.com
Comparison: Diy Vs. Professional Thermostat Replacement
Understanding the differences between doing it yourself and hiring a mechanic can help you choose the best option. Here is a comparison:
| Factor | DIY | Professional Service |
|---|---|---|
| Cost | $20–$60 (parts only) | $100–$300 (parts + labor) |
| Time Required | 1–2 hours | 1 hour (average) |
| Risk of Mistakes | Higher | Lower |
| Warranty | None (unless you buy parts with warranty) | Often included |
Real-world Example: What Can Go Wrong
Imagine a car owner named Alex. He replaced his thermostat on a Saturday afternoon. He forgot to clean the old gasket material, re-used the old coolant, and didn’t bleed the air. The next day, his engine overheated. After a tow and a visit to the mechanic, he found out that a $15 gasket mistake cost him $200 in repairs.
Lesson: Small errors can lead to big expenses. Take your time and follow every step carefully.
Credit: thelandautorepair.com
How To Avoid These Mistakes
- Research your car’s requirements before buying parts.
- Let your engine cool completely before starting work.
- Drain enough coolant to avoid spills.
- Clean all gasket surfaces until they are smooth and free of debris.
- Use the right gasket and sealant as recommended.
- Tighten bolts to the correct torque using a torque wrench.
- Install the thermostat in the correct direction.
- Bleed air from the system before finishing.
- Check hoses and clamps for wear or leaks.
- Test the new thermostat before installing if possible.
- Use fresh coolant if the old coolant is dirty or old.
- Dispose of old coolant safely.
- Start the engine and check for leaks and proper temperature.
Key Data: Thermostat Failure And Engine Damage
According to the National Institute for Automotive Service Excellence (ASE), about 20% of engine overheating cases are caused by thermostat problems or installation errors. Replacing a thermostat incorrectly can sometimes lead to head gasket failure, which is one of the most expensive engine repairs. This is why paying attention to details during replacement is so important.
When To Ask For Professional Help
If you feel unsure about any step, it’s better to ask a professional mechanic. Modern cars can have complex cooling systems, and some have hidden thermostats that are hard to reach. Spending a bit more for expert help can save you from expensive mistakes.
For more detailed guides and diagrams, you can check resources like Haynes Manuals.
Frequently Asked Questions
What Are The Signs Of A Bad Thermostat?
Common signs include engine overheating, temperature gauge fluctuations, heater not working properly, or coolant leaks near the thermostat housing.
Can I Drive With A Faulty Thermostat?
It’s not recommended. A faulty thermostat can cause engine overheating or prevent your engine from reaching normal operating temperature, leading to poor fuel economy and possible engine damage.
How Long Does It Take To Replace A Car Thermostat?
For most cars, it takes 1–2 hours if you have the right tools and experience. Some models may require more time if the thermostat is hard to reach.
Is It Necessary To Replace The Coolant When Changing The Thermostat?
If your coolant is old, dirty, or mixed with a different type, it’s best to replace it. New coolant protects your engine and prevents overheating.
Do I Need To Bleed The Cooling System After Replacing The Thermostat?
Yes, bleeding the system removes trapped air that can cause overheating or noise. Some cars have a special bleed screw, while others need to be run with the radiator cap off until bubbles stop.
Replacing a car thermostat is a job many car owners can do, but only if they pay careful attention to details. By avoiding common mistakes, using quality parts, and checking your work, you can keep your engine running smoothly and save money in the long run.
If you ever feel unsure, don’t hesitate to ask for professional help—your engine’s health depends on it.
Credit: www.gatestechzone.com
