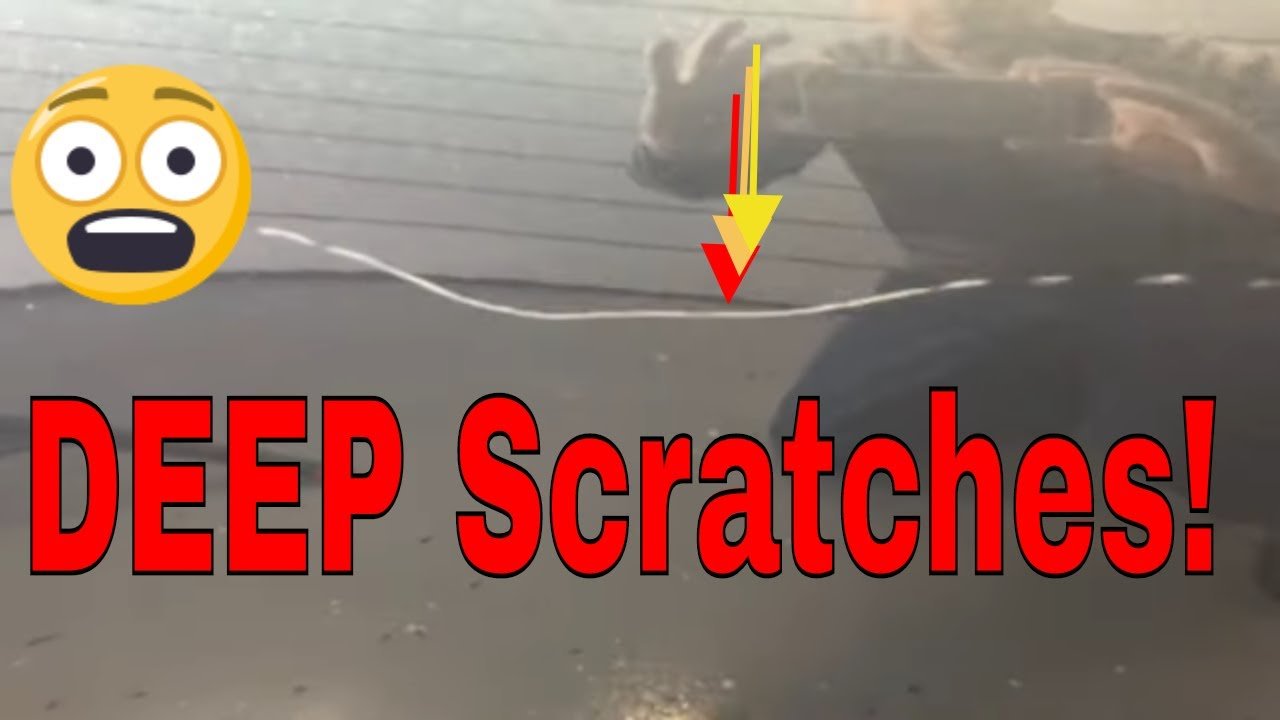
Many car owners know that sinking feeling when they spot a scratch on their vehicle. Especially when the scratch goes deep into the clear coat, it can ruin the look and even lower the car’s value. But what if you could fix it yourself? Buffing out a deep clear coat scratch is possible with the right techniques and materials. This guide will walk you through every step, sharing expert tips and common mistakes, so you can restore your car’s shine with confidence.
Understanding Deep Clear Coat Scratches
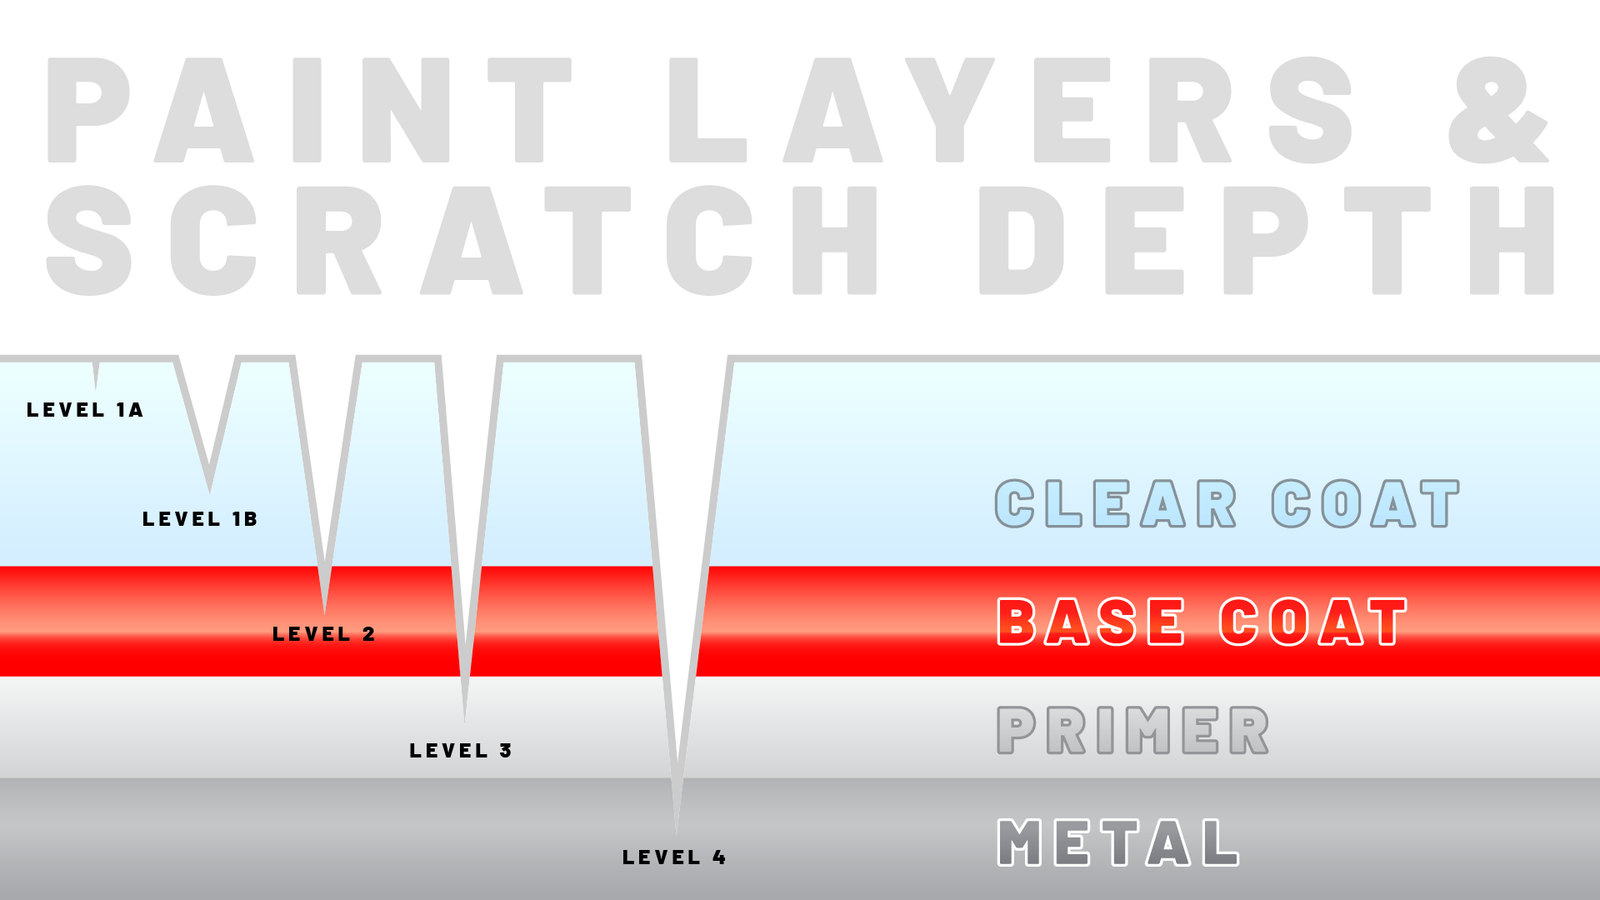
Before you start, it’s important to know what you’re dealing with. The clear coat is the top transparent layer of your car’s paint. It protects the color underneath from sunlight, dirt, and chemicals. A deep scratch in the clear coat goes beyond minor surface marks and often catches your fingernail if you run it across. These scratches don’t reach the colored paint, but they are too deep for regular waxing or light buffing to remove.
Many people confuse deep clear coat scratches with paint or primer scratches. Here’s a quick way to know:
- If the scratch is white or cloudy but not metallic, it’s likely in the clear coat.
- If you see metal or primer (usually grey or black), the scratch is much deeper.
Understanding this difference helps you choose the right repair method.
What You’ll Need: Tools And Materials
Buffing out a deep clear coat scratch requires a few specific items. Here’s a list of what you should gather before starting:
- Automotive masking tape (to protect nearby areas)
- Sandpaper (2000-grit and 3000-grit)
- Scratch remover compound or rubbing compound
- Microfiber towels
- Dual-action buffer (optional, but gives better results)
- Spray bottle with water
- Polishing pad (if using a buffer)
- Automotive polish (for final shine)
- Car wax or sealant
One thing many beginners overlook is the quality of the sandpaper and compound. Cheap or worn-out products can cause more damage. Investing in automotive-grade supplies makes a big difference in the final result.
Credit: www.youtube.com
Preparing The Area
Preparation is key for a smooth repair. Start by washing the area with car soap and water. Remove all dirt, wax, and grease, as these can get trapped and cause swirl marks during buffing. Dry the area completely with a clean microfiber towel.
Next, use masking tape to cover the edges around the scratch. This prevents accidental damage to unaffected paint. It’s a step many skip, but it can save you from creating extra work.
Now, inspect the scratch closely. Use a bright light or sunlight. If your fingernail catches on the scratch but does not go through to the paint, it’s ideal for this method.
Sanding The Scratch
Sanding might sound scary, but it’s a controlled way to even out the clear coat. Here’s how to do it safely:
- Soak the 2000-grit sandpaper in water for at least 10 minutes. Wet sanding reduces heat and helps avoid deeper scratches.
- Lightly spray water on the scratch and sandpaper.
- Using gentle, back-and-forth motions, sand only the scratch area. Keep the sandpaper flat and avoid pressing hard.
- Check your work often. After 10-15 passes, dry the area and inspect. Stop when the scratch is barely visible, but do not sand too deep.
- Switch to 3000-grit sandpaper and repeat the process. This smooths out sanding lines and prepares the surface for buffing.
A useful tip: always keep the area wet while sanding. Dry sanding can cause hazing or deeper grooves that are hard to remove.
Applying The Compound
With sanding done, it’s time to use a rubbing compound. This product helps remove fine sanding marks and polishes the clear coat.
- Apply a small amount (about a dime-sized drop) of compound to a microfiber towel or polishing pad.
- Work the compound into the sanded area using small, circular motions. If you have a dual-action buffer, use it at a low speed for more even results.
- Buff for about 30 seconds, then wipe off the residue with a clean towel. Inspect the area.
- If some haze or marks remain, repeat the process, but avoid over-buffing, which can thin the clear coat.
Many first-timers use too much compound or press too hard. This can lead to uneven gloss or even clear coat removal. Be gentle and patient.
Polishing For Gloss
Even after compounding, the area might look slightly dull compared to the rest of the car. Polishing restores the deep shine and blends the repair.
- Apply automotive polish to a clean polishing pad or towel.
- Using gentle, circular motions, work the polish into the repaired area.
- Buff with a clean, dry microfiber towel until the surface shines.
If you used a buffer earlier, use a softer pad for polishing. Don’t rush this step—the polish brings back the clarity and depth of the clear coat.
Sealing And Protecting The Repair
The final step is to protect your work. Applying a car wax or sealant over the area helps shield the clear coat from future damage and blends the repair with the rest of the paint.
- Use a soft applicator to spread a thin, even layer of wax.
- Allow it to dry to a haze, then buff off with a clean towel.
- For extra protection, apply a second coat after 24 hours.
Some people skip waxing after buffing, but this leaves the fresh clear coat vulnerable to UV rays and contaminants.
Common Mistakes To Avoid
Buffing out a deep clear coat scratch is straightforward, but there are a few traps to watch for:
- Skipping masking tape: You might accidentally scratch surrounding areas.
- Using dry sandpaper: This causes deeper grooves that are hard to remove.
- Buffing too aggressively: You can remove too much clear coat, making the repair worse.
- Ignoring the final wax: The area can fade or haze over time.
Take your time, check your progress often, and use the right materials for the best result.
Credit: www.youtube.com
When To Seek Professional Help
Not all scratches are suitable for DIY repair. If you notice any of the following, consider getting help from an auto body shop:
- The scratch has gone through the clear coat and paint, exposing primer or metal.
- The damaged area is very large or in a difficult spot (like near trim or emblems).
- You’re not confident in your technique or tools.
Professionals have access to specialized equipment and can match the finish perfectly. For small, deep clear coat scratches, however, most owners can achieve impressive results at home.
Comparing Key Products For Scratch Removal
Choosing the right products makes a big difference. Here’s a comparison of popular scratch removal compounds:
| Product | Type | Ease of Use | Average Price |
|---|---|---|---|
| Meguiar’s Ultimate Compound | Rubbing Compound | Easy | $10 |
| 3M Scratch Remover | Polishing Compound | Moderate | $13 |
| Turtle Wax Scratch Repair & Renew | All-in-One | Very Easy | $8 |
For beginners, an all-in-one product can be safer. But for the best results on deep clear coat scratches, a two-step compound and polish process is recommended.
Manual Vs. Machine Buffing
You can buff by hand or use a machine. Here’s how they compare:
| Method | Control | Speed | Result Quality |
|---|---|---|---|
| Hand Buffing | High | Slower | Good |
| Dual-Action Buffer | Medium | Fast | Excellent |
If you’re new to car care, hand buffing gives you more control and lowers the risk of mistakes. For larger scratches or professional results, a dual-action buffer can save time and effort.
Real-world Example
Sarah, a car owner in Texas, noticed a long scratch on her white sedan after parking near some bushes. She researched DIY methods and decided to try buffing it out herself. Using 2000-grit sandpaper, Meguiar’s Ultimate Compound, and a simple hand applicator, she worked on the scratch for about an hour. After polishing and waxing, the damaged area was almost invisible, and the paint looked shiny again.
Her main tip: “Take your time with each step. Rushing made the scratch look worse at first, but slowing down and following the process carefully fixed it.”
Credit: www.drbeasleys.com
Two Insights Many Beginners Miss
- Depth Control Is Critical: Many people sand too much, trying to remove the scratch completely. The goal is to level the edges of the scratch, not to remove all the clear coat in the area. Less is more—stop when the scratch is just blended, not vanished.
- Lighting Changes Everything: Indoor lights can hide fine marks, while sunlight reveals them. Always check your work in natural light before finishing. This avoids surprises the next day.
Maintaining The Repair
After buffing out a deep scratch, keep the area in top shape by:
- Washing your car regularly with gentle soap.
- Reapplying wax every 2-3 months.
- Avoiding automatic car washes with stiff brushes.
Proper maintenance prevents new scratches and keeps the repaired spot looking fresh.
Frequently Asked Questions
How Do I Know If A Scratch Is Too Deep To Buff Out?
If the scratch exposes primer or bare metal (usually gray or silver), it’s too deep for buffing. These need touch-up paint or professional repair. If your fingernail catches but you still see paint color, buffing can help.
Can I Use Toothpaste To Remove Deep Clear Coat Scratches?
Toothpaste can help with tiny surface scratches, but it is not effective for deep clear coat scratches. It lacks the abrasiveness needed and can leave residue or haze.
How Long Does It Take To Buff Out A Deep Clear Coat Scratch?
For most DIY repairs, expect to spend about 1 to 2 hours. This includes cleaning, sanding, compounding, polishing, and waxing. Rushing can lead to mistakes or poor results.
What Is The Risk Of Buffing Out A Scratch Myself?
The main risk is removing too much clear coat. This can cause dull spots or even expose paint. Always check your progress often and use gentle pressure.
Where Can I Find More Information On Car Paint Repair?
For more detailed guides, you can visit the Automotive Paint Wikipedia page, which explains the structure and care of car paint systems.
Buffing out a deep clear coat scratch is not magic, but with the right approach, it’s a skill any car owner can master. With patience, good materials, and attention to detail, you can save money and enjoy a car that looks great again.
