
Installing a car bug deflector hood guard might seem like a small upgrade, but it can make a big difference. These guards protect your vehicle’s hood and windshield from rocks, bugs, and road debris. Over time, this can save you money on paint repairs and keep your car looking new.
The good news? You don’t need to be a mechanic to install one. With a little patience and the right steps, anyone can do it in their own garage or driveway. This article will guide you through everything you need to know about installing a bug deflector hood guard, sharing practical tips, common mistakes, and insights even experienced DIYers sometimes overlook.
Why Use A Car Bug Deflector Hood Guard?
A bug deflector hood guard is more than a stylish accessory. It’s a line of defense for your car’s paint and windshield. When you drive, your hood takes the impact of insects, small stones, and debris. Over time, this can cause scratches, chips, and stains.
Car owners often underestimate how quickly small chips can lead to rust. Even a little damage can reduce your car’s resale value. Installing a hood guard helps keep your car’s front end in top condition. Insects and debris hit the guard instead of your paint, making cleaning much easier.
Most deflectors are made from durable acrylic or polycarbonate, so they handle tough impacts without breaking.
Tools And Materials You Will Need
Before you start, gather all the necessary tools and materials. Missing something halfway can slow you down or cause mistakes.
- Bug deflector hood guard (correct size for your car)
- Installation kit (usually included with the guard – check for screws, clips, or adhesive strips)
- Rubbing alcohol or automotive cleaner
- Clean microfiber cloth
- Masking tape (optional, for alignment)
- Screwdriver (Phillips or flathead, depending on your kit)
- Measuring tape or ruler
- Step stool (for taller vehicles)
- Protective gloves (optional, for safety)
Some bug deflectors use adhesive, while others use screws or special clips. Always check the instructions that come with your specific model.
Preparing Your Vehicle
Proper preparation is essential for a successful installation. Dirt, dust, or wax on your hood can prevent the guard from sticking or cause uneven mounting.
- Park on a flat surface: Make sure your car is on level ground and the parking brake is set.
- Clean the hood: Use rubbing alcohol or a recommended automotive cleaner to wipe the area where the deflector will sit. Remove all dirt, wax, and oil.
- Dry completely: Wait until the hood is fully dry. Even a little moisture can weaken adhesive strips.
- Test fit the deflector: Place the bug guard on your hood to check alignment. This helps you see how it fits before you commit to installation.
Many beginners skip the test fitting step. But this is where you notice if the guard sits unevenly or if something is blocking it, like an antenna or washer nozzle.
Types Of Bug Deflector Hood Guards
Not all deflectors install the same way. Here’s a quick look at the main types and how they attach:
| Type | Attachment Method | Pros | Cons |
|---|---|---|---|
| Adhesive Mount | Double-sided tape | Easy, no drilling | Surface must be very clean |
| Screw-on | Screws or bolts | Very secure | May require drilling |
| Clip-on | Special clips | No holes, removable | May loosen over time |
Most car owners prefer adhesive or clip-on guards for ease of installation. However, trucks and off-road vehicles often use screw-on models for extra strength.
Credit: www.youtube.com
Step-by-step Installation Guide
1. Read The Instructions
Every bug deflector has specific instructions. Read these carefully before starting. Even if you’ve done this before, brands can differ in small but important ways.
2. Mark The Installation Points
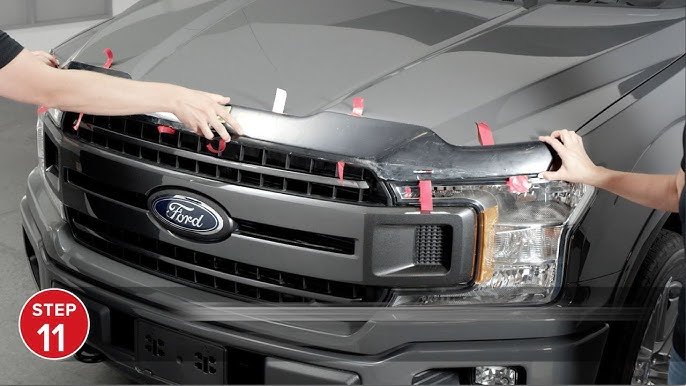
Use a measuring tape to find the center of your hood. Some people use masking tape to mark where the deflector will sit. This helps keep the guard straight and avoids mistakes.
3. Attach Adhesive Or Hardware
For Adhesive Guards:
- Peel off a small part of the backing tape first.
- Align the guard using your marks.
- Press down lightly at first, checking the position.
- Once satisfied, remove the rest of the backing and press the entire length firmly for 1-2 minutes.
For Screw-on Or Clip-on Guards:
- Align the guard using the guide holes or clips.
- Insert screws or clips without tightening fully.
- Check alignment, then tighten all fasteners evenly.
4. Final Checks And Pressure
After installing, go over the whole length of the guard, pressing it down to ensure good contact. If you use screws, double-check that all are snug, but do not overtighten. Too much force can crack the guard or damage your hood.
5. Wait Before Washing
If you used adhesive, wait at least 24 hours before washing your car. Water or pressure can weaken the bond before it is fully set.
Common Mistakes To Avoid
Even careful DIYers make small errors. Here are two non-obvious mistakes people often miss:
- Ignoring temperature: Adhesive works best at moderate temperatures (60°F-80°F / 15°C-27°C). If you install in cold weather, the tape may not stick well. Warm up your garage, or wait for a sunny day.
- Skipping alignment checks: Rushing this step can leave the guard crooked. Always check from both the driver’s and passenger’s side before final attachment.
Another mistake is tightening screws too much. Plastic deflectors can crack easily if you force them. Use gentle pressure, just enough to keep the guard secure.
Special Tips For Different Vehicle Types
For Suvs And Trucks
Taller vehicles might need a step stool or ladder. Take your time with alignment, since even a small angle error is more visible on a big hood.
If your vehicle is often off-road, consider a screw-on bug guard. These handle vibrations and rough conditions better than adhesive strips.
For Cars With Curved Hoods
Newer cars often have more complex hood shapes. Hold the guard in place and gently flex it to match the curve before removing adhesive backing. Never force the plastic; if it feels too tight, double-check the fit.
For Vehicles With Existing Damage
If your hood already has chips or scratches, clean and repair these first. Installing a guard over damaged paint can trap moisture and make rust worse.
How To Choose The Right Bug Deflector Hood Guard
Choosing the right product is as important as the installation. Consider these factors:
- Material: Most guards are made from acrylic or polycarbonate. Polycarbonate is stronger but more expensive.
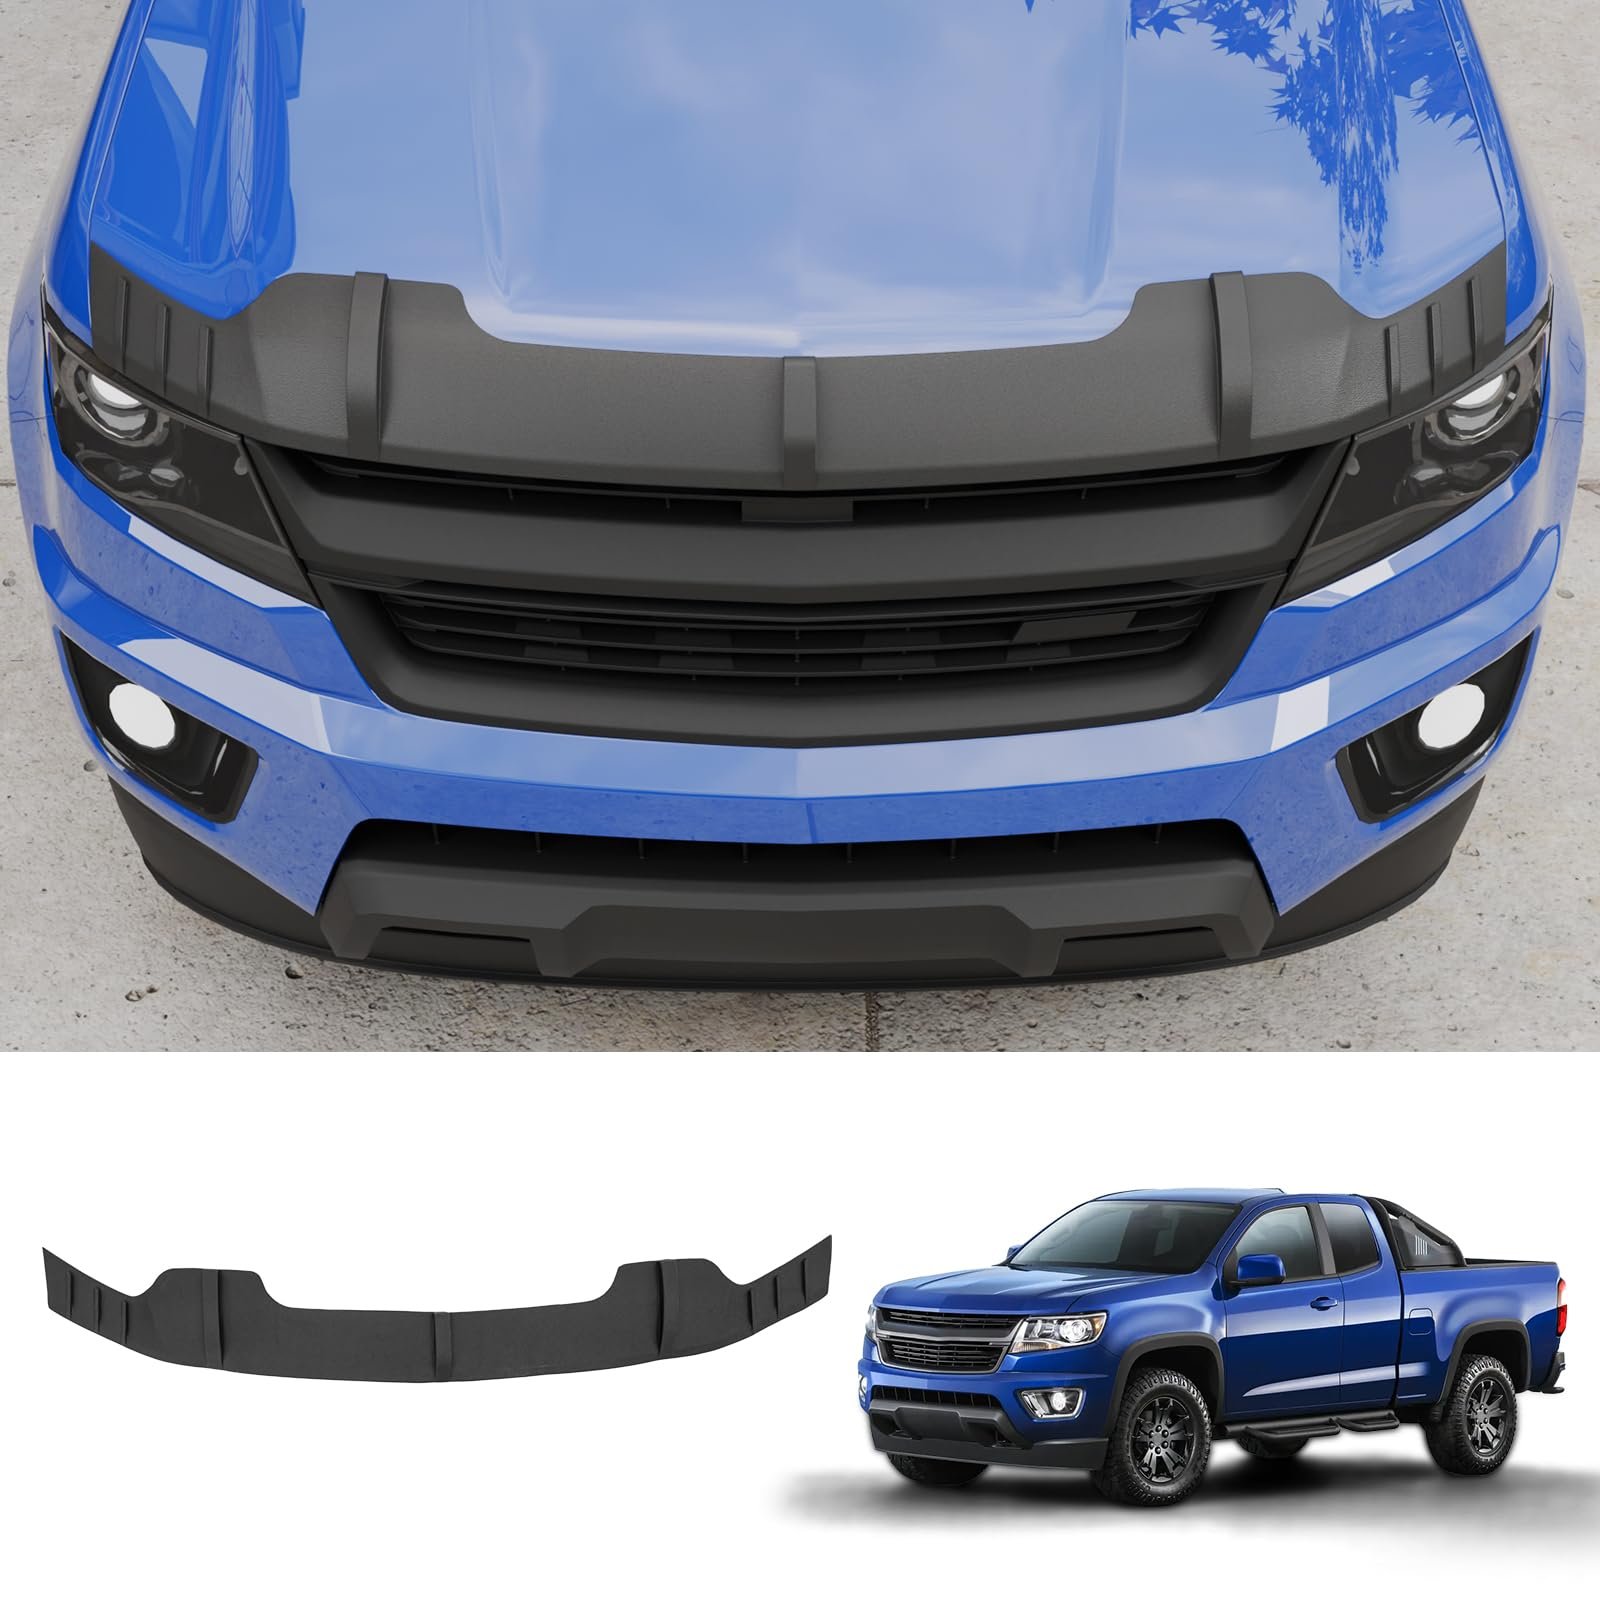
- Fit: Look for a model designed for your exact make, model, and year. Universal guards may not fit perfectly.
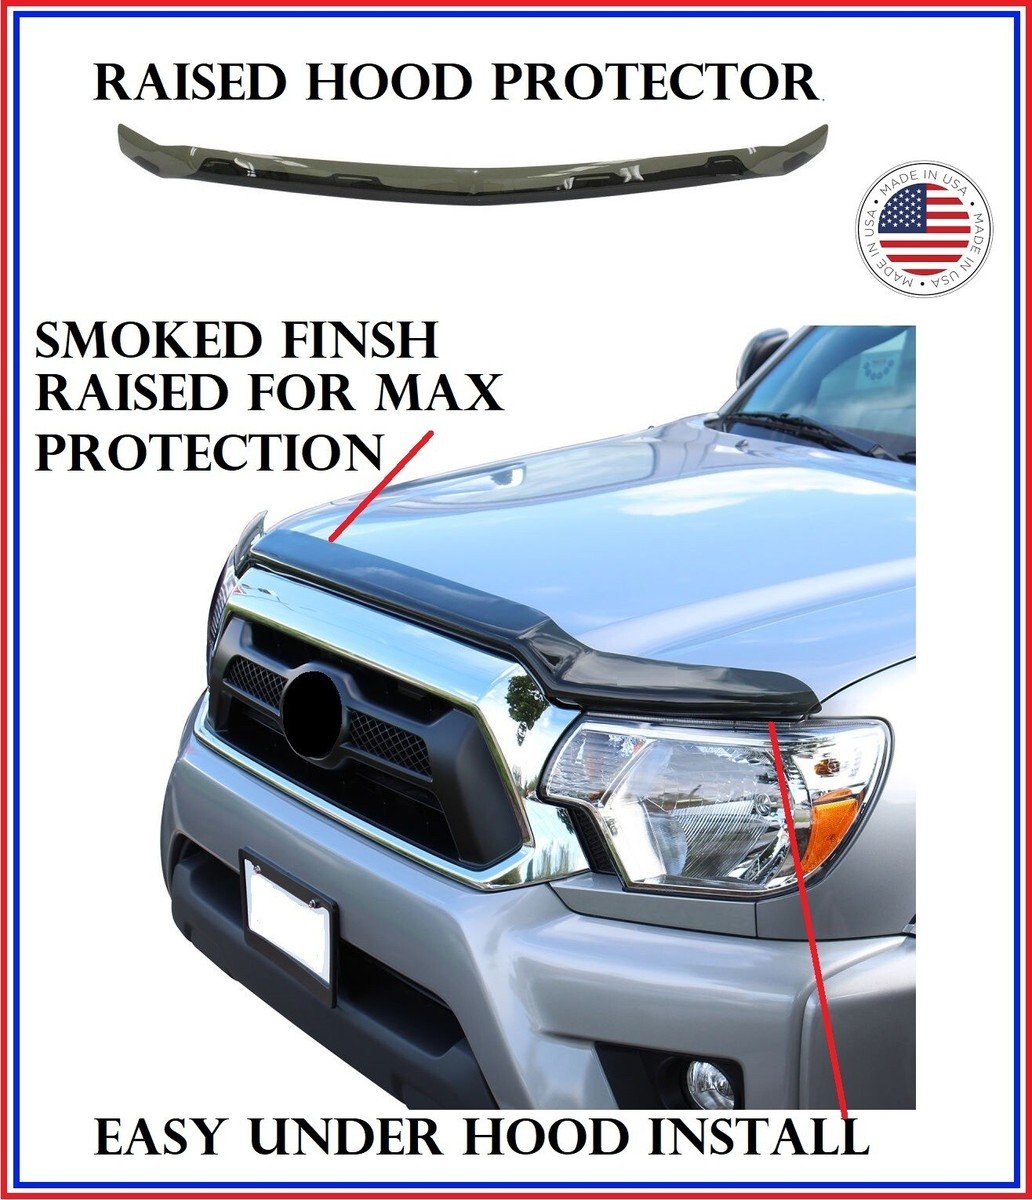
- Color: Clear or smoked options are popular. Clear is less visible, while smoked adds style.
- Attachment method: Decide if you prefer adhesive, screws, or clips.
- Brand reputation: Read reviews and check warranty information.
Here is a quick comparison of material types:
| Material | Strength | UV Resistance | Cost |
|---|---|---|---|
| Acrylic | Good | Moderate | Lower |
| Polycarbonate | Excellent | High | Higher |
Credit: marchettiwines.it
Aftercare And Maintenance
A bug deflector hood guard is low maintenance, but a few simple steps will help it last longer:
- Wash regularly: Use mild soap and water. Avoid abrasive pads or strong chemicals.
- Check hardware: Every few months, check that all screws or clips are tight.
- Inspect for cracks: If you see any damage, replace the guard immediately. Cracks can spread and even fall off at highway speed.
- Wax carefully: Do not wax over the adhesive area or hardware, as this can loosen the bond.
Many car owners forget to check their bug guard after the first few months. This is when clips can loosen, especially after temperature changes.
Cost, Value, And Time Estimate
Installing a bug deflector hood guard is affordable and quick.
- Average cost: $40 to $120, depending on brand and material
- Installation time: 20 to 40 minutes for most cars, up to 1 hour for trucks/SUVs
- DIY savings: Professional installation can cost $50–$80 extra
Over several years, a hood guard can save hundreds of dollars in paint repairs and cleaning.
Credit: www.ebay.com
Environmental Impact And Safety
Bug deflector hood guards do not affect fuel economy or vehicle safety when installed correctly. Quality guards are designed to minimize wind noise and avoid blocking your view.
If you drive in areas with a lot of insects or gravel roads, a bug guard can make a noticeable difference in visibility and cleaning time. Some studies show a reduction in windshield pitting and bug splatter by up to 60% for vehicles with a properly installed guard.
For more details on automotive accessories and their benefits, check out this Wikipedia page on automotive accessories.
Troubleshooting: What If Something Goes Wrong?
Even with careful installation, sometimes issues happen:
| Problem | Cause | Solution |
|---|---|---|
| Guard won’t stick | Surface dirty or too cold | Clean again, warm up area, reapply adhesive |
| Guard is crooked | Rushed alignment | Remove, realign before adhesive sets |
| Cracking or rattling | Overtightened screws, wrong fit | Replace, use correct torque |
If you notice vibration or noise after installation, double-check the attachment points. Sometimes a small adjustment is all it takes to fix the problem.
Frequently Asked Questions
What Is The Main Purpose Of A Car Bug Deflector Hood Guard?
The main purpose is to protect your car’s hood and windshield from insects, rocks, and debris. This helps prevent paint chips, stains, and scratches, keeping your vehicle looking newer for longer.
Can I Install A Bug Deflector Hood Guard By Myself?
Yes, most people can install a hood guard with basic tools and some patience. Adhesive or clip-on models are especially easy for beginners. Always follow the instructions specific to your product.
Will A Bug Deflector Affect My Car’s Fuel Economy?
A properly installed bug deflector does not affect fuel economy in any noticeable way. Most modern guards are designed to be aerodynamic and minimize wind resistance.
How Do I Clean My Bug Deflector Hood Guard?
Clean the guard with mild soap and water using a soft cloth. Avoid harsh chemicals or abrasive pads, as these can damage the material and reduce its clarity.
What If My Bug Deflector Becomes Loose Or Damaged?
If your guard becomes loose, check all screws or clips and tighten as needed. If it cracks or breaks, replace it immediately to avoid further damage or the risk of it coming off while driving.
Installing a car bug deflector hood guard is a simple upgrade that offers lasting protection. With the right tools, careful preparation, and attention to detail, you can complete this task in less than an hour and enjoy peace of mind on every drive.
