
Setting up a parts washer in your garage can make cleaning greasy tools, auto parts, and machinery much easier. A parts washer helps remove oil, dirt, and grime in a safe and efficient way. But to get the most from your investment, you need to install it correctly.
Whether you’re a car enthusiast or a DIY mechanic, this guide will show you every step, from choosing the right model to safe disposal of cleaning fluids. If you want a garage that’s both clean and professional, a parts washer is a smart upgrade.
Why Install A Parts Washer In Your Garage?
A parts washer is more than just a tub with a pump. It’s a tool that saves you time and protects your health. Manual cleaning with rags or brushes can leave behind dangerous residues. These residues can damage your tools, and even harm your skin over time. With a parts washer, you get a closed system that uses a special solvent or water-based solution to break down grime.
Regular use of a parts washer extends the life of your equipment. Clean parts work better and last longer. You’ll also save money because you won’t need to replace dirty or damaged parts as often. For anyone who spends hours in the garage, this machine is a real game-changer.
Types Of Parts Washers
Before you set up, you need to know which washer fits your needs. The most common types are solvent-based and aqueous (water-based) parts washers. Here’s a quick comparison:
| Type | Cleaning Solution | Best For | Safety | Common Use |
|---|---|---|---|---|
| Solvent-Based | Petroleum solvents | Heavy grease, oil | Needs ventilation, fire risk | Auto repair, machinery |
| Aqueous | Water + detergent | Light to medium cleaning | Safer, less odor | Home garages, electronics |
Solvent-based washers clean faster but have more safety concerns. Aqueous washers are safer for home use and better for the environment.
Credit: www.ebay.com
Picking The Right Parts Washer
Choosing the correct model is key to a smooth setup. Here are the main factors to consider:
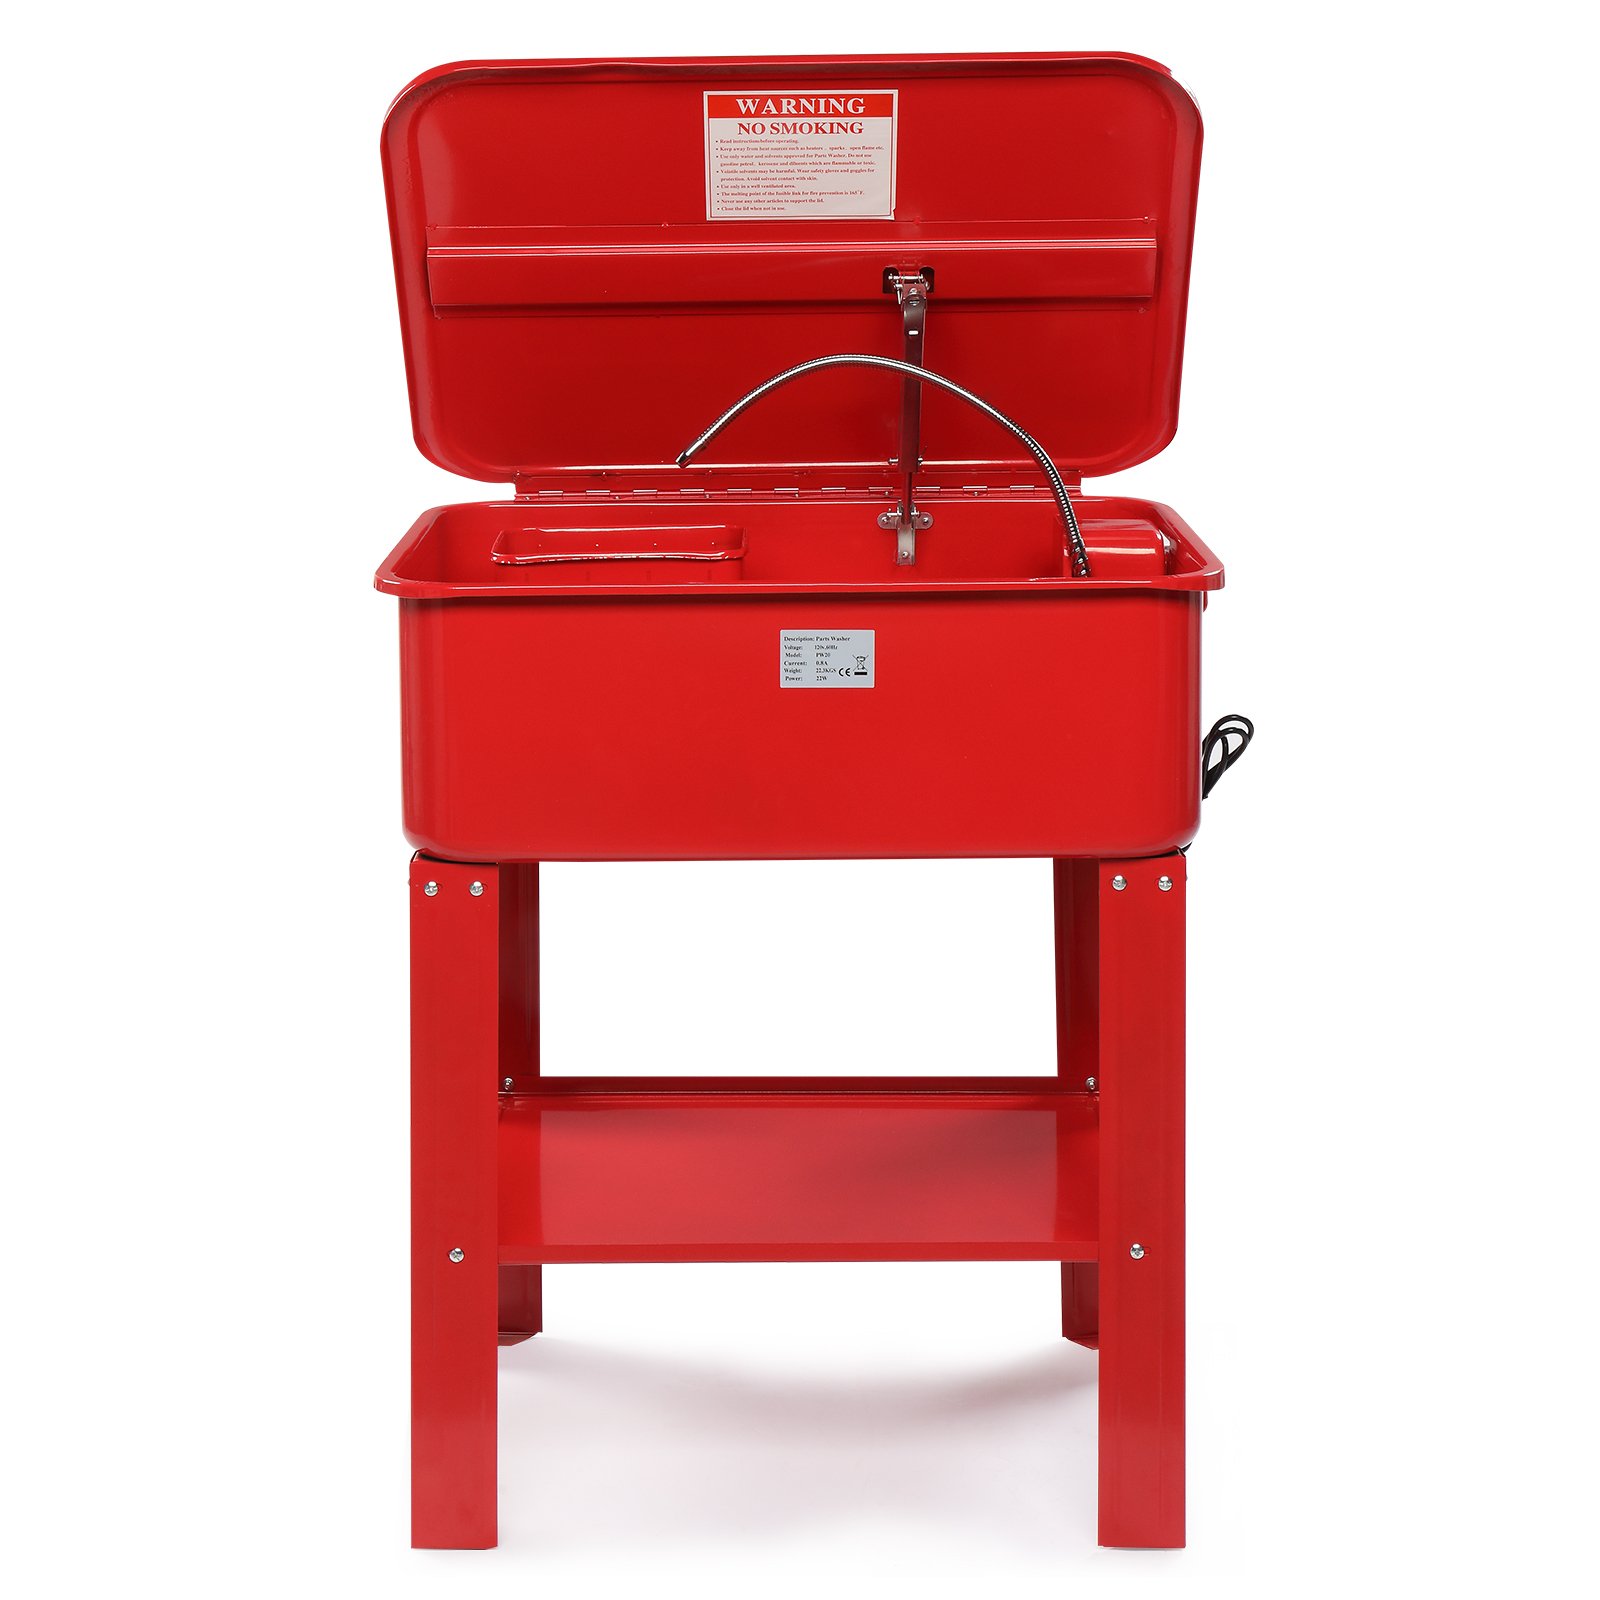
- Capacity: How many parts will you clean at once? For small parts, a benchtop model (3–5 gallons) is enough. For larger auto parts, look for a floor-standing unit (20+ gallons).
- Power Source: Most units plug into a standard outlet. Some larger models may need a dedicated circuit.
- Pump Strength: Look for a pump rated for at least 40 gallons per hour for steady flow.
- Build Material: Steel is durable, but plastic may be lighter and cheaper.
- Safety Features: Check for a fusible link (shuts off the pump in a fire), sealed lids, and splash guards.
It’s also a good idea to compare prices and warranty terms. While it’s tempting to buy the cheapest model, paying a little more for quality often pays off in the long run.
Preparing Your Garage
A safe and organized setup prevents accidents and helps you work efficiently. Before you move the washer in, take these steps:
- Choose a location near a power outlet and away from open flames, heaters, or sparks.
- Make sure the floor is level. A tilted washer can spill liquid or tip over.
- Leave at least 3 feet of space around the washer. This allows you to move parts in and out easily.
- Install a fire extinguisher within reach—especially if you use solvents.
- Place a rubber mat under the washer to catch drips and protect your floor.
- Ensure good ventilation. Open a window or use a fan if you’re working with solvents.
A common mistake is placing the washer too close to flammable materials like gasoline cans or rags. This can be dangerous and may even violate local fire codes.
Assembling The Parts Washer
Most parts washers arrive in a box with some assembly required. Carefully follow the instructions that come with your model, but here’s what you can usually expect:
- Unbox all parts and check for missing pieces. Lay everything out for easy access.
- Attach the legs or base if your model is a floor unit. Make sure all bolts are tight.
- Install the pump. Usually, this involves connecting the pump to the filter and the flexible spout.
- Secure the lid and check for proper fit. The lid should close fully and latch if required.
- Insert the cleaning tray or basket. This holds your parts above the cleaning fluid.
If your washer has a drain plug, make sure it’s closed before adding liquid. Many beginners forget this step and end up with a big mess.
Filling With Cleaning Solution
Choosing the right cleaning fluid is just as important as the washer itself. Here’s a quick comparison of common options:
| Fluid Type | Best For | Hazards | Disposal |
|---|---|---|---|
| Petroleum Solvent | Heavy oil, grease | Flammable, fumes | Hazardous waste facility |
| Water-Based Solution | Light dirt, general use | Less hazardous | Often drain safe (check local rules) |
| Citrus-Based Cleaner | Eco-friendly, mild jobs | Mild skin irritation | Usually drain safe |
When filling, pour slowly to avoid splashes. Fill only to the max fill line (usually marked inside the tank). Overfilling can cause spills when you add parts.
Pro tip: Always wear gloves and eye protection, even with water-based solutions. Some chemicals can irritate your skin or eyes.
Electrical And Safety Setup
Most home parts washers run on standard 120V outlets. Here’s how to connect safely:
- Plug the washer into a GFCI outlet to prevent shocks.
- Keep cords away from water and moving parts.
- Do not use extension cords unless rated for heavy loads.
- Check that the pump runs smoothly before adding parts.
If your washer has a heater, check the temperature settings. Many water-based washers work best around 110–120°F (43–49°C). Never use a heater with flammable solvents.
For fire safety, ensure the fusible link (if present) is intact. This device melts in high heat, shutting off the pump and closing the lid.
First Use: Cleaning Your Parts
With your washer ready, it’s time to clean some parts:
- Remove loose dirt with a brush before washing.
- Place parts in the basket or on the tray.
- Turn on the pump and direct the flexible spout or brush onto the part.
- Move the part to expose all surfaces.
- Let parts soak for a few minutes if needed.
- Remove the part and let excess fluid drip back into the tank.
- Dry parts with a lint-free cloth or compressed air.
Don’t overload the basket. If parts are stacked, the cleaner can’t reach every surface.
Maintenance And Cleaning
Regular care keeps your parts washer working well and extends its life. Here’s what to do:
- Change the cleaning fluid when it’s dirty or loses its power (usually every 1–3 months).
- Clean the filter monthly. Clogged filters reduce cleaning power.
- Wipe down the inside and outside of the tank with a damp cloth.
- Inspect hoses and seals for cracks or leaks.
- If you notice a drop in pump pressure, check for blockages.
Never pour used solvent down the drain. Take it to a hazardous waste facility. Water-based fluids may be drain-safe, but always check local rules.
Common Mistakes To Avoid
Even experienced users can make errors. Here are some to watch out for:
- Using the wrong fluid: Petroleum solvent in a water-based washer can damage seals and the pump.
- Overfilling: Can cause messy spills and damage electrical parts.
- Ignoring ventilation: Fumes from solvents are dangerous. Always work in a well-ventilated area.
- Not wearing PPE: Even mild cleaners can irritate skin or eyes.
- Neglecting maintenance: Dirty fluid or clogged filters reduce cleaning power and can break the pump.
A surprising tip: Some beginners try to wash electrical parts without drying them completely, leading to short circuits when reinstalled. Always allow parts to dry fully before use.
Credit: www.youtube.com
Upgrading Your Setup
If you plan to use your parts washer often, a few upgrades can help:
- Heated models clean faster, especially with water-based solutions.
- Parts washer brushes with fluid flow make scrubbing easier.
- Magnetic trays can hold small screws or clips during washing.
- Secondary containment trays catch spills and prevent stains on your garage floor.
Some advanced models come with oil skimmers to remove floating oils, extending the life of your cleaning fluid.
Environmental And Legal Considerations
Proper disposal of cleaning fluids is not just smart—it’s the law in most places. Solvent waste is usually considered hazardous, and illegal dumping can lead to large fines. Many cities offer free hazardous waste collection days. If you’re not sure, ask your local recycling center.
Water-based fluids are often safer to dispose of, but check for any local regulations. Never mix different chemicals in the same washer; this can create dangerous fumes.
For more about safe waste handling, you can check the EPA guide on hazardous waste.
Credit: www.youtube.com
Frequently Asked Questions
What Size Parts Washer Do I Need For A Home Garage?
For most home garages, a 3–5 gallon benchtop washer is perfect for cleaning small tools and car parts. If you work on larger engines or transmissions, consider a 20-gallon floor model for more space.
Can I Use A Parts Washer For Plastic Or Rubber Items?
Yes, but use a water-based solution and check that the fluid is safe for plastics and rubber. Solvent-based fluids can cause swelling or cracking in some materials.
How Often Should I Change The Cleaning Fluid?
Change the fluid when it becomes dark, smells bad, or loses cleaning power. For most home users, every 1–3 months is typical, but heavy use may require more frequent changes.
Is It Safe To Leave Cleaning Fluid In The Washer When Not In Use?
Yes, as long as the lid is closed and the washer is in a safe, ventilated area away from heat or flames. For extra safety, unplug the unit after use.
What’s The Difference Between Heated And Unheated Parts Washers?
Heated washers use a built-in element to warm the cleaning fluid, which speeds up the cleaning process, especially for grease and oil. Unheated models are cheaper and simpler but may take longer to clean heavy grime.
Setting up a parts washer in your garage is a solid move for anyone serious about maintenance or repairs. A well-chosen and properly installed washer saves time, protects your health, and keeps your tools in top shape. Follow each step, stay safe, and you’ll enjoy a cleaner, more efficient workspace for years to come.
