
A car horn is more than just a tool for alerting others on the road. It’s a safety device that can prevent accidents, warn pedestrians, and even help in emergencies. When your car horn suddenly stops working, it can feel frustrating and unsafe.
Many people think fixing a horn is difficult, but with the right steps, most problems can be solved without much stress. In this article, you’ll learn how to fix a car horn that stopped working, step by step. You will find practical advice, common mistakes, and expert tips to help you get your horn working again.
Whether you are a beginner or have some experience with car repairs, you’ll find this guide easy to follow and complete.
Understanding Why Car Horns Stop Working
A car horn can fail for many reasons. The most common issues include electrical problems, a damaged horn unit, or faulty switches. Let’s look at the main causes:
- Blown fuse: Horns draw a lot of current, so the fuse can blow easily if there’s a short.
- Bad relay: The relay helps send power from the battery to the horn. If it fails, the horn won’t work.
- Broken horn button: The button on the steering wheel can wear out or get stuck.
- Wiring issues: Wires can become loose, corroded, or broken.
- Defective horn: Sometimes, the horn itself fails due to age or damage.
Non-obvious insight: Many beginners skip checking the relay, thinking only about the fuse or the horn. However, the relay is often a hidden cause.
Safety First: Preparing For Repairs
Before you start, take some safety steps:
- Turn off the engine and remove the key.
- If you need to work with electrical parts, disconnect the battery.
- Wear gloves to protect your hands from sharp edges.
- Have basic tools ready: Screwdriver, multimeter, pliers, socket set.
If your car uses an airbag steering wheel, be extra careful. Airbags can deploy accidentally if handled wrongly. If unsure, read your car’s manual or get help from a mechanic.
Step-by-step Guide To Fixing A Car Horn
Let’s fix your horn, step by step. Each step will help you find and solve the problem.
1. Check The Fuse
Locate your car’s fuse box. The horn fuse is usually labeled “Horn” or “HORN. ” Use your car’s manual to find the exact location.
- Pull out the fuse and check if it looks burned or broken.
- If blown, replace it with a new fuse of the same rating (usually 10-15 amps).
- Test the horn. If it works, you’re done!
Data: Around 30% of horn failures are due to blown fuses.
2. Inspect The Relay
The horn relay is often next to the fuse box. It’s a small block that controls power flow.
- Swap the horn relay with another relay of the same type in your car.
- If the horn works after swapping, replace the relay.
Example: Many Toyota and Honda models use standard relays, making swapping easy.
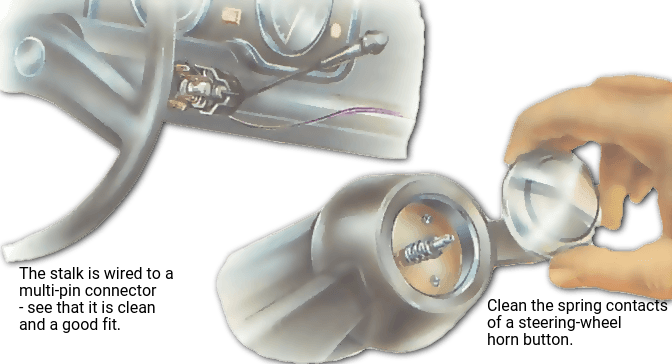
3. Test The Horn Button
Press the horn button on the steering wheel. If you don’t hear a click or feel resistance, the button may be faulty.
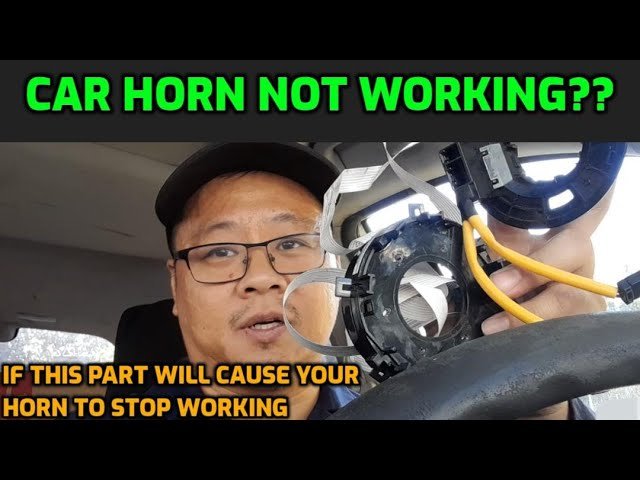
- Remove the airbag carefully (if present).
- Check the horn switch for wear or damage.
- Use a multimeter to test if the switch is sending a signal when pressed.
Practical tip: If the horn button feels loose or stuck, clean around it and check for debris.
4. Inspect Wiring And Connections
Look under the hood for the horn unit. Follow the wires leading to it.
- Check for loose, corroded, or broken wires.
- Use a multimeter to test continuity.
- Repair or replace damaged wiring.
Non-obvious insight: Water and dirt often cause corrosion in horn wiring, especially in older cars.
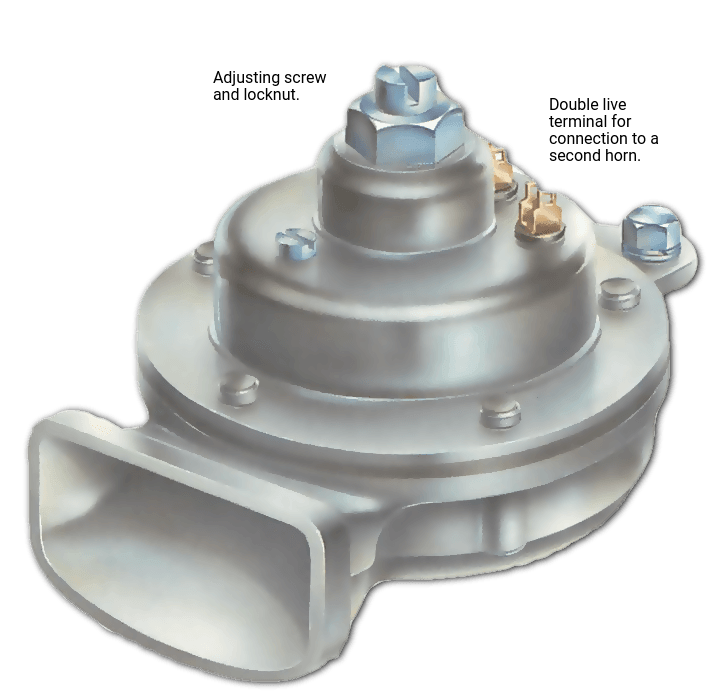
5. Test The Horn Unit
Remove the horn from the car. Connect it directly to the battery using jumper wires.
- If the horn sounds, it’s working.
- If silent, replace the horn.
Statistics: More than 20% of horn failures are due to the horn unit itself.
6. Check Ground Connections
Many horns rely on a good ground connection. If the ground wire or mounting point is rusty or loose, the horn won’t work.
- Clean the ground contact with sandpaper.
- Tighten mounting bolts.
Example: In Ford vehicles, a rusty ground is a common issue.
7. Replace Faulty Parts
After testing, replace any faulty parts: fuse, relay, horn button, wiring, or horn unit. Use OEM (original equipment manufacturer) parts for best fit and reliability.
Comparison Table: Common Causes and Solutions
| Cause | How to Check | Solution | Frequency (%) |
|---|---|---|---|
| Blown Fuse | Visual inspection | Replace fuse | 30% |
| Bad Relay | Swap/test relay | Replace relay | 15% |
| Faulty Button | Press/test with multimeter | Replace/repair button | 10% |
| Wiring Issue | Inspect/test continuity | Repair wiring | 25% |
| Defective Horn | Direct battery test | Replace horn | 20% |
Common Mistakes When Repairing A Car Horn
Many people make mistakes that slow down repairs or cause more problems. Here are some to avoid:
- Skipping the relay check: Don’t assume the fuse is always the problem.
- Using the wrong fuse size: Too high or too low can damage the circuit.
- Ignoring wiring corrosion: Clean all contacts before reconnecting.
- Testing the horn without proper tools: Use a multimeter for accurate results.
- Forgetting to reconnect the battery: Always reconnect when testing.
Credit: www.howacarworks.com
Tools You Need For Car Horn Repair
Having the right tools makes the job easier and safer. Here’s a handy list:
- Multimeter: For testing electrical parts.
- Screwdriver set: For removing panels and horn units.
- Socket set: For bolts and nuts.
- Pliers: For pulling fuses and wires.
- Jumper wires: For direct battery testing.
- Sandpaper: For cleaning ground contacts.
Comparison Table: Basic vs. Advanced Tools
| Tool Type | Basic Tools | Advanced Tools |
|---|---|---|
| Electrical Testing | Multimeter | Power probe |
| Removal | Screwdriver, pliers | Trim removal tool |
| Cleaning | Sandpaper | Wire brush |
| Testing Horn | Jumper wires | Battery tester |
Practical Tips For A Successful Repair
- Always check the manual for your car’s fuse and relay locations.
- Clean all electrical contacts before reconnecting.
- Use OEM parts for replacements; aftermarket parts may not fit well.
- If your horn is weak but not dead, check the voltage drop with a multimeter.
- Test the horn after each step to avoid unnecessary replacements.
Experience-based tip: Sometimes, the problem is a combination of issues. For example, a slightly corroded wire and a weak relay together can stop the horn from working.
Credit: www.howacarworks.com
When To Get Professional Help
If you follow all steps and the horn still doesn’t work, it may be time to call a professional. Some horn systems are connected to alarm or airbag circuits, which can be dangerous to repair without special training.
Signs you need expert help:
- Airbag warning light comes on
- Horn circuit is part of car’s security system
- Multiple electrical issues at once
- You don’t have the right tools or experience
A professional can quickly diagnose and fix complex problems. This saves time and keeps your car safe.
Cost Of Fixing A Car Horn
Repair costs depend on the cause. Here’s a breakdown:
- Fuse: $5–$10
- Relay: $10–$30
- Horn button: $20–$50
- Wiring repair: $30–$100 (DIY or shop)
- New horn unit: $20–$60
Professional labor can add $50–$100 depending on location. DIY repairs can save money if you have basic tools and skills.
Data: According to AutoZone, most horn repairs cost under $100 for parts.
Preventing Future Horn Problems
To avoid horn issues in the future:
- Check the fuse and relay every 6–12 months.
- Clean horn wiring and ground contacts regularly.
- Test the horn as part of routine maintenance.
- Avoid using the horn excessively; this can cause wear.
- Keep the engine bay clean to prevent corrosion.
Non-obvious insight: Parking near salt or in wet areas can speed up corrosion in horn wiring.
Frequently Asked Questions
What If My Horn Sounds Weak But Still Works?
A weak horn often means low voltage or corroded connections. Check the battery, wiring, and ground contact. Clean all connections and test with a multimeter. Replace parts if needed.
Can I Use A Different Horn Model As A Replacement?
Yes, but always check the voltage rating and mounting compatibility. Using the wrong model can cause electrical problems or poor sound quality. OEM parts are safest.
Is It Safe To Repair The Horn Myself If My Car Has An Airbag?
If your steering wheel has an airbag, disconnect the battery and wait at least 10 minutes before starting. If unsure, ask a mechanic. Airbag circuits are sensitive and can be dangerous.
How Long Does It Take To Fix A Car Horn?
Most repairs take 30–60 minutes if you have the tools and parts. Complex wiring or airbag issues can take longer.
Why Does My Horn Stop Working Only In Cold Weather?
Cold weather can cause wires to contract and connections to loosen. Moisture and salt can also cause corrosion. Inspect wiring and ground contacts closely during winter.
Fixing a car horn isn’t as hard as it seems. With simple tools, careful checks, and a step-by-step approach, you can solve most horn problems yourself. Remember to stay safe, avoid common mistakes, and use quality parts. Keeping your horn working means safer driving for you and others.
If you ever feel stuck, don’t hesitate to ask for professional help. A working horn is a simple thing, but it makes a big difference on the road.
Credit: www.youtube.com