
Many drivers want their cars to feel modern, safe, and connected. Installing a Car Android Auto head unit is one of the best upgrades you can do. It lets you use Google Maps, stream music, make calls, and read messages—all from a smart touchscreen on your dashboard. But the idea of replacing your car’s head unit can feel overwhelming, especially if you’ve never done it before.
The good news? With the right tools, clear instructions, and some patience, most people can install an Android Auto head unit themselves. You don’t need to be a car expert, but you do need to understand the basics, follow each step carefully, and avoid common mistakes.
This guide will walk you through the whole process, from choosing the right unit to the final test drive, while sharing practical insights that save time, money, and stress.
Understanding Car Android Auto Head Units
A Car Android Auto head unit is a replacement for your car’s factory radio. It adds a touchscreen, Bluetooth, and the ability to connect your Android phone for apps and navigation. Most units also support Apple CarPlay, so iPhone users aren’t left out.
There are two main types:
- Single DIN: Fits in a 2-inch (50mm) tall slot. Common in older cars.
- Double DIN: Fits in a 4-inch (100mm) tall slot. Most modern cars use this size.
Before buying, check your car’s dashboard opening. Some cars need adapters to fit standard units. Also, consider screen size, audio features, and whether you want wireless or wired Android Auto.
What You’ll Need For Installation
Here are the essential tools and materials for installing an Android Auto head unit:
- New head unit (with wiring harness and mounting kit)
- Trim removal tools (plastic, to avoid scratching)
- Screwdrivers (Philips and flathead)
- Wire stripper/crimper
- Electrical tape or heat shrink tubing
- Soldering iron (optional, for strong connections)
- Panel adapters (if your car is not standard size)
- Steering wheel control adapter (if keeping those features)
- USB extension cable (for easier phone connection)
- Owner’s manual for your car
A few things that beginners miss: Some cars have special security screws or hidden clips. Also, certain European and luxury cars may need unique adapters. Double-check compatibility before you start.
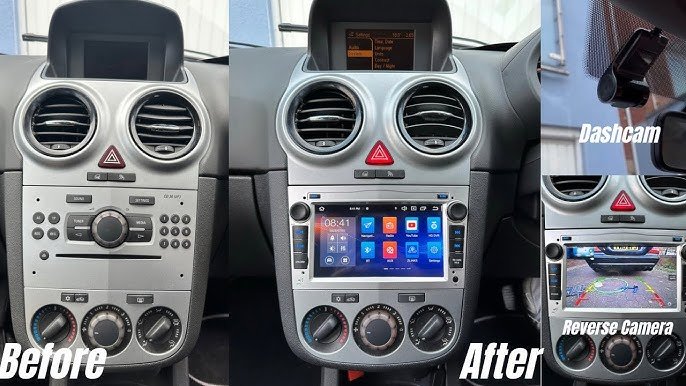
Credit: www.youtube.com
Preparation: Safety First
Safety is critical. Before you touch anything, disconnect the negative battery terminal. This prevents short circuits and protects your car’s electronics. Wait at least five minutes before working, to allow airbag systems to power down.
Remove all jewelry that might touch wires. Park the car in a well-lit, dry area. Take photos of each step as you go—this makes reassembly much easier, especially if something doesn’t work right away.
Removing The Old Head Unit
This step takes patience. Rushing can break fragile trim pieces or damage wiring.
- Remove Trim Panels: Use plastic trim tools to gently pry around the head unit. Most cars have several clips—work slowly.
- Unscrew the Head Unit: Locate all screws or bolts holding the radio. Keep them organized; you’ll need them later.
- Disconnect Wiring: Carefully unplug all harnesses and antenna cables. Some connectors have tabs you must press.
- Inspect the Opening: Clean out any dust or debris. Check for any damage or modifications from previous owners.
Pro tip: If you find aftermarket wiring (like splices or tape), label everything before disconnecting. This can prevent hours of confusion later.
Comparing Head Unit Features
Choosing the right Android Auto head unit depends on your needs and budget. Here’s a quick comparison of common features:
| Feature | Basic Models | Mid-Range | Premium |
|---|---|---|---|
| Screen Size | 6-7 inch | 7-9 inch | 9-10+ inch |
| Resolution | 800×480 | 1024×600 | 1280×720 or higher |
| Android Auto | Wired | Wired/Wireless | Wireless |
| Audio Output | Standard | High-power | Hi-Res/Optical |
| Extra Features | None | Backup camera input | HD Radio, Navigation |
If you want wireless Android Auto or high-quality sound, focus on mid-range or premium models. Remember, a bigger screen isn’t always better if it blocks air vents or controls.
Wiring The New Head Unit
Wiring is the most technical part, but it’s manageable with care. Most head units come with a wiring harness. Your job is to connect the wires from your car to the new unit—color by color.
Step-by-step Wiring Process
- Match Wires by Color: Most harnesses use standard colors. For example, yellow is usually 12V constant, red is ignition, black is ground, and so on. Double-check with your unit’s manual.
- Connect Wires: Use crimp connectors or solder for strength. Avoid twisting and taping unless temporary.
- Insulate Connections: Use electrical tape or heat shrink tubing to prevent shorts.
- Connect Optional Features: If your car has steering wheel controls, backup camera, or external amplifiers, connect those wires now.
A key insight: Some cars have “CAN bus” systems that need special adapters. If you skip this, you might lose features like warning chimes or airbag sensors.
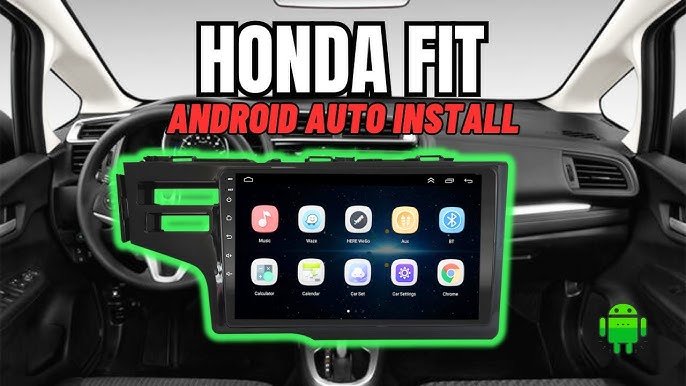
Credit: www.youtube.com
Mounting The New Head Unit
Check your car’s mounting kit. Some cars need metal brackets or faceplate adapters. Test-fit the unit before final installation.
- Slide the new head unit into the dash.
- Secure with screws or bolts, using the ones you removed earlier.
- Attach trim panels, pressing gently until all clips snap in.
If the unit feels loose, add foam padding or check for missing screws. A solid fit prevents rattling and protects the wiring.
Connecting Your Phone And Testing
With everything mounted, it’s time to reconnect the battery and test your system:
- Power On: The head unit should light up. If not, check the fuse and wiring.
- Connect Your Android Phone: Use a good-quality USB cable. Some units also support wireless connection.
- Follow On-Screen Prompts: You may need to install or update the Android Auto app on your phone.
- Test All Features: Try navigation, music, calls, and voice commands. Check steering wheel controls and backup camera if connected.
If something doesn’t work, double-check connections. Many problems are caused by swapped wires or loose plugs.
Common Mistakes And How To Avoid Them
Some errors can cost time or even damage your car. Here’s what to watch out for:
- Forgetting to disconnect the battery can blow a fuse or worse.
- Forcing trim panels may break clips or scratch your dash.
- Mixing up wires is easy—label everything before disconnecting.
- Skipping the test fit can lead to poor alignment or rattles.
- Ignoring firmware updates on your new unit may cause bugs or crashes.
A non-obvious tip: Buy a few extra fuses and keep them handy. Many beginners blow a fuse during installation.
Real-world Example: Toyota Corolla (2016)
Let’s look at an actual case. A 2016 Toyota Corolla owner wanted to upgrade to Android Auto. They chose a 7-inch double DIN unit with wireless Android Auto.
- Trim removal took about 20 minutes.
- Factory radio was secured by 4 screws; all were saved for reuse.
- An adapter harness matched the car’s wiring. No soldering needed.
- A dash kit filled the gap between the new unit and the dash.
- Total install time: About 2 hours, including testing and cleanup.
Lesson: Having the right harness and adapters made the process much smoother. The owner also found that the steering wheel control adapter required an extra wire they almost missed.

Credit: www.reddit.com
Android Auto Head Unit: Cost Comparison
Prices vary widely depending on features and brand. Here’s what you might expect:
| Brand | Wired AA | Wireless AA | Screen Size | Price Range (USD) |
|---|---|---|---|---|
| Pioneer | Yes | Yes | 6.8-9″ | $350-800 |
| Sony | Yes | No | 6.95″ | $250-500 |
| Kenwood | Yes | Yes | 7-10.1″ | $400-1000 |
| Alpine | Yes | Yes | 7-9″ | $400-900 |
Note: Installation kits, adapters, and professional labor can add $100–$300 more.
Tips For A Clean And Professional Install
- Always test the unit before final mounting.
- Route cables away from sharp edges and moving parts.
- Use zip ties to tidy up wiring.
- Keep the owner’s manual and wiring diagram for future reference.
- Update the firmware for the latest features and bug fixes.
A trick many skip: Run a USB extension to your glove box or center console. This makes it easier to plug in your phone and keeps cables out of sight.
When To Seek Professional Help
Some cars are trickier than others. If your vehicle has factory amplifiers, advanced safety features, or complex dashboards, consider a professional install. Also, if you aren’t comfortable working with car wiring, it’s safer to pay for expert help. A mistake here can be expensive to fix.
Professional installers can also integrate extra features like backup cameras, parking sensors, and external amplifiers.
Maintaining Your Android Auto Head Unit
Once installed, keep your system running smoothly:
- Clean the screen with a soft cloth.
- Avoid direct sunlight for long periods to prevent overheating.
- Update software when new versions are released.
- Check wiring and connections if you notice any glitches.
If your unit ever freezes or won’t start, a simple reset (using the button or unplugging the battery) can solve many issues.
Frequently Asked Questions
How Do I Know If A Head Unit Will Fit My Car?
Check your car’s radio size (Single DIN or Double DIN). Measure the opening or look up your car model online. Some vehicles need special dash kits or wiring harnesses. Always check compatibility before buying.
Can I Install Android Auto Head Unit Without Cutting Car Wires?
Yes. Most reputable brands sell plug-and-play wiring harnesses for popular cars. These adapters connect the new unit to your car’s wiring without cutting or splicing.
Will I Lose Steering Wheel Controls After Installing A New Head Unit?
Not necessarily. Many head units support steering wheel controls, but you need a special adapter. Make sure your chosen unit and adapter are compatible with your car model.
How Long Does Installation Take For A Beginner?
It usually takes 2–4 hours for a first-timer, depending on your car and tools. Reading the manuals and preparing your workspace in advance can speed things up.
Do I Need Internet Access For Android Auto To Work?
Your phone needs a mobile data connection for features like maps and music streaming. The head unit itself does not require Wi-Fi, but some updates may need internet access.
Upgrading to an Android Auto head unit brings your car’s dashboard into the 21st century. With careful planning and attention to detail, you can enjoy a safer, smarter driving experience. If you want more details on Android Auto’s features and compatibility, check the official Android Auto site. Enjoy your new connected drive!
