
Installing a digital gauge cluster in your car is one of the smartest upgrades for both style and function. Many modern drivers want real-time information, a fresh dashboard look, and higher accuracy compared to aging analog gauges. But before you start, you need to know the right steps, tools, and what to expect.
This guide will walk you through the whole process, share practical tips, and help you avoid common mistakes. Whether you are a DIY enthusiast or just curious, you’ll finish reading with a clear picture of how to install a car digital gauge cluster successfully.
Why Upgrade To A Digital Gauge Cluster?
Traditional analog clusters often become less reliable as cars age. Needles may stick, backlights fail, and readings can be inaccurate. But a digital gauge cluster offers:
- Sharper display: Crisp, bright screens that are easy to read, even in sunlight.
- Customizable layouts: See only the data you want, from speed to tire pressure.
- Advanced diagnostics: Many digital clusters show error codes and more engine info.
- Modern look: Updates the cabin to feel like a newer vehicle.
If you want to keep your car current or just enjoy more data while driving, this upgrade is a smart move.
What To Consider Before Installing
Not every car or driver’s needs are the same. Make sure you:
- Check compatibility: Not all digital clusters fit every car. Some require adapters or special wiring.
- Understand your skill level: Basic wiring and tool use are needed. If you’re new to car electronics, consider getting help.
- Budget for the project: High-quality clusters can cost from $200 to over $2,000, depending on your car and brand.
- Warranty impact: Modifying wiring may affect your car’s warranty. Check before starting.
- Legal requirements: Some regions require accurate odometer readings and may have rules about changing clusters.
Tools And Materials You Will Need
Gather all equipment before starting. Here is what you will usually need:
- Digital gauge cluster kit (with wiring and manual)
- Screwdrivers (Phillips and flathead)
- Socket set (metric and standard)
- Wire strippers and crimpers
- Electrical tape or heat-shrink tubing
- Multimeter (for checking connections)
- Plastic trim removal tools
- Zip ties
- Owner’s manual or wiring diagrams for your car
Some kits may need extra adapters or CAN bus modules. Always read your specific kit instructions.
Removing The Old Gauge Cluster
This step needs patience and care. Damaging trim or wiring can be costly.
- Disconnect the battery: Safety first—remove the negative cable to avoid shorts.
- Remove dashboard trim: Use plastic tools to avoid scratching. Work gently.
- Unscrew the cluster: Usually 2–4 screws hold it. Keep screws safe for reassembly.
- Unplug connectors: Carefully detach wiring. Some have tabs you must press.
Non-obvious tip: Take photos as you remove each piece. You’ll be glad when it’s time to reassemble!
Wiring: The Most Critical Step
Digital clusters need power, ground, and data. Here’s how to handle wiring:
Understanding Cluster Wiring
Most clusters connect to:
- Ignition power: So it turns on only when the car is running.
- Ground: To complete the circuit.
- CAN bus or OBD-II: For engine data and speed.
- Lighting: So the display dims with your headlights.
Making The Connections
- Match wires: Use your car’s wiring diagram and the cluster’s instructions.
- Test wires with a multimeter: Don’t guess—confirm each wire’s purpose.
- Connect securely: Use crimp connectors or solder for reliability.
- Insulate: Wrap all connections with electrical tape or heat-shrink tubing.
Beginner mistake: Rushing wiring leads to loose connections and glitches. Take your time.
Example: Connecting Speed Signal
Suppose your car sends speed info via the OBD-II port. You can splice into the correct wire or, in some kits, use a plug-and-play OBD-II adapter for a clean install.
Installing The Digital Gauge Cluster
Now comes the satisfying part: putting in your new cluster.
- Test-fit the cluster: Before wiring, check if it fits the opening. Some cars need a bracket or adapter.
- Connect the wiring: Plug in connectors or attach wires as directed.
- Secure the cluster: Screw it in gently—don’t overtighten.
- Reconnect the battery: Power up and check if the cluster turns on.
If the display is blank, double-check your wiring and fuses.
Configuring And Calibrating Your Cluster
Most digital clusters need setup. They may offer customizable colors, layouts, and units.
Calibration Steps
- Set odometer: Match the mileage to your car’s actual odometer if possible (important for legal reasons).
- Adjust warning levels: Choose when alerts for temperature, RPM, etc., appear.
- Test each function: Verify that speed, RPM, fuel, and other readings work.
Non-obvious insight: Some clusters update via USB or Bluetooth, letting you tweak layouts or install firmware updates. Check your manual for these features.
Reassembling The Dashboard
Reverse the removal steps:
- Replace trim panels: Line up clips and press gently.
- Check fit and finish: Make sure no gaps or rattles remain.
- Test all functions: Turn on headlights, start the car, and look for warning lights or errors.
If you see any warning or error codes, don’t ignore them—consult your manual.
Comparing Digital Gauge Cluster Features
To help you choose the right kit, here’s a look at common features in popular clusters:
| Feature | Basic Cluster | Advanced Cluster |
|---|---|---|
| Display type | LCD monochrome | Full-color TFT |
| Custom layouts | No | Yes |
| OBD-II data | Limited | Full diagnostics |
| Navigation | No | Optional |
| Firmware updates | No | Yes (USB/Bluetooth) |
Cost Breakdown Of A Typical Installation
Installing a digital gauge cluster is not just the price of the display. Here’s a rough cost estimate:
| Item | Estimated Cost |
|---|---|
| Digital gauge cluster kit | $250–$1,500 |
| Wiring adapters | $20–$100 |
| Professional installation (optional) | $100–$500 |
| DIY tools/materials | $30–$80 |
The total price can range from $300 to over $2,000, depending on brand and labor.
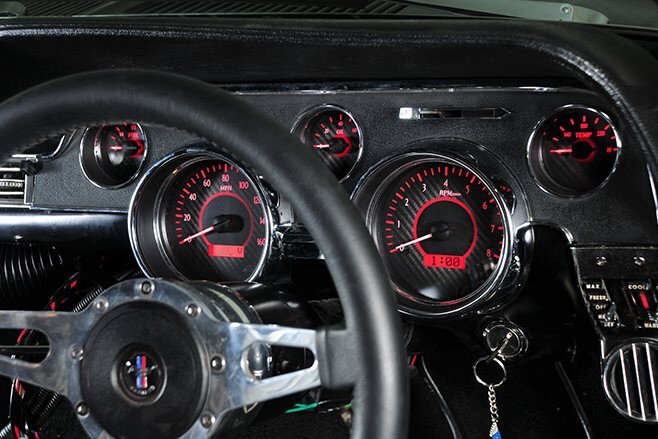
Credit: www.streetmachine.com.au
Diy Vs. Professional Installation
You may wonder if you should do this yourself or hire a shop. Here’s a comparison:
| Factor | DIY | Professional |
|---|---|---|
| Cost | Lower | Higher |
| Time required | 3–8 hours | 1–3 hours |
| Tools needed | Must own or buy | Provided by shop |
| Warranty impact | Possible risk | May offer warranty |
| Customization | As you wish | Limited to their skill |
DIY saves money and is rewarding, but professional work is faster and safer for those less experienced.
Common Mistakes And How To Avoid Them
Even careful installers can slip up. Watch out for:
- Forgetting to disconnect the battery: This can blow fuses or damage electronics.
- Mixing up wires: Always double-check colors and functions.
- Not testing as you go: Check each step before moving on, so mistakes are easier to fix.
- Skipping the manual: Each cluster and car is different.
- Ignoring legal requirements: Odometer tampering can be illegal.

Credit: carlinklife.com
Real-world Example: Upgrading A 2012 Honda Civic
Let’s say you want to replace the analog cluster in a 2012 Honda Civic. The new digital cluster comes with a plug-and-play harness but needs calibration. Steps:
- Remove trim and screws using plastic tools and a Phillips screwdriver.
- Unplug factory cluster and connect the new harness to the digital cluster.
- Secure the cluster, reconnect the battery, and turn the key.
- Enter setup mode to calibrate speedometer and fuel level.
- Test all functions. If the check engine light appears, double-check CAN bus connections.
This type of project usually takes about 4–6 hours for a careful DIYer.
Extra Tips For A Successful Install
- Label wires as you disconnect them—masking tape helps.
- Keep all factory parts in case you want to revert later.
- Check forums for car-specific advice—owners often share unique tips.
- Don’t rush—a neat install lasts longer and looks better.
If you want to see more about digital displays and car electronics, Wikipedia’s page on digital instrument clusters is a good resource.
Upgrading to a digital gauge cluster can make your car feel brand new, boost safety, and show you more about your engine’s health. With good planning and careful work, you’ll get a dashboard that impresses every time you drive.
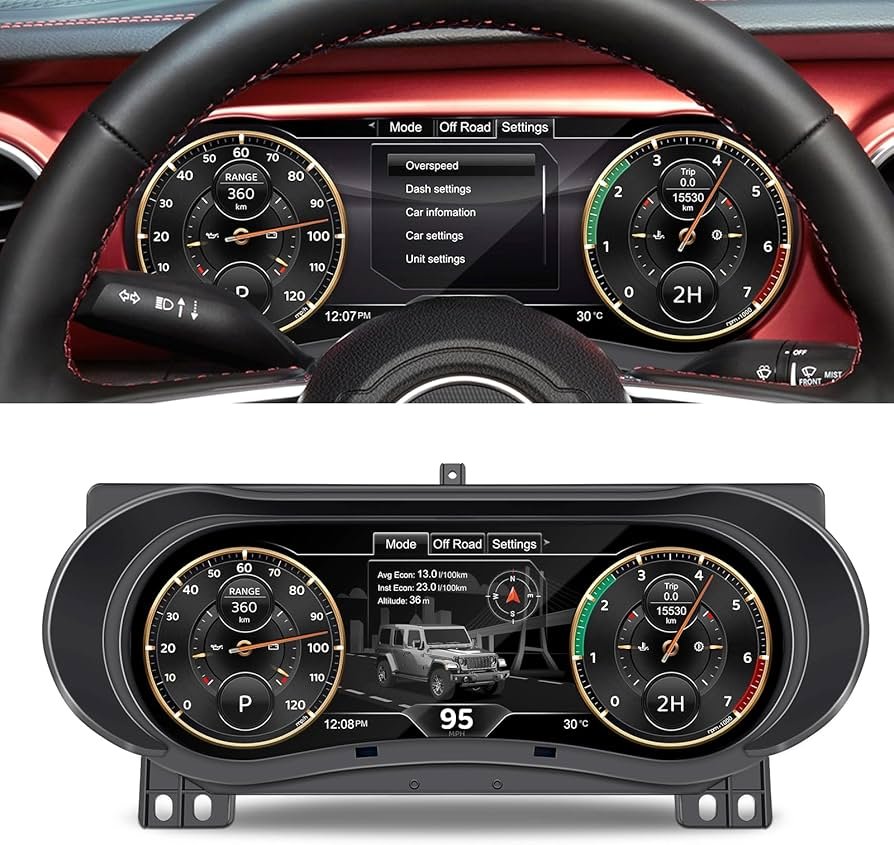
Credit: www.amazon.com
Frequently Asked Questions
How Hard Is It To Install A Digital Gauge Cluster?
Most kits are designed for DIY installation if you are comfortable with basic tools and wiring. However, if your car is more complex or you’re unsure, professional help is a good idea.
Will A Digital Cluster Work With Any Car?
No, clusters are not universal. You need a model designed for your make and year. Some cars need special adapters or firmware.
Can I Return To My Old Cluster After Installing A Digital One?
Yes, as long as you keep the original cluster and don’t modify any wiring permanently. Always save factory parts for this reason.
Does Installing A Digital Cluster Affect My Car’s Value?
It can increase value for tech-savvy buyers, but purists may prefer original equipment. Always keep the old cluster to offer both options.
What If The New Cluster Shows Wrong Information?
Check wiring, calibration steps, and refer to the cluster’s manual. Sometimes updates or software tweaks are needed to match your car’s sensors and settings.
With a little patience and the right tools, installing a car digital gauge cluster is an upgrade that pays off every time you start your engine.
