
Installing a car fuel pressure regulator might sound technical, but with the right guidance, it becomes a manageable task—even for someone with basic mechanical skills. A fuel pressure regulator is an essential part of your vehicle’s fuel system. It controls the pressure of fuel going to the injectors, which helps your engine run smoothly and efficiently. If you want better performance, improved fuel economy, or you’ve noticed problems like rough idling, poor acceleration, or black smoke from the exhaust, upgrading or replacing your regulator could be the answer.
Many car owners ignore the fuel system until it causes problems. However, a faulty or worn-out regulator can lead to major engine issues. Installing a new one not only restores performance but can also prevent expensive repairs in the future. This guide covers everything you need to know: the tools required, safety precautions, step-by-step installation, common mistakes, and tips for a smooth process.
Understanding The Fuel Pressure Regulator
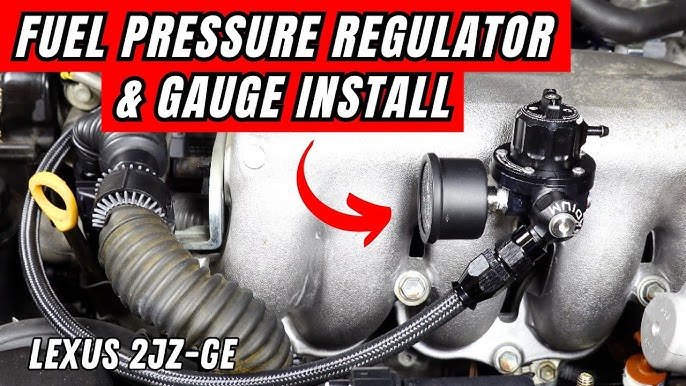
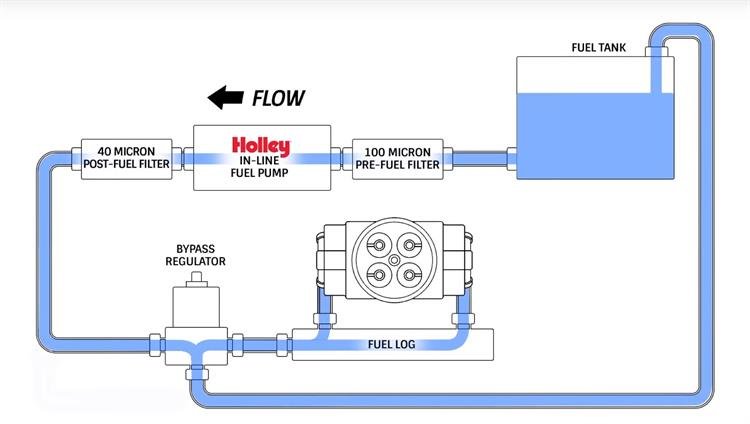
Before you begin, it’s important to understand what a fuel pressure regulator does. It sits between the fuel pump and the injectors, keeping the fuel pressure consistent no matter how hard the engine works. Most modern cars use a vacuum-operated regulator. Some performance vehicles may use an adjustable aftermarket unit. If you plan to upgrade your engine or use high-performance parts, installing an adjustable regulator is often necessary.
There are two main types:
- OEM (Original Equipment Manufacturer) regulators: Designed for stock vehicles.
- Aftermarket adjustable regulators: Used for tuning and performance upgrades.
If you’re not sure which type your car uses, check the owner’s manual or consult with a mechanic.
Why Install Or Replace A Fuel Pressure Regulator?
- Engine performance: A faulty regulator can cause rough idle, stalling, or hesitation.
- Fuel efficiency: Incorrect pressure wastes fuel.
- Engine protection: Prevents damage to injectors and pistons.
- Tuning upgrades: Essential for turbocharged or modified engines.
Non-obvious insight: Some symptoms of a bad regulator (like hard starting or fuel smell) are often mistaken for other issues. Replacing the regulator early can avoid unnecessary repairs.
Credit: www.youtube.com
Tools And Materials You Will Need
Having the right tools makes the installation easier and safer. Here’s what you’ll need:
- New fuel pressure regulator (OEM or adjustable, as needed)
- Basic hand tools (wrenches, screwdrivers, pliers)
- Socket set (metric or standard, based on your car)
- Fuel line disconnect tool (for some vehicles)
- Rags and a container (to catch fuel spills)
- Safety goggles and gloves
- Torque wrench (for precise tightening)
- Vacuum hose (if the old one is cracked or damaged)
- Replacement O-rings or gaskets (if not included with the regulator)
Don’t forget to work in a well-ventilated area. Gasoline fumes are harmful and can ignite easily.
Safety Precautions Before Starting
- Disconnect the battery: This prevents sparks.
- Relieve fuel system pressure: Locate the fuse for the fuel pump, remove it, and start the car until it stalls. This will depressurize the system.
- Keep fire extinguishers nearby: Fuel vapors are flammable.
- Avoid open flames: No smoking or exposed lights.
Many beginners skip system depressurization, which can cause dangerous fuel spray. Never underestimate this step.
Credit: www.youtube.com
Step-by-step Guide: Installing A Fuel Pressure Regulator
1. Locate The Fuel Pressure Regulator
The regulator is usually mounted on the fuel rail, near the injectors. In some vehicles, it’s inside the fuel tank (especially in newer models). For most DIY installations, you’ll be working with an external regulator.
2. Remove The Old Regulator
- Disconnect the vacuum line (if present). Label it for easy reconnection.
- Loosen the fuel lines: Use a fuel line disconnect tool if needed. Some fuel will spill, so place rags and a container underneath.
- Unbolt the regulator from the rail using the correct socket or wrench.
- Remove the old O-ring or gasket. Clean the mounting area with a lint-free rag.
3. Prepare The New Regulator
- Check for O-rings or gaskets. Lubricate them lightly with clean engine oil.
- If you have an adjustable regulator, note the factory setting. You’ll adjust it after installation.
4. Install The New Regulator
- Attach the regulator to the rail, ensuring the O-ring seats properly.
- Reconnect the fuel lines. Tighten the fittings firmly, but don’t overtighten.
- Reconnect the vacuum hose.
5. Reconnect And Check
- Replace the fuel pump fuse.
- Reconnect the battery.
- Turn the ignition key to “ON” (do not start) and listen for the fuel pump. Check for leaks around the regulator.
- If there are no leaks, start the engine.
6. Adjust (if Using An Adjustable Regulator)
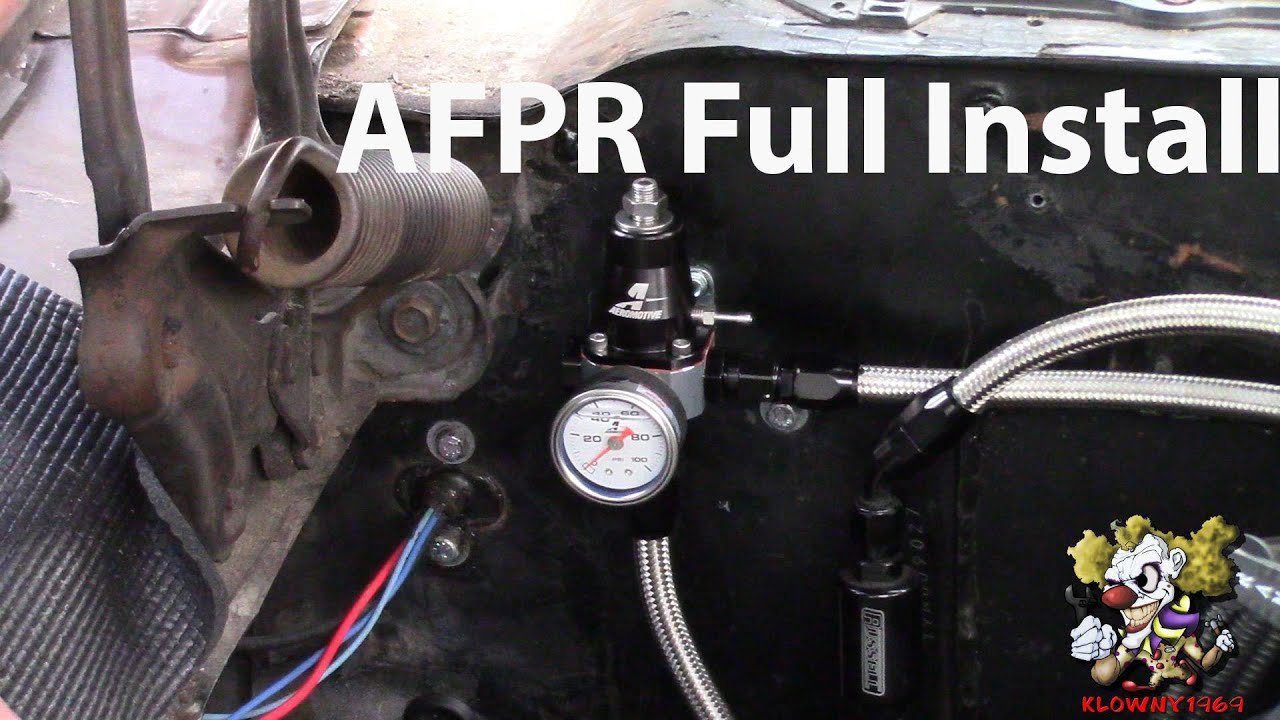
- Use a fuel pressure gauge to check pressure at idle and under load.
- Adjust the regulator screw as needed, following the specifications in your manual or tuner’s guide.
Non-obvious insight: Some adjustable regulators require a few minutes of engine run time before pressure stabilizes. Always re-check pressure after a short drive.
Common Mistakes And How To Avoid Them
- Skipping pressure relief: This is dangerous. Always depressurize the system before disconnecting any fuel lines.
- Damaging O-rings: A pinched or twisted O-ring will cause leaks. Lubricate them and check their position before installing.
- Ignoring torque specs: Over-tightening can strip threads or crack the regulator housing.
- Missing vacuum hose: Forgetting to connect the vacuum line leads to poor performance and high idle.
- Not checking for leaks: Even a small leak is a fire risk. Inspect carefully with the engine running.
Many first-timers forget to reconnect the battery or the fuel pump fuse, leading to confusion when the car won’t start.
Tips For A Smooth Installation
- Take photos before you remove anything. This helps with reassembly.
- Replace any old or cracked hoses.
- If your regulator is inside the fuel tank, consider professional installation—these jobs are complex and require special tools.
- Always use parts specified for your car’s make and model.
Comparing Different Types Of Regulators
Choosing the right type of fuel pressure regulator is key. Here’s a simple comparison:
| Type | Best For | Adjustment | Price Range |
|---|---|---|---|
| OEM (Stock) | Daily driving, no mods | Non-adjustable | $30–$80 |
| Aftermarket Adjustable | Performance, tuning | Adjustable | $60–$200 |
| In-Tank Integrated | Modern vehicles | Non-adjustable | $50–$150 |
Credit: www.speedwaymotors.com
Fuel Pressure Regulator Symptoms And Solutions
It helps to recognize the signs of a failing regulator before installation. Here’s a quick reference:
| Symptom | Possible Cause | Solution |
|---|---|---|
| Hard starting | Low fuel pressure | Check/replace regulator |
| Black smoke | High fuel pressure | Adjust or replace regulator |
| Poor acceleration | Leaking diaphragm | Replace regulator |
| Strong fuel smell | Fuel leak | Inspect and fix leak |
What To Do After Installation
- Test drive the car: Watch for any leaks, check engine light, or abnormal performance.
- Monitor fuel pressure for a few days.
- If you notice any issues (like poor idle or leaks), recheck all connections.
- For adjustable regulators, consider a professional tune for best results.
When To Seek Professional Help
While most external regulators can be replaced at home, some situations require a mechanic:
- The regulator is inside the fuel tank
- You don’t have the proper tools (like a fuel pressure gauge)
- You’re unsure about fuel system safety
Professional installation ensures everything is done according to manufacturer standards and keeps your warranty intact.
Additional Resources
If you want to learn more about how fuel systems work and different regulator types, you can visit the Wikipedia page on fuel pressure regulators.
Frequently Asked Questions
How Do I Know If My Fuel Pressure Regulator Needs Replacement?
Common signs include hard starting, poor acceleration, black smoke, and a noticeable fuel smell. If your car’s check engine light is on and you notice these symptoms, the regulator may be failing.
Can I Install A Fuel Pressure Regulator Myself?
Yes, if it’s an external regulator and you have basic tools and some mechanical skill. For in-tank or integrated units, professional installation is recommended.
How Long Does It Take To Install A Fuel Pressure Regulator?
Most external regulator installs take about 1–2 hours. If it’s your first time, allow extra time for setup and double-checking your work.
Is It Safe To Drive With A Faulty Regulator?
No. Driving with a bad regulator can cause engine damage, poor fuel economy, and even fires due to leaks. Replace it as soon as possible if you notice symptoms.
Do I Need To Adjust An Aftermarket Regulator After Installation?
Yes. Use a fuel pressure gauge to set the correct pressure for your engine. Improper adjustment can cause performance issues or damage.
Installing a fuel pressure regulator is a practical upgrade that can make your car run better and last longer. With careful steps, attention to safety, and the right tools, most car owners can do this job at home. Always double-check every connection and never ignore the signs of a failing regulator—your engine’s health depends on it.
