
Installing a functional car hood scoop is a popular way to improve engine performance and give your vehicle a sportier look. But doing it right takes more than just cutting a hole and bolting on a scoop. The process involves careful planning, precise measurements, and the right tools.
A functional hood scoop is not just for style—it helps direct cool air to the engine, which can increase power and efficiency. Whether you want better performance or a custom appearance, learning how to install a car hood scoop the correct way makes a big difference.
This guide will walk you through every step, highlight common mistakes, and offer tips even car enthusiasts sometimes miss.
What Is A Functional Hood Scoop?
A functional hood scoop is designed to channel cool, outside air into the engine bay or directly into the intake system. This contrasts with decorative scoops, which are just for looks and do not improve airflow. By reducing engine temperature and increasing oxygen supply, a functional scoop can help boost horsepower and improve combustion.
Not every scoop fits every car, and not all installations are equal. Some designs work best for specific engines, such as turbocharged or naturally aspirated. Understanding the scoop’s role helps you choose and install the right one for your needs.
Choosing The Right Hood Scoop
Selecting the best hood scoop for your car is crucial for both performance and appearance. Here are key factors to consider:
| Type of Scoop | Main Benefit | Best For |
|---|---|---|
| Ram Air | Forces air into intake at speed | Performance vehicles |
| Cowl Induction | Draws air from base of windshield | Muscle cars |
| Shaker Scoop | Mounts directly to engine, moves with vibration | Classic muscle cars |
| Cold Air Intake Scoop | Directs cool air to intake | Modern cars, daily drivers |
Material matters too. Most scoops are made from fiberglass, ABS plastic, or metal. Fiberglass is lightweight and easy to paint but can crack if not handled carefully. ABS plastic is durable and resists heat, while metal scoops are strong but may need rust protection.
Compatibility is another important point. Check the dimensions of your hood and the scoop. Consider the engine layout—some scoops fit better on cars with a center-mounted intake, while others work with offset designs.
Tools And Materials Needed
Before starting, gather all necessary tools and materials:
- Hood scoop (functional type, matched to your vehicle)
- Electric drill
- Drill bits (assorted sizes)
- Jigsaw or reciprocating saw (for cutting metal)
- Masking tape
- Ruler or measuring tape
- Marking pen
- Rust inhibitor or primer (for exposed metal edges)
- Sandpaper (medium and fine)
- Rivets or bolts (as provided by the scoop manufacturer)
- Silicone sealant (optional, for weatherproofing)
- Screwdrivers and wrenches
- Protective gloves and eyewear
Having the right tools ready will prevent delays and help you achieve a professional result.
Preparing Your Car Hood
Proper preparation is essential for a safe and effective installation. Follow these steps:
- Clean the hood thoroughly. Dirt or grease can cause the template to slip or make markings unclear.
- Remove the hood if possible. This gives better access for measuring, cutting, and drilling. Most hoods are attached with just a few bolts.
- Check for obstructions under the hood. Make sure no critical components (like wiring, sensors, or support beams) are in the way of the planned scoop location.
- Mark the centerline of the hood. Use masking tape and a ruler to create a visible guide from the windshield to the grille. This ensures your scoop aligns perfectly with the car’s body lines.
A non-obvious tip: always check hood insulation. Some cars have thick padding on the underside. You may need to trim or remove this for the scoop to fit correctly.
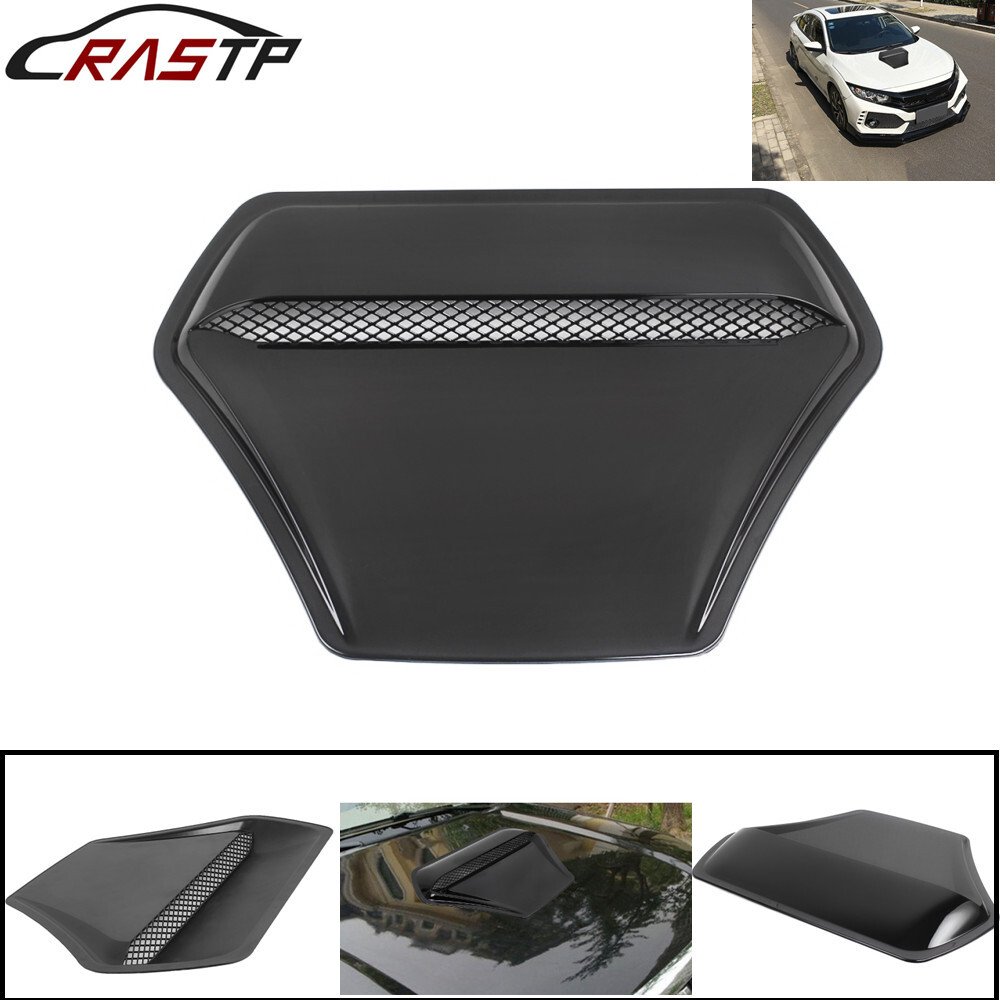
Credit: www.ebay.com
Positioning And Marking The Scoop
Accurate placement is key for both function and aesthetics. Here’s how to do it:
- Place the scoop on the hood in the desired position. Most functional scoops perform best near the front, where they catch the most airflow.
- Use the provided template (most quality scoops come with one). If there’s no template, trace the scoop’s base onto cardboard and cut it out as a guide.
- Mark all mounting holes and the opening for air passage. Use a fine-tip marker for clear lines.
- Double-check measurements. Step back and view the car from different angles. Make small adjustments as needed before cutting.
A common beginner mistake is aligning the scoop with the hood edges instead of the car’s centerline. This can make the scoop look crooked. Always use the centerline for reference.
Cutting The Hood
This is the most critical part of the installation. Take your time and follow safety steps.
- Apply masking tape around the marked cut area. This reduces paint chipping and makes the lines easier to see.
- Drill pilot holes at the corners of the marked opening. Use a small bit first, then a larger one to fit the saw blade.
- Cut the opening using a jigsaw or reciprocating saw. Keep the speed steady and follow the lines closely.
- Smooth rough edges with sandpaper. Start with medium grit, then finish with fine grit.
- Apply rust inhibitor or primer to all exposed metal edges. This step is often missed but prevents rust and extends the life of your hood.
If your car’s hood is aluminum or composite, be sure to use the correct saw blade and avoid bending the material.
Installing The Hood Scoop
Now it’s time to attach the scoop:
- Test fit the scoop over the opening. Make sure it sits flush with the hood and that all holes align.
- Mark and drill mounting holes for bolts or rivets. Use the scoop as a guide.
- Apply silicone sealant around the cut edge (optional). This helps prevent water leaks and reduces vibration.
- Secure the scoop with the provided hardware. Tighten bolts or rivets evenly to avoid warping the scoop or hood.
- Check fit and alignment one last time. Adjust as needed before final tightening.
Some installations may include a mesh grill inside the scoop. Install this before attaching the scoop to the hood if needed.
Sealing And Finishing Touches
To complete the job and ensure durability:
- Inspect for gaps between the scoop and hood. Fill small gaps with silicone or weatherproof sealant.
- Touch up paint around the cut area if needed. Use matching paint and clear coat for a seamless look.
- Reinstall the hood if you removed it earlier. Check that it opens and closes smoothly.
- Test the scoop by starting the engine and checking for air movement. You should feel cool air flowing into the engine bay at idle and especially at higher speeds.
A practical tip: If you live in a rainy area, check inside the engine bay for leaks after the first drive. Add more sealant if necessary to protect electrical components.
Comparison: Functional Vs. Non-functional Hood Scoops
Not sure if a functional scoop is right for you? Here’s a quick comparison:
| Feature | Functional Hood Scoop | Non-Functional (Decorative) |
|---|---|---|
| Main Purpose | Improves engine airflow and cooling | Style only, no airflow benefit |
| Installation | Requires cutting and sealing | Usually stick-on or bolt-on, no cutting |
| Performance Gain | Possible horsepower boost | None |
| Cost | Higher (due to complexity) | Lower |
| Maintenance | Needs periodic check for leaks/rust | Minimal |
Common Mistakes To Avoid
Many first-timers make errors that can be costly or reduce performance. Watch for these:
- Rushing the cutting process – Take your time; uneven cuts are hard to fix.
- Skipping rust protection – Bare metal will rust quickly, especially in humid climates.
- Poor alignment – Always check from multiple angles and use the centerline.
- Not sealing the scoop – Water leaks can damage engine components.
- Choosing the wrong scoop – Not all scoops fit all hoods or engine layouts. Double-check compatibility.

Credit: www.vintage-mustang.com
Maintenance And Long-term Care
A functional scoop requires a bit more care than a decorative one:
- Check fasteners regularly for looseness, especially after driving on rough roads.
- Inspect seals for cracks or gaps every few months.
- Clean the scoop to prevent debris from entering the engine bay.
- Touch up paint at the edges if you notice chips or scratches.
- Watch for rust on steel hoods or hardware, and treat it quickly.
A less obvious insight: If your car has a mass air flow sensor, monitor it after installation. Extra moisture or debris from the scoop can sometimes affect readings. Clean or replace the air filter more often if needed.
Practical Examples And Results
Many car owners see a real difference after installing a functional scoop. For example, a turbocharged engine may gain 5–10 horsepower due to cooler intake air, while naturally aspirated engines often feel more responsive in hot weather. Some drivers have reported a reduction in engine bay temperatures by as much as 10–15°F (5–8°C), especially when driving at highway speeds.
Aftermarket scoops can also improve the resale value of a vehicle if installed cleanly and professionally. However, a sloppy job can have the opposite effect, making careful installation even more important.
Professional Installation Vs. Diy
Should you install the scoop yourself or hire a pro? Here’s a quick comparison to help you decide:
| Factor | DIY Installation | Professional Installation |
|---|---|---|
| Cost | Lower (only materials/tools) | Higher (labor fees apply) |
| Time | 3–6 hours (for beginners) | 1–2 hours (with experience) |
| Skill Needed | Moderate to high | Low (handled by experts) |
| Warranty | None (unless kit provides one) | Usually includes labor warranty |
| Customization | Full control over look/placement | Limited to shop’s recommendations |
If you are comfortable with cutting and drilling metal, DIY saves money and lets you customize the look. If not, a professional shop ensures a clean and reliable result.
Where To Learn More
For advanced details about hood scoop aerodynamics, you can visit resources like Wikipedia.

Credit: alsettevs.com
Frequently Asked Questions
How Much Horsepower Does A Functional Hood Scoop Add?
A well-designed functional hood scoop can add 5–10 horsepower, especially on performance engines. The actual gain depends on your car’s setup, the size of the scoop, and how well it’s installed.
Will A Hood Scoop Cause Water To Enter The Engine?
If installed and sealed properly, water rarely reaches the engine. Most scoops have internal drains or mesh that blocks large debris. However, avoid driving through deep water and check for leaks after heavy rain.
Can I Install A Hood Scoop On Any Car?
Most cars can accept a scoop, but some hoods are too curved or have internal supports that make installation difficult. Always check your hood’s structure before starting, and choose a scoop that matches your car’s shape and engine layout.
Is It Legal To Install A Functional Hood Scoop?
Laws vary by location. In most areas, functional scoops are legal if they do not block the driver’s view or cause safety issues. Check your local vehicle codes before installing.
Do I Need To Tune My Engine After Installing A Scoop?
Usually, no tuning is required for a basic scoop. However, if you notice changes in engine performance or air/fuel mixture, a simple tune-up or air filter check may help.
Adding a functional hood scoop can upgrade both your car’s look and its performance, but only if installed with care. With the right preparation, tools, and attention to detail, you can achieve professional results and enjoy the benefits of cooler, more powerful engine airflow for years to come.
