
Swirl marks on car paint can make even a well-maintained vehicle look old and neglected. These fine, circular scratches are common, especially on dark-colored cars. Many car owners think removing swirl marks requires a professional detailer and expensive tools. The good news is, with the right knowledge and products, you can remove swirl marks from car paint by yourself at home.
This guide will take you through every step, with real examples, expert tips, and practical advice so your car looks glossy and flawless again.
What Are Swirl Marks?
Swirl marks are tiny, spiderweb-like scratches on your car’s paint. They are most visible under direct sunlight or street lights. Swirls happen when dirt or dust is rubbed into the paint, often during washing or drying with the wrong technique. Automatic car washes, dirty sponges, and even careless hand washing can all cause swirls.
Not all swirl marks are the same. Some are very light and only affect the clear coat, while others can be deeper. Knowing the type of swirl marks you have helps you choose the right removal process.
What Causes Swirl Marks?
Swirl marks are often the result of:
- Improper washing: Using old or dirty sponges, towels, or brushes.
- Dry wiping: Cleaning a dusty car without water or lubricant.
- Automatic car washes: The brushes can be filled with dirt from other cars.
- Poor drying methods: Using rough towels or letting the car air dry.
- Contaminants: Small particles of sand or grit can scratch the surface.
Many people are surprised to learn that even new cars can have swirl marks from dealership washing.
Tools And Products Needed For Diy Swirl Mark Removal
You do not need expensive machines to remove swirl marks at home. However, you need the right products and tools for good results. Here’s a breakdown:
| Tool/Product | Purpose | Beginner Friendly? |
|---|---|---|
| Microfiber Wash Mitts | Gentle cleaning, reduces scratches | Yes |
| Car Wash Soap (pH-neutral) | Removes dirt safely | Yes |
| Clay Bar Kit | Removes bonded contaminants | Yes |
| Dual Action Polisher (Optional) | Machine application for faster results | Optional |
| Foam Applicator Pads | Apply polish by hand | Yes |
| Microfiber Towels | Buffing and drying | Yes |
| Swirl Mark Remover or Polish | Removes light scratches | Yes |
| Car Wax or Paint Sealant | Protects paint after polishing | Yes |
Most swirl removers are labeled as polish or scratch remover. For beginners, hand application is safest.
Step-by-step: How To Remove Swirl Marks From Car Paint
Correct swirl removal is a process, not a single step. Rushing or skipping steps can make swirls worse. Here’s how to do it right.
1. Wash Your Car Thoroughly
Start with a very clean surface. Use a two-bucket wash method—one bucket for soapy water, one for rinsing your mitt. This reduces the chance of rubbing dirt back onto the paint.
- Use a gentle, pH-neutral car wash soap.
- Wash from top down (roof first, wheels last).
- Rinse often and use a clean microfiber wash mitt.
2. Decontaminate With A Clay Bar
Washing removes loose dirt, but not everything. Use a clay bar kit to pull out tiny particles stuck in the paint.
- Spray clay lubricant or quick detailer on a small area.
- Gently rub the clay bar in straight lines (not circles).
- When the clay glides smoothly, move to the next area.
- Wipe with a clean microfiber towel.
This step makes the surface smooth, so polishing is more effective.
3. Inspect The Paint
Dry the car and check the paint under sunlight or a bright lamp. This helps you see how many swirl marks remain and which areas need the most work.
4. Apply Swirl Mark Remover Or Polish
This is the most important step. There are two ways:
By Hand
- Put a small amount of swirl remover on a foam applicator pad.
- Work in a 2×2 ft section.
- Rub the product in overlapping, straight lines with medium pressure.
- Buff off with a clean microfiber towel.
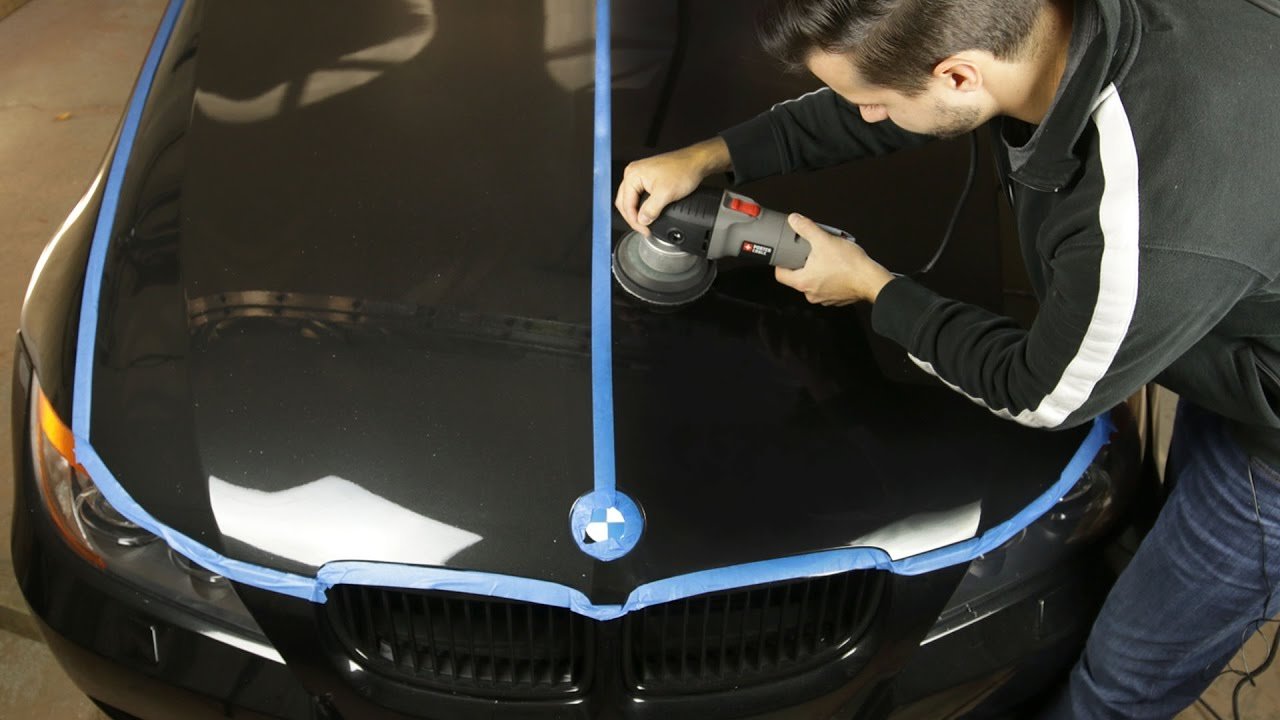
By Machine (dual Action Polisher)
- Attach a foam polishing pad.
- Apply polish to the pad and spread on the paint.
- Start at low speed, then increase gently.
- Move the polisher in slow, overlapping passes.
- Wipe away residue with a microfiber towel.
Tip: Beginners should start by hand. It’s slower but safer. A dual action polisher removes swirls faster but requires practice.
5. Inspect Results And Repeat If Needed
Check your work in good light. Some marks may need a second round of polish. Do not over-polish—modern clear coats are thin. Usually, one or two passes are enough.
6. Apply Wax Or Paint Sealant
Once you are happy with the finish, protect it.
- Use a synthetic sealant for longer protection (up to 6 months).
- Use carnauba wax for a deep shine (lasts 1-3 months).
- Apply a thin, even layer with a foam pad.
- Allow it to haze, then buff off with a microfiber towel.
This step locks in your hard work and makes future cleaning easier.
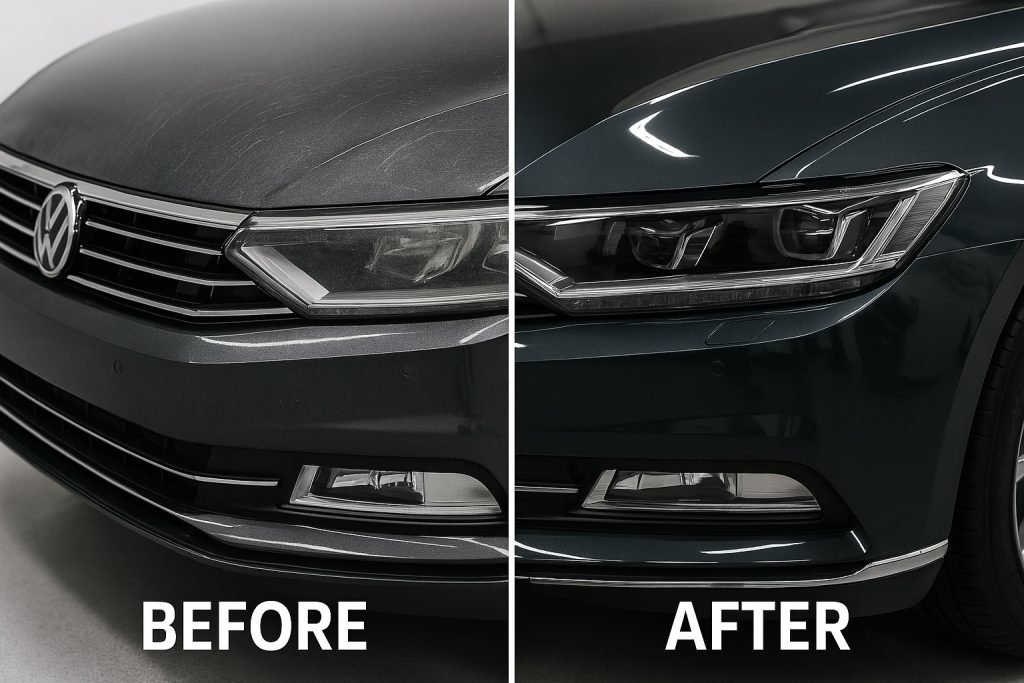
Credit: retrodetailing.com
Common Mistakes Beginners Make
Many people make swirl marks worse by trying to remove them incorrectly. Here are mistakes to avoid:
- Using bath towels or old rags: These create more scratches.
- Skipping the clay bar step: Polishing over dirt can cause deeper damage.
- Working in direct sunlight: Products dry too fast and can stain.
- Applying too much pressure: Let the polish do the work, not your muscles.
- Ignoring pad cleanliness: Dirty pads spread grit and create new swirls.
- Polishing too often: You can thin the clear coat if you polish repeatedly.
One less-known tip: Always wash microfiber towels without fabric softener. Softener leaves residue that can scratch paint.
How To Prevent Swirl Marks In The Future
After all your hard work, you want the paint to stay swirl-free. Here’s how:
- Always use high-quality microfiber towels for washing and drying.
- Wash your car regularly, but gently.
- Use the two-bucket method every time.
- Avoid automatic car washes.
- Wax or seal the paint every few months.
- Store your car under cover or in a garage when possible.
Another insider tip: Use a spray detailer between washes. It adds lubrication and reduces dry wiping.
Credit: www.youtube.com
Diy Vs. Professional Swirl Mark Removal
Many car owners wonder if they should try swirl removal themselves or hire a pro. Here’s a quick comparison:
| Aspect | DIY | Professional |
|---|---|---|
| Cost | Low (under $100 for supplies) | High ($150–$500+ per detail) |
| Time Needed | 2–6 hours (depending on experience) | 1–2 hours (for professionals) |
| Result Quality | Good (with care and patience) | Excellent (experience & tools) |
| Risk | Low (if done by hand) | Very low |
DIY is a great option for most people, especially if you enjoy working on your car and want to save money. Professionals are best if your paint is badly damaged or you want show-quality results.
How Weather And Paint Type Affect Swirl Removal
Weather and paint type can change your swirl removal process. For example, extremely hot or cold temperatures can make polish dry too quickly or not work well. Always work in the shade and when the paint is cool to the touch.
Modern cars have clear coats, which are harder than older single-stage paints. This means polishing takes a bit more time but is also safer. If you have a classic car with single-stage paint, be extra gentle.
Two Non-obvious Insights For Better Results
- Use inspection sprays: After polishing, use a paint-safe inspection spray (sometimes called panel wipe) to remove any oils left by the polish. This shows the true condition of the paint, not just what the polish hides.
- Pad priming: Always prime your foam pad with a small amount of polish before starting. This reduces the chance of dry buffing, which can create new micro-scratches.
Most beginners skip these steps, but they make a real difference.
Maintaining A Swirl-free Finish
After removing swirl marks, maintenance is key:
- Wash your car weekly with the right tools.
- Use a spray wax or quick detailer after each wash for extra slickness.
- Store microfiber towels in a clean, dry place.
- Inspect your paint every few months in good light.
With these habits, swirl marks will be much less likely to return.
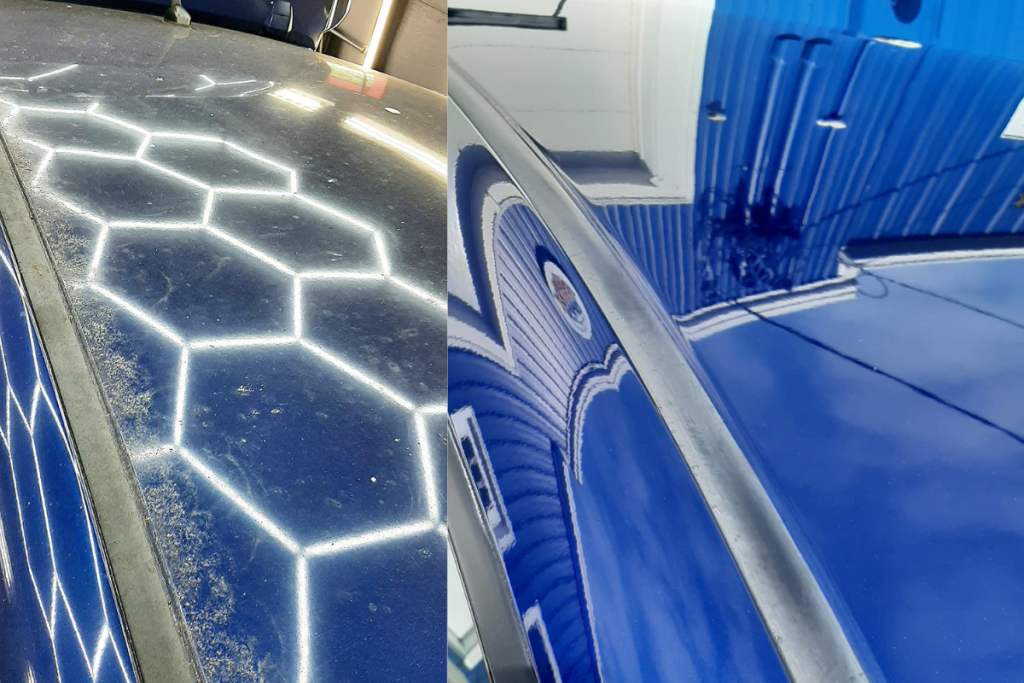
Credit: retrodetailing.com
Choosing The Right Swirl Mark Remover
Not all swirl removers are equal. Look for products labeled as “fine polish” or “swirl remover. ” Avoid compounds unless you have deep scratches—they are more abrasive.
Here’s a quick comparison of popular swirl removers:
| Product | Type | Abrasiveness | Best For |
|---|---|---|---|
| Meguiar’s Ultimate Polish | Finishing Polish | Low | Light swirls, beginners |
| 3D Speed All-in-One | Polish + Sealant | Low-Medium | Quick jobs, protection |
| Sonax Perfect Finish | Finishing Polish | Medium | Moderate swirls, advanced users |
Always test a new product on a small area first.
For further reading, the Wikipedia page on car washing offers more information about car cleaning techniques.
Frequently Asked Questions
What Is The Best Way To Check For Swirl Marks?
The best way is to inspect your car in direct sunlight or under a bright LED light. Swirl marks look like fine, circular lines, especially on black or dark paint.
Can Swirl Marks Be Completely Removed By Hand?
Most light swirl marks can be removed by hand with a good swirl remover and a foam applicator pad. Deep scratches may need machine polishing or professional help.
How Often Should I Polish My Car To Remove Swirls?
Polish only when needed—usually once or twice a year. Over-polishing can thin your car’s clear coat and cause more problems.
Does Waxing Remove Swirl Marks?
No, wax does not remove swirl marks. Wax only hides them by filling in scratches temporarily and adds protection. Polishing is needed to remove swirls.
Are Swirl Marks The Same As Scratches?
Swirl marks are a type of very fine scratch, usually caused by washing or drying. Deeper scratches that catch your fingernail need more than just polish to repair.
Swirl mark removal is a rewarding DIY project if you follow the right steps. With patience and care, your car’s paint can look fresh, glossy, and almost new again. Remember, prevention is easier than cure—so use safe washing and drying habits to keep swirl marks away for good.
