
Faded plastic trim can make even the best cars look old and neglected. Many car owners notice this problem after a few years—black trims turn grey, colored trims lose their shine, and the whole vehicle feels less attractive. But you don’t need to spend a lot at a detailing shop or buy new parts.
With the right steps and materials, you can repair car plastic trim faded DIY-style and restore that fresh look. Let’s dive into practical ways you can bring your car’s trim back to life, avoid common mistakes, and even make the results last longer.
Why Car Plastic Trim Fades
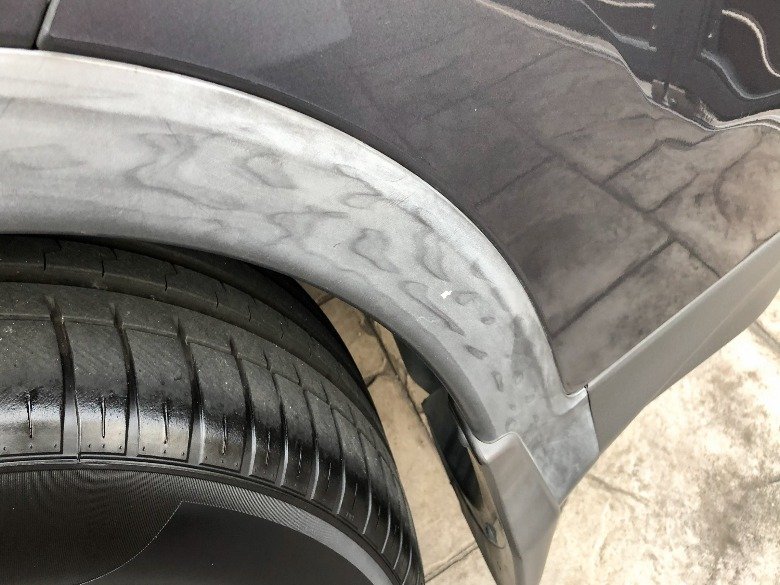
Car trims are usually made from ABS plastic, polypropylene, or polycarbonate. These materials are tough, but they’re not immune to the elements. Ultraviolet (UV) rays from the sun break down the plastic over time. Rain, salt, pollution, and car cleaning chemicals also play a part. As the surface layer gets damaged, it loses color and becomes chalky.
Most trims are black or dark gray, so fading is extra obvious. If you park outside or live in a sunny climate, you’ll see this problem faster. Some manufacturers add UV protection, but it wears off after a few years.
Once this happens, faded trim can make your car look years older than it really is.
Tools And Materials You Need
You don’t need a garage full of tools to fix faded trim, but using the right products makes the job easier and the results last longer. Here’s what you should gather before starting:
- Microfiber cloths: At least two, for cleaning and applying products.
- Car wash soap: Mild, not dish soap.
- Soft brush or sponge: For scrubbing dirt out of textured trim.
- Plastic trim cleaner: Optional, but helps remove old wax and grime.
- Isopropyl alcohol (rubbing alcohol): For final prep.
- Trim restorer: Choose a gel, spray, or wipe designed for automotive use.
- Gloves: To protect your hands from chemicals.
- Masking tape: To protect nearby paint and glass.
- Small detailing brush: For tight corners and textured surfaces.
You can find all these at auto parts stores or online. If you want more permanent results, you’ll need a plastic trim dye or plastic paint. For most people, a good trim restorer is enough.
Credit: www.slashgear.com
Step-by-step: How To Repair Faded Car Plastic Trim
Let’s get into the repair process. Each step matters, and skipping one can mean your trim fades again quickly.
1. Wash The Trim Thoroughly
Use regular car wash soap and water to clean the trim. Dirt, road salt, and old wax can stick to the surface, making it hard for any treatment to stick. Scrub gently with a soft brush, especially if the trim is textured.
Rinse well and let it dry.
2. Remove Leftover Contaminants
Even after washing, plastic can hold onto oils and chemicals. Wipe the trim with a microfiber cloth dampened with isopropyl alcohol. This removes stubborn residues and gives you a fresh surface.
3. Mask Off Adjacent Areas
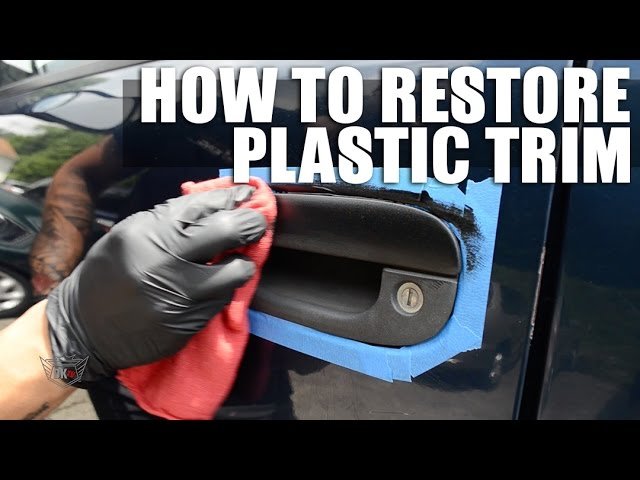
Trim restorer can stain paint or glass. Use masking tape to protect the edges around the trim. Be patient—taking time here saves cleanup later.
4. Apply Trim Restorer
Now, use your chosen trim restorer. These products come in gels, sprays, and wipes. Read the instructions on your product, but usually:
- Squeeze some gel onto a microfiber cloth or sponge.
- Rub it into the faded trim using small, circular motions.
- Cover all areas evenly.
For textured trim, a small detailing brush can push product into every groove. Let the restorer soak in for the recommended time—usually 5–10 minutes.
5. Buff And Inspect
Buff away any extra product with a clean, dry microfiber cloth. Step back and check your work. If the trim still looks uneven or faded, apply a second coat.
6. Let It Cure
Some products need a few hours to fully bond with the plastic. Try not to get the trim wet for at least 12–24 hours. This helps the restorer last longer.
7. Repeat For Best Results
Deeply faded plastic may need two or three treatments, a day apart. Don’t try to fix everything in one heavy application—several light coats work better and avoid streaks.
Comparing Methods: Trim Restorer Vs. Plastic Dye Vs. Heat Gun
Different DIYers use different methods to restore plastic trim. Here’s a quick comparison to help you choose what’s right for your car.
| Method | Cost | Skill Needed | How Long It Lasts | Common Risks |
|---|---|---|---|---|
| Trim Restorer | Low ($10–$30) | Beginner | 2–6 months | Can streak if applied too thick |
| Plastic Dye | Medium ($20–$40) | Intermediate | 1–2 years | Needs careful masking, can stain paint |
| Heat Gun | Low ($20–$30) | Advanced | 6–12 months | Can warp or melt trim if overheated |
Trim restorer is easiest, safest, and works for most people. Plastic dye is more permanent, but needs careful handling. The heat gun method (gently heating the trim until oils come to the surface) is risky—one mistake can ruin a part.
How To Use Plastic Trim Dye For Long-lasting Results
If your trim is severely faded or you want a result that lasts over a year, plastic trim dye is a good choice. This is not paint—it soaks into the plastic and restores color from within.
Preparation
- Clean as described above, but be extra thorough.
- Use alcohol to remove all residues.
- Mask all nearby areas with tape and plastic sheeting.
Application
- Wear gloves and old clothes.
- Use a small foam brush or applicator pad.
- Apply the dye in thin, even coats.
- Let it dry between coats (usually 30–60 minutes).
- Add more coats if needed for deep color.
After drying, avoid water or touching for 24 hours. Most dyes take a week to fully cure, but you can drive the car after a day.
Key Tips
- Only use dye made for automotive plastic.
- Test on a small, hidden area first.
- Never rush masking—it’s hard to remove dye from paint.
The Heat Gun Method: When And How To Use It
Some car enthusiasts use a heat gun to restore faded plastic. Heat brings oils to the surface, making the plastic look dark again. This method is fast but risky.
- Clean and dry the trim.
- Set your heat gun to the lowest setting.
- Hold it at least 6 inches from the trim.
- Move slowly and evenly—never hold heat in one spot.
- Stop as soon as you see color return.
Don’t use this method on painted trim or thin, fragile pieces. Practice on an old part first if possible.
Common Mistakes To Avoid
Many beginners make the same errors when repairing faded trim. Avoid these for better, longer-lasting results:
- Skipping cleaning: Dirt or wax left behind blocks the restorer.
- Using household cleaners: Harsh chemicals can damage plastic.
- Applying too much product: Thick layers can streak and attract dust.
- Not masking carefully: Overspray or drips stain paint and are hard to remove.
- Expecting miracles: Deep fading may take several treatments or need dye, not just a restorer.
How To Keep Plastic Trim Looking New
After you repair car plastic trim faded DIY, the job isn’t over. Regular maintenance keeps your trim looking good longer.
- Wash with car soap only—no household cleaners.
- Apply UV protectant every 1–2 months.
- Avoid parking in direct sun for long periods.
- Treat with trim restorer again when you see fading return.
Many car owners forget about trim until it’s too late. A little care every month saves a big repair later.
Real-world Example
Consider a 2010 Honda CR-V with badly faded black bumpers. The owner tried a quick fix with olive oil (a common online tip) but found it washed off after one rain. After using a proper trim restorer and following the steps above, the trim stayed black for over five months—even through several washes and heavy sun.
Comparing Popular Trim Restorer Products
There are many trim restorer brands. Here’s how a few popular ones compare based on user reviews and durability.
| Brand | Type | Average Durability | Ease of Use | Water Resistance |
|---|---|---|---|---|
| Meguiar’s Ultimate Black | Gel | 3–4 months | Easy | Good |
| CarGuys Plastic Restorer | Liquid | 4–6 months | Very Easy | Excellent |
| Gtechniq C4 | Coating | 8–12 months | Moderate | Excellent |
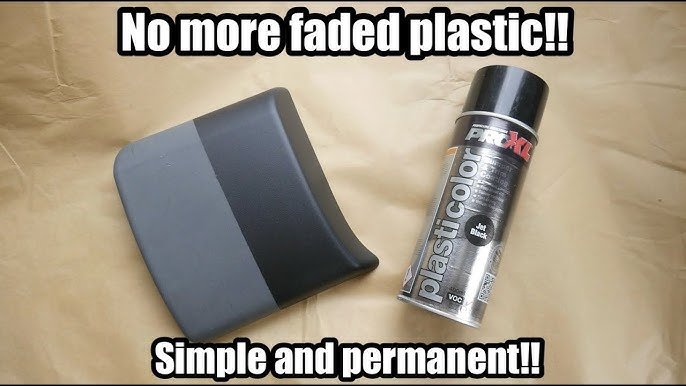
A non-obvious tip: Many “miracle” home remedies like peanut butter or WD-40 provide only a quick shine and can attract dirt, making your trim look worse after a few days.
Credit: www.youtube.com
How To Tell If Your Trim Needs Replacement
Sometimes, trim is just too far gone—cracked, chalky, or brittle. Here’s how to tell if you need a new piece:
- Deep cracks or holes: Restorers can’t fix these.
- Trim feels crumbly or soft: The plastic has broken down.
- Repeated fading after treatment: The surface is too damaged to hold product.
If you reach this point, buying a new trim piece is better than constant repairs.
Why Diy Beats Professional Detailing For Trim
Professional detailers do a great job, but you pay for labor and overhead. A DIY approach:
- Costs less (often under $30 total)
- Lets you control the process
- Teaches you skills for future car care
- Allows you to repeat treatments anytime
Just remember: patience and proper prep are the keys to success.
Credit: www.youtube.com
Frequently Asked Questions
What Is The Best Product To Restore Faded Car Plastic Trim?
The best product depends on your needs. For most people, a gel trim restorer like Meguiar’s or CarGuys gives great results quickly. For long-term color, a plastic dye or coating lasts much longer but takes more effort to apply.
How Long Do Diy Trim Restoration Results Last?
Most trim restorers last 2–6 months before you need to reapply. Dyes or coatings can last up to a year. Sun, rain, and how often you wash your car will affect durability.
Can I Use Household Products To Restore Faded Trim?
Some household items (like olive oil or peanut butter) create a quick shine but wash off fast and attract dust. For lasting results, always use products designed for automotive trim.
Is It Safe To Use A Heat Gun On Plastic Trim?
A heat gun can restore color, but it’s risky. Too much heat can warp or melt plastic. It’s best for thick, black trim, and you should practice on a hidden area first.
How Can I Prevent Plastic Trim From Fading Again?
Wash your trim with mild car soap, avoid harsh chemicals, and apply a UV protectant every couple of months. Parking in the shade and using a windshield sunshade also help.
Restoring faded plastic trim is one of the most satisfying DIY car projects. With the right tools, a little patience, and good technique, you can make your car look years newer for a small cost. For more details on car plastics and restorers, check out this overview on automotive plastics. Taking care of your trim not only improves your car’s appearance, it also protects its value for years to come.
