
Replacing your car’s brake calipers yourself can save you a lot of money and help you better understand your vehicle. Many drivers think this job is only for experts, but with patience, the right tools, and a safe approach, you can do it at home.
The process is not just about swapping parts; it’s about restoring your car’s stopping power and making sure you’re safe on the road. This guide will show you every step, share practical tips, and point out important details most beginners miss.
Understanding Brake Calipers
The brake caliper is a critical part of your car’s braking system. It houses the brake pads and uses hydraulic pressure to squeeze them against the brake rotor, slowing your car. Over time, calipers can stick, leak, or wear out, causing poor braking, uneven wear, or even dangerous brake failure.
You might need to replace a caliper if you notice:
- Your car pulls to one side when braking
- There’s a brake fluid leak near a wheel
- The brake pedal feels soft or spongy
- Your brakes stay partially engaged (drag)
Ignoring these signs can damage other parts of your braking system and increase repair costs.
Tools And Materials Needed
Before you start, gather all the necessary tools and parts. Having everything ready will make the process much smoother.
Essential tools:
- New brake caliper(s) (make sure they fit your car’s year, make, and model)
- Wrench set (metric or standard, depending on your car)
- Socket set and ratchet
- Brake line wrench (flare nut wrench)
- C-clamp or caliper piston tool
- Brake fluid (type recommended by your car’s manual)
- Jack and sturdy jack stands
- Lug wrench
- Brake cleaner spray
- Drip pan
- Rubber or plastic tubing (for bleeding brakes)
- Empty bottle (for brake fluid)
- Disposable gloves and safety glasses
- Shop towels or rags
Optional but helpful:
- Torque wrench (for precise tightening)
- Wire brush (cleaning parts)
- Penetrating oil (for stubborn bolts)
Credit: www.autozone.com
Preparing Your Car
Safety is essential when working on brakes. Start by finding a flat, solid surface—never work on a slope or soft ground. Always use jack stands; never rely on a jack alone. Here’s how to get your car ready:
- Loosen the lug nuts on the wheel where you’ll work, but don’t remove them yet.
- Use the jack to raise the car and place it securely on jack stands.
- Remove the wheel and set it aside.
- Place a drip pan under the brake assembly to catch any fluid.
- Clean the area with brake cleaner to prevent dirt from entering the system.
Many beginners forget to slightly loosen the brake fluid reservoir cap under the hood. This step helps relieve pressure and makes the caliper easier to remove.
Removing The Old Caliper
Now, you’re ready to remove the old, faulty caliper:
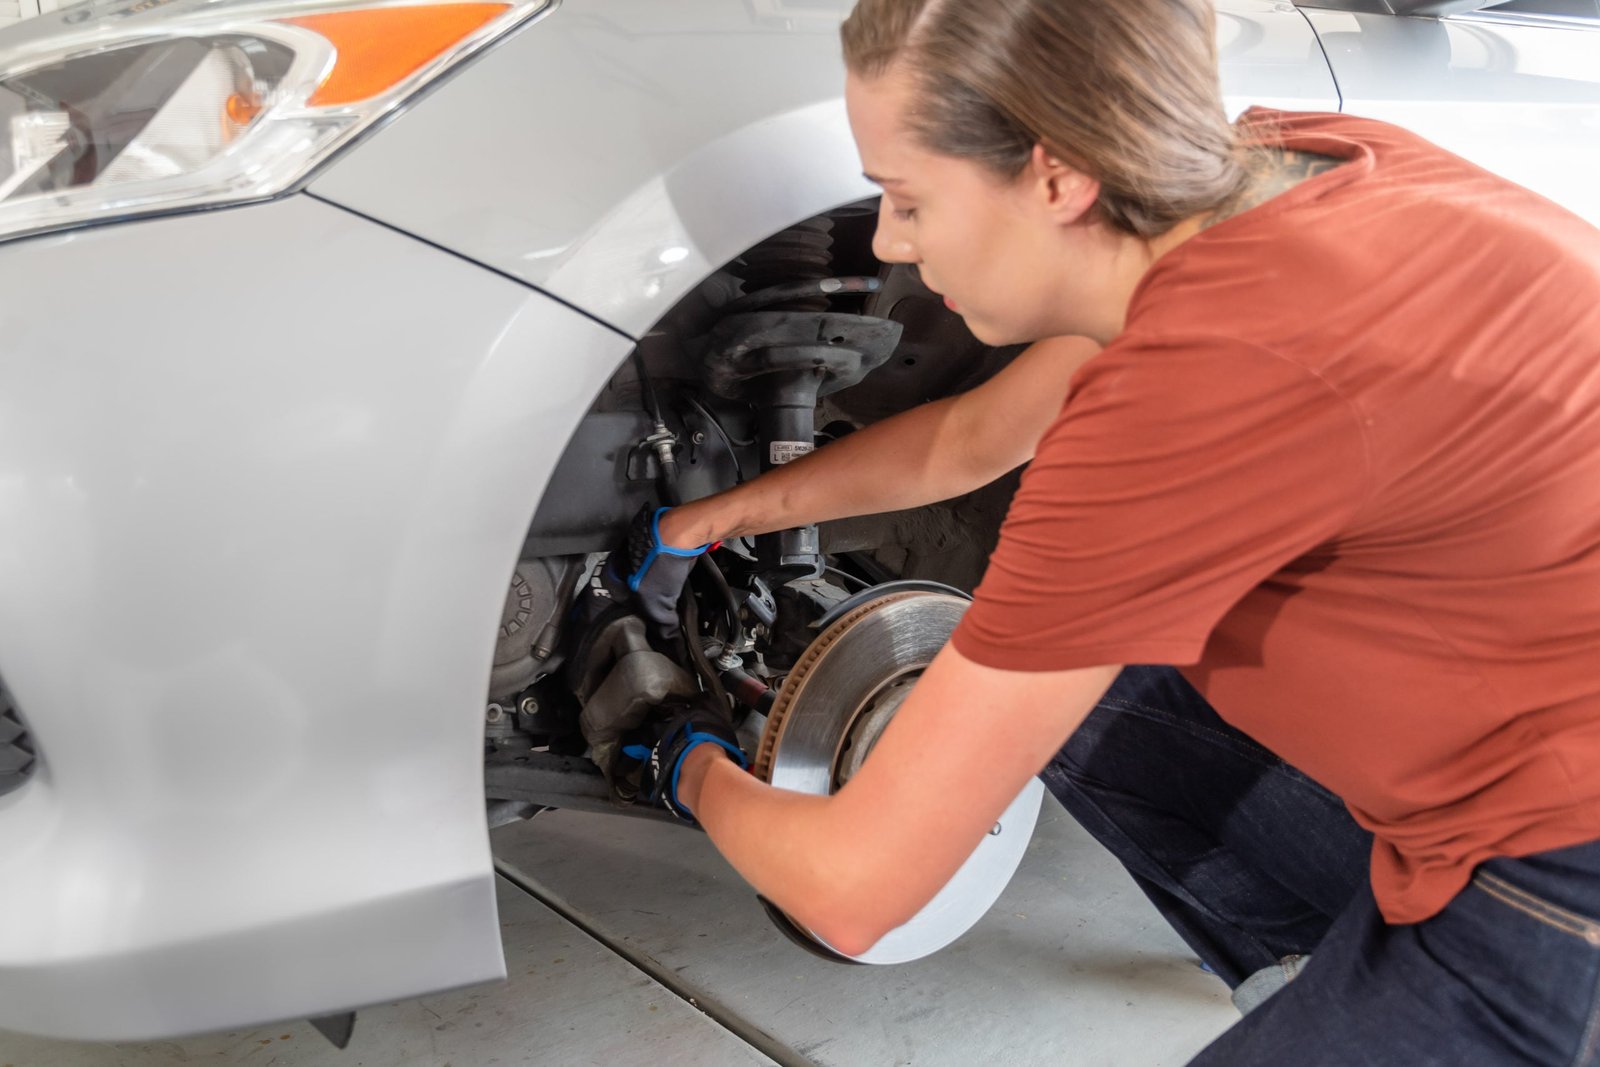
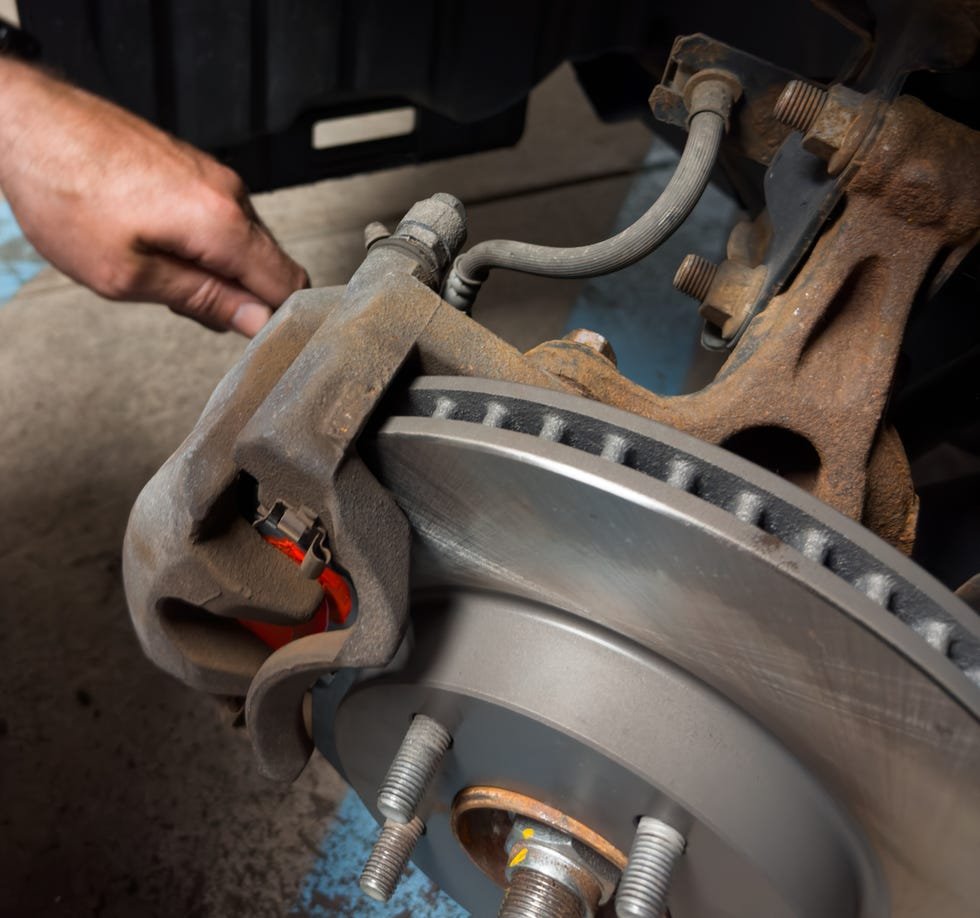
- Locate the brake caliper and inspect how it’s mounted. Most calipers are held by two main caliper bolts.
- Use the correct socket or wrench to remove these bolts. If they are rusty or stuck, apply a little penetrating oil and let it soak for a few minutes.
- Carefully slide the caliper off the rotor. If it’s stuck, gently wiggle it—do not pry hard or hit it, as this can damage the rotor.
- Support the caliper with a hanger or zip tie so it doesn’t pull on the brake hose.
- Using the brake line wrench, loosen the brake hose fitting where it enters the caliper. Be ready for some brake fluid to leak out.
- Plug or cap the brake line to prevent fluid loss and contamination.
- Remove the old caliper from the work area.
A common mistake is letting the caliper hang by the brake hose—this can damage the hose and create a safety risk.
Installing The New Caliper
With the old caliper removed, it’s time to fit the new one. This is the most important part of the process, so take your time.
- Compare the old and new calipers side by side to ensure they are identical. Double-check the mounting points and the piston size.
- Transfer any hardware from the old caliper if needed (like anti-rattle clips or mounting brackets).
- Attach the brake hose to the new caliper, tightening the fitting securely but not overtightening. If your caliper uses copper washers, always use new ones.
- Position the new caliper over the brake rotor and align it with the mounting bracket.
- Reinstall the caliper bolts. If your manufacturer specifies a torque, use a torque wrench for accuracy.
- Double-check all connections for tightness and proper fit.
If your caliper has a bleeder valve, make sure it’s facing up. This helps remove air during bleeding.
Bleeding The Brake System
After replacing a caliper, air can enter the brake lines. Bleeding the brakes removes this air, restoring firm, reliable brake pedal feel.
How To Bleed Brakes
- Fill the brake fluid reservoir with fresh fluid.
- Attach a piece of clear tubing to the caliper’s bleeder valve. Place the other end in a bottle partially filled with brake fluid.
- Have a helper slowly press the brake pedal several times, then hold it down.
- Loosen the bleeder valve to let fluid and air escape into the tubing. Tighten the valve before your helper releases the pedal.
- Repeat until no air bubbles appear in the tube, and only clean fluid comes out.
- Top up the brake fluid as needed.
Bleed each caliper you replaced, and always start with the wheel farthest from the master cylinder (usually the rear passenger side).
Here’s a quick comparison of manual vs. one-person brake bleeding methods:
| Method | People Needed | Pros | Cons |
|---|---|---|---|
| Manual (2-person) | 2 | Simple, no special tools | Needs helper, can be messy |
| One-person kit | 1 | Convenient, less mess | Kit needed, may be slower |
If the brake pedal still feels soft after bleeding, repeat the process—air may still be trapped.
Reassembling And Checking Your Work
Once the new caliper is installed and bled, it’s time to put everything back together:
- Refit the wheel and hand-tighten the lug nuts.
- Lower the car back to the ground.
- Tighten the lug nuts in a star pattern to the specified torque.
- Pump the brake pedal a few times with the car off—this seats the pads against the rotor.
- Check the brake fluid level and top up if needed.
- Look for leaks around the caliper and brake hose.
Do not drive until the pedal feels firm and the brakes respond normally.
Test Drive And Final Steps
Test the brakes in a safe, empty area before returning to normal driving:
- Start the car and press the brake pedal firmly to check for leaks or sponginess.
- Move forward slowly and gently apply the brakes.
- Check for any abnormal noises, pulling, or weak braking.
- Gradually increase speed and test braking again.
If you notice any issues, stop immediately and recheck your work. Sometimes, new calipers need a short break-in period for the pads to seat perfectly.
What Beginners Often Miss
- Cleaning the sliding pins: Dirty or dry caliper pins can cause sticking, even after replacement. Always clean and grease them before reassembly.
- Using the correct brake fluid: Mixing different brake fluid types can cause brake failure. Always use the type specified in your owner’s manual.
- Tightening sequence: Lug nuts and caliper bolts have specific tightening patterns and torque settings. Incorrect tightening can cause warping or uneven pressure.
- Checking for leaks: After installation and bleeding, double-check for leaks at all connections. Even a small leak can lead to dangerous brake loss.
When To Seek Professional Help
Replacing brake calipers is within reach for many DIYers, but some situations require a mechanic:
- If a caliper bolt is seized or stripped
- If the brake line is damaged or leaking
- If you’re not comfortable bleeding brakes
- If the ABS system is involved (on some cars, special procedures are needed)
Never take chances with your brakes—if you’re unsure, ask for professional help.
Credit: www.youtube.com
Cost And Time Estimate
Most DIYers can replace a caliper in about 1–2 hours per wheel. Parts cost varies:
- New caliper: $40–$120 each (standard vehicles)
- Brake fluid: $10–$20
- Tools (if needed): $20–$60
A shop may charge $150–$300 per caliper, so doing it yourself can save a lot.
Here’s a quick comparison:
| Replacement Option | Average Cost per Caliper | Time Needed | Who Should Choose |
|---|---|---|---|
| DIY | $40–$120 | 1–2 hours | Confident DIYers |
| Professional shop | $150–$300 | 2–3 hours (including wait) | Those who prefer experts |
Extra Tips For A Smooth Job
- Take clear photos before disassembly. This helps you remember how everything fits together.
- Keep your work area clean and organized.
- Don’t reuse old hardware unless your manual says it’s safe.
- Always double-check part numbers before buying new calipers.
If you want to learn more about braking systems, explore this detailed guide from the Wikipedia Disc Brake page.
Replacing your own brake calipers is a valuable skill. You’ll save money, gain confidence, and know your car is safe.
Credit: www.popularmechanics.com
Frequently Asked Questions
How Do I Know If My Brake Caliper Is Bad?
Common signs include uneven braking, the car pulling to one side, brake fluid leaks near the wheels, or a soft brake pedal. Squeaking or grinding noises may also indicate caliper problems.
Do I Need To Replace Both Calipers At The Same Time?
It’s not always required, but replacing both calipers on the same axle can ensure even braking and prevent future issues. If one failed from age, the other may not be far behind.
Can I Drive My Car If A Caliper Is Leaking?
No. A leaking caliper can cause sudden brake failure. It’s unsafe to drive until the leak is fixed and the system is bled properly.
What Type Of Brake Fluid Should I Use?
Always use the brake fluid type specified in your car’s manual, such as DOT 3, DOT 4, or DOT 5.1. Mixing types can damage your braking system.
Why Is My Brake Pedal Still Soft After Replacing The Caliper?
A soft pedal usually means there’s still air in the brake lines. Bleed the brakes again and check for leaks. Old rubber hoses or master cylinder issues can also cause this problem.
Changing brake calipers yourself is challenging but rewarding. With care, the right tools, and a methodical approach, you can do the job safely and confidently. Your brakes are your car’s most important safety system—always double-check your work and never cut corners.
