
Replacing a car’s camshaft position sensor might sound complicated, but with the right tools and a careful approach, it’s a manageable job for most people who like to fix things themselves. This small part plays a big role in your engine’s performance.
If it fails, your car may run poorly, stall, or not start at all. Learning how to replace a camshaft position sensor can save you time, money, and help you understand more about your car.
Many drivers ignore warning signs from their vehicle, hoping the problem will go away. That rarely happens. A faulty camshaft sensor affects fuel efficiency and engine power. For some cars, ignoring this issue can even cause damage to other engine parts.
This guide will walk you through every step of replacing the camshaft position sensor, with tips to avoid common mistakes. Whether you’re a beginner or have some experience, you’ll finish the job with more confidence than when you started.
What Is A Camshaft Position Sensor?
The camshaft position sensor is an electronic device found in most modern engines. Its job is to monitor the position and speed of the camshaft, and send this data to the engine control unit (ECU). The ECU uses this information to control fuel injection and ignition timing. In simple words, the sensor helps your car start, run smoothly, and perform efficiently.
If the sensor fails, your engine may misfire, hesitate, or even stall. Sometimes, the car won’t start at all. The check engine light usually comes on, and you may see error codes if you scan the car’s computer. Replacing the sensor quickly is important to keep your engine healthy.
Signs Your Camshaft Position Sensor Needs Replacement
You don’t need to be a mechanic to notice when something is wrong. Pay attention to these common signs:
- Check Engine Light – This is the most obvious sign. The light can mean many things, but a camshaft sensor problem is a common cause.
- Engine Misfires or Hesitates – If your engine runs rough, stalls, or hesitates during acceleration, the sensor might be failing.
- Poor Fuel Efficiency – When the sensor sends bad data, the ECU can’t adjust fuel and timing correctly, wasting fuel.
- Difficulty Starting – The car may crank for a long time before starting, or not start at all.
- Reduced Engine Power – Your car may feel weak or unresponsive.
Some drivers ignore these symptoms, but doing so can lead to more expensive repairs later.
Tools And Materials Needed
Before you start, gather these tools and materials. Having everything ready will save you time and frustration.
- Replacement camshaft position sensor (get the correct part for your car’s make, model, and engine)
- Socket set (usually 8mm or 10mm sockets, but check your vehicle’s needs)
- Ratchet or wrench
- Flathead screwdriver
- Torx bits (some vehicles use Torx screws)
- Gloves (optional, but protects your hands)
- Safety glasses (for eye protection)
- Digital multimeter (for testing the sensor, optional)
- OBD-II scanner (for reading and clearing error codes, optional)
- Flashlight (to see in tight spaces)
- Clean rag or towel
Some cars may require special tools, so check your repair manual or online guides for your specific vehicle.
Locating The Camshaft Position Sensor
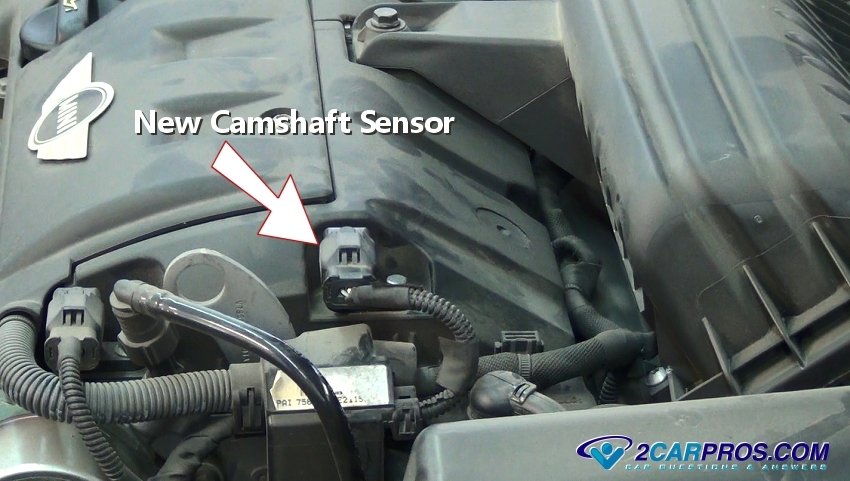
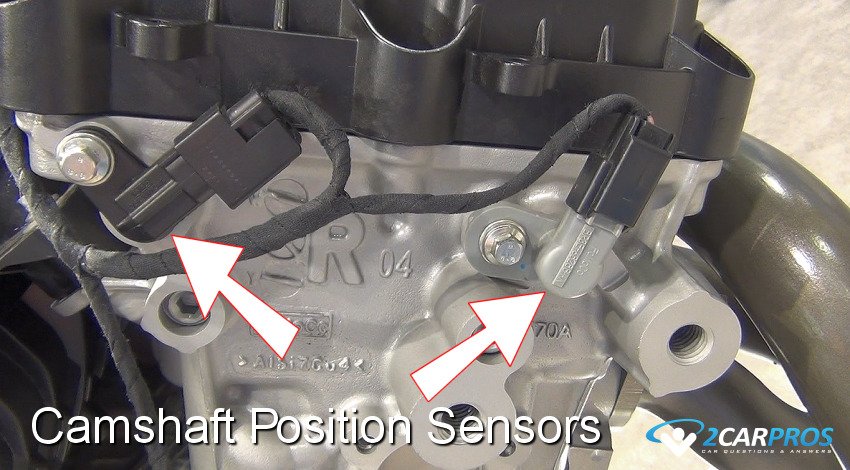
The camshaft sensor is usually found near the top or front of the engine, attached to the engine block, cylinder head, or near the timing cover. Its location depends on your car’s make and engine type.
Here’s a quick comparison for common car brands:
| Car Brand | Typical Sensor Location | Tools Needed |
|---|---|---|
| Honda | Top of cylinder head | 10mm socket |
| Ford | Front of engine block | 8mm socket, Torx bit |
| Toyota | Near timing cover | 10mm socket |
| BMW | Front/top of engine | T30 Torx |
| Chevrolet | Side of engine block | 10mm socket |
If you’re unsure, check your car’s repair manual or search online for your specific year and model.
Credit: todayifoundout.com
Step-by-step Guide To Replacing The Camshaft Position Sensor
Replacing the camshaft position sensor is a process most people can do with patience and attention to detail. Here’s how to get it right.
1. Prepare Your Vehicle
- Park your car on a flat, safe surface.
- Turn off the engine and let it cool down for at least 15 minutes.
- Disconnect the negative terminal of the battery to prevent accidental shocks or shorts.
2. Locate The Sensor
- Use a flashlight to find the sensor using the information above.
- You may need to remove the engine cover or air intake parts for better access.
3. Disconnect The Sensor’s Electrical Connector
- Press the tab or gently lift the clip on the sensor’s plug.
- Pull the connector straight out without forcing it. Don’t pull on the wires.
4. Remove The Old Sensor
- Use the correct socket or Torx bit to remove the sensor’s mounting bolt(s).
- Gently twist and pull the sensor out. If it’s stuck, carefully wiggle it free. Don’t use excessive force, as you may damage the mounting surface.
5. Compare The Old And New Sensors
- Check that the new sensor matches the old one in shape, size, and connector type.
- Sometimes, the new sensor comes with an O-ring or seal. Replace the old one if needed.
6. Install The New Sensor
- Insert the new sensor into the mounting hole, making sure it sits flush.
- Secure the sensor with the mounting bolt(s). Tighten by hand first, then use the tool to snug it down. Do not overtighten—these bolts are small and can strip easily.
7. Reconnect The Electrical Connector
- Push the connector onto the sensor until you hear a click or feel it lock in place.
8. Reinstall Any Removed Parts
- Put back the engine cover, air intake, or other parts you removed.
9. Reconnect The Battery
- Attach the negative battery terminal.
10. Test The Repair
- Start the engine and let it idle. The check engine light should turn off if the problem is fixed.
- Use an OBD-II scanner to clear any remaining codes.
- Take the car for a short drive to make sure everything feels normal.
Practical Tips And Insights
Many first-time DIYers make mistakes that can be avoided with a few simple tips:
- Double-check the part number before buying the sensor. Even small differences can cause problems.
- Use a torque wrench if you have one. Most sensor bolts only need 7–9 ft-lbs (10–12 Nm). Overtightening is a common beginner mistake.
- If the connector is stuck, spray a little electrical contact cleaner to loosen dirt. Don’t pry with sharp tools.
- When installing the new sensor, make sure the O-ring is not pinched or twisted. This prevents oil leaks.
- If your check engine light stays on after the replacement, scan for new codes. Sometimes, another sensor or wiring issue is present.
- Be patient. Rushing the job can damage delicate parts.
Credit: www.2carpros.com
Common Mistakes To Avoid
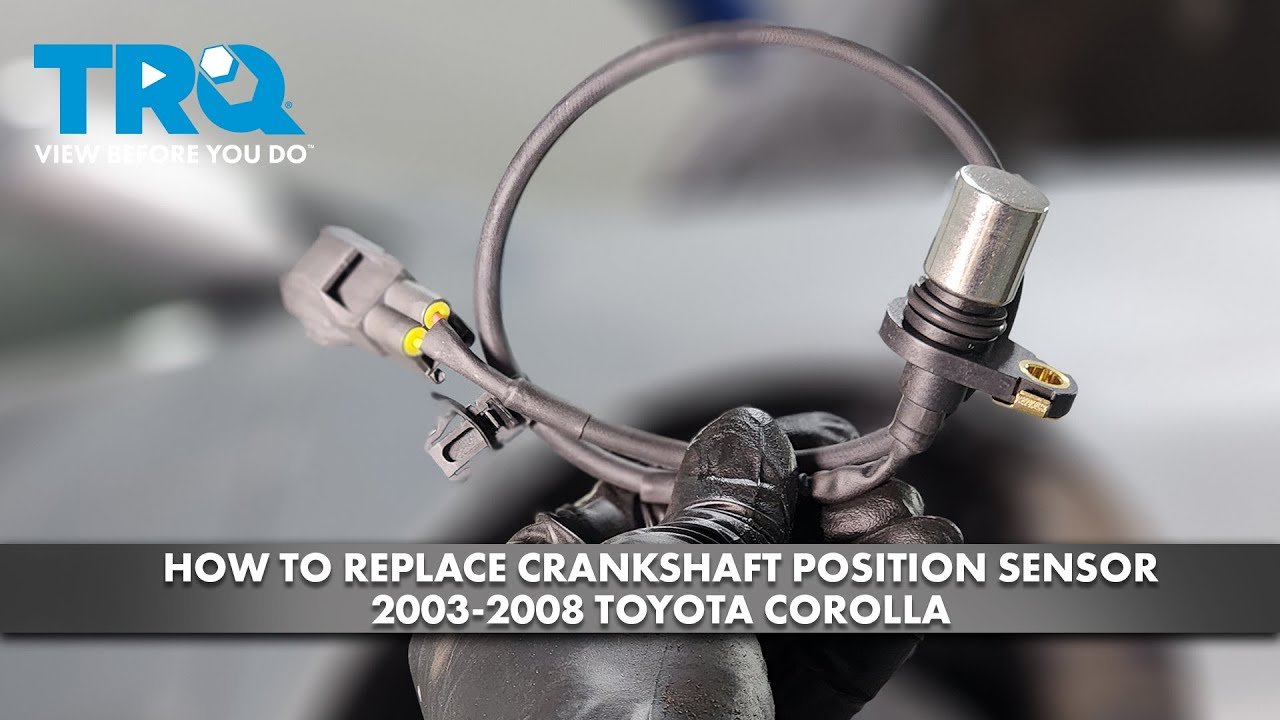
- Mixing Up Sensors – Many engines have both a camshaft and crankshaft sensor. They are not the same.
- Forgetting to Disconnect the Battery – This can lead to electrical shorts or error codes.
- Not Clearing Error Codes – The check engine light may stay on even after a successful repair if codes aren’t cleared.
- Reusing Damaged Seals – Old O-rings can cause oil leaks.
- Dropping Bolts into the Engine Bay – Use a magnet or a piece of tape on your socket to avoid this frustration.
Cost And Time Involved
Replacing a camshaft position sensor is usually not expensive if you do it yourself. Here’s a typical breakdown:
| Item | Estimated Cost | Time Required |
|---|---|---|
| Camshaft Position Sensor | $20–$80 (depending on car) | — |
| Basic Tools | $0–$50 (if you already own tools) | — |
| Labor (mechanic) | $75–$150 per hour | 30–60 minutes |
Most DIYers complete the job in about 30–60 minutes. If you take the car to a shop, the labor cost will be much higher.
What To Do If The Sensor Is Still Not Working
Sometimes, replacing the sensor doesn’t fix the problem. Here are reasons why:
- Wiring issues – Damaged wires or connectors can cause the same symptoms.
- Faulty ECU – Rare, but possible in older cars.
- Wrong sensor – Some aftermarket sensors don’t work as well as OEM parts.
- Other engine problems – Timing chain, crankshaft sensor, or other faults.
If the problem continues, use a multimeter to check the wiring, or consult a professional. Some issues require advanced diagnostics.
How To Test A Camshaft Position Sensor
If you want to be sure your old sensor is bad, testing is possible with a multimeter.
- Set the multimeter to measure resistance (Ohms).
- Disconnect the sensor’s electrical connector.
- Touch the meter leads to the sensor’s terminals (refer to your car’s manual for pin layout).
- Compare the reading to your vehicle’s specifications. A faulty sensor will show no reading (open), a short, or a value far outside the normal range.
Testing can confirm the sensor is the real cause, not another problem.
Credit: www.youtube.com
Real-world Example: Toyota Camry
For a 2012 Toyota Camry, the camshaft position sensor is on the right side of the engine, near the timing cover. The process:
- Remove engine cover.
- Disconnect the sensor’s wiring.
- Remove the 10mm bolt.
- Pull out the old sensor and install the new one.
- Reinstall everything and test.
Most drivers report a smoother idle and better fuel efficiency after replacement.
Oem Vs Aftermarket Sensors
Choosing between OEM (Original Equipment Manufacturer) and aftermarket sensors can be tricky. OEM parts cost more but match your car perfectly. Some aftermarket brands work well, but others may fail quickly or give incorrect signals.
Here’s a quick comparison:
| Type | Pros | Cons |
|---|---|---|
| OEM | Best fit, reliable, long-lasting | Higher cost |
| Aftermarket | Lower price, easy to find | Quality varies, may not last as long |
If in doubt, use OEM or a well-reviewed aftermarket brand.
When To Seek Professional Help
Some cars have sensors in hard-to-reach places, under intake manifolds or behind the engine. If you’re not comfortable removing many parts, or if the sensor is buried deep, it’s wise to ask a mechanic for help. Also, if replacing the sensor doesn’t fix the problem, expert diagnostic tools may be necessary.
Safety Reminders
- Always work in a well-ventilated area.
- Keep tools and small parts away from moving engine parts.
- Wear safety glasses to protect your eyes from dust or debris.
Frequently Asked Questions
What Happens If I Drive With A Bad Camshaft Position Sensor?
Driving with a bad sensor can lead to poor performance, misfiring, and even engine stalling. Over time, it may cause further damage to the engine or catalytic converter.
How Do I Know If My Sensor Is Bad Or If It’s A Wiring Problem?
If you’ve replaced the sensor and problems remain, check the wiring and connectors for damage. Use a multimeter or seek professional help for deeper diagnostics.
Can I Clean A Camshaft Position Sensor Instead Of Replacing It?
In most cases, cleaning does not fix a failed sensor. If oil or dirt is present on the sensor, it’s better to replace it to avoid future issues.
Will A Bad Camshaft Position Sensor Cause A Check Engine Light?
Yes, a faulty sensor almost always triggers a check engine light. Use an OBD-II scanner to confirm the specific error code (usually P0340 or similar).
Where Can I Find More Information About My Car’s Sensor Location?
Check your car’s repair manual or trusted websites like Wikipedia for detailed diagrams and explanations.
Taking care of your camshaft position sensor keeps your engine running smoothly and avoids expensive repairs. With the right steps and attention to detail, you can handle this repair and enjoy the satisfaction of fixing your own car.
