
Replacing a car head gasket is one of the most challenging DIY tasks for car owners. But if you have strong attention to detail, patience, and the right tools, you can save hundreds or even thousands in repair costs. Many mechanics charge $1,000 to $2,000 for a head gasket replacement, mainly because it’s a time-consuming job.
Doing it yourself can feel intimidating, but with careful steps and some preparation, it’s possible—even for advanced beginners. This guide will walk you through everything you need to know, from identifying symptoms to reassembling your engine. Along the way, you’ll learn tips that even seasoned DIYers sometimes miss.
Understanding The Head Gasket
The head gasket sits between the cylinder head and the engine block. Its job is to seal the combustion chamber so that oil and coolant do not mix. When a head gasket fails, you might see white smoke, overheating, or even engine misfires. Ignoring a blown head gasket can quickly lead to severe engine damage.
Common signs of head gasket failure:
- White smoke from the exhaust
- Milky oil (oil mixed with coolant)
- Overheating engine
- Bubbles in the radiator
- Loss of power
If you notice one or more of these, it’s time to consider a replacement. Before you start, be sure you’re comfortable with engine work and have a good workspace.
Tools And Materials Needed
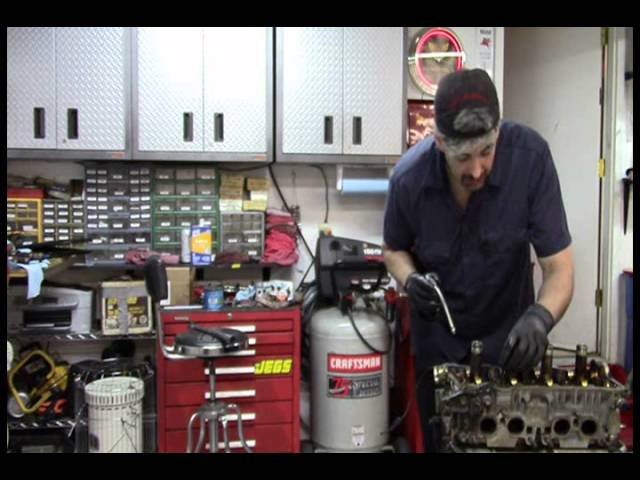
Replacing a head gasket requires more than a basic wrench set. Missing even one important tool can stop your project. Here’s what you’ll need:
Essential tools:
- Full socket and wrench set (metric and SAE)
- Torque wrench (accurate to 1 Nm)
- Screwdrivers (various sizes)
- Pliers and vice grips
- Gasket scraper or razor blade
- Engine hoist (for some vehicles)
- Coolant catch pan
Supplies and parts:
- New head gasket (OEM recommended)
- Intake and exhaust manifold gaskets
- Valve cover gasket
- Engine oil and filter
- Coolant
- Thread locker
- RTV sealant (if specified by service manual)
- Clean rags
Helpful extras:
- Digital camera or phone (take photos as you disassemble)
- Ziplock bags (for bolts and parts)
- Labels and masking tape
- Service manual for your specific car
It’s a good idea to check the service manual for any unique tools required for your make and model.
Credit: www.youtube.com
Preparation And Safety
Before you touch a bolt, make sure your car is parked on a flat, stable surface. Disconnect the battery to prevent accidental shorts. Wear gloves and safety glasses. Let the engine cool completely—removing a hot radiator cap can cause burns.
Organize your workspace to avoid confusion. Place bolts in labeled bags as you remove them. Take photos of hose and wiring layouts. These small steps will save you hours of frustration during reassembly.
Step-by-step Head Gasket Replacement
Here’s a detailed guide to help you replace your car’s head gasket.
1. Drain Fluids
Start by draining the coolant from the radiator. Open the radiator drain plug and let the fluid flow into a pan. Remove the oil drain plug and drain the engine oil. This prevents spills when the head is removed.
2. Remove Engine Components
Take off the air intake, throttle body, and any plastic covers. Remove the spark plugs and ignition coils. Disconnect sensors, wiring, and vacuum lines from the cylinder head. Always label connectors to avoid confusion.
Unbolt the intake and exhaust manifolds. You may need to move the exhaust system or other parts for better access. Remove the timing belt or chain (mark its position for reinstallation).
3. Remove The Cylinder Head
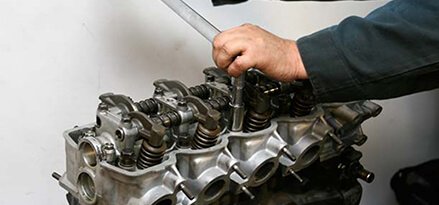
Carefully loosen the cylinder head bolts in the reverse order of tightening (see your service manual for the correct sequence). Do this in stages to prevent warping. Once loose, lift the cylinder head straight up. It may be heavy—get help if needed.
Place the head on a clean surface. Avoid dropping or scratching it.
4. Clean The Mating Surfaces
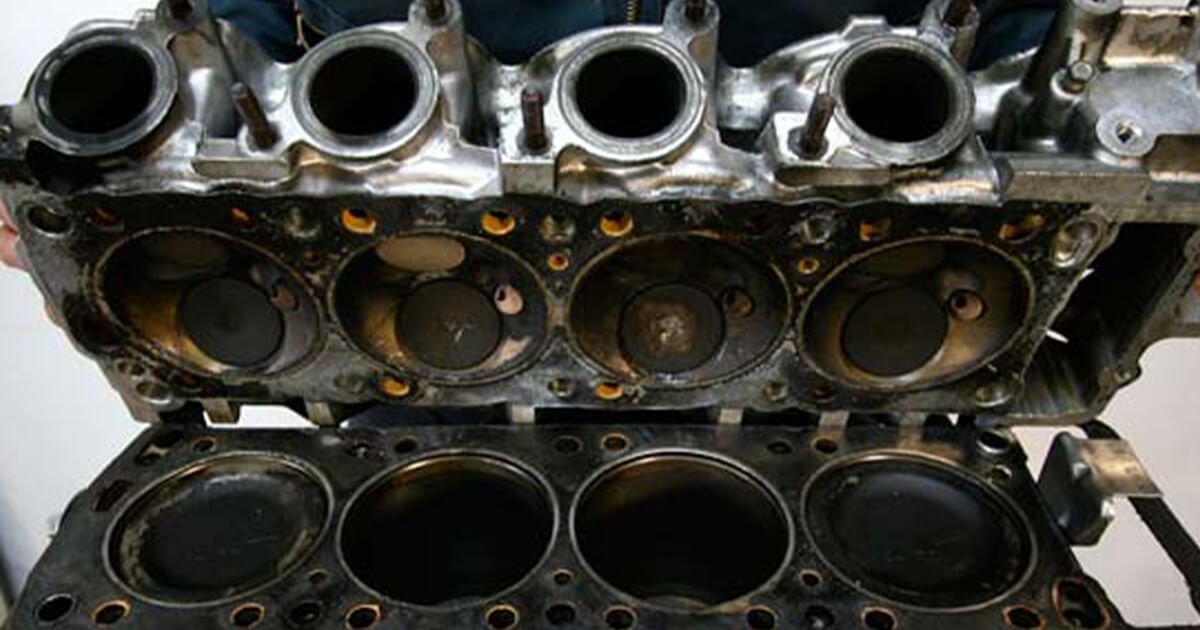
Use a gasket scraper to remove all traces of the old gasket from the engine block and cylinder head. The surfaces must be spotless. Even a tiny piece of debris can cause a leak.
Wipe with brake cleaner and a lint-free cloth. Avoid scratching the metal. Check for warping with a straight edge and feeler gauge.
5. Inspect And Prepare
Before installing the new gasket, inspect the cylinder head and block for cracks or warping. If you see any damage, have the head checked by a machine shop. Skipping this can lead to repeated failure.
If your engine uses head bolts that stretch (torque-to-yield), you must replace them with new ones.
6. Install The New Head Gasket
Place the new gasket on the engine block. Make sure it’s facing the correct direction—most gaskets are marked “top” or “front. ” Don’t use sealant unless the instructions say so.
Carefully lower the cylinder head onto the gasket. Avoid sliding it, which can damage the seal.
7. Torque The Head Bolts
Insert the head bolts. Using a torque wrench, tighten them in the correct sequence and to the specified torque. This step is crucial. Uneven torque can lead to leaks or warping.
Some engines require tightening the bolts in stages, with a final angle-tightening step. Always follow the service manual.
8. Reassemble Engine Components
Reinstall the timing belt or chain, making sure the timing marks line up. Attach the intake and exhaust manifolds using new gaskets. Reconnect wiring, hoses, and sensors. Install spark plugs and ignition coils.
Replace the valve cover gasket and install the valve cover. Double-check all connections.
9. Add Fluids And Check
Refill the engine oil and coolant. Check for leaks before starting the engine. If everything looks good, reconnect the battery.
10. Start And Test The Engine
Start the engine and let it idle. Watch for warning lights and listen for strange noises. Check for leaks around the head and under the car.
Let the engine reach operating temperature. Recheck the oil and coolant levels. Add more if needed. Take a short test drive, then check for leaks and retorque the head bolts if your manual requires it.
Credit: www.mobil.com
Common Mistakes To Avoid
Many first-timers run into problems that could have been avoided with a little extra care. Here are some mistakes to watch out for:
- Not labeling parts: Mixing up bolts and connectors can lead to confusion.
- Skipping surface cleaning: Even a small piece of old gasket can cause a leak.
- Ignoring torque specs: Tightening bolts by “feel” can warp the head.
- Forgetting to bleed air from the cooling system: This can lead to overheating.
- Not checking for warping: Reinstalling a warped head almost guarantees failure.
A practical tip: Always take your time during disassembly. Rushing leads to lost parts and missed steps.
Table: Tools Needed For Head Gasket Replacement
Here’s a quick comparison of tools, showing which are essential and which are optional.
| Tool | Essential | Optional | Purpose |
|---|---|---|---|
| Torque wrench | Yes | No | Correct bolt tightening |
| Engine hoist | No | Yes | For heavy heads |
| Gasket scraper | Yes | No | Clean gasket surfaces |
| Digital camera | No | Yes | Track disassembly |
Table: Symptoms Of A Blown Head Gasket
Compare the most common symptoms and what they might mean.
| Symptom | Possible Cause | Urgency |
|---|---|---|
| White exhaust smoke | Coolant in combustion chamber | High |
| Milky oil | Coolant mixed with oil | Critical |
| Overheating | Coolant loss | High |
| Loss of power | Poor compression | Medium |
Table: Cost Comparison – Diy Vs. Professional
See how much you can save by doing the job yourself.
| Option | Cost | Time Required | Risk Level |
|---|---|---|---|
| Professional repair | $1,000 – $2,000 | 2 – 3 days | Low |
| DIY replacement | $150 – $500 (parts) | 1 – 2 days (with experience) | High |
Expert Insights And Final Tips
Many car owners think a head gasket replacement is impossible without a full garage and a lift. In reality, with patience and organization, a motivated DIYer can succeed in a basic home garage. Here are two extra tips that save time and money:
- Double-check the head bolt type: Some engines use “torque-to-yield” bolts, which must be replaced every time. Reusing them can cause leaks or breakage.
- Plan for extra expenses: Sometimes you find other problems, like a warped head or damaged sensors. Budget 10-20% extra for surprises.
If you’re unsure at any step, consult your service manual or ask for advice on trusted car forums. The official manuals and online communities can fill in gaps your experience may not cover. For more technical details, check out the Cylinder head gasket article on Wikipedia.
Replacing a head gasket is challenging, but it’s a rewarding way to learn more about your car and save money. When done right, your engine will run smoothly for years to come.
Frequently Asked Questions
How Do I Know If My Head Gasket Is Blown?
Look for symptoms like white exhaust smoke, engine overheating, or milky oil. You might also see bubbles in the radiator or a sudden loss of power.
Can I Drive With A Blown Head Gasket?
It’s not safe. Driving with a blown gasket can quickly cause severe engine damage, including a cracked head or engine block.
How Long Does It Take To Replace A Head Gasket Yourself?
For most DIYers, expect to spend 10 to 20 hours over a weekend. If it’s your first time, it may take longer.
Do I Need Special Tools To Change A Head Gasket?
You’ll need a torque wrench and possibly some specific tools for your engine model. Check your service manual before starting.
What Happens If I Don’t Torque The Head Bolts Correctly?
Improperly torqued bolts can cause leaks, warped heads, or even engine failure. Always follow the torque sequence and specifications in your manual.
Credit: www.mobil.com
