
Replacing your car’s EGR (Exhaust Gas Recirculation) valve can seem intimidating, but with the right guidance, anyone can do it. This task is not just for professional mechanics—many car owners have saved money and improved their vehicle’s performance by tackling it themselves.
If you notice rough idling, reduced fuel efficiency, or even the dreaded check engine light, your EGR valve may be the culprit. Here’s a practical, step-by-step guide to replace your car’s EGR valve and avoid costly labor charges.
What Is An Egr Valve And Why Is It Important?
The EGR valve is a critical part of your car’s emission control system. It recirculates a portion of exhaust gases back into the engine’s intake, lowering combustion temperatures and reducing harmful nitrogen oxide emissions. This helps your car run cleaner and more efficiently.
When the EGR valve fails, you might experience engine knocking, hesitation, or increased emissions. If ignored, a faulty EGR can lead to expensive repairs and even engine damage. Knowing its function helps you understand why replacement is so important.
Signs Your Egr Valve Needs Replacement
Many drivers miss early warning signs of EGR valve trouble. Here are the most common symptoms:
- Check Engine Light: A faulty EGR often triggers this warning.
- Rough Idling: The engine may idle unevenly or stall.
- Poor Fuel Economy: You notice you’re refueling more often.
- Engine Knocking: A pinging noise, especially during acceleration.
- Failed Emissions Test: Your vehicle does not meet standards.
- Increased Exhaust Smoke: Visible smoke from the tailpipe.
Non-obvious insight: Some drivers ignore mild symptoms thinking it’s “just old age” for the car, but EGR valve problems can get worse quickly. Early replacement saves money and prevents further engine damage.
Tools And Materials You Need
You don’t need advanced tools, but having the right equipment makes the job smoother. Gather these before you start:
- Replacement EGR valve (specific to your car model)
- Socket set and ratchet
- Wrenches
- Screwdrivers
- Pliers
- New gasket (often included with the valve)
- Gloves
- Cleaner (carburetor or throttle body cleaner)
- Rags
- Safety glasses
Practical tip: Double-check the replacement part number. Even a small mismatch can cause fitment issues. Many online stores let you enter your car’s VIN to verify compatibility.
Preparing Your Car For Egr Valve Replacement
Before removing anything, make sure your car is ready:
- Park on a flat surface and allow the engine to cool. Working on a hot engine can cause burns.
- Disconnect the battery. This prevents accidental short circuits.
- Locate the EGR valve. Usually found near the intake manifold or throttle body. If unsure, check your owner’s manual or search online images for your car model.
Non-obvious insight: Some newer vehicles have electronic EGR valves with sensors. These require extra care—never force electrical connectors.
Credit: www.youtube.com
Step-by-step Guide To Replacing Your Egr Valve
Follow these clear steps to remove and install the EGR valve:
Step 1: Remove Engine Covers And Components
Many cars have plastic covers or intake tubes blocking access to the EGR valve. Remove these carefully, setting bolts aside so you don’t lose them.
Step 2: Disconnect Electrical Connections
If your EGR valve has electrical plugs, gently unplug them. Use pliers if needed, but don’t pull on the wires directly.
Step 3: Remove Vacuum Lines
Some EGR valves connect to vacuum hoses. Mark or take a photo so you remember their position for reassembly.
Step 4: Loosen And Remove Mounting Bolts
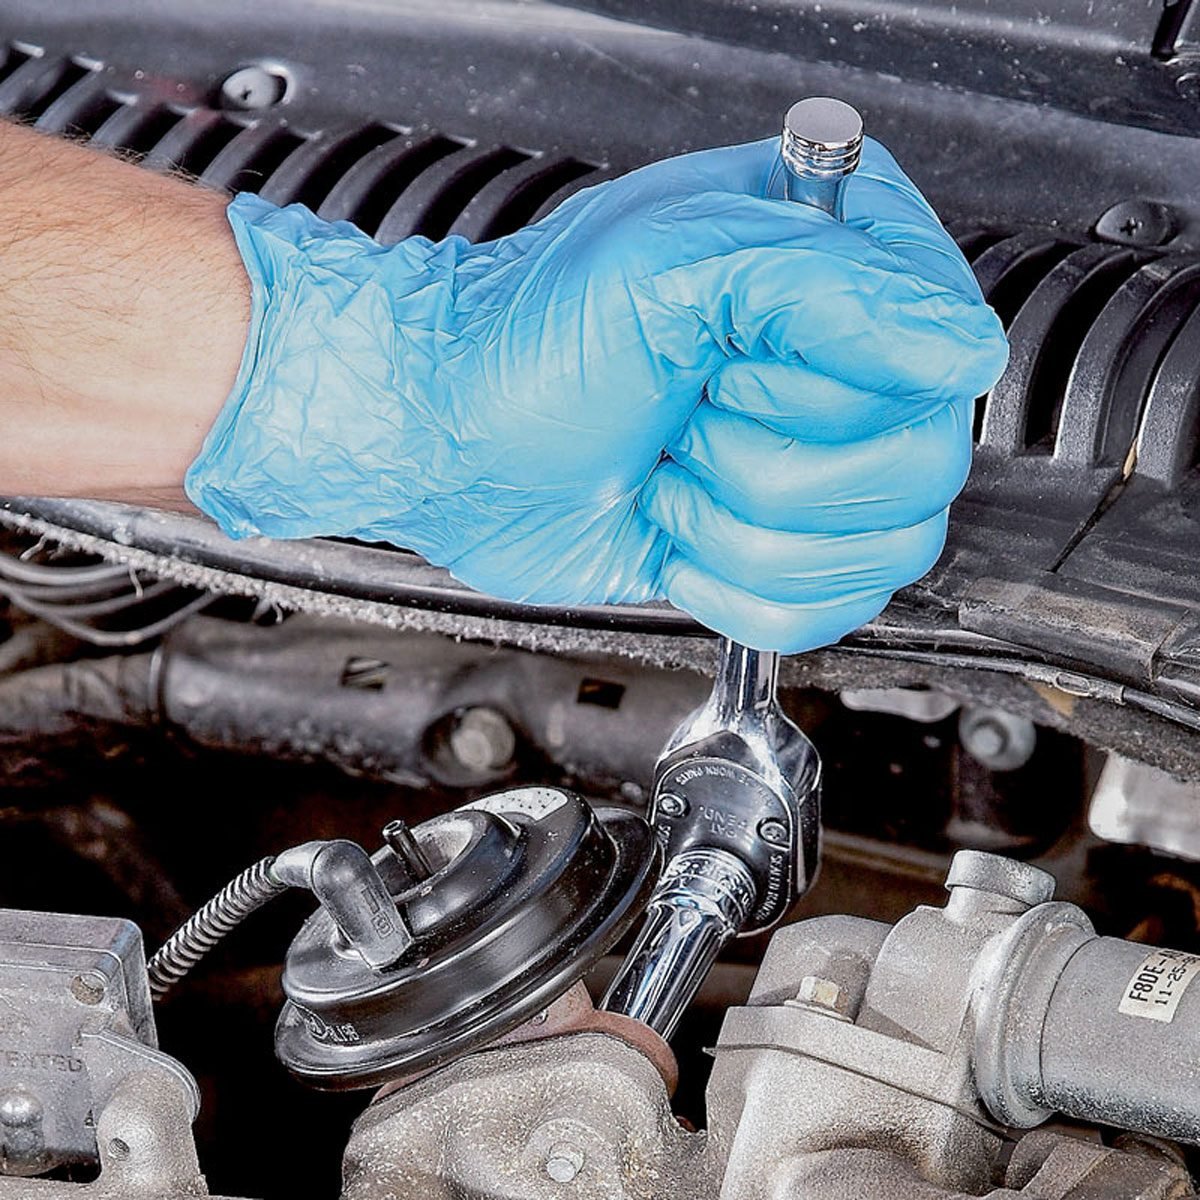
Use your socket set to remove bolts holding the valve. Sometimes these bolts are tight due to heat cycles. If stuck, apply penetrating oil and wait a few minutes.
Step 5: Remove The Egr Valve
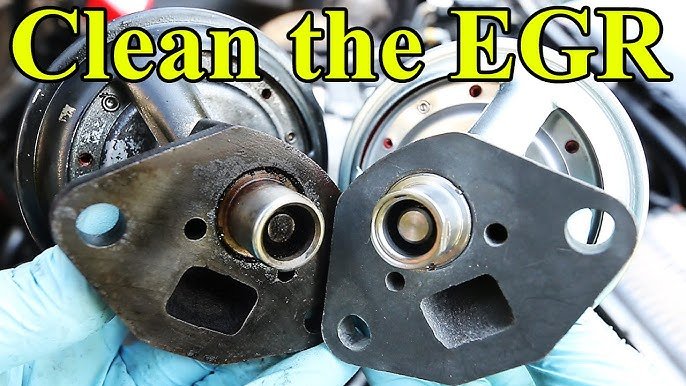
Lift the valve away from the engine. Inspect the mounting surface for carbon buildup. Clean thoroughly with carburetor cleaner and a rag.
Step 6: Install New Gasket
Always use a new gasket. Place it between the engine and the new valve to prevent leaks.
Step 7: Install The New Egr Valve
Position the new valve carefully. Insert bolts and tighten evenly. Avoid overtightening—refer to your vehicle’s torque specs if possible.
Step 8: Reconnect Vacuum Lines And Electrical Plugs
Attach hoses and connectors exactly as they were. Double-check your photo or marks.
Step 9: Reinstall Engine Covers And Components
Replace any covers or tubes you removed earlier.
Step 10: Reconnect The Battery And Start The Engine
Start your car. The engine should idle smoothly. Listen for abnormal noises and check for leaks.
Here’s a quick comparison of the main steps between manual and electronic EGR valves:
| Step | Manual EGR Valve | Electronic EGR Valve |
|---|---|---|
| Locate Valve | Near intake manifold | Near intake, includes sensors |
| Disconnect | Vacuum hoses | Electrical plugs |
| Remove | Bolts, gasket | Bolts, gasket, sensors |
| Install | New valve, gasket | New valve, gasket, sensor connection |
Common Mistakes To Avoid
Many beginners make simple errors that can cause bigger problems. Here’s what to watch for:
- Using old gaskets: Always use a new gasket to prevent leaks.
- Forgetting vacuum hose positions: Mark or photograph hose locations before removal.
- Overtightening bolts: This can crack the valve or mounting surface.
- Skipping battery disconnection: Risk of electrical shorts.
- Not cleaning mounting surfaces: Carbon buildup can block the new valve.
Non-obvious insight: Even experienced DIYers sometimes forget to clear error codes after replacement. If your check engine light stays on, use an OBD-II scanner or visit an auto parts store.
Testing Your Car After Egr Valve Replacement
Once installed, you need to confirm everything works:
- Start your engine and let it idle for a few minutes.
- Watch for engine smoothness and check for leaks.
- Take your car for a short drive. Notice any hesitation or knocking.
- Use an OBD-II scanner to clear error codes if the check engine light is still on.
If you notice persistent problems, double-check all connections and gasket placement. If issues remain, the EGR valve may not be the only problem—consider consulting a mechanic.
Here’s a quick reference table on post-replacement checks:
| Check | Expected Result | Action if Problem |
|---|---|---|
| Engine idle | Smooth, no stalling | Recheck valve, hoses |
| Check engine light | Off after reset | Scan for codes |
| Leaks | No visible exhaust or fluid leaks | Tighten bolts, check gasket |
| Performance | No knocking, better fuel economy | Inspect other engine parts |
How Much Does Egr Valve Replacement Cost?
DIY replacement saves money, but it’s good to know the typical costs:
- EGR valve price: $50–$250 depending on vehicle type.
- Mechanic labor cost: $100–$300, often charged hourly.
For most cars, you can complete the job in 1–2 hours. If your car is newer or has a complex engine layout, plan extra time.
Non-obvious insight: Some auto parts stores loan specialty tools for free with a deposit. Take advantage if you need a unique wrench or socket.
Credit: www.youtube.com
Practical Tips For A Smooth Egr Valve Replacement
Here are some proven tips to make your job easier:
- Work in daylight. Good lighting reduces mistakes.
- Keep parts organized. Small bolts can get lost easily.
- Wear gloves and glasses. Protect yourself from chemicals and hot surfaces.
- Don’t rush. Take your time, especially during reassembly.
- Have a friend help. Sometimes a second pair of hands makes removal easier.
If you’re unsure, check online forums or videos for your specific car model. Many drivers share step-by-step guides with photos for extra clarity.
For more technical details on EGR valves, you can visit Wikipedia.
Frequently Asked Questions
What Does The Egr Valve Do In A Car?
The EGR valve recirculates exhaust gases back into the engine’s intake. This lowers combustion temperatures and reduces harmful emissions, helping the engine run cleaner.
How Often Should I Replace My Egr Valve?
Most EGR valves last about 50,000–100,000 miles. If you experience symptoms like rough idling or poor fuel economy, check it sooner.
Can I Drive With A Bad Egr Valve?
You can drive for a short time, but it’s not recommended. A faulty EGR valve can increase emissions, cause engine knocking, and lead to more expensive repairs.
Do I Need Special Tools To Replace The Egr Valve?
Usually, basic tools like sockets and wrenches are enough. Some cars may require a special socket or tool, but most auto parts stores loan these for free.
Will Replacing The Egr Valve Turn Off My Check Engine Light?
If the EGR valve was the cause, replacing it should turn off the light. You may need to use an OBD-II scanner to clear error codes after replacement.
Replacing your car’s EGR valve is a practical way to save money and keep your engine healthy. With careful preparation and attention to detail, you can complete this task yourself—even if you’re not a car expert. Take your time, follow the steps, and enjoy the benefits of a smoother-running vehicle.
Credit: www.familyhandyman.com