Replacing a car evaporator core is a major DIY AC repair because the part sits inside the HVAC box behind the dashboard. Plan on safe refrigerant recovery, battery disconnection, careful dashboard removal, new O-rings, vacuum testing and a correct recharge before the AC can work properly again.
Before opening the system, confirm the evaporator is actually leaking or clogged. If the problem is only low refrigerant, start with this car AC refrigerant level check first. While the dashboard and HVAC box are apart, it is also smart to inspect airflow parts and replace the cabin air filter if it is dirty.
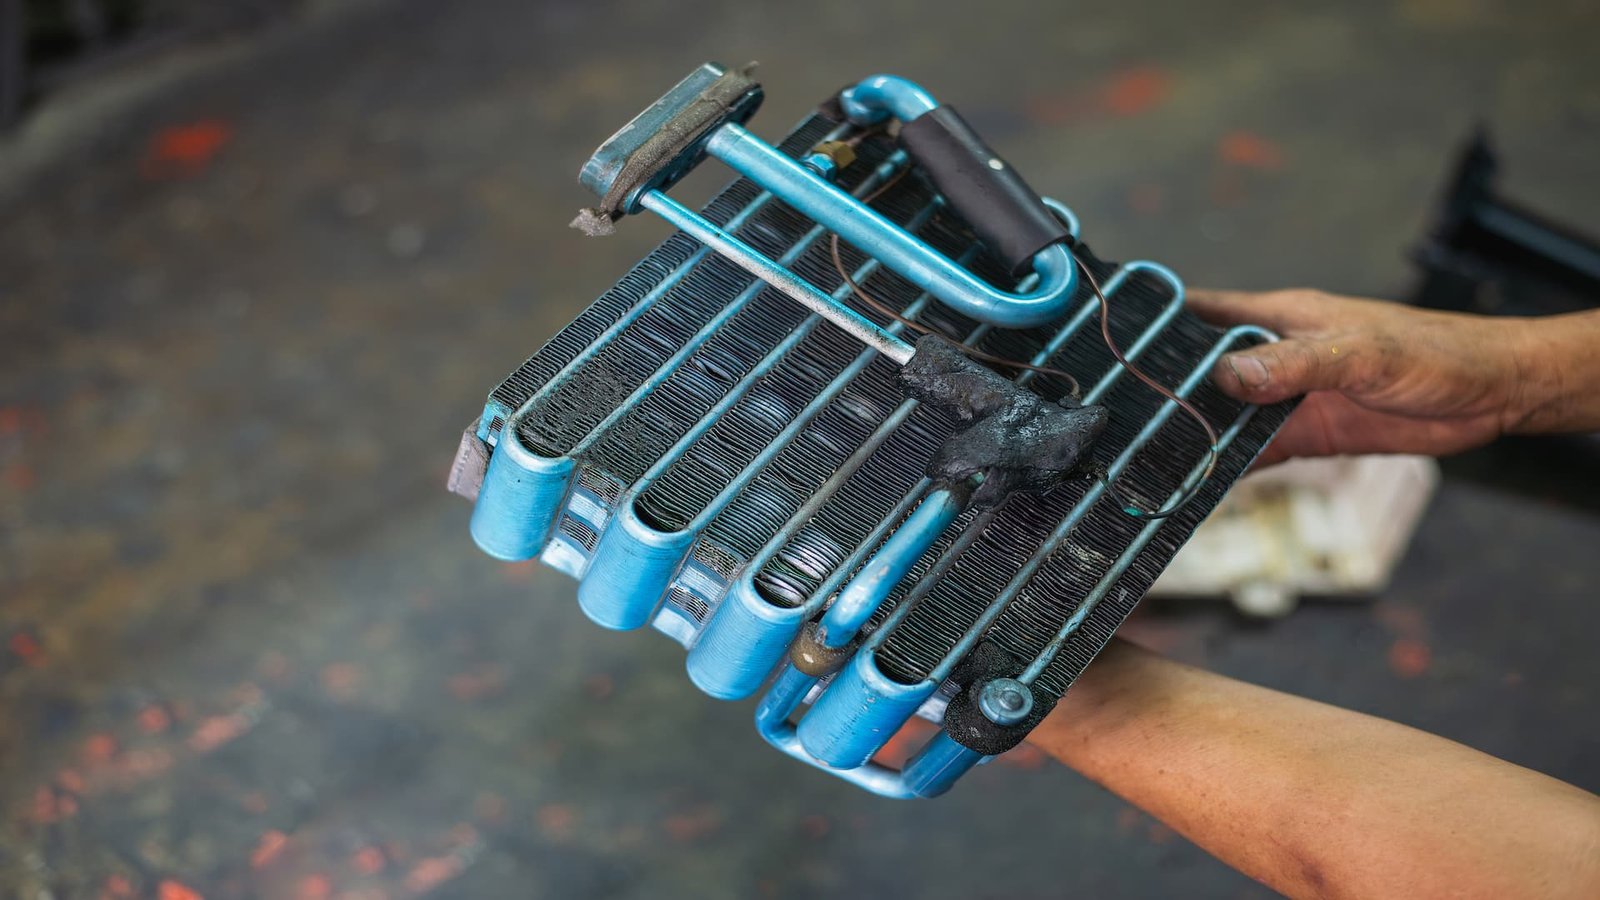
What Is The Evaporator Core And Why Replace It?
The evaporator core is like a small radiator, usually located deep inside your car’s dashboard. Refrigerant passes through it and absorbs heat from the cabin air, making the air cool and comfortable. Over time, the evaporator can leak, get clogged, or develop mold. Common signs you need a replacement include:
- Weak or no cold air from vents
- Sweet or musty smell from the AC
- Fogging inside windows
- Wet spots under the dashboard (not always from the AC)
Replacing the core is necessary for a reliable and safe AC system. Ignoring the problem can lead to expensive repairs and even damage other AC parts.
Tools And Materials Needed
Before starting, gather all tools and parts. Working on the AC system is a big project, and being prepared makes it easier and safer.
- Socket set (metric and standard)
- Screwdrivers (flat and Phillips)
- Pliers
- Plastic trim removal tools
- Torx drivers (for some dashboards)
- Ratchet and extensions
- Wrenches
- Replacement evaporator core (make sure it fits your car’s year, make, and model)
- O-rings and seals (new, for all AC connections)
- Refrigerant recovery machine (or arrange professional evacuation)
- AC manifold gauge set
- Vacuum pump
- Refrigerant (R134a or specified type)
- Safety glasses and gloves
- Shop towels
- Plastic bags and labels (for screws and small parts)
One thing beginners often overlook is the need for new O-rings. Reusing old ones can cause leaks and mean redoing the job.
Credit: www.autonationmobileservice.com
Safety First: Handling Refrigerant
AC systems are under pressure and contain refrigerant that is harmful to people and the environment. Always discharge the AC system before opening any lines. In many places, it’s illegal to vent refrigerant yourself. Most auto shops can recover it for a small fee.
- Wear safety glasses and gloves at all times.
- Work in a well-ventilated area.
- Never smoke or use open flames near refrigerant.
If you’re unsure, ask a professional to discharge the system for you before you begin.
Step-by-Step Guide to Replacing the Evaporator Core
Replacing the evaporator core is a big job because it’s buried behind the dashboard. Here’s a breakdown of the process:
1. Disconnect The Battery
Always start by disconnecting the negative battery terminal. This prevents accidental airbag deployment and protects electrical systems.
2. Remove Refrigerant From The System
If not already done, have the refrigerant recovered by a licensed professional. This step is important for safety and is required by law in many countries.
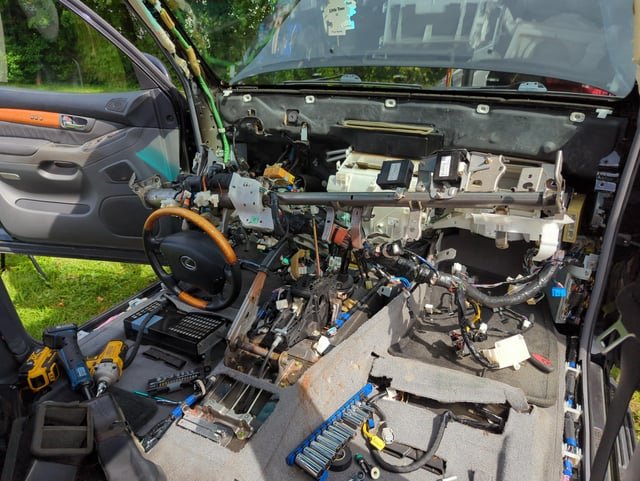
3. Remove Interior Panels And Dashboard
This step takes time and patience. You will need to remove:
- Lower dash panels
- Center console (if equipped)
- Glove box
- Radio and climate controls
- Steering column covers (sometimes)
- Instrument cluster (in some models)
Use plastic trim tools to avoid damaging panels. Take photos or label connectors to help with reassembly. Keep screws and clips organized in plastic bags.
4. Disconnect Ac Lines At The Firewall
Under the hood, find the two aluminum lines going into the firewall. These connect to the evaporator core. Remove the bolts or clips holding them. Be careful—some refrigerant oil may drip out.
5. Remove The Heater Box
The heater box (sometimes called HVAC box or plenum) holds the evaporator core and often the heater core. Depending on your car, you may need to:
- Unbolt the heater box from the firewall
- Disconnect electrical connectors, vacuum lines, and control cables
- Remove mounting bolts inside and outside the cabin
Some vehicles make this step easier than others. In some, you’ll need to fully remove the dashboard; in others, you can slide the heater box out with less disassembly.
6. Remove The Old Evaporator Core
Open the heater box carefully—there may be screws, clips, or tabs holding it together. Take note of how everything fits for reassembly. Remove the old evaporator core and inspect for signs of leaks, corrosion, or clogging.
7. Install The New Evaporator Core
Place the new evaporator core into the heater box. Replace all O-rings and seals on the AC connections. Double-check the fit and alignment. Reassemble the heater box and make sure all clips and screws are secure.
8. Reinstall The Heater Box
Slide the heater box back into position. Reconnect all electrical connectors, vacuum lines, and control cables. Secure it with the original bolts.
9. Reconnect Ac Lines And Interior Components
Under the hood, reconnect the AC lines to the firewall. Make sure all O-rings are new and connections are tight. Inside, reinstall the dashboard, panels, and everything else you removed. Take your time—rushing this step can break clips or lead to rattles.
10. Reconnect The Battery
Once everything is back in place, reconnect the negative battery terminal.
11. Evacuate And Recharge The Ac System
With all parts installed, you need to remove air and moisture from the system. Connect an AC manifold gauge set and a vacuum pump to the service ports.
- Pull a vacuum for at least 30 minutes.
- Check for leaks (the system should hold vacuum).
- Recharge with the correct amount of refrigerant.
Proper refrigerant charge is critical. Too much or too little can damage the compressor or reduce cooling performance. If you’re unsure, have a shop do the recharge.
12. Test The System
Start your car and run the AC. Check for:
- Cold air from the vents
- No unusual noises from the dashboard
- No refrigerant leaks under the hood or inside
If everything works, you’ve done it—your AC should feel like new.
Common Mistakes To Avoid
Many beginners underestimate the time and effort required. Here are common pitfalls and how to avoid them:
- Skipping new O-rings: Old seals often leak after reassembly.
- Forgetting wire/cable locations: Take clear photos before you remove anything.
- Losing screws and clips: Use labeled bags for all hardware.
- Forcing panels: Use plastic tools and gentle pressure.
- Incorrect refrigerant charge: Check your car manual for the exact amount.
- Not evacuating the system: Air or moisture in the AC will reduce cooling and cause corrosion.
- Not checking for leaks: Use soapy water on connections or an electronic leak detector.
How Much Time And Money Will It Take?
Replacing the evaporator core is one of the most time-consuming DIY car repairs. On average, expect to spend 6–12 hours depending on your skill level and vehicle.
Here’s a cost and time comparison:
| Option | Time Required | Cost Estimate |
|---|---|---|
| DIY (yourself) | 6–12 hours | $100–$400 (parts & tools) |
| Professional Mechanic | 1–2 days (shop time) | $800–$1800 (parts & labor) |
If you already own some tools, your cost will be lower. The real savings come from avoiding expensive shop labor.
Credit: www.reddit.com
Should You Do It Yourself Or Hire A Pro?
Not sure if you should tackle this repair? Here’s a comparison of DIY vs. professional service:
| DIY | Professional |
|---|---|
| Save money on labor | Faster turnaround |
| Learn about your car | No risk of damaging electronics |
| Time-consuming | Higher cost |
| Risk of mistakes | Warranty on work |
If you enjoy working on cars, have some patience, and want to save money, DIY is rewarding. For those who need their car quickly or feel unsure, a trusted mechanic is a better choice.
Extra Tips For Success
- Mark all connectors and cables with masking tape to avoid confusion.
- Take plenty of photos during disassembly.
- Keep your workspace organized.
- Replace the cabin air filter while the system is apart.
- If your heater core is old, consider replacing it at the same time. Both are in the same box.
Many DIYers miss the chance to fix other hidden problems while the dashboard is apart. Inspect for broken blend doors, worn foam seals, or even dashboard rattles.
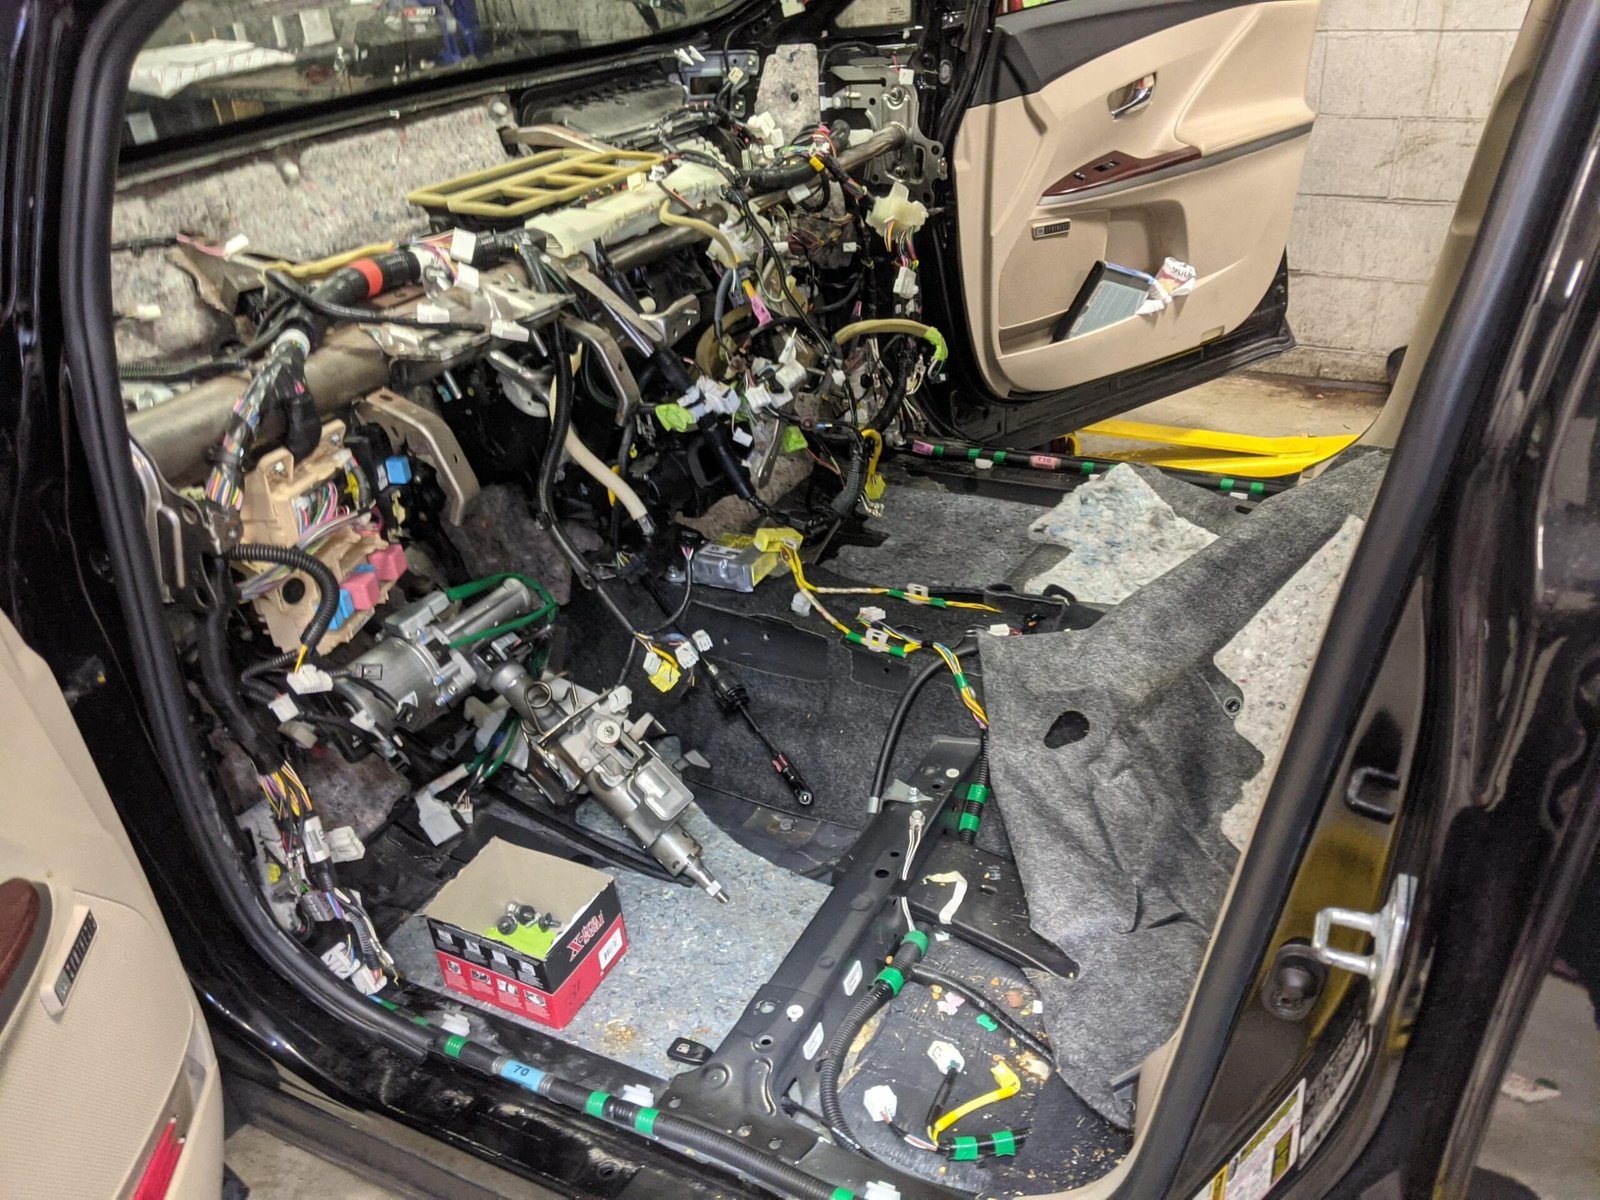
Credit: www.reddit.com
Signs Your Evaporator Core Is Bad
Not all AC problems are caused by a faulty evaporator core. Here’s how to know the core is likely the issue:
- Sweet smell from vents (refrigerant leak)
- Water dripping on passenger floor
- Weak airflow even with fan on high
- Visible corrosion or oily residue on AC lines
If you’re not sure, have a shop perform a leak test or use a UV dye. This step can save you hours if the core is not the problem.
When To Get Help
Some cars are much harder than others. European and luxury vehicles often have complex dashboards. If you’re struggling or stuck, don’t be afraid to ask for help. Online forums, YouTube, and factory service manuals are valuable resources.
If you feel uncomfortable with any step, especially refrigerant handling, let a professional finish the job. Safety should always come first.
Frequently Asked Questions
How Do I Know If My Car’s Evaporator Core Is Leaking?
You might notice sweet smells from the vents, fogging inside the windows, or wet spots on the floor. Sometimes, the AC will blow warm air. A leak test with dye or an electronic detector can confirm it.
Can I Replace The Evaporator Core Without Removing The Dashboard?
In most cars, you must remove at least part of the dashboard. Some trucks and older vehicles have easier access, but most modern vehicles require full or partial dash removal.
Do I Need Special Tools For This Job?
You need basic hand tools, but also an AC manifold gauge set and vacuum pump for recharging the system. You may need Torx drivers or special trim tools depending on your car.
How Long Will My Ac Stay Cold After Replacing The Evaporator Core?
A new evaporator core should last 8–15 years if installed correctly and the rest of the AC system is in good shape.
Where Can I Find Detailed Instructions For My Specific Car?
Factory service manuals are best. You can also find guides and videos for many models on forums and sites like WikiHow.
—
Replacing a car evaporator core yourself is a challenging but rewarding project. With the right tools, preparation, and patience, you can restore your AC, learn new skills, and save hundreds of dollars. Take your time, stay organized, and don’t be afraid to ask for help if you need it. Your cool, comfortable car will be worth the effort.
