Replacing sway bar links yourself can save you money, keep your car handling safely, and give you a real sense of accomplishment. Many drivers worry this job is too hard, but with the right tools and clear steps, most people can do it at home. Sway bar links (sometimes called stabilizer links) help your car stay flat in turns and improve road grip. When they wear out, you may hear clunking noises or feel less control in corners. Fixing them quickly helps avoid bigger suspension problems later.
This guide walks you through everything: tools you need, how to spot bad sway bar links, step-by-step replacement, and smart tips to avoid mistakes. Even if you’re new to car repair, you’ll finish confident and safe.
What Do Sway Bar Links Do?
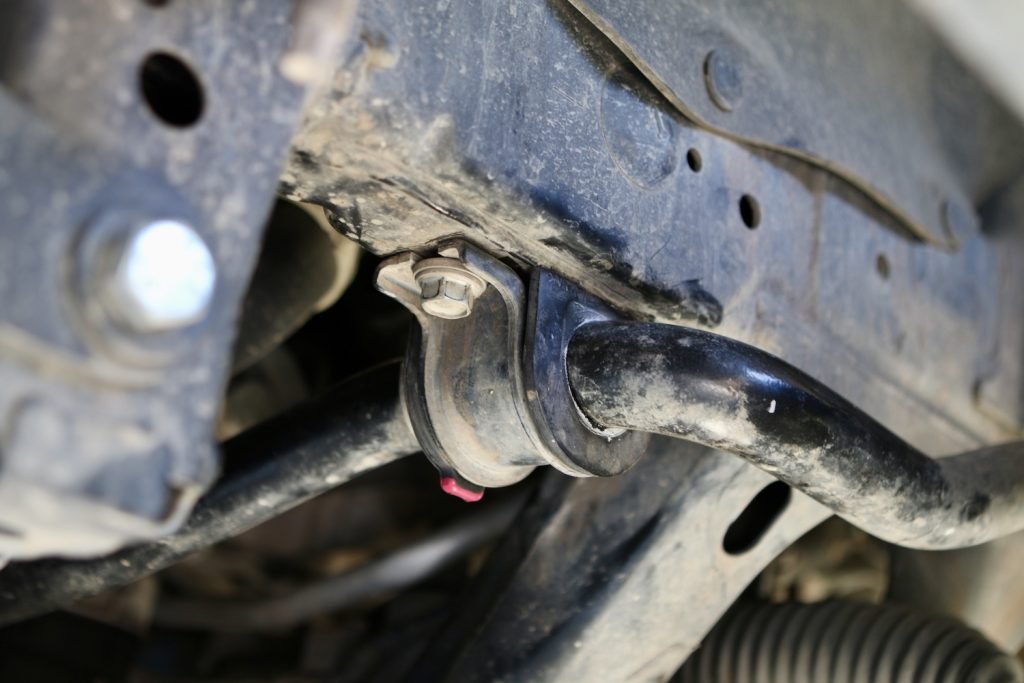
The sway bar is a simple but important suspension part. It connects the left and right wheels with a metal bar, helping keep your car level during turns. The sway bar links connect the bar to the suspension on each side. They let the sway bar move as your car handles bumps and corners.
If a link breaks or wears out, your car may lean too much in turns, or you might hear a rattle or clunk over bumps. In some cases, handling feels loose or unpredictable. Replacing worn links quickly keeps your suspension healthy and your car safe.
Signs Your Sway Bar Links Need Replacement
Not sure if your sway bar links are the problem? Here are key signs to watch for:
- Clunking or rattling noises when driving over bumps or rough roads.
- Loose or unstable steering during cornering.
- Uneven tire wear or poor alignment that doesn’t improve after adjustments.
- Visible movement: If you grab a sway bar link and can wiggle it by hand, it’s too loose.
- Broken or missing rubber boots on the link’s joints.
Beginners often miss the difference between sway bar link noise and other suspension sounds. Worn links usually make noise only when you hit a bump or turn sharply. If your car makes noise just driving straight on smooth roads, the problem could be somewhere else, such as ball joints or struts.
Tools And Materials Needed
Having the right tools will save you time and frustration. Here’s what you’ll need for most cars:
- Jack and jack stands (never rely on just a jack)
- Wheel chocks for safety
- Socket set (often 13-19mm, but check your car’s bolts)
- Wrenches (sometimes you need two for stubborn bolts)
- Breaker bar (for tough, rusted bolts)
- Penetrating oil (like WD-40, for rusty parts)
- Torque wrench (for correct bolt tightness)
- New sway bar links (make sure you get the right size/model)
- Gloves and safety glasses
Optional but helpful:
- Pry bar (for stubborn links)
- Impact driver (for faster removal)
- Rust brush (to clean threads before reassembly)
Not all links are the same. Some are straight rods with bushings, while others have ball joints at both ends. Always check your car’s manual or an auto parts website before buying replacements.
Preparing Your Car
Before you start, park your car on a flat, solid surface. Set the parking brake and chock the wheels. Loosen the wheel lug nuts a little (but don’t remove them yet). Raise the car with a jack and secure it on jack stands.
Never crawl under a car that isn’t safely supported.
Remove the wheel for best access to the sway bar links. Some experienced DIYers work with the wheel on, but it’s much harder and less safe.
Safety First
- Always use jack stands. Jacks can fail, but stands are solid.
- Wear eye protection—rust or dirt can fall when you remove old links.
- Keep your tools organized to avoid searching for missing sockets.
Step-by-step Sway Bar Link Replacement
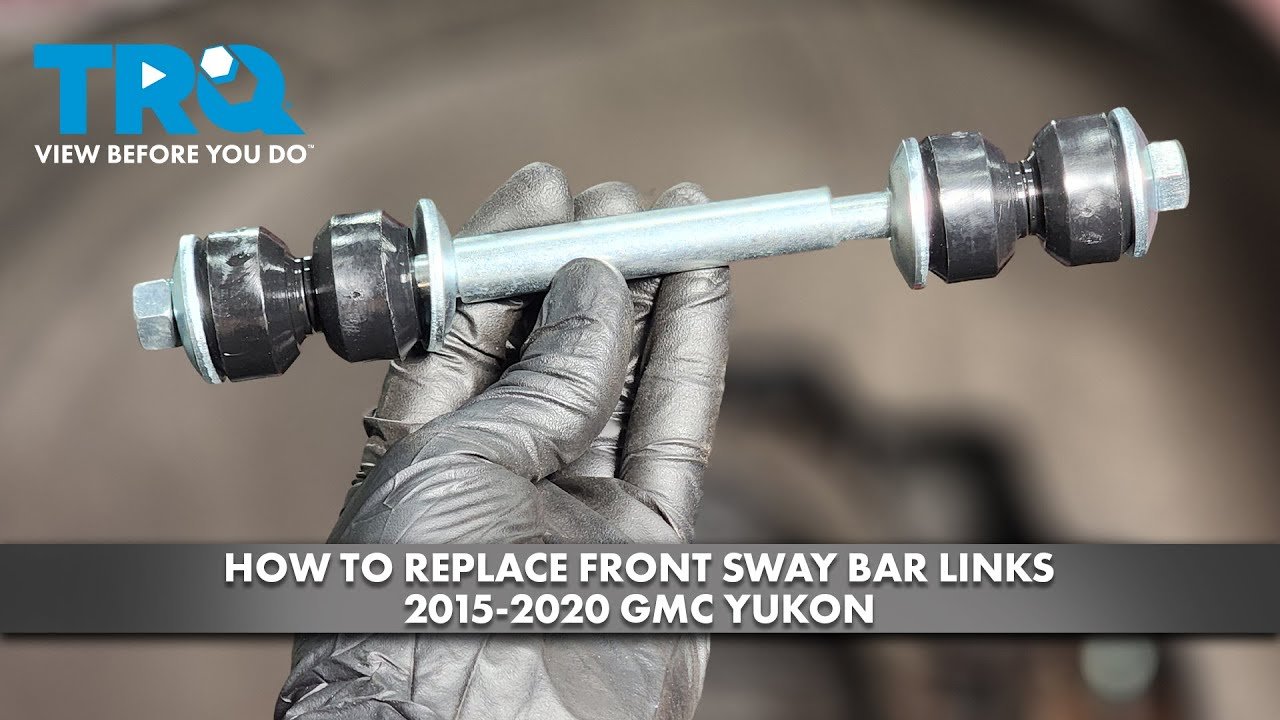
1. Inspect And Compare Parts
Before removing the old link, compare your new part to the old one. Check:
- Length
- Diameter
- Bolt size and type
- Number of bends or angles
It’s common for beginners to buy parts that look similar but don’t fit. If they don’t match, don’t force them—return for the correct ones.
2. Remove The Old Sway Bar Link
Spray all nuts and bolts with penetrating oil. Let it soak for 10-15 minutes. Use your socket and wrench to loosen the nuts. Some links spin as you turn the nut—hold the stud with a wrench or Allen key if needed.
If a bolt is very rusty, use a breaker bar for extra power. Don’t hit bolts with a hammer unless you plan to replace them.
| Common Bolt Sizes | Metric (mm) | SAE (inch) |
|---|---|---|
| Sway Bar Link | 14, 15, 17 | 9/16″, 5/8″ |
| Wheel Lug Nut | 19, 21 | 3/4″, 13/16″ |
Remove both upper and lower nuts, then slide the old link out. If it’s stuck, gently pry it with a screwdriver or pry bar.
3. Clean The Mounting Points
Before installing the new link, clean the holes or studs with a rust brush. Dirt or corrosion can make new parts fit poorly or cause early wear.
4. Install The New Sway Bar Link
Slide the new link into position. Hand-tighten both nuts first. Make sure the link is straight, not twisted.
Use your socket or wrench to tighten the nuts snugly. Finish with a torque wrench set to your car manufacturer’s specification (usually between 35-55 ft-lbs). Over-tightening can damage the bushing or threads; too loose and the link may fail.
5. Double-check Your Work
Give the new link a firm shake. It should feel solid with no play. Check that the sway bar is still centered and not hitting other parts.
Replace the wheel, tighten the lug nuts by hand, lower the car, and torque the lug nuts to spec.
6. Repeat On The Other Side
Most cars have sway bar links on both sides. If one has failed, the other is likely worn too. Replacing both is good practice for long-term safety.
Common Mistakes And How To Avoid Them
Many first-time DIYers run into these problems:
- Buying the wrong part: Double-check fitment for your car’s year, make, and model.
- Forgetting to torque bolts: Guessing can mean loose links or broken threads.
- Not cleaning mounting points: Rust or dirt can cause the new link to fail early.
- Working without jack stands: Never rely on a jack alone—serious injuries happen this way.
- Skipping both sides: Worn links often come in pairs. Fixing one can leave the other ready to break.
For older cars, bolts may be badly rusted or seized. If you break a bolt, you may need an extractor tool or help from a mechanic. Always allow extra time for rusted parts.
How Long Does It Take?
For most cars, plan about 1-2 hours per side if you’re new to the job. Experienced DIYers sometimes finish both sides in under an hour. Rust, stuck bolts, or complicated designs can add time.
Cost Comparison: Diy Vs. Shop
Doing the job yourself can save a lot. Here’s a comparison:
| Replacement Method | Parts Cost (USD) | Labor Cost (USD) | Total Cost (USD) |
|---|---|---|---|
| DIY | $30–$80 (pair) | $0 | $30–$80 |
| Repair Shop | $60–$120 (pair) | $100–$200 | $160–$320 |
You can see, replacing sway bar links yourself is much cheaper, especially if you already own the tools.
Extra Tips For A Smooth Job
- Take clear photos before you start, so you remember how everything fits.
- If you live in a snowy area, spray bolts with penetrating oil the night before.
- Use gloves to avoid cuts from sharp suspension parts.
- If you hear continued noise after replacement, double-check torque specs and link alignment.
- Some cars use special “locking” nuts—always use new ones if supplied.
An overlooked detail: If your car’s suspension is loaded (car on the ground) when you tighten the links, the bushings wear more naturally and last longer. Some experts recommend final tightening with the wheels back on the ground for the best result.
When To Get A Professional
If you see broken sway bar brackets, badly bent links, or corroded mounting holes, the job may be more than a DIY fix. Also, if you lack the right tools or workspace, a shop is safer. Some cars (especially European models) have complex suspension layouts that need special tools.
Credit: trail4runner.com
After Replacement: What To Check
Take your car for a short drive. Listen for any new noises. Steering should feel tight and stable, especially in corners. If the car pulls, clunks, or feels worse, recheck your work before driving further.
Having your alignment checked after any suspension work is smart, even though sway bar links don’t usually change alignment. Poor alignment can hide other suspension problems.
Sway Bar Link Types And Upgrades
Not all links are equal. Some cars use plastic links, which are lighter but wear faster. Others use steel or aluminum for better durability. Aftermarket “performance” links may have stronger joints for spirited driving or racing.
| Link Type | Material | Durability | Best For |
|---|---|---|---|
| OEM Standard | Plastic/Steel | 3–5 years | Daily driving |
| Heavy Duty | Steel/Aluminum | 5–8 years | Rough roads, towing |
| Performance | Aluminum/Ball Joint | 3–8 years | Sport driving |
Choose the type that fits your driving style and road conditions.
Credit: www.youtube.com
Where To Learn More
For detailed diagrams, torque specs, and part numbers, check your car’s factory service manual or trusted auto forums. Some cars have unique features, and these manuals often have step-by-step photos. The Wikipedia Sway Bar page explains the science behind how sway bars and links work, if you want deeper knowledge.
Frequently Asked Questions
How Do I Know If My Sway Bar Links Are Really Bad?
If you hear clunking over bumps, notice poor handling in corners, or see visible play in the links, it’s time to replace them. A simple test: try moving the link by hand with the wheel off—there should be no movement.
Can I Drive With A Broken Sway Bar Link?
You can drive short distances, but your car will handle poorly, especially in turns. It’s less safe, and other suspension parts may wear out faster. Replace broken links as soon as possible.
Do I Need An Alignment After Changing Sway Bar Links?
Usually, sway bar link replacement doesn’t affect wheel alignment. But if you notice pulling or uneven tire wear, get an alignment check to be safe.
How Long Do Sway Bar Links Last?
Most standard links last 3–5 years or 40,000–60,000 miles. Heavy-duty or performance links may last longer, but rough roads and weather can shorten their life.
Can I Replace Sway Bar Links Without Removing The Wheels?
On some cars, yes—but it’s much harder and less safe. Removing the wheels gives better access and helps you spot other worn suspension parts.
Replacing your car’s sway bar links is a smart DIY project that improves safety, handling, and saves money. With patience and the right tools, you’ll drive away with new confidence and a smoother ride.

Credit: www.autonationmobileservice.com
