
Replacing the tie rod ends on your car can seem challenging if you’ve never handled car repairs before. However, with the right knowledge, tools, and a patient approach, it’s a job you can do yourself and save significant money. This guide will walk you through everything you need to know about how to replace car tie rod ends yourself—from understanding what tie rod ends are, to step-by-step instructions, safety tips, and answers to common questions.
What Are Tie Rod Ends And Why Do They Matter?
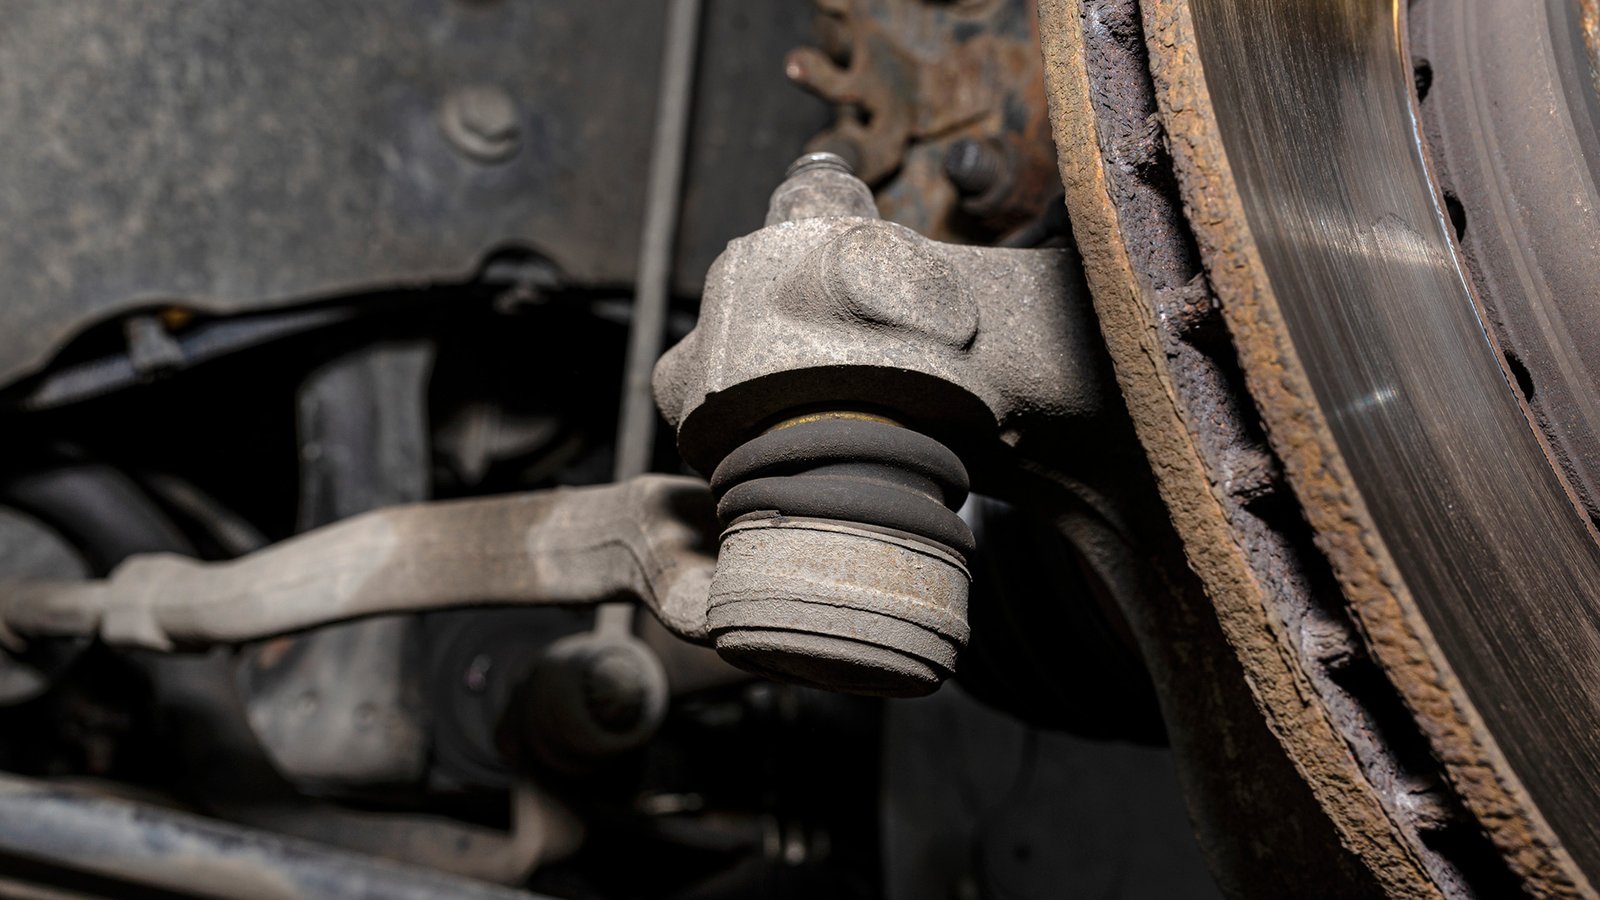
Tie rod ends are small but critical parts of your car’s steering system. They connect the steering rack to the steering knuckle, which moves the wheels when you turn the steering wheel. When tie rod ends wear out, you may notice loose steering, uneven tire wear, or even vibrations while driving.
Ignoring worn tie rod ends is dangerous—failure can lead to sudden loss of steering control. Most experts recommend checking your tie rods every 50,000 miles, but rough roads and aggressive driving can wear them out faster.
Signs Your Tie Rod Ends Need Replacement
Before you start, make sure replacement is necessary. Here are clear signs your tie rod ends need attention:
- Steering feels loose or has extra play
- Uneven or rapid tire wear
- Clunking noises when turning or driving over bumps
- Vibration in the steering wheel, especially at higher speeds
- Car pulls to one side
A simple check: Park the car, raise the front wheels, and try to move the wheel left and right by hand. If you feel movement or hear a knocking sound, your tie rod ends are probably worn.
Credit: www.thedrive.com
Tools And Parts You’ll Need
You don’t need a full mechanic’s shop to replace tie rod ends. Most tools are affordable and available at auto parts stores.
- Jack and jack stands
- Lug wrench
- Wrenches (usually 17-22 mm, but check your vehicle’s manual)
- Needle-nose pliers
- Tie rod puller or a hammer (for separating the tie rod from the steering knuckle)
- Penetrating oil (like WD-40)
- Grease gun (if your new tie rod ends have grease fittings)
- Torque wrench
- Measuring tape or ruler
- Replacement tie rod ends (inner, outer, or both—match to your vehicle)
- New cotter pins (if required)
- Marker or paint pen
- Wheel alignment tool (optional, but a shop alignment is recommended after replacement)
Having all these tools ready before you begin will save you frustration and time.
How To Replace Tie Rod Ends Yourself: Step-by-step
Let’s break down the process into easy-to-follow steps. These apply to most front-wheel-drive and rear-wheel-drive vehicles, but always check your car’s service manual for specific details.
1. Prepare Your Workspace
Park your car on a flat, level surface. Set the parking brake and block the rear wheels. Loosen the front wheel lug nuts slightly before raising the car. Use a jack to lift the front of the car and secure it with jack stands.
Never work under a car supported only by a jack.
2. Remove The Wheel
Finish loosening and removing the lug nuts, then take off the wheel to expose the steering and suspension components.
3. Locate The Tie Rod End
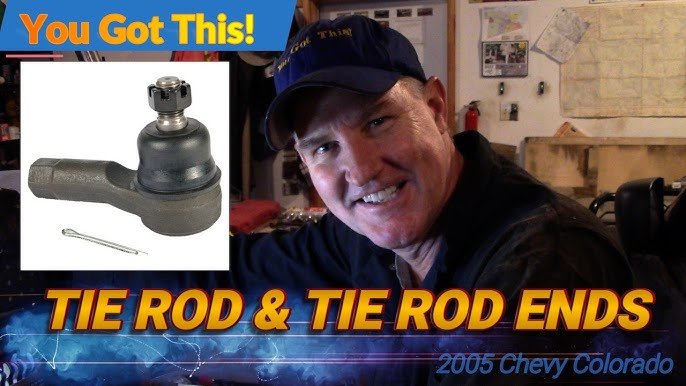
Find the outer tie rod end—it connects to the steering knuckle. The inner end connects further inside, attached to the steering rack. Most replacements only require changing the outer tie rod, but sometimes both are replaced.
4. Mark The Tie Rod Position
To maintain your alignment as much as possible, use a marker or paint pen to mark where the tie rod end threads onto the rod. Measure the length from a fixed point (like the end of the tie rod) to the lock nut.
Write this down—it helps during installation.
5. Loosen The Tie Rod End Nut
Spray the area with penetrating oil and let it soak for a few minutes. Use a wrench to loosen the jam nut (the nut that locks the tie rod end in place on the rod). Do not remove it yet.
6. Remove The Cotter Pin And Castle Nut
Most tie rod ends are held to the knuckle with a castle nut and cotter pin. Use needle-nose pliers to pull out the cotter pin, then remove the castle nut with a wrench. If the cotter pin is rusted, cut it off carefully.
7. Separate The Tie Rod End From The Knuckle
Insert a tie rod puller or pickle fork between the tie rod end and the knuckle and apply pressure. If you don’t have a puller, a sharp strike with a hammer on the side of the knuckle (not the tie rod) can help break the connection.
Be gentle to avoid damaging the threads.
8. Remove The Tie Rod End
Unscrew the tie rod end from the rod. Count the number of turns it takes to remove it. This will help you install the new one at a similar length.
9. Install The New Tie Rod End
Screw the new tie rod end onto the rod using the same number of turns as removal. Align it with your previous mark. This keeps your alignment close, but it’s not a substitute for a professional wheel alignment.
10. Reattach To The Steering Knuckle
Insert the tie rod end into the knuckle. Hand-tighten the castle nut, then torque it to your vehicle’s specification using a torque wrench. Insert a new cotter pin through the castle nut and tie rod stud. Bend the cotter pin ends to secure.
11. Tighten The Jam Nut
Turn the jam nut against the tie rod end to lock it in place. Use a wrench to ensure it’s snug.
12. Grease The Tie Rod End (if Required)
If your new tie rod ends have a grease fitting, use a grease gun to add fresh grease until you see a small amount squeeze out.
13. Reinstall The Wheel
Put the wheel back on, hand-tighten the lug nuts, lower the car, and then torque the lug nuts to the manufacturer’s specification.
14. Test And Align
Start the car and turn the steering wheel side to side to check for smooth operation. Carefully drive at low speed to test steering response. Always get a professional wheel alignment after replacing tie rod ends. Even a small misalignment can cause rapid tire wear and unsafe handling.
Comparison: Diy Vs. Professional Tie Rod End Replacement
Here’s a quick look at how doing it yourself compares to visiting a mechanic.
| Aspect | DIY Replacement | Professional Shop |
|---|---|---|
| Cost | $40–$100 (parts only) | $150–$350 (parts + labor) |
| Time Needed | 1–2 hours (per side) | 1–2 hours (including wait) |
| Tools Required | Basic hand tools | None |
| Skill Level | Moderate | Not needed |
| Alignment Needed | Yes, extra cost | Usually included |
Common Mistakes And How To Avoid Them
Many beginners make simple mistakes that can cause problems later. Here’s how to avoid them:
- Not marking the original tie rod position: Always mark or measure before removal. This helps keep the alignment close.
- Forgetting the wheel alignment: Skipping alignment can ruin new tires quickly.
- Over-tightening or under-tightening nuts: Use a torque wrench to avoid damaging parts.
- Losing the cotter pin: Always replace with a new cotter pin—never reuse the old one.
- Damaging the steering knuckle: Don’t hit the tie rod threads directly; always tap the knuckle if needed.
How Tie Rod End Types Differ
Not all tie rod ends are the same. Some cars use inner and outer tie rod ends, and some have different designs for left and right sides. Choosing the wrong type can create installation problems.
| Tie Rod End Type | Location | Typical Use |
|---|---|---|
| Outer Tie Rod End | Connects to steering knuckle | Most common replacement |
| Inner Tie Rod End | Attaches to steering rack | Less often replaced, more complex |
Pro Tip: Always compare the new part with the old one before installation to ensure you have the correct match.
Real-world Example: Tie Rod End Replacement On A Honda Civic
Let’s look at a practical example. On a 2010 Honda Civic, the typical signs of worn tie rods are clunking noises and loose steering. The process for this car is similar to what’s described above, but the outer tie rod end uses a 19 mm nut and requires a torque of 35 ft-lbs. Always check your vehicle’s specific numbers.
After replacement, an alignment at a local shop costs about $80–$120. Skipping this step will cause the car to drift and the tires to wear unevenly within weeks.
Cost Breakdown: What To Expect
Here’s a typical cost breakdown for a DIY tie rod end replacement:
| Item | Estimated Cost |
|---|---|
| Replacement Tie Rod End (each) | $20–$50 |
| Basic Tool Rental or Purchase | $0–$40 |
| Wheel Alignment (shop) | $80–$120 |
| Total Per Side (DIY) | $100–$200 |
| Total Per Side (Professional) | $150–$350 |
The savings are clear if you do it yourself, especially if you already own the basic tools.
Two Key Insights Beginners Miss
- Alignment After Replacement Is Critical: Many people think marking and measuring is enough to keep the car driving straight. It’s not. Even small changes in tie rod length affect toe angle, which impacts tire wear and handling. Always get a professional alignment after the job.
- Check Both Sides: If one tie rod end is worn, the other side often isn’t far behind. Check both sides and consider replacing them together for balanced steering and safety.
Safety Reminders
- Always use jack stands—never trust a hydraulic jack alone.
- Wear eye protection when working with rusted parts.
- Tighten all nuts to the correct torque.
- Test drive slowly before returning to normal speeds.
When To Seek Professional Help
If you notice severe rust, bent steering components, or the tie rod won’t separate easily, don’t force it. It’s safer to let a professional handle the repair. Also, if you lack basic tools or workspace, a shop visit may be the better choice.

Credit: burtbrothers.com
Where To Find More Information
If you want more technical details on tie rod ends and steering systems, the Wikipedia Tie Rod article is a great place to start.
Frequently Asked Questions
How Long Do Tie Rod Ends Last?
Tie rod ends usually last 50,000 to 100,000 miles, but poor road conditions or aggressive driving can reduce their lifespan. Inspect them during every routine service.
Can I Drive With A Bad Tie Rod End?
It’s risky. A worn tie rod end can break suddenly, causing a loss of steering control. If you notice symptoms, replace it as soon as possible.
Do I Need A Wheel Alignment After Replacing Tie Rod Ends?
Yes. Even careful replacement will change your alignment. Skipping alignment can cause fast tire wear and poor handling.
How Do I Know If I Have Inner Or Outer Tie Rod Problems?
Outer tie rod problems often cause clunking noises and loose steering. Inner tie rod issues can also cause steering play but are harder to diagnose. A mechanic can check both during an inspection.
Is Replacing Tie Rod Ends A Beginner-friendly Job?
With patience and basic tools, many car owners can handle outer tie rod replacement. Inner tie rod replacement is more advanced and may require special tools.
Replacing your own tie rod ends is a valuable skill that can save you money and teach you more about your car. With careful preparation and attention to detail, you’ll enjoy safer driving and a better understanding of your vehicle’s steering system.
Credit: www.youtube.com
