
Replacing the upper control arm on your car can sound intimidating, especially if you have never handled suspension parts before. But with the right guidance, basic tools, and a bit of patience, you can do this job at home and save money on labor costs.
This detailed guide will walk you through every step, share helpful tips, and point out common mistakes to avoid. Whether you’re a DIY beginner or have some experience under the hood, you’ll find clear instructions and practical insights here.
What Is An Upper Control Arm?
The upper control arm is a critical part of your vehicle’s suspension system. It connects the car’s frame or body to the steering knuckle, allowing the wheel to move up and down smoothly. Most commonly found in front suspensions, especially in vehicles with double wishbone setups, the upper control arm helps keep your tire aligned and stable. If it fails, you might notice uneven tire wear, strange noises, or steering problems.
Why Replace The Upper Control Arm?
A worn or damaged upper control arm can cause several issues:
- Clunking or knocking sounds over bumps
- Poor steering response
- Uneven tire wear
- Vehicle pulling to one side
Ignoring these signs can lead to more expensive repairs, unsafe driving, or even loss of control. Replacing the control arm not only restores safe handling but also prevents further suspension damage.
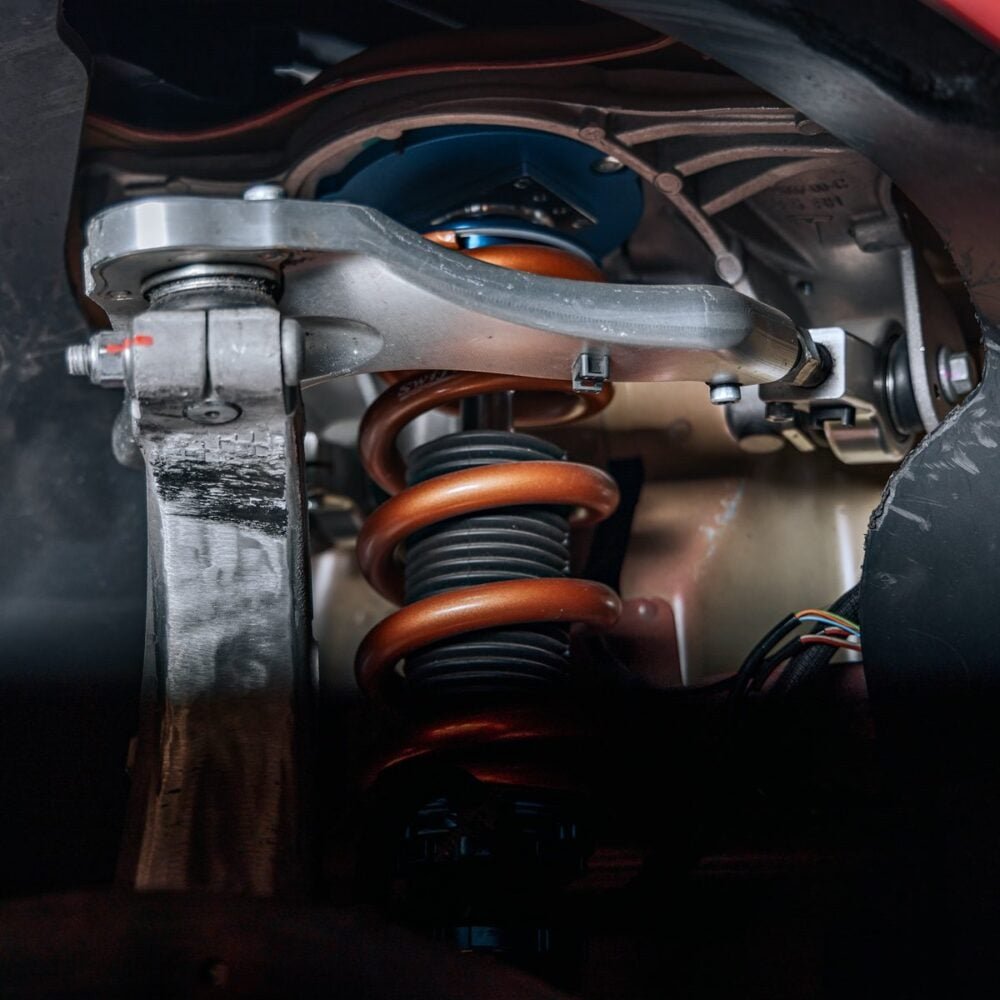
Credit: unpluggedperformance.com
Tools And Materials You Will Need
Having the correct tools makes this job much easier and safer. Here’s a checklist:
- Jack and jack stands – Never work under a car supported only by a jack.
- Socket set and ratchet
- Wrenches (combination/open-end)
- Breaker bar (for stubborn bolts)
- Torque wrench (for correct bolt tightness)
- Ball joint separator/pickle fork
- Pry bar
- Hammer
- Needle-nose pliers (for cotter pins)
- Penetrating oil (for rusty bolts)
- New upper control arm (specific to your car)
- Replacement hardware (if not included)
- Wheel chocks
Optional but helpful: safety glasses, gloves, and a work light.
Non-obvious tip: Many DIYers forget the torque wrench. Tightening suspension bolts to the correct specification is essential for safety and performance.
Preparation Steps
Before you start, make sure you have enough space and time. Work on a flat, stable surface. Set aside 2–4 hours if it’s your first time; experienced mechanics can finish in about an hour.
- Park the car on a level surface.
- Engage the parking brake and chock the rear wheels.
- Loosen the front wheel lug nuts (do not remove yet).
- Raise the car with a jack and secure it on jack stands.
- Remove the front wheel.
Pro tip: Take a clear picture of the suspension before removing parts. This helps you remember the correct assembly.
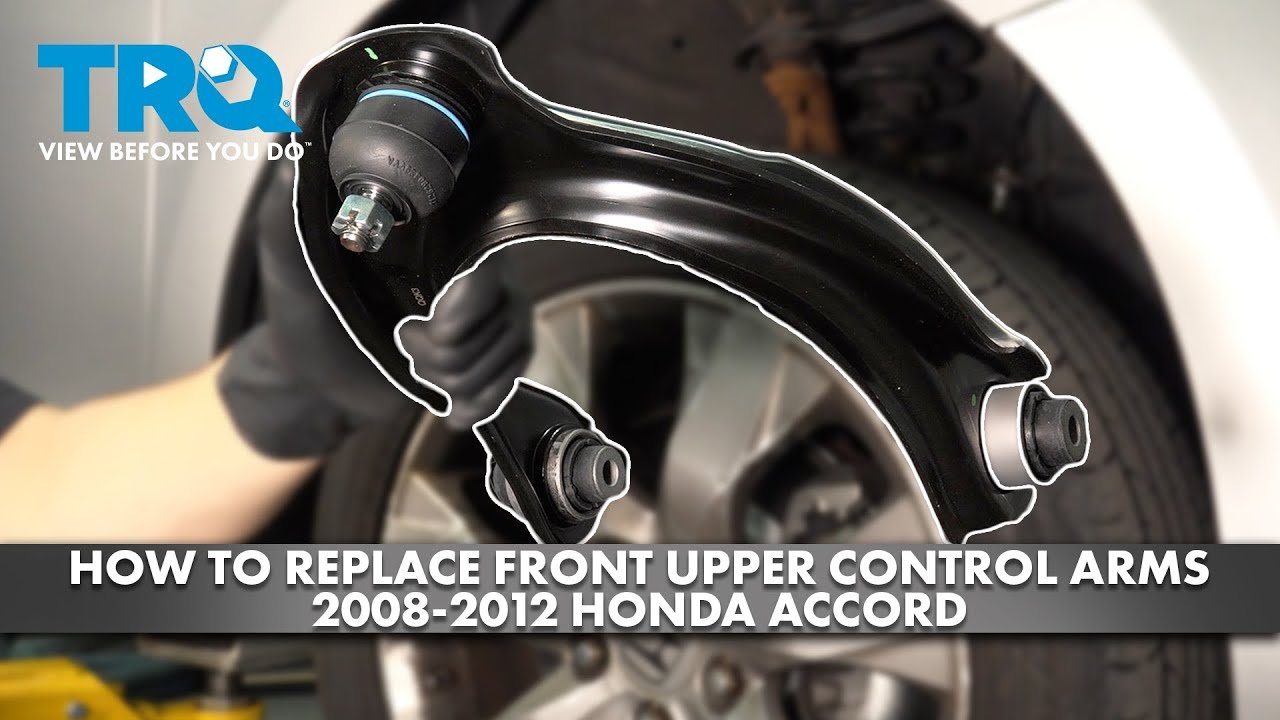
Credit: www.youtube.com
Step-by-step Guide To Replacing The Upper Control Arm
1. Locate The Upper Control Arm
The upper control arm is usually above the wheel hub, connected to the frame (or body) at two points and to the steering knuckle at the ball joint.
2. Remove The Cotter Pin And Ball Joint Nut
- Find the cotter pin on the upper ball joint nut.
- Use needle-nose pliers to straighten and remove it.
- With a wrench or socket, loosen and remove the ball joint nut. Sometimes, the nut must be loosened but not fully removed until the ball joint is separated.
3. Separate The Ball Joint From The Knuckle
- Use a ball joint separator or pickle fork to break the ball joint free from the steering knuckle.
- Place the tool between the joint and knuckle, and tap with a hammer until it pops loose.
- Remove the nut completely if you haven’t already.
Insight: If you don’t have a separator, you can hit the side of the knuckle sharply with a hammer while prying down on the control arm, but be careful not to damage the knuckle.
4. Remove Control Arm Mounting Bolts
- Locate the two (sometimes one) bolts attaching the control arm to the frame.
- Spray with penetrating oil if rusty.
- Use a socket and ratchet, or a breaker bar for stubborn bolts.
- Remove the bolts and slide out the control arm.
Some cars have alignment shims at the control arm mounts. Keep track of their position or snap a photo, as reinstalling them incorrectly can affect wheel alignment.
5. Compare Old And New Control Arms
Lay the new and old arms side by side.
- Check for size, shape, and mounting points.
- Verify the ball joint and bushings are included (if not, you may need to transfer or buy them).
- Some replacement arms come pre-assembled; others do not.
Beginner mistake: Installing the wrong part. Always check compatibility before starting the job.
6. Install The New Upper Control Arm
- Slide the new arm into place, aligning the mounting holes.
- Insert the bolts (and any alignment shims) and hand-tighten them.
- Attach the ball joint to the steering knuckle.
- Install the ball joint nut and tighten to manufacturer specs.
- Insert a new cotter pin through the castle nut and ball joint stud.
Important: Do not fully tighten the frame bolts until the car is at ride height (explained below).
7. Torque Bolts At Ride Height
Suspension bushings can be damaged if bolts are tightened while the wheels hang down.
- Reinstall the wheel and lower the car so it supports its own weight.
- Bounce the car slightly to settle the suspension.
- Now, torque the frame bolts and ball joint nut to the specifications in your vehicle repair manual.
Practical example: Most ball joint nuts need around 60–80 ft-lbs, but always check your car’s specs.
8. Final Checks
- Double-check all bolts are tight and pins are installed.
- Reinstall the wheel and torque lug nuts properly.
- Lower the car completely.
Non-obvious insight: After replacing a control arm, a wheel alignment is essential. Skipping this step can ruin new tires quickly.
Safety Tips And Common Mistakes
- Never work under a car supported only by a jack.
- Do not reuse old cotter pins. They can break and fail.
- Don’t skip wheel alignment. Even a small change in control arm position affects alignment.
- Don’t overtighten bolts. Use a torque wrench for all suspension fasteners.
- Take your time with rusty bolts. Rushing can snap them, leading to bigger problems.
Symptoms Of A Bad Upper Control Arm
If you’re not sure your upper control arm is the problem, look for these signs:
- Clunking or knocking when driving over bumps
- Uneven tire wear (inside or outside edges)
- Loose steering feel
- Poor alignment or pulling to one side
- Visible damage (bent, cracked, or worn bushings/ball joint)
If you notice these, inspect the control arm before replacing other parts.
How Much Does It Cost To Replace An Upper Control Arm?
Costs can vary depending on vehicle make and model. Here’s a comparison of average costs:
| Component | DIY Cost (USD) | Shop Cost (USD) |
|---|---|---|
| Upper Control Arm (per side) | $50–$180 | $250–$500 |
| Wheel Alignment | $0 (DIY not recommended) | $70–$120 |
| Total (1 side) | $50–$180 | $320–$620 |
Tip: Buying both left and right control arms together can save money.
When To Replace Both Sides
While you can replace a single upper control arm, it’s often wise to do both sides at the same time, especially on older or high-mileage vehicles. This ensures balanced handling and even wear. If one arm is worn, the other is likely not far behind.
Should You Attempt This Job Yourself?
Replacing the upper control arm is within the reach of most DIYers with basic mechanical skills. If you’re comfortable changing brakes or doing simple suspension work, you can do this job. However, if you lack tools or workspace, or if bolts are heavily rusted, consider getting help from a professional.
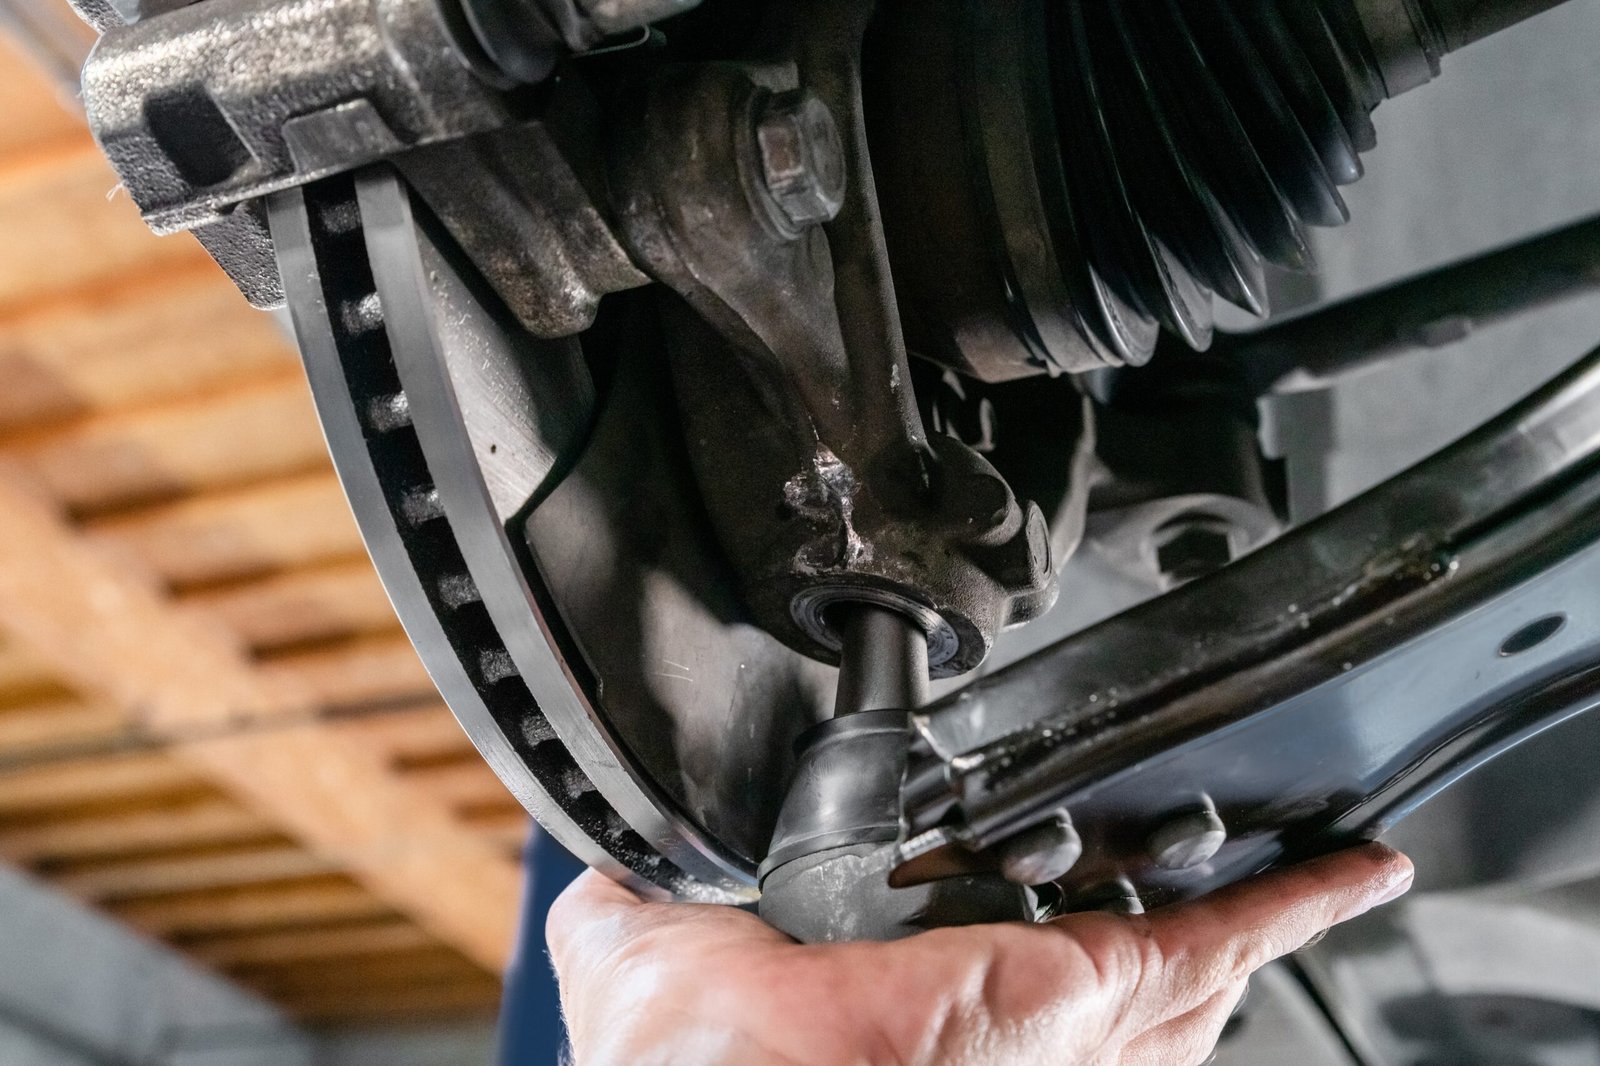
Credit: www.autozone.com
Upper Control Arm Vs. Lower Control Arm
Many people confuse the upper and lower control arms. Here’s a quick comparison:
| Feature | Upper Control Arm | Lower Control Arm |
|---|---|---|
| Position | Above steering knuckle | Below steering knuckle |
| Main function | Controls camber, supports wheel movement | Supports vehicle weight, connects to strut/spring |
| Failure symptoms | Steering play, uneven tire wear, clunking | Severe tire wear, loss of control, major noises |
Insight: The lower control arm usually carries more weight and wears faster, but both are crucial for safe driving.
After Replacement: What To Check
Once the new upper control arm is installed, do the following:
- Schedule a professional wheel alignment immediately.
- Test drive slowly and listen for any strange noises.
- Recheck all bolts after 50–100 miles to ensure nothing has loosened.
- Inspect for leaks or damage to nearby parts.
Environmental Impact: Recycle Old Parts
Don’t just throw away your old control arm. Most auto parts stores or recycling centers accept used suspension parts. Recycling metal helps reduce environmental impact.
Where To Find More Information
If you need more specific instructions for your car model, always refer to your vehicle’s service manual. For extra tips, you can check reliable sites like the Wikipedia Control Arm page.
Frequently Asked Questions
How Do I Know If My Upper Control Arm Is Bad?
Common signs include clunking noises, uneven tire wear, wandering steering, or a wheel that appears out of alignment. If you feel vibration or see worn bushings or a damaged ball joint, the control arm likely needs replacement.
Can I Drive With A Bad Upper Control Arm?
It’s not safe. A failing upper control arm can lead to steering loss or tire blowout. If you suspect a problem, repair it as soon as possible.
Is A Wheel Alignment Necessary After Replacing The Upper Control Arm?
Yes. Even minor changes in the control arm position affect wheel alignment. Skipping alignment can ruin your tires and make your car handle poorly.
How Long Does It Take To Replace An Upper Control Arm?
For beginners, set aside 2–4 hours. Experienced DIYers may finish in 1–2 hours. Rusty or stuck bolts can add time.
What Happens If I Overtighten The Control Arm Bolts?
Overtightening can crush bushings, causing premature wear and poor suspension movement. Always use a torque wrench and follow your car’s specifications.
Replacing your car’s upper control arm is a practical way to keep your vehicle safe and performing well. With the right tools and careful attention to detail, you can complete this repair at home and gain valuable experience. Remember, safety comes first, and when in doubt, consult a professional mechanic.
