
Replacing a car’s vapor canister may sound complicated, but with the right approach, many car owners can do it themselves. The vapor canister (also called a charcoal canister) is an essential part of your car’s emission system. It traps fuel vapors from the gas tank, stopping them from escaping into the air. Over time, this part can get clogged or damaged, causing issues like a check engine light, rough idling, or even failed emission tests. If you’re ready to learn how to handle this repair yourself, this guide will walk you through every step, sharing tips, tools, and insights that most beginners miss.
What Is A Vapor Canister And Why Replace It?
The vapor canister is filled with activated charcoal. Its job is to absorb gasoline vapors and hold them until the engine burns them safely. If the canister fails, your car may not pass emissions checks, and you might even notice a fuel smell. Many drivers ignore the vapor canister until the check engine light comes on, but replacing a faulty one can improve your car’s performance and help the environment.
Replacing the vapor canister yourself saves money and gives you a better understanding of your car. Most canisters last between 50,000 and 100,000 miles, but contamination or physical damage can shorten their life.
Signs Your Vapor Canister Needs Replacement
Knowing when your vapor canister is failing is important. Here are common symptoms:
- Check engine light: Often triggered by emission problems.
- Strong fuel odor: Especially near the rear of the car or gas tank area.
- Difficulty filling the gas tank: The pump may shut off repeatedly.
- Failed emissions test: A faulty canister increases emissions.
- Engine performance issues: Like rough idle or hesitation.
If you notice one or more of these, it’s time to inspect the vapor canister.
Tools And Materials You Will Need
Having the right tools makes the job easier and safer. Here’s what you’ll need:
- Socket set (metric or standard, depending on your car)
- Wrenches (usually 10mm and 12mm)
- Screwdrivers (flathead and Phillips)
- Pliers
- Jack and jack stands (for safety if the canister is under the car)
- Replacement vapor canister (make sure it matches your car model)
- Safety glasses and gloves
- Flashlight
- Shop towels
Some cars have plastic clips or special fasteners, so check your owner’s manual for any special tools.
Preparing For The Replacement
Before you start, park your car on a flat surface and turn off the engine. Let the car cool down if you’ve been driving. Disconnect the battery to avoid any electrical issues. Wear gloves and safety glasses to protect yourself from fuel vapors and dirt.
It’s also smart to check for any error codes with an OBD-II scanner. This will confirm the vapor canister is the problem.
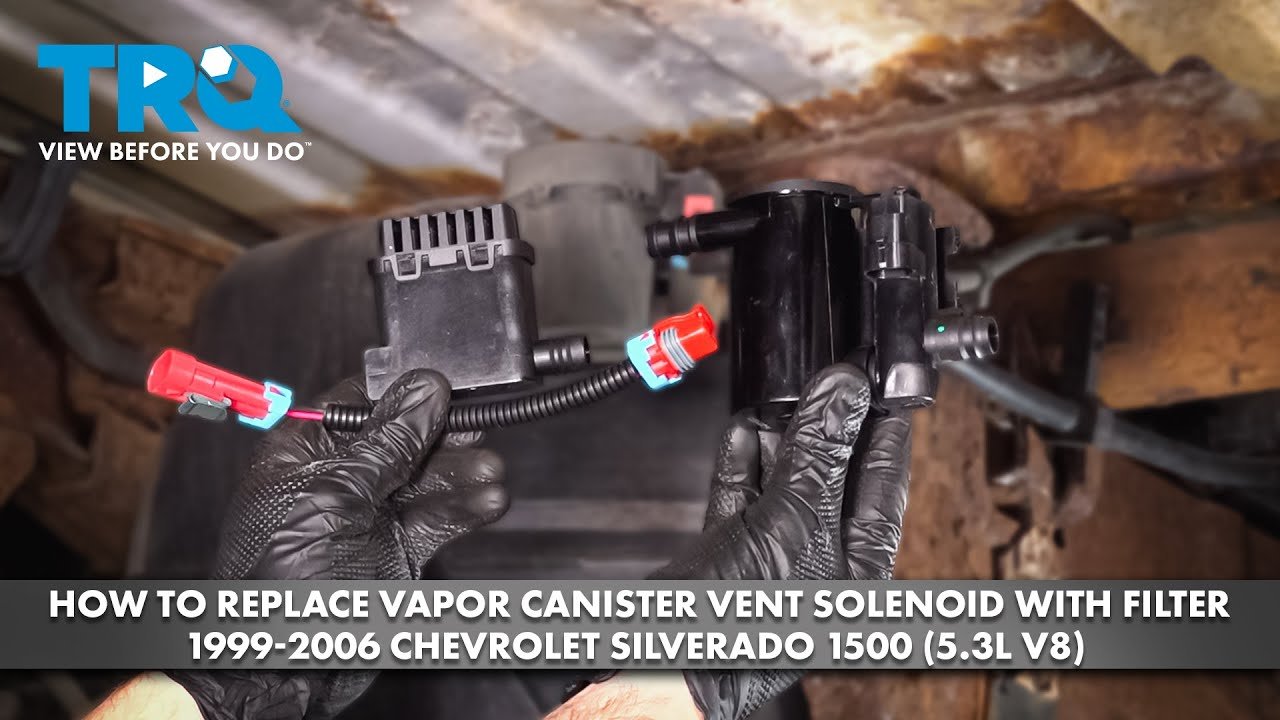
Credit: www.youtube.com
Locating The Vapor Canister
The vapor canister is usually found near the rear of the vehicle, close to the gas tank or under the trunk area. On some cars, it may be under the hood. Look for a black plastic box with hoses attached.
If you’re unsure, your owner’s manual or a quick online search for your car’s make and model will help. Some vehicles have a metal shield protecting the canister.
Step-by-step: How To Replace Your Car’s Vapor Canister
1. Safely Lift And Secure The Vehicle
If your canister is under the car, use a jack to lift the rear end and support it with jack stands. Never work under a car supported only by a jack.
2. Disconnect The Battery
Remove the negative cable from the battery. This prevents accidental sparks and resets the check engine light after the job.
3. Locate And Inspect The Canister
With a flashlight, find the canister. Check for cracks, broken hoses, or signs of fuel leaks. Make a note of how the hoses are connected. Taking a photo can help during reassembly.
4. Remove Hoses And Electrical Connectors
Most canisters have several hoses and sometimes an electrical connector. Use pliers to loosen hose clamps. Gently pull off the hoses. If they are stuck, twist them carefully—never force them, or they may crack.
5. Unbolt And Remove The Old Canister
Use your socket set or wrench to remove the bolts or screws holding the canister. Some models have plastic clips that need to be pried off. Once unfastened, slide the canister out.
6. Compare The Old And New Canister
Place the old and new canisters side by side. Check that all ports and mounting points match. If anything looks different, double-check the part number.
7. Install The New Canister
Slide the new canister into place. Bolt or clip it securely. Reconnect all hoses and electrical connectors in their original positions. Make sure each hose is tight and secure.
8. Double-check All Connections
Before lowering the car, check every hose and connector. Loose hoses can cause leaks or set off the check engine light.
9. Lower The Vehicle And Reconnect Battery
Carefully remove the jack stands and lower the car. Reconnect the negative battery cable.
10. Test And Clear Codes
Start the engine and let it idle for a few minutes. Watch for any warning lights. If you have an OBD-II scanner, clear any codes and check for new ones. Take the car for a short drive to make sure everything runs smoothly.
Credit: maritimeauto.com
Common Mistakes To Avoid
Many first-timers make simple errors that can cause more problems. Here’s what to watch out for:
- Mixing up hoses: Always label or photograph before disconnecting.
- Forgetting to disconnect the battery: This can cause electrical issues.
- Over-tightening bolts: This can crack the canister or break mounts.
- Ignoring leaks: Check for fuel smells or drips after finishing.
- Skipping a test drive: Always drive the car to ensure the repair worked.
Real-world Example: 2015 Toyota Corolla Vapor Canister Replacement
Let’s look at a popular car, the 2015 Toyota Corolla. The vapor canister is mounted near the rear axle, with three hoses and two mounting bolts. The replacement process takes about 45 minutes.
After lifting the car and disconnecting the battery, you unplug the hoses and electrical connector. Remove the bolts, swap in the new canister, and reconnect everything. Start the engine; the check engine light should turn off after a few miles of driving.

Credit: www.amazon.sg
Cost Comparison: Diy Vs. Mechanic
Replacing the vapor canister yourself can save a lot of money. Here’s a comparison:
| Service Option | Estimated Cost | Time Required |
|---|---|---|
| DIY Replacement | $60 – $200 (parts only) | 1 – 2 hours |
| Mechanic Shop | $250 – $500 (parts + labor) | 1 – 2 hours |
If you already own the tools, DIY is much cheaper. However, if you’re not comfortable working under your car, a mechanic may be worth the extra cost for safety.
Tips For A Smooth Replacement
Even with simple jobs, a few tips can make the process smoother:
- Use penetrating oil on rusty bolts.
- Replace any cracked hoses during the job.
- Keep a magnet handy to catch dropped bolts.
- Double-check the part number before starting.
- If your car is older, consider replacing hose clamps with new ones.
Many beginners miss that a clogged canister can also damage the purge valve. If you’re replacing the canister due to a rough idle or strong fuel smell, inspect the purge valve too.
When To Seek Professional Help
While many people can replace a vapor canister at home, sometimes it’s better to call a professional:
- If bolts are rusted or hard to reach.
- If you notice damaged wiring or connectors.
- If the check engine light stays on after replacement.
- If your car has a hybrid or electric system, as these may need special handling.
Don’t hesitate to ask a mechanic for help if you’re unsure. Safety always comes first.
Understanding Emission System Codes
Sometimes, the check engine light comes on due to emission system codes. Common OBD-II codes related to the vapor canister include:
| Code | Meaning | Possible Cause |
|---|---|---|
| P0440 | Evaporative Emission System Malfunction | Loose gas cap, faulty canister |
| P0441 | Incorrect Purge Flow | Faulty purge valve or canister |
| P0446 | Vent Control Circuit Malfunction | Blocked canister vent |
Reading these codes with a scanner will help you confirm the problem before replacing parts.
Environmental Impact
A working vapor canister doesn’t just help your car—it helps the planet. Gasoline vapors are a major source of air pollution. Replacing a faulty canister can reduce your car’s emissions by up to 20%, keeping harmful chemicals out of the air.
Learning More
If you want to dive deeper into your car’s emission system, the Environmental Protection Agency offers helpful guides and diagrams. You can find more information at EPA Emission Standards Guide.
Frequently Asked Questions
How Long Does It Take To Replace A Vapor Canister?
Most replacements take between 1 and 2 hours. If bolts are easy to reach and you have the right tools, it might be even faster.
Can I Drive With A Bad Vapor Canister?
You can drive, but it’s not recommended. You may smell fuel vapors, fail emissions tests, and possibly damage other emission parts if you wait too long.
Will Replacing The Vapor Canister Turn Off The Check Engine Light?
Usually, yes. Once the new canister is installed and the system is tested, the check engine light should go off. Sometimes, you’ll need to clear the code with an OBD-II scanner or drive for a few miles.
Do All Cars Have The Same Vapor Canister?
No. The size, shape, and location of the vapor canister vary between car models and years. Always buy the correct part for your specific car.
What Else Should I Check When Replacing The Vapor Canister?
Inspect the purge valve, hoses, and clamps for wear or cracks. A faulty purge valve can cause similar symptoms and is often replaced at the same time.
Replacing your car’s vapor canister yourself is a practical way to save money and learn more about your vehicle. With the right tools, careful steps, and a bit of patience, you can complete this job confidently and enjoy a cleaner, better-running car.
