
Setting up a welding area in your home garage can transform your DIY projects. Whether you want to repair metal items, build frames, or create art, a well-designed workspace is essential. Many beginners start welding without proper planning, but this often leads to safety problems, poor results, and wasted money.
If you design your welding area carefully, you will work faster, safer, and with better results. Let’s explore how you can create a professional, safe, and efficient welding area right in your own garage.
Choosing The Right Spot In Your Garage
The first step is picking the best location for your welding area. Not all corners of a garage are suitable. Welding creates sparks, fumes, and heat, so your workspace needs to be safe and comfortable.
Look for a space that:
- Has enough room for your welding table, tools, and movement
- Is far from flammable items like paint, oil, or stored paper
- Gets good airflow from windows or doors
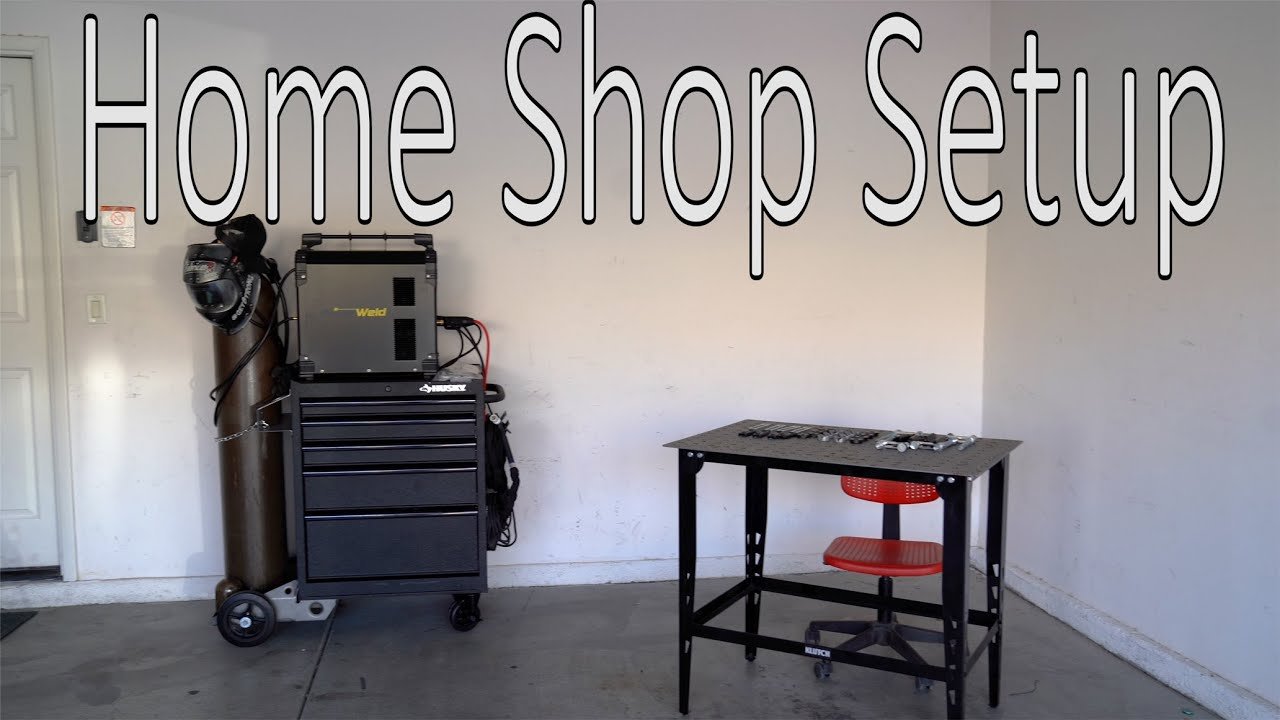
If your garage is small, try to clear one wall or a corner. Never weld near your car or stored gasoline. Some welders make the mistake of setting up too close to clutter, increasing fire risk. An open area near a door is ideal because you can easily ventilate fumes.
Planning For Safety First
Safety is the most important part of a home welding area. Welding can cause burns, fires, or breathing problems if you ignore basic rules. Before you buy equipment, make sure you have a safety plan.
Fire Prevention
Keep a fire extinguisher rated for electrical and chemical fires within easy reach. Check that it is full and not expired. Install a simple smoke detector nearby. Some people forget to protect the floor—use a steel sheet or heavy rubber mat under your welding table. This stops sparks from starting a fire.
Protective Equipment
You need the right personal protective equipment (PPE) every time you weld:
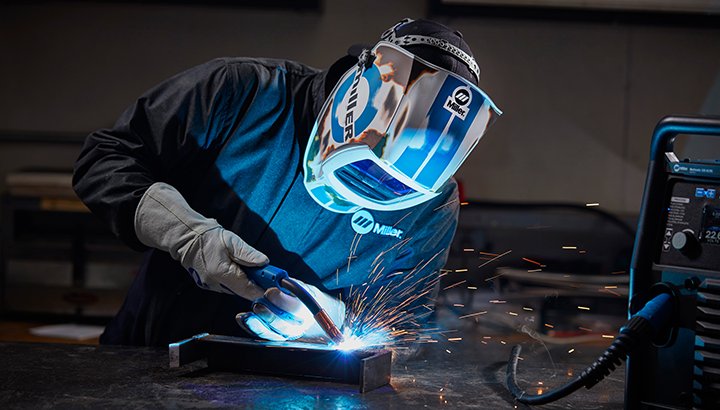
- Welding helmet with auto-darkening lens
- Fire-resistant gloves and jacket
- Closed-toe leather boots
- Safety glasses (under the helmet)
- Ear plugs if you use grinders
Store PPE on a dedicated hook or shelf so you never forget it. Many beginners skip PPE for small jobs and get burned. Never weld without full protection.
Electrical Safety
Welding machines use a lot of power. Plug your welder into a grounded outlet. Never use cheap extension cords—they can overheat and cause a fire. If you are not sure about your garage wiring, ask a licensed electrician to check it.
Essential Equipment And Tools
Good tools make welding easier and safer. You do not need the most expensive gear, but you should choose reliable brands and models. Here’s a list of what you’ll need to get started:
- Welding Machine: For home garages, a MIG welder or stick welder is popular. MIG is easier for beginners and cleaner for thin metal. Stick is better for thicker work but creates more mess.
- Welding Table: A solid steel table is best. Wood tables can catch fire. Choose a table with a ground clamp connection.
- Clamps: Use several strong clamps to hold your workpieces. This keeps your hands free and your welds straight.
- Angle Grinder: For cleaning, cutting, and smoothing metal. A basic 4.5-inch grinder is enough.
- Wire Brush and Chipping Hammer: These help clean welds and remove slag.
- Measuring Tools: Metal ruler, square, tape measure, and a marker.
- Storage Shelves or Pegboard: Keep tools organized and easy to find.
- Lighting: Bright, shadow-free LED lighting is important for seeing your welds.
Many people forget about ventilation. A simple fan or fume extractor can prevent harmful smoke from building up. This is especially important for small or windowless garages.
Organizing Your Welding Area
A cluttered welding area is unsafe and inefficient. Organize your tools and materials so you can find them quickly and avoid accidents.
Layout And Workflow
Arrange your table, welder, and tools in a way that lets you move naturally from one step to the next. Keep your welding machine close to the table, with enough slack in the cables. Store clamps, grinder, and wire brush within arm’s reach.
Place your PPE near the entrance so you suit up before starting.
Storage Solutions
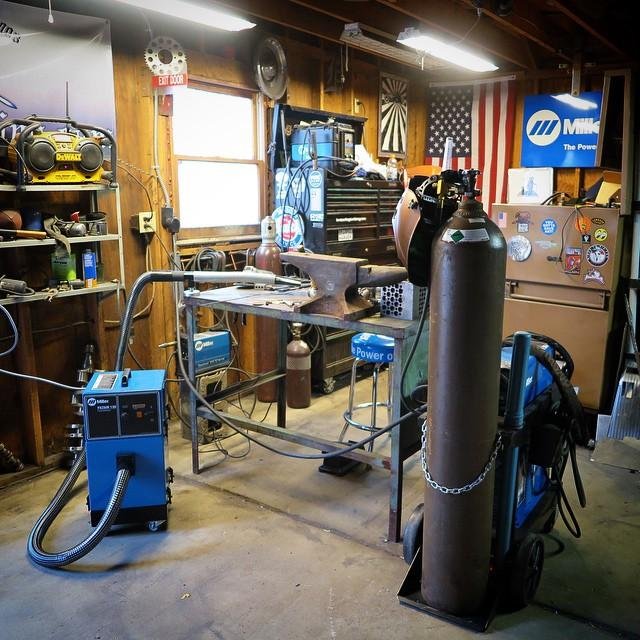
Store scrap metal in a separate bin, not on the floor. Hang your grinder, chipping hammer, and brushes on a pegboard. Use shelves for welding rods, wire, and other supplies. Keep flammable items in a closed metal cabinet, far from your welding area.
Here is a simple comparison of storage options for welding tools:
| Storage Type | Pros | Cons |
|---|---|---|
| Pegboard | Easy access, visible tools | Not for heavy items |
| Shelves | Holds more, flexible | Can get messy |
| Tool Chest | Secure, mobile | Expensive, less visible |
Choose a mix that fits your space and budget.
Setting Up Ventilation
Welding creates fumes that can be dangerous if you breathe them. In a small garage, fumes build up fast. Many beginners ignore this risk and feel sick after welding.
Open windows and doors before you start. If possible, add a window fan or small fume extractor to pull smoke outside. Never weld in a closed garage. For the best safety, install a dedicated exhaust fan above your welding table.
Here’s a look at common ventilation options:
| Ventilation Method | Effectiveness | Cost |
|---|---|---|
| Open Door/Window | Basic, better than nothing | Free |
| Portable Fan | Good for small spaces | Low |
| Fume Extractor | Best, removes fumes at source | Medium to high |
If you weld often, invest in a fume extractor for your health.
Power And Electrical Setup
Welders use a lot of electricity, so your garage must be ready. A 120V outlet is enough for most small MIG welders, but some stick welders and bigger machines need 240V.
- Check your breaker box to see which outlets are on which circuits.
- Use only heavy-duty, grounded outlets.
- Avoid running other high-power tools on the same circuit while welding.
If you’re not sure about your wiring, ask a licensed electrician. Overloaded circuits can trip breakers or start fires. Never use indoor extension cords or power strips for welders.
Credit: www.millerwelds.com
Lighting For Better Results
Good lighting helps you see your work and make better welds. Many garages are too dark, especially in corners. Add bright LED shop lights above your table and along the wall.
For detailed work, use a small adjustable lamp you can point at your weld. Avoid using only one light source, as this can create shadows and hide defects.
Managing Cables And Hoses
Loose welding cables and hoses can trip you or cause accidents. Always keep them organized:
- Use wall hooks or hangers for cables when not in use.
- Coil cables neatly and keep them off the floor.
- Check for cracks or damage before every use.
This small habit prevents many common injuries and keeps your workspace tidy.
Preparing For Different Welding Projects
Not all welding projects are the same. You may work with thick steel, thin sheet metal, or even stainless. Plan your area to handle different jobs:
- Keep a small vice mounted on your table for holding small parts.
- Store extra welding wire, rods, and tips for different materials.
- Have a spray bottle of water nearby to cool hot metal (never for electrical fires).
Many beginners forget to plan for future projects. Leaving space for a larger table or extra tools will save you time and money later.
Common Mistakes And How To Avoid Them
Setting up a welding area is not just about buying tools. Here are mistakes beginners often make:
- Ignoring ventilation: Fumes are invisible but dangerous.
- Poor organization: Tools scattered everywhere slow you down.
- Using flammable tables or floors: Sparks can start a fire quickly.
- Overloading electrical circuits: This can damage your welder or start a fire.
- Skipping PPE: Even a quick weld can cause burns or eye damage.
- No fire extinguisher nearby: Seconds matter in an emergency.
Avoid these errors for a safer and more productive garage.
Credit: www.youtube.com
Budget Tips: Saving Money Without Sacrificing Safety
Welding setup costs can add up, but you can save money with smart choices:
- Buy used tools from trusted sources for items like clamps and grinders.
- Build your own welding table from scrap steel if you have basic skills.
- Start with a basic MIG welder if you are a beginner; you can upgrade later.
- Use free or low-cost storage like wall shelves and buckets.
Never save money by skipping safety gear or using poor wiring. Safety must always come first.
Example: Setting Up A Basic Welding Area (real-world Scenario)
Let’s imagine you have a single-car garage, about 20 feet by 10 feet. You clear out one corner, about 6 by 8 feet, near a window. You buy a small MIG welder (120V), a steel table, and a pegboard for tools.
You install an LED light above the table and a small window fan for ventilation.
You hang your helmet, gloves, and jacket on hooks. You store rods, wire, and grinder on a wall shelf. A fire extinguisher is mounted on the wall. You keep the floor clear and always suit up before welding.
This setup lets you do most DIY welding jobs safely and efficiently. As you gain experience, you can add more tools and improve your layout.
Credit: www.thefabricator.com
Table: Basic Welding Area Setup Checklist
Here’s a quick reference table to help you remember the main steps:
| Item | Why It Matters | Common Mistake |
|---|---|---|
| Fire extinguisher | Fast fire response | Storing it too far away |
| Steel welding table | Prevents fire, easy to clean | Using wood or flammable surface |
| Proper ventilation | Removes fumes | Welding in closed space |
| PPE | Protects from burns, UV | Skipping for small jobs |
| Organized tools | Saves time, prevents accidents | Leaving tools on floor |
Frequently Asked Questions
What Is The Best Type Of Welder For A Home Garage?
A MIG welder is the best choice for most home garages. It is easy to use, works well on thin metal, and produces clean welds. If you plan to weld thick materials, a stick welder might be better. Always check your garage’s power supply before buying.
How Do I Ventilate My Garage While Welding?
Open windows and doors before welding. Use a fan or a fume extractor to pull fumes outside. Never weld in a closed space, as fumes can be harmful. For frequent welding, install a dedicated exhaust fan above your work table.
Can I Use A Wooden Table For Welding?
No, a wooden table is not safe for welding. Sparks and heat can start a fire. Always use a steel or fire-resistant table. If you have to use a wooden table temporarily, cover it with a thick steel sheet.
What Safety Gear Is Absolutely Necessary?
You must wear a welding helmet, fire-resistant gloves and jacket, closed-toe boots, and safety glasses. Do not skip PPE, even for quick jobs. This gear protects you from burns, sparks, and UV light.
Do I Need A Special Outlet For My Welder?
Most small MIG welders run on a standard 120V outlet, but some machines need 240V. Check your welder’s manual and your garage’s wiring. Never use cheap extension cords. If unsure, ask a licensed electrician for advice.
Setting up a welding area in your home garage takes effort, but the rewards are big. You will work safer, faster, and with better results. Plan your space carefully, invest in safety, and stay organized. Soon, you’ll be ready for any metal project. For more on welding safety guidelines, see the Welding Wikipedia page. Happy welding!
