
To use a torque wrench correctly, find the exact torque specification, confirm whether the fastener should be dry or lubricated, set the wrench to the correct units, use the proper socket, pull smoothly from the handle, and stop at the wrench’s signal. Do not guess torque values, do not use a torque wrench as a breaker bar, and do not keep pulling after a click.
What Is A Torque Wrench And Why Does It Matter?
A torque wrench is a specialized tool used to apply a specified turning moment to a fastener. Unlike a regular wrench, it lets you control exactly how tight a fastener gets. This is crucial for mechanical work where too much or too little force can cause damage or failure.
For example, car manufacturers specify exact torque values for wheel bolts. Overtightening can stretch or break the bolt, while undertightening can make the wheel come loose. In the construction and machinery industries, improper torque can lead to dangerous results.
Two non-obvious facts beginners often miss:
- Material matters: Different metals need different torque. Aluminum bolts, for example, can strip much more easily than steel.
- Temperature changes torque: As metal heats or cools, the clamping force can change, so always check torque when the item is at the right temperature (often room temperature unless your manual says otherwise).
Types Of Torque Wrenches
Choosing the right tool makes all the difference. Here are the most common torque wrenches and where they work best:
| Type | How It Works | Best For |
|---|---|---|
| Beam Torque Wrench | Uses a pointer and scale to show torque as you turn | Simple, affordable, basic automotive work |
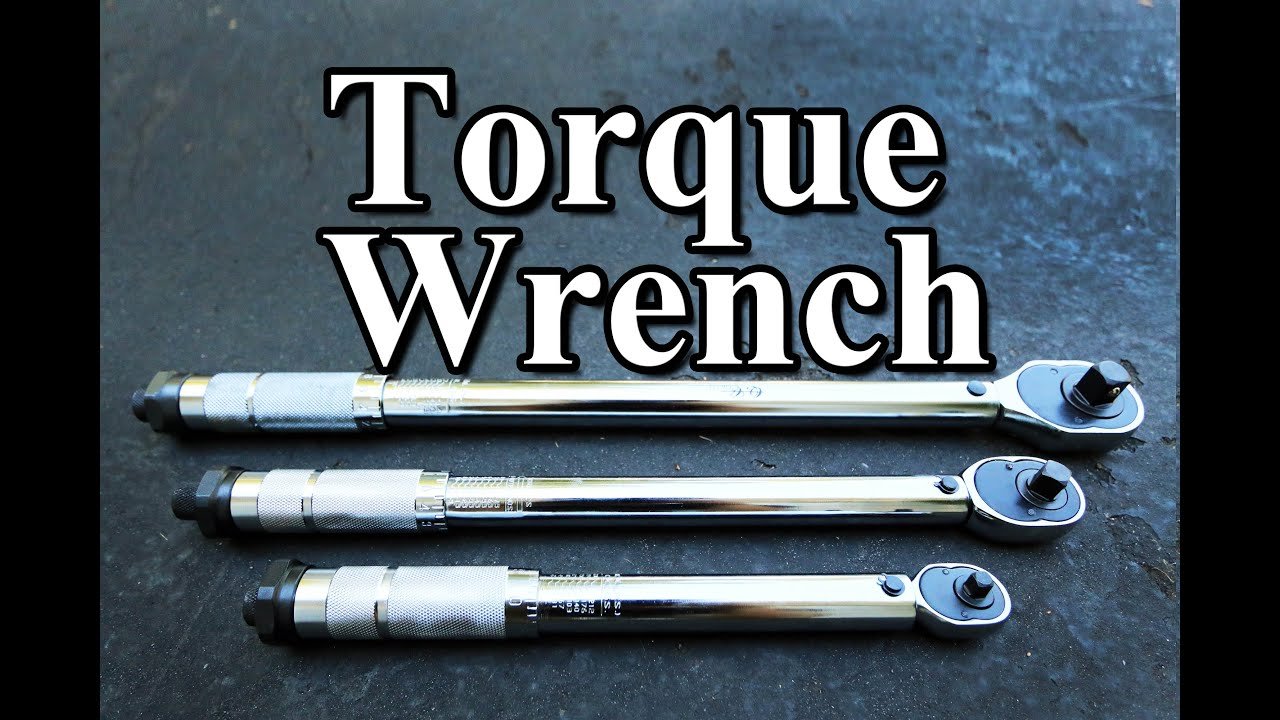
| Click Torque Wrench | Clicks when set torque is reached | Automotive, bikes, general use |
| Digital Torque Wrench | Shows torque on a digital screen, often beeps/vibrates | Professional, precise work |
| Dial Torque Wrench | Has a dial gauge for direct reading | Lab work, high accuracy jobs |
Most beginners start with a click torque wrench because it’s easy to use and offers good accuracy.
How To Choose The Right Torque Wrench
Not all torque wrenches are the same. Here’s what to look for:
- Torque range: Choose a wrench whose published working range comfortably includes your target torque. Do not assume every wrench is most accurate at exactly the middle of its scale; use the maker’s stated range and accuracy specification.
- Drive Size: Common sizes are 1/4”, 3/8”, and 1/2”. For car wheels, 1/2” is standard, for bikes, 1/4” or 3/8”.
- Accuracy: Check the manufacturer’s stated accuracy and applicable standard or calibration certificate. Accuracy varies by wrench type, direction, and range.
- Length: Longer wrenches provide more leverage for higher torque values.
- Build Quality: Metal construction and a solid ratchet feel are signs of a durable wrench.
A useful tip: Avoid buying the cheapest model. Low-cost wrenches can be unreliable and may lose accuracy quickly.
Preparing To Use A Torque Wrench
Before you start, make sure you’re set up for success:
- Check the manual for the correct torque value. Never guess!
- Clean the threads of both bolt and nut. Dirt or oil can change how torque is applied.
- Lubricate if required. Some bolts need a drop of oil, others must be dry. The manual will say.
- Inspect the wrench. Make sure it’s calibrated and not damaged.
- Select the right socket. Use a snug-fitting socket to avoid rounding the bolt.
Do not use a generic torque chart for critical fasteners. Wheel fasteners, bicycle components, engine hardware, and structural bolts can differ widely by design, thread condition, material, coating, lubrication, and tightening sequence. Use the specification from the vehicle, component, or fastener manufacturer.
Step-by-step: How To Use A Torque Wrench
Follow these steps for safe and accurate results:
1. Set The Desired Torque
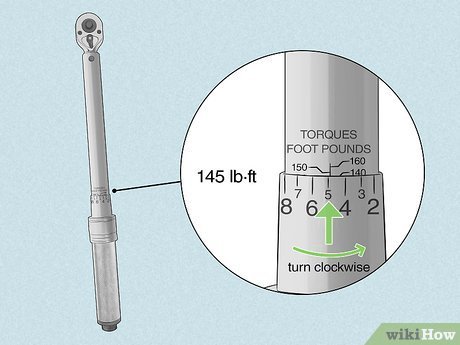
For a click-type wrench, twist the handle to the required torque value, then lock it. For a beam or dial type, you watch the scale as you turn.
2. Attach The Right Socket
Make sure it fits snugly on the bolt or nut. Loose sockets can slip, causing injury or damage.
3. Position the Wrench Correctly
Seat the socket fully on the fastener and keep the wrench aligned with the fastener axis so you are not side-loading the socket. Hold the wrench at the manufacturer’s marked handle position; changing the effective lever length with extensions or adapters can alter the applied torque unless you compensate correctly.
4. Apply Steady Force
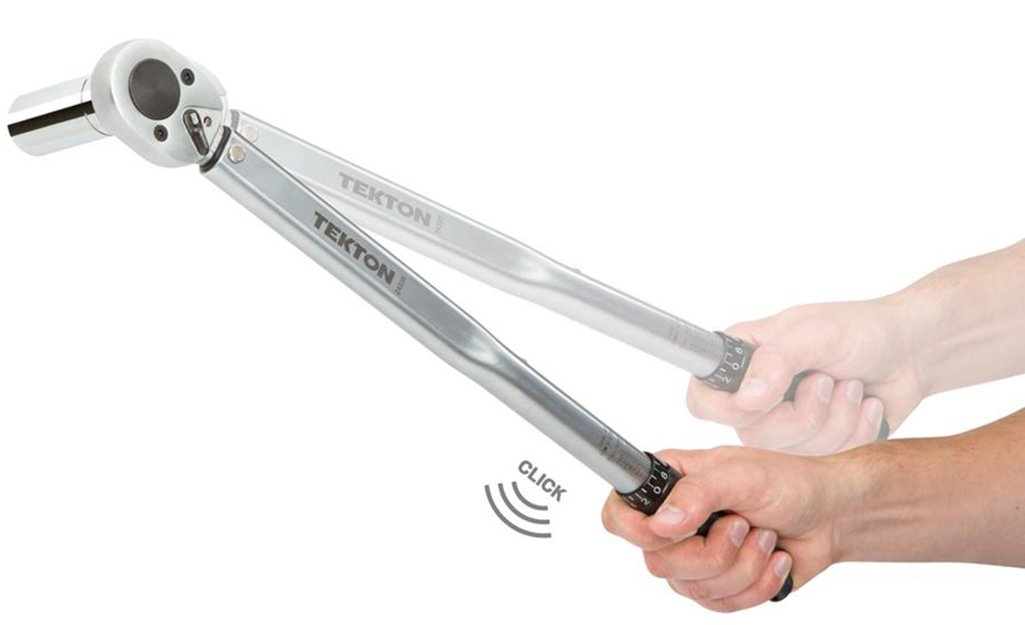
Pull smoothly, not jerkily. Stop as soon as you feel or hear the click (for click wrenches), or when the pointer or dial hits the set value.
5. Do Not Re-Torque Automatically
Once the fastener reaches the specified torque, stop unless the manufacturer calls for a second pass or a later re-torque. Repeatedly clicking the wrench on an already tightened fastener can increase clamp load beyond the intended value.
6. Store It as the Manufacturer Specifies
For many adjustable click-type wrenches, the maker recommends returning the setting to the lowest marked value before storage, but not below the scale. Beam, dial, and electronic wrenches have different storage requirements, so follow the tool manual.
Common Mistakes Beginners Make
Even with the right tool, many people slip up. Here’s what to watch for:
- Using the wrong torque setting: Always double-check the manual and units (Nm vs ft-lb).
- Pulling too fast: A slow, steady pull is needed for accuracy.
- Not resetting after use: Storing under tension ruins calibration.
- Ignoring calibration: Calibration interval depends on tool use, accuracy requirements, drops/overloads, and manufacturer guidance. Critical work may need more frequent verification.
- Using as a breaker bar: Never use your torque wrench to loosen tight bolts.
Technique matters: Pull smoothly at the designated handle position and avoid side-loading the socket. If you use a crowfoot or extension that changes the effective lever length, calculate the corrected setting or follow the adapter manufacturer’s instructions.
Credit: www.wikihow.com
How To Care For And Calibrate Your Torque Wrench
Proper care extends your tool’s life and keeps readings accurate.
- Clean after each use. Wipe down to remove grease or dirt.
- Store in a case. Protects from dust and knocks.
- Never drop it. Even a short drop can knock it out of calibration.
- Get it calibrated. At least once a year, or if it’s dropped. Many hardware stores offer this service.
A little-known fact: Even unused, the calibration can drift over time. If you use your wrench for critical work, calibration is a must.
Real-world Examples: Why Torque Matters
Incorrect torque can cause problems you may not expect:
- Car wheels: Incorrect torque can leave clamping force too low or overstress studs and threads. Use the vehicle-specific wheel fastener specification and tightening sequence.
- Bicycle parts: Over-tightening carbon fiber parts can cause cracks worth hundreds of dollars to fix.
- Engine assembly: Even a few Nm too much or too little can lead to oil leaks, blown gaskets, or engine failure.
Credit: www.youtube.com
Tips For Improving Your Technique
Want to get better? Try these tips:
- Practice on scrap metal. Get the feel for the click or dial before working on your project.
- Use a torque chart. Keep a printed chart of common torque values in your toolbox.
- Mark bolts after tightening. Use a paint pen to show which bolts are done.
- Work in a quiet area. You need to hear or feel the click clearly.
- Don’t rush. Taking your time saves you from costly mistakes.
Dry vs. Lubricated Torque Matters
A torque value is only meaningful under the thread and seating conditions assumed by the specification. Oil, anti-seize, threadlocker, plated threads, washers, and reused fasteners can change friction and therefore clamp load at the same wrench setting. If the manual says “clean and dry,” do not lubricate the threads. If it specifies lubricant or threadlocker, use the stated product and procedure.
When Torque-Angle Tightening Is Required
Some engine and structural fasteners use a torque-plus-angle procedure rather than one final torque number. In that case, tighten to the initial torque, then rotate the fastener through the specified angle with an angle gauge or approved digital tool. Do not substitute a guessed final torque for a torque-angle sequence.
Frequently Asked Questions
What Happens If I Overtighten A Bolt With A Torque Wrench?
Overtightening can stretch, weaken, or break the bolt. It can also damage the threads or the part you’re working on. Always stop when the wrench clicks or the dial reaches the set value.
Can I Use A Torque Wrench To Loosen Bolts?
No. A torque wrench is designed for tightening only. Using it to loosen bolts can damage its calibration and internal parts.
How often should I calibrate my torque wrench?
Follow the tool manufacturer’s interval or your workplace quality standard. Heavy use, a drop, an overload, or critical fastener work can justify earlier verification.
What’s The Difference Between Nm And Ft-lb?
Nm (Newton-meters) and ft-lb (foot-pounds) are both units of torque. 1 ft-lb = 1.35582 Nm. Always use the unit your manual specifies. Mixing them up can cause mistakes.
Where Can I Find Official Torque Specifications For My Project?
Use the vehicle service manual, component manufacturer instructions, or an official repair database. General reference sites can explain torque concepts but should not be used as the source for a critical fastener specification.
Getting comfortable with a torque wrench takes practice, but it’s one of the most valuable skills for any DIYer or mechanic. With the right technique and a careful approach, you’ll achieve results that are safe, accurate, and professional every time.
Taking these steps seriously will help you protect your equipment—and yourself—while giving you the confidence to tackle new projects.
Credit: www.homedepot.com
